Back to Basics ~ tips and techniques to create a great loaf in 5 minutes a day.

Note that there is an updated version of this post, click here to view.
Recently we have seen lots of new readers on the website who are asking wonderful questions about how to perfect their loaves. First I’d like to say welcome to the site and thank you for trying the bread. As I bake through the basic Master recipe from ABin5 I will try to answer some of the most frequently asked questions and also introduce you to a few new pieces of equipment I’ve recently started to use that make the whole experience just a little easier. The goal is to create a large batch of dough that stores in the refrigerator for up to two weeks. That’s why our method saves you so much time– all the mixing and prep is divided over four one-pound loaves.
Master Recipe from The New Artisan Bread in Five Minutes a Day: The Discovery That Revolutionizes Home Baking:
3 cups lukewarm water (you can use cold water, but it will take the dough longer to rise. Just don’t use hot water or you may kill the yeast)
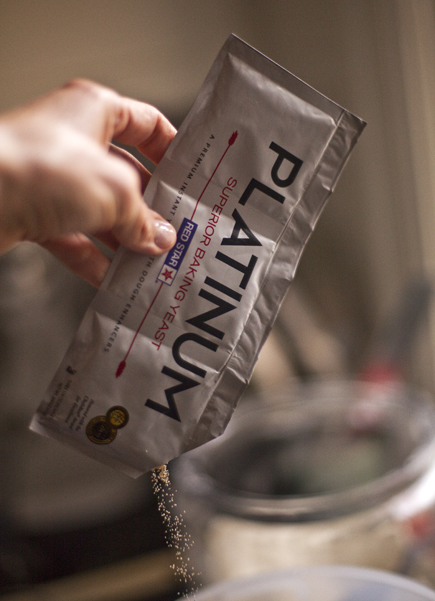
1 tablespoon granulated yeast ( you can use any kind of yeast including: instant, “quick,” rapid rise, bread machine, active dry, or fresh cake yeast*. We’ve always tested with Red Star Yeast and they have a new premium product called PLATINUM, which has worked beautifully in our recipes. You can also decrease the amount of yeast in the recipe by following the directions here. Or you can bake with a sour dough starter, see instructions here.)
*If you use cake yeast you will need 1.3 ounces.
1 to 1 1/2 tablespoons Morton Kosher Salt (adjust to suit your taste or eliminate it all together. Find more information here)
6 1/2 cups (2-pounds) all-purpose flour (we tested the recipes with typical supermarket flour. If you use a higher protein flour check here)
Mixing the dough:

In a 5 or 6 quart bowl or lidded Food Storage Container, dump in the water and add the yeast and salt. Because we are mixing in the flour so quickly it doesn’t matter that the salt and yeast are thrown in together.

(If you are using the fresh cake yeast break it up with a spoon)

Dump in the flour all at once and stir with a long handled wooden spoon or a Danish Dough Whisk, which is one of the tools that makes the job so much easier!

Stir it until all of the flour is incorporated into the dough, as you can see it will be a wet rough dough.

Put the lid on the container, but do not snap it shut. You want the gases from the yeast to escape. (I had my husband put a little hole in the top of the lids so that I could close the lids and still allow the gases to get out. As you can see it doesn’t take much of a hole to accomplish this.)

Allow the dough to sit at room temperature for about 2 hours to rise. When you first mix the dough it will not occupy much of the container.

But, after the initial 2 hour rise it will pretty much fill it. (If you have decreased the yeast you will have to let it go longer than 2 hours.) DO NOT PUNCH DOWN THE DOUGH! Just let it settle by itself.

The dough will be flat on the top and some of the bubbles may even appear to be popping. (If you intend to refrigerate the dough after this stage it can be placed in the refrigerator even if the dough is not perfectly flat. The yeast will continue to work even in the refrigerator.) The dough can be used right after the initial 2 hour rise, but it is much easier to handle when it is chilled. It is intended for refrigeration and use over the next two weeks, ready for you anytime. The flavor will deepen over that time, developing sourdough characteristics.

The next day when you pull the dough out of the refrigerator you will notice that it has collapsed and this is totally normal for our dough. It will never rise up again in the container.

Dust the surface of the dough with a little flour, just enough to prevent it from sticking to your hands when you reach in to pull a piece out.

You should notice that the dough has a lot of stretch once it has rested. (If your dough breaks off instead of stretching like this your dough is probably too dry and you can just add a few tablespoons of water and let it sit again until the dough absorbs the additional water.)

Cut off a 1-pound piece of dough using kitchen shears* and form it into a ball. For instructions on how to form the ball watch one of our videos. Place the ball on a sheet of parchment paper… (or rest it on a generous layer of corn meal on top of a pizza peel.)
*I actually use a pair of Sewing Shears because I like the long blade. I just dedicated a pair to the kitchen.

Let the dough rest for at least 40 minutes, (although letting it go 60 or even 90 minutes will give you a more open hole structure in the interior of the loaf. This may also improve the look of your loaf and prevent it from splitting on the bottom. ) You will notice that the loaf does not rise much during this rest, in fact it may just spread sideways, this is normal for our dough.
You can also try our “refrigerator rise trick,” shaping the loaves and then immediately refrigerating them overnight. By morning, they’ll have risen and are ready for the oven after a brief room-temp rest while the oven preheats (click for instructions).
Preheat the oven to 450 degrees with a Baking Stone* on the center rack, with a metal broiler tray on the bottom (never use a glass vessel for this or it will shatter), which will be used to produce steam. (The tray needs to be at least 4 or 5 inches away from your stone to prevent it from cracking.)
*(or Cast Iron Pizza Pan– which will never crack and conducts heat really well. Be careful to dry it after rinsing with water or it will rust)

Cut the loaf with 1/4-inch slashes using a serrated knife. (If your slashes are too shallow you will end up with an oddly shaped loaf and also prevent it from splitting on the bottom.)

Slide the loaf into the oven onto a preheated stone (the one I’m using is the cast iron) and add a cup of hot water to the broiler tray. Bake the bread for 30-35 minutes or until a deep brown color. As the bread bakes you should notice a nice oven spring in the dough. This is where the dough rises. To insure that you get the best results it is crucial to have an Oven Thermometer to make sure your oven is accurate.

If you used parchment paper you will want to remove it after about 20-25 minutes to crisp up the bottom crust. Continue baking the loaf directly on the stone for the last 5-10 minutes.

Allow the loaf to cool on a rack until it is room temperature. If you cut into a loaf before it is cooled you will have a tough crust and a gummy interior. It is hard to wait, but you will be happy you did! Make sure you have a nice sharp Bread Knife that will not crush the bread as you cut. Or you can tear it apart as they do in most of Europe.

If you have any leftover bread just let it sit, uncovered on the cutting board or counter with the cut side down. If you cover a bread that has a crust it will get soggy.
Enjoy and have fun baking. Bread that is made with love and joy tastes better!
Note: Red Star Yeast is a sponsor of this website and its promotional activities, and provided samples of yeast for recipe testing.
i am reading your book right now and am so excited to get started baking! I had a question about the bucket, can you store it in the fridge in the container bucket that had the small hole in the lid? Or do I need a different lid with no small hole for when it’s in the fridge?
No, the whole idea was to wash fewer implements– mix and store in the same vessel.
Great! I am glad to have less to clean. I will be sure to use the same bucket with the hole in the lid when storing it in the fridge. Thank you!
Can you clarify the type of yeast? I thought different yeasts (active dry vs instant) have different measurements, and I usually use about 40% the volume of active if I’m using instant, but you say it doesn’t matter what type…help?
Also doesn’t active dry need to proof in water before?
See page 14 of “The New Artisan Bread in Five…” for our yeast discussion. Our method breaks lots of rules. The book’s at https://amzn.to/17Rw23Y
I like so much this recipe!
It is so incredibly easy and flexible.I have tried to do myself a bread in using all the materials that you mentioned in your recipes, otherwise, i havn’t obtain the same results as it would be. Do you think it is due to a bad proportion of water and flour or just because of the yeast?
Thank you
Hi Jane,
What results are you getting and I can try help you. What flour are you using?
Thanks, Zoë
The Bread is Delicious! And i Like it
Terrific!
I am having difficulty slashing the dough, which I think might be because my dough is slightly too wet. However, I opted for a wetter dough for a more open hole structure. Also, does the rest time affect it as well? I tend to let my dough sit out for 90 minutes before baking. Thanks!
Hi Mandy,
Slashing wet dough, especially if it has had a long rise, can be a challenge. You want to make sure you are using a very sharp, serrated knife. Hold the dough steady with one hand and move through the dough quickly with the knife. If you don’t achieve the 1/2-inch deep slash in the first swipe, then repeat the process until you do. Moving swiftly is the key to getting the knife through without sticking.
Thanks, Zoë
I find that a razor blade does a much better job than a serrated knife, which tends to drag and cling to the dough. Granted, not everyone has razor blades lying around anymore; I happen to still shave with them :). But to anyone having a problem slashing wet dough, it would be worth tracking some down. You can get tiny 5-packs on Amazon if you aren’t readily finding them in your area.
Honestly, I’ve had the opposite experience with wet dough, but who knows. My guess is that it depends on your bread knife.
I actually found last week that using a filet knife worked *wonderfully* when I put the dough in, went “crap! I didn’t slash it!” and reached into the oven with the knife to do the slashing immediately.
I use kitchen shears (scissors) to do my ‘slashing’.
Also, I just use a cast iron dutch oven with the lid on – no need to put water in the oven or anything like that, the moisture in the bread self-steams inside the pot. Put the pot in the oven to get as hot as possible, bang the bread dough in, then I take the lid off after about 30 minutes in the oven and the bread crisps up beautifully.
I halved the recipe as it was my first trial. The dough seemed a little dry and I added more water. After two hours the dough has risen nicely and I put it in the fridge. However after 3 hours when I wanted to pull out a portion, the dough seemed too wet till it was very difficult to even slash it. How can I save the remaining batch that is in the fridge ?
Thanks.
Hi Jamie,
The dough may stiffen up a bit after it is chilled a bit longer, but here is a video that will help with shaping wet dough: https://artisanbreadinfive.com/2010/03/08/new-video-shaping-the-ball-from-a-very-wet-dough
Thanks, Zoë
Link doesn’t work anymore.
Unfortunately the TV stations generally don’t keep those videos “live” permanently, so we eventually lose access to them… sorry about that.
Went to watch the video about shaping wet dough, and as you said in your response to the question, it’s gone. But I, too, have been trying to work up the nerve to try again. My first attempt, I watched your videos on line, read and re-read all the instructions, bought a big plastic, lidded container, etc., etc. Got it all mixed, followed the instructions for sitting out, refrigerating, and such – all the while thinking “how is this possibly going to work when it comes time to take out the dough for my first loaf?” – but forged ahead, shrinking the surface of the dough with flour while realizing that I was going to have to go “below” the surface to get enough dough. And, I pretty much got the result I expected – I tried to go as shallow as possible and still come up with enough dough and I ended up with my all my fingers and palm pretty much covered with very sticky dough. In the video, you never seem to have any dough on your hands and as I’m typing this, I suddenly wondered – do you by any chance oil your hands? That would probably help, I would think.
I love the concept of having a batch of dough instantly available, but I can’t quite bring myself to try it again…
Hi Mary Lynne,
Did you happen to find this video? https://artisanbreadinfive.com/2017/04/16/new-video-shaping-the-ball-from-a-very-wet-dough/ Let me know if it helps with your wet dough.
Thanks, Zoë
Follow the recipe in the book exactly .. but keep in mind .. all flours contain different levels of protein, and will absorb water differently.
I have tried all the available flours from the local supermarkets .. always go for the ‘strong’ (higher protein) flours. They all absorb different levels of water.
It is a matter of practice, when you stir the dough you will eventually get a feel for how much is right. Generally though, I use half the amount of water to flour and it works perfectly.
Note that you should still get great results if the dough is ‘wet’ – I would err on the side of wet instead of too dry.
Also .. i found a stirring technique where I use a metal spoon, I hold it by the round bit, using the handle as the bit that stirs the mix. I make some small circles in the middle of the dough to start off, then just make circles on the outside of the bowl. This stops the flour from sticking on the sides, and incorporates everything really nicely. Never even have to touch any dough.
ps .. I have now been buying my flour from a local baker – i get it in bulk, is much cheaper than the supermarket, and he loves to talk shop with me – I genuinely love baking bread.
Zoe .. I love your book(s) it really opened up this amazing world of baking fresh bread for my family.
How do bakeries make those nice light, airy, chewy kaiser rolls? I’ve tried many recipes I’ve found online and although they look exactly like what I can buy at the bakery, they are usually dense and heavy.
Super-airy results aren’t what you get with our method– which gives you a more toothsome crumb. Short answer: they use only white flour, knead it extensively and possibly use artificial dough conditioners. Tell me which of our books you’re working off of and I’ll make some suggestions as to what to try.
Jeff, I’d love to hear your suggestions for Carole’s question above. I’ve tried many times to make light weight buns, but they’re always so heavy… I have both the new ABin5 and the healthy bread book!!
Hi Carole and Lor,
Many bakeries use flours and dough enhancers that just aren’t available to home bakers. They also use steam injected ovens and have dough kneaders and shapers, so it is very difficult to replicate much of what you can find at a production bakery. A high moisture dough like ours is not going to produce that super light interior. If we develop a recipe that can fit into our method we will post it for sure.
Thanks, Zoë
I make about a loaf a day and the results are much appreciated with whom I share. However, I consistently do not get the second rise like I would like to see. The bread is flat the end result gives me a height of of less than 3 inches. Any suggestions to give me a lift?
Hi Mike,
How long are you letting the dough rise after you shape it?
It may also be a matter of shaping the dough. Here is a video that may help: https://artisanbreadinfive.com/2010/03/08/new-video-shaping-the-ball-from-a-very-wet-dough
Thanks, Zoë
I don’t have a stone. Can I use an inverted cast iron skillet? I have several skillets . Or, can I use a cookie sheet with parchment paper. I want to try your recipe but can’t invest in kitchen equipment at this time. Thank you.
Yes, you don’t even have to invert, and it heats up faster than stones. And it can’t break.
Baking sheets work too, especially the heavy-guage ones like https://amzn.to/1UF9YmI
If using an iron skillet, does it have to be oiled or can the bread go right on the surface?
Right on surface, so long as the pan’s well-seasoned, and you reasonably dust and cornmeal the dough before setting it down.
I love your book and really revolutionary is not a misstatement! I’ve been making all kinds of different recipes but there are a couple of recipes from my “old world” of bread making that I don’t want to leave behind. Do you have a guide to turning a conventional recipe into a 5-minute recipe?
Andy
Hi Andy,
Thank you for the great note, we are thrilled you are enjoying the method. Here is some info for your other recipes: https://artisanbreadinfive.com/2010/04/21/converting-traditional-recipes-to-the-abin5-method
Thanks, Zoë
Would I have to change anything when making this bread at 6,000 ft.?
Hi Don,
Here are some tips: https://artisanbreadinfive.com/2008/02/10/qa-high-altitude-baking
Cheers, Zoe
How long does fresh (unrefrigerated) dough need to rise?
To be specific, I often make a half recipe, refrigerate it for a couple days, then turn it into a single loaf requiring a 90-minute rise before baking (for 45 minutes). How long do you think it would need if I skip the refrigerator?
Hi Bridget,
Which recipe are you using, from which book? Most all of the recipes give a time for both fresh and refrigerated dough.
Thanks, Zoë
It’s a general question, since I make several recipes from New Artisan Bread in 5. (Master, Buttermilk, Wheat sandwich loaf, etc.) I did find one comment in the text about halving the rise time when using fresh dough. Is that a general rule?
Hi Bridget,
In general you can reduce the time by about half. This will depend on the recipe, especially if you are working the dough a lot while shaping the bread.
Thanks, Zoë
HI
I am from Australia and thanks for your site.
I would like to ask what happens to the dough if you want to knead it by adding more flour to make it workable?
Also were can I buy your book from?
Many Thanks
Ang
Hi Ang,
You can add a bit more flour to the dough. If you knead the dough you will need to let it rest longer after shaping it into a loaf, to allow the yeast to rise again.
Our books are available on Amazon, but I am not sure if they are available on the Australian site?
Thanks, Zoë
I found that whisk to be just OKAY….but Zatoba came up with a longer and better one with safer bees wax finish and less harmful chemicals to keep the steel top on so it will last forever. Plus there other baking stuff rocks.
Hi can u let me know the cup measurement in ml? I am from mumbai would love to try this out here one cup is 200ml
Hi Shweta,
Here are the measurements in grams. The weight measurements are in all of our books.
680 grams water
10 grams granulated yeast
20 grams kosher salt
910 grams all-purpose flour
Thanks! Zoë
Sticky!! I mean really really really sticky dough. So sticky that I can barely shape it into a ball. My hands become deeply covered with sticky dough, which of course sticks to the ball I’m trying to make 🙁 So much waste!
Yes, I flour my hands and the dough in the bucket before beginning, but I think that very likely my bread dough is too wet right from the start, but I followed your recipe to the letter. I live in Pennsylvania if you’re wondering about altitude or humidity. Nope – none of that is a problem here.
Just add flour till it looks like our videos. But I’m guessing you don’t measure the way we do? See https://artisanbreadinfive.com/2010/04/28/how-we-measure-our-flour-using-the-scoop-and-sweep-method , or weigh the flour.
Or are you using a flour like White Lily (protein’s too low, ends up too wet)?
Thanks for your response. I’ll eventually figure out what I’m doing wrong, but to answer your questions:
` yes, I’m using scoop and sweep
` yes, it is regular, unbleached, all-purpose flour
Fortunately I have a lot of patience. Currently my result is a strange looking loaf but still tasty loaf. I’m hoping next time it will look and taste great. Thanks again.
Madeleine: Weighing will most likely solve your problem…
I,m very impressed with your web site, it answered my question.
The photoes and detailed explanations make easy for me to make tasty bread.
Sincerely
Greg Rambo
Thank you Greg,
Enjoy all the bread! Zoë
I made this recipe tonight and cooked it for about 30 minutes until the loaf was darker. After letting it cool to room temperature it still seems like it is a little moist inside. But looks done. The dough is very airy with lots of bubbles. How can you tell if it is under cooked?
Thanks!
Well, first question– did you let it cool completely–two hours? Otherwise it’ll seem wet inside. More tips on our FAQs page at https://artisanbreadinfive.com/faqs Especially the entry about Dense or Gummy Crumb. And much, much more info in our books (click on the book images above).
I received (at my request) your new ABin5M and have a question or two before I try my first batch.
1. I’m going to halve the recipe so am ordering a 3-quart container. I saw a review that said to be careful because a little extra yeast makes it overflow. Can I be pretty certain that if I use half the amount of yeast called for in the full recipe, I won’t have a problem?
2. Also, I wondered – could I mix the dough in a mixing bowl and then transfer to the storage container for refrigeration? I know it’s another thing to wash but I love dishwashers!
3. In the new book you mention using a cast iron dutch oven. Could that include an enameled Dutch oven? I think I remember seeing one in the book…And if I can put it to bake in that, I guess after I form the ball I would transfer it to a parchment sheet and then put sheet and all in the (preheated?) Dutch oven with its lid, right? And then slip out the paper about half way through?
I’m really excited to try this – can’t quite imagine me without bread dough up to my elbows but I’m willing to try and get it to work for me.
Oh, and I just thought of one other thing – is the salt called for in your recipes based on the new “healthy watch your blood pressure” trend? Used as a flavor ENHANCER, it’s not going to kill anyone.
Thanks for a great book and in advance for your response.
1. Yes, that should be fine.
2. Sure!
3. Enameled is fine, I’ve used it. You can build the ball right on the parchment “sling,” drop the whole thing in the preheated Dutch oven and cover it. You don’t absolutely need to remove the parchment but the bottom will crisp better if you do. It’s a bit awkward to get it out–careful not to burn yourself.
4. Salt: we give a range, you can decrease it further. It’s to taste, yes, as a flavor enhancer.
Wow! I didn’t expect such a prompt reply. I’ve ordered a 3 quart “bucket” and will start a batch of dough as soon as I get it. Thanks so much!
Is it normal for the dough not to collapse after a day in the fridge?
I made this dough yesterday, let it rise for just over two hours. At that time, it had not yet reached the top of the container. This morning, the dough was still about 3/4 of the way up my 5.5 qt container, although I could see that it had perhaps been a bit higher. I just got home from work. The dough has been in the fridge about 20 hours. Its still at the 3/4 mark.
Which of our recipes are you using? (which book/page number?)?
The one on this page. I made a loaf from it though and it tastes really good, although maybe a little dense (I don’t think I slashed deep enough)
It’s fine about the non-collapse. Much more info in our books (click on the images above). Or check our FAQs page above.
I just made my first loaf of bread from the Master Recipe from the New Artisian Bread in Firve Minutes a Day and loved it. My questions which I haven’t found answers to in the book or on the website are:
Can I make 2 loaves (1 lb) at the same time? If so……I am assuming that each must rise at least 40 minutes. Can I bake them together on my stone at the same time and if so, for how many minutes?
Or, is it better to make them separately and once 1 is done baking, insert the other loaf?
Please advise! Thanks!
To your questions:
1. Sure–rising/resting’s the same, but you may find that you need a longer baking time (engineers call this effect “heat sink”). More so in a small oven, less so or non-existing in a large one. 10% more baking time?
2. You can bake them on the same stone. Too cumbersome to do them sequentially–I never do that.
Great. I will try this!
How big should a one lb loaf be when finished? I cannot for the life of me get my bread to be as large as yours. I used an 8×4 loaf pan and while the bread looks lovely and tastes good, it hasn’t risen past the halfway point of the loaf pan. Do I need to use 2 lbs for this? Thanks
Sounds like your pan’s a little larger than the skimpy 1-pound pans–just use more, in a loaf pan, fill it to 3/4 full and you’ll be happy (may take longer to bake).
You mention Gold Medal flour; is that bleached or unbleached? Also, can the peasant bread be made without wheat? Thank you.
Hi Maureen,
We always use unbleached when possible, since we prefer the flavor. You can replace the wheat with more rye or just use more white flour. It won’t have the same flavor, but it will still be a really nice loaf.
Cheers, Zoë
I love to make homemade bread with my bread maker device. I love this recipe, it seems to be very easy to prepare. Definitely, I follow your tips when preparing for a loaf. I have a question is it necessary to do a hole or use a lid when it is in the fridge?
Let a little air escape…
Hi. I followed this recipe using whey and water (half and half) and made 2 delicious loaves. After 10 days in the fridge, I went to prep another batch for baking. When I lifted the dough there is a small amount of liquid in the bottom of the container (looks like whey) and a faint smell of fermentation. Can I still use it or has it started to spoil? Would I have been better off to freeze the extra dough in batches and just thaw as required?
P.S. Love, love love this bread!!!
Have you been through our FAQs page? I believe the answer’s in there.
Hi again…I’ve been browsing thrugh the FAQs and comments and haven’t seen an answer to this. It’a a little daunting when there are over 5000 comments LOL.
Hi Joyce,
Sorry we never got back to you on this. Here is a post that can help: https://artisanbreadinfive.com/2015/05/20/fresh-bread-made-with-older-dough/
Keep in mind that the fermentation will be more intense with the whey in the dough, so I typically use that dough up in 7 days.
Thanks, Zoë
Wow! So yummi!! I even can feel its smell!!
I wonder where all my comments/questions go to. I don’t get replies.
Which posts have you commented under? We’re pretty careful.
Maureen: I did a spot check of your past comments, and looks like we respond right there. I’m guessing you’re losing track of exactly where in the website you’ve posted. In order to see our response, you have to come back to the exact same post (article) where you left your comment.
Thank you. You said your did a spot check and found my comments/questions. Can you tell me where to go to find them?
Most of them are on “Ask a Question.” Also these pages:
Back to Basics
FAQs
My favorite rye…
Type those words into the Search Bar and you’ll find the pages I’m talking about. The “FAQs” is a pull-down menu from the top of the page.
Cited pages just show as xxxx(s). Thank you anyway.
No, you were too fast for me! I used that as a placeholder while I got the actual page labels, which are in there now.
Feel like a pest. I don’t see anything more; just the xxxx(s).
Do you know how to clear the “cache” in your browser? That should clear the problem, but here’s the material re-copied into this spot right here:
Most of them are on “Ask a Question.” Also these pages:
Back to Basics
FAQs
My favorite rye…
Type those words into the Search Bar and you’ll find the pages I’m talking about. The “FAQs” is a pull-down menu from the top of the page.