Back to Basics ~ tips and techniques to create a great loaf in 5 minutes a day.

Note that there is an updated version of this post, click here to view.
Recently we have seen lots of new readers on the website who are asking wonderful questions about how to perfect their loaves. First I’d like to say welcome to the site and thank you for trying the bread. As I bake through the basic Master recipe from ABin5 I will try to answer some of the most frequently asked questions and also introduce you to a few new pieces of equipment I’ve recently started to use that make the whole experience just a little easier. The goal is to create a large batch of dough that stores in the refrigerator for up to two weeks. That’s why our method saves you so much time– all the mixing and prep is divided over four one-pound loaves.
Master Recipe from The New Artisan Bread in Five Minutes a Day: The Discovery That Revolutionizes Home Baking:
3 cups lukewarm water (you can use cold water, but it will take the dough longer to rise. Just don’t use hot water or you may kill the yeast)
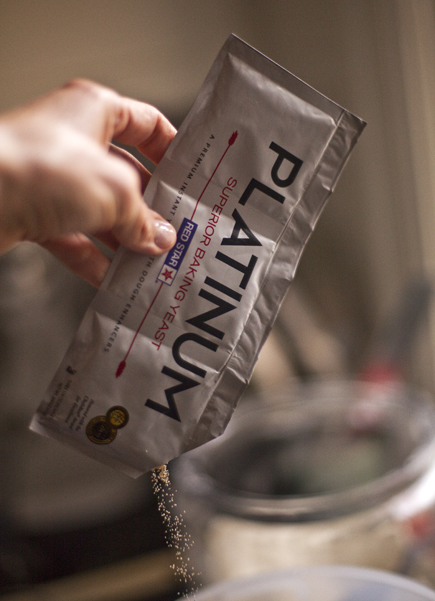
1 tablespoon granulated yeast ( you can use any kind of yeast including: instant, “quick,” rapid rise, bread machine, active dry, or fresh cake yeast*. We’ve always tested with Red Star Yeast and they have a new premium product called PLATINUM, which has worked beautifully in our recipes. You can also decrease the amount of yeast in the recipe by following the directions here. Or you can bake with a sour dough starter, see instructions here.)
*If you use cake yeast you will need 1.3 ounces.
1 to 1 1/2 tablespoons Morton Kosher Salt (adjust to suit your taste or eliminate it all together. Find more information here)
6 1/2 cups (2-pounds) all-purpose flour (we tested the recipes with typical supermarket flour. If you use a higher protein flour check here)
Mixing the dough:

In a 5 or 6 quart bowl or lidded Food Storage Container, dump in the water and add the yeast and salt. Because we are mixing in the flour so quickly it doesn’t matter that the salt and yeast are thrown in together.

(If you are using the fresh cake yeast break it up with a spoon)

Dump in the flour all at once and stir with a long handled wooden spoon or a Danish Dough Whisk, which is one of the tools that makes the job so much easier!

Stir it until all of the flour is incorporated into the dough, as you can see it will be a wet rough dough.

Put the lid on the container, but do not snap it shut. You want the gases from the yeast to escape. (I had my husband put a little hole in the top of the lids so that I could close the lids and still allow the gases to get out. As you can see it doesn’t take much of a hole to accomplish this.)

Allow the dough to sit at room temperature for about 2 hours to rise. When you first mix the dough it will not occupy much of the container.

But, after the initial 2 hour rise it will pretty much fill it. (If you have decreased the yeast you will have to let it go longer than 2 hours.) DO NOT PUNCH DOWN THE DOUGH! Just let it settle by itself.

The dough will be flat on the top and some of the bubbles may even appear to be popping. (If you intend to refrigerate the dough after this stage it can be placed in the refrigerator even if the dough is not perfectly flat. The yeast will continue to work even in the refrigerator.) The dough can be used right after the initial 2 hour rise, but it is much easier to handle when it is chilled. It is intended for refrigeration and use over the next two weeks, ready for you anytime. The flavor will deepen over that time, developing sourdough characteristics.

The next day when you pull the dough out of the refrigerator you will notice that it has collapsed and this is totally normal for our dough. It will never rise up again in the container.

Dust the surface of the dough with a little flour, just enough to prevent it from sticking to your hands when you reach in to pull a piece out.

You should notice that the dough has a lot of stretch once it has rested. (If your dough breaks off instead of stretching like this your dough is probably too dry and you can just add a few tablespoons of water and let it sit again until the dough absorbs the additional water.)

Cut off a 1-pound piece of dough using kitchen shears* and form it into a ball. For instructions on how to form the ball watch one of our videos. Place the ball on a sheet of parchment paper… (or rest it on a generous layer of corn meal on top of a pizza peel.)
*I actually use a pair of Sewing Shears because I like the long blade. I just dedicated a pair to the kitchen.

Let the dough rest for at least 40 minutes, (although letting it go 60 or even 90 minutes will give you a more open hole structure in the interior of the loaf. This may also improve the look of your loaf and prevent it from splitting on the bottom. ) You will notice that the loaf does not rise much during this rest, in fact it may just spread sideways, this is normal for our dough.
You can also try our “refrigerator rise trick,” shaping the loaves and then immediately refrigerating them overnight. By morning, they’ll have risen and are ready for the oven after a brief room-temp rest while the oven preheats (click for instructions).
Preheat the oven to 450 degrees with a Baking Stone* on the center rack, with a metal broiler tray on the bottom (never use a glass vessel for this or it will shatter), which will be used to produce steam. (The tray needs to be at least 4 or 5 inches away from your stone to prevent it from cracking.)
*(or Cast Iron Pizza Pan– which will never crack and conducts heat really well. Be careful to dry it after rinsing with water or it will rust)

Cut the loaf with 1/4-inch slashes using a serrated knife. (If your slashes are too shallow you will end up with an oddly shaped loaf and also prevent it from splitting on the bottom.)

Slide the loaf into the oven onto a preheated stone (the one I’m using is the cast iron) and add a cup of hot water to the broiler tray. Bake the bread for 30-35 minutes or until a deep brown color. As the bread bakes you should notice a nice oven spring in the dough. This is where the dough rises. To insure that you get the best results it is crucial to have an Oven Thermometer to make sure your oven is accurate.

If you used parchment paper you will want to remove it after about 20-25 minutes to crisp up the bottom crust. Continue baking the loaf directly on the stone for the last 5-10 minutes.

Allow the loaf to cool on a rack until it is room temperature. If you cut into a loaf before it is cooled you will have a tough crust and a gummy interior. It is hard to wait, but you will be happy you did! Make sure you have a nice sharp Bread Knife that will not crush the bread as you cut. Or you can tear it apart as they do in most of Europe.

If you have any leftover bread just let it sit, uncovered on the cutting board or counter with the cut side down. If you cover a bread that has a crust it will get soggy.
Enjoy and have fun baking. Bread that is made with love and joy tastes better!
Note: Red Star Yeast is a sponsor of this website and its promotional activities, and provided samples of yeast for recipe testing.
Hi there, I was just curious if you have had anyone try this at higher altitude? I live at 8175 feet in CO and would like to give it a whirl, but I’m apprehensive due to the elevation. I have a few books on high altitude baking, but in my own experience some recipes work fine while others need adjustments. Just thought I’d ask to possibly save me some time/effort! Thanks so much!
Hi Robin,
We sure have, here is a post on high altitude baking. I think it is also helpful to read through the comments from people baking in these conditions: https://artisanbreadinfive.com/2008/02/10/qa-high-altitude-baking
Thanks, Zoë
Oh you are the BEST!!! And yes, a simple comment reply about bread has completely made my day, I sincerely appreciate you!!
That’s great Robin,
Let us know if you have any questions after you read through the post.
Cheers, Zoë
I baked the artisan bread at my daughters in Tusconand in order to get the same raise I used only 21/2 cups water that did the trick
You mean because of the altitude? Surprised it was different, only at 2,600 feet.
I really didn’t believe that making bread could be this easy!!! I halved the recipe the first time I made it. I ended up eating a whole loaf standing right there in my kitchen! I just mixed the whole recipe and hope it lasts a week! Thank you for sharing such a really great, practical recipe!
Hi CI,
We’re thrilled that you’re enjoying the bread! Thanks for the note.
Cheers, Zoë
Hi,
I’m wondering if it’s possible to make this using baking powder instead of yeast? If so would it be an even exchange of ingredients? Thanks so much for your help and this great site.
Best,
Libby
Hi Libby,
Unfortunately, yeast and baking powder behave very differently and can not be easily swapped. If you are looking for recipe with baking powder, you will want to look up “quick breads.” Our recipes are fast, but not quite the same as a quick bread.
Thanks, Zoë
Hi Zoe,
Thanks. So nothing that could be done in the crockpot, like a soda bread?
Libby
Hi Libby,
There probably are quick bread recipes that can be done in a crock pot, but we don’t do quick breads on this site. We just do doughs from our books and they are all yeasted.
Good luck! Zoë
Hi Zoe,
Ok, thank you so much for your reply.
Libby
Libby, are you perhaps looking for gluten free recipes? If so, the Healthy Bread in 5 Minutes a Day has several GOOD ones.
Sort of, I’m currently on an elimination diet and it’s looking like wheat might be the problem…with luck it won’t be yeast too. I was hoping to find a recipe online for a basic bread to try the various flours. Since my apt. oven’s heat is uneven, the crock pot is looking like a wonderful alternative.
Libby – this site has a post on crock pot bread baking – https://artisanbreadinfive.com/2012/05/29/crock-pot-bread-baking-fast-bread-in-a-slow-cooker
Tina: Thanks– we can’t link to sites dispensing advice unless we know them, and we don’t know the one you referenced, so that had to be edited out…
Thanks anyways. 🙂 I’ve been trying different recipes from around the interwebs with interesting results.
My bread after it is formed raises sideways instead of up After it is baked it does have oven spring and tastes very good. My problem is that I want to make rye bread for Rueben sandwiches. My bread is only about 2 1/2 inches high
Another problem is that after I have mixed the dough and left it out for 2 hours it never raises to the 5 qt mark on container like yours does on the video. It only goes up to about the 4 qt mark.
I take the temperature of the water and it is 100 degrees. I have calibrated my thermometer so I know that the reading is correct.Again I cannot thank the two of you enough. the book is terrific.
PS the taste of the rye bread is superb
Hi! I had the same problem until I realized that when using whole grain wheat flour, the dough will tend to spread and not have much ride due to low gluten. Two suggestions, use vital wheat gluten and use a bread pan or form of some kind.
Hi Sue,
Some of the doughs will have more active initial rises, so it isn’t necessarily bad that your dough isn’t rising as much as ours. Once in a while, usually when using chilled water, mine doesn’t go beyond the 4qt mark.
Have you watch the video about shaping wet dough? This may help the shape of your loaf and the ability to rise. https://artisanbreadinfive.com/2010/03/08/new-video-shaping-the-ball-from-a-very-wet-dough
Thanks. Zoë
I make a lot of 100% WW bread that is very light and wonderful but would like to know if I can make your bread with 100% WW flour?
Thank You…
Hi Jennifer,
Yes, we have several 100% ww recipes in our book Healthy Bread in 5. You can’t just swap ww flour for the all-purpose flour, because the flours behave very differently.
Thanks, Zoë
why should we “cover loosely” the loaf with a plastic wrap before baking the whole grain master recipe bread and not for the white one?
And does it have to be plastic?
Would a clean kitchen cloth do?
The WG has a longer resting time which would allow the surface to dry out, esp in the winter. Can use an overturned bowl, but we’ve found that cloth sticks. Wax paper works too.
My bread comes out delicious, but a bit dense on the bottom (it is airy further to the top.) this happens no matter if I keep the dough in the fridge for 2 days or one week. I’ve also had to add almost another cup of water to get the dough (w/ 6.5 cups of flour) to reach the consistency of your pictures and videos. Thoughts?
are you in Canada (higher protein in the AP flour)? Are you using bread flour? Same issue. See our FAQs tab above and click on “Flour varieties: Do I need to adjust the liquids when I use different kinds of white flour?”
Finally, try a longer rest after shaping, up to 90 min.
Interesting… I’m in the US and I use Gold’s All-purpose, unbleached flour. I have let the dough rise longer- it does get airier, but still a bit dense towards the bottom. I may have to play around with it a bit more then…
(Thank you for the recipe- we are enjoying it!)
Meira, what do you do immediately after forming the cloak (form the dough ball from the dough bucket)? Do pinch and tuck the bottom up into the ball? Roll the dough ball on the counter or board (habit of normal bread bakers)?
Another thought might be resting time. How long between forming the douogh ball and shaping?
Last thought is how much are you handling the dough? This is where the art comes in. The less you handle the dough, the better.
I am an experienced bread baker and decided to try this method. It was fantastic. The crust was “fancy bakery-boughten” crust and deeply colored (I didn’t bother with steam and it didn’t matter). The inside was chewy and well-sructured with holes. Toasts beautifully. It was hard to keep from eating the loaf in one sitting.
Wow, so glad David!
I love your book. I have no prior bread baking experience, have been using the basic recipe & want to master this consistently before branching out. I haven’t yet found a food storage container like the ones you recommend & have been using a bowl and plastic wrap. My first loaf is usually wonderful but the next ones are increasingly dense and usually split at the bottom. Is this because of my storage method? Is it okay to use a stainless steel soup pot? Thanks for any help you can provide, and thank you for your recipe!
Stainless steel soup pot’s great, but no, the container’s not causing the problem. Try a longer rest time; rather than 40 minutes, consider 60 or even 90 min.
Hi Jeff and Zoe ….Love the book!!!
But unfortunately being in the uk I am finding it difficult to convert from cups. I have managed to convert the dry ingredients (thanks to your site) But I’m having trouble converting 1 cup of water to ml
Hope you can help and keep up the good work 😉
Andy
Andy: Do you have the UK version, on Amazon at https://amzn.to/fLNCN2? One US cup is 237 ml, but round as you see fit. Or weigh the flour and water (1000 grams white flour and 750 grams water in the basic recipe for white dough).
Hello Andy! Being in the UK, are there also diffenences in the flour used? If so, then what adjustments need to me made? I seem to recall there being differences in some countries and the water or liquid used needed to be adjusted based on protein content. Just a thought.
I have been making your artisan breads now for a couple of years to the delight of my family and friends. I have just recently made your recipe for “Roasted Garlic Potato Bread” and found the texture of this bread to be even better than the
Glad the recipes are working out for you!
I have been making your artisan breads now for a couple of years to the delight of my family and friends. I have just recently made your recipe for “Roasted Garlic Potato Bread” and found the texture of this bread to be even better than the “Master Recipe”. It was a bit lighter but still rustic-like.
Since then, I have been adding 1 Cup of mashed potatoes to the basic Master Recipe and really love the results. I figure the magic is in the potato starch, but would like to understand the chemistry behind the texture change. Any comments?
Also, because your bread recipes are so easy and delicious, I have made gift baskets that include one of your recipe books along with a Danish Dough Hook, various flours, a jar of yeast, etc. Great for Christmas or hostest gifts and have converted even simple cooks into artisan bread bakers!
Be careful Jackie. Friends like you are hard to come by. (butter….butter…butter…butter up) Great gift idea.
Not sure about the chemistry– but I love potato-enriched doughs too!
I followed the recipe for the rye bread in you Healthy book; my goal is to make marble (rye & pumpernickel) but, my bread came out very small — didn’t rise at all and very hard! I am a new bread maker but was very upset because this is the 2nd time I tried this recipe — the 1st was without the vital gluten – the 2nd was with.
The dough is very dry — not at all wet like your picture above, although it is a mixture of rye, wheat & AP flour so maybe it soaks up the moisture quicker. It was very dry and thick from the moment I mixed it but, as I said, I followed the recipe exactly! Please help …. I really want to make this bread for St. Patty’s day!!!
Thanks……. looking forward to learning what I’m doing wrong!
Which flour brands are you using, and where are you located (Canada versus US?)? The AP flours are different in US/Canada (more protein in Canadian AP, which takes more water). And if you’re using Bob’s Red Mill or Hodgson Mill whole wheat, that often leads to a drier result.
Bottom line: add more water till it looks like our videos at YouTube.com/breadin5. Probably about a quarter-cup, though I’m not certain of that w/o seeing your dough.
This recipe doesn’t work w/o the VWG, but you’re using that now, so that’s not it. Are you making any substitutions at all?
Thank you very much for creating this method of bread baking. I have been baking bread for nearly fifty years and this is the tastiest bread I have ever made. And the easiest. I am using your method (with some adjustments) with my homeground Montana Gold wheat berries and whole rye sourdough starter and have not had a failure yet.
And your books will be some of the best Christmas presents I have given in a long time.
Hi Carol,
Thank you for the lovely note, we’re thrilled that you’re enjoying the bread!
Cheers, Zoë
I have never baked my own bread before and am anxious to try it. My kitchen aid mixer has a dough hook attachment on it can I use this to mix the dough. Or will it be to much.
Hi Amanda,
Our dough is very wet, so the paddle attachment tends to work even better.
Thanks, Zoue
Hi. Wondering why you use “plain” flour (what we call it in the UK) instead of “strong” bread flour? I always have it in my head that you have to use this sort. Obviously I’m totally wrong about that, but still. Also, how fancy/organic/expensive does the plain flour have to be? Does it make a huge difference in your experience? Thanks for any info.
Hi Sam,
We chose plain flour, because it is closest to all-purpose flour (the most common US flour), which is found in everyone’s pantry. We didn’t want people to be intimidated by ingredients they weren’t familiar with. Strong flour will also work, but it requires more water. Both produce a lovely loaf of bread.
Thanks, Zoë
My first loaf is in the oven and the rest in the fridge.
Hoping for the best since I’ve only tried bread baking a few times and once or twice successfully. (How does this work without the sugar for the yeast?)
It is FREEZING today on Northern WI, so I let it rise near the furnace, not too close but just enough. It rose beautifully, my only glitch was trying to make the shape, I watched the vid and see why you’ve said here that over handling is a problem, if felt like I did that. I forget to slash the top, it was baking for about 5 min. when I remembered, so I took it out quickly and slashed. Hope it works out. I’m baking in slightly heated, medium sized cast iron frying pan.
I’m walking away from this comment now but will be back when it’s cooled and tried 🙂
I’m back and Oh my word…it is fantastic. I have been wanting to make this type of bread for years, not normal bread, but this type, that you’d find in Chicago or Italy. Rustic, crusty, dense, lovely.
Thanks for the recipe.
Hugs,
Pam
Hi Pam,
Thanks for the lovely note. So glad you enjoyed the bread!
Cheers, Zoë
I don’t have a Danish cloche, but a Kitchenaid with dough hook. Can I use that? I also have the paddle and whisk, but know the whisk is out. Thank you and looking forward to trying the crock pot bread today!
will work better with the paddle in dough this wet. No whisk, as you say.
I have used a wooden spoon and a wet hand for the last 6 months without any problem. Just make sure you use up all the flour, no white powder, before you stop mixing.
Hi. In the midst of my very first homemade bread making attempt. For the first rise, the dough has been on the counter for about 3 hours and does not seem to be gaining much in size. I used gold-medal all purpose flour, warm water to start and covered the bowl with plastic wrap. I did poke a hole in the wrap, as I saw the whole in the container lid in your pictures. We keep our house at a cool 68 degrees. Could this be the culprit?
could be. what’s happening now? Just give it more time. Will go faster with 1.5T but 1.0 works too.
Actually turned out pretty well. It didn’t look great but tasted pretty delicious. My non-carbohdrate eating two year old just downed two whole pieces. Made another batch this morning with the 1 1/2 tbls. We’ll see! Thanks so much for the response.
great Natalie!
Hi. Just noticed that the recipe above calls for 1 tablespoon yeast and the video on you tube calls for 1 and 1/2 tablespoons yeast. Could you clarify for me. Maybe this is why mine isn’t rising? Thanks in advance.
You can always use less yeast than a recipe calls for, but the rising time will be longer. Less yeast gives better flavour though.
If you are in a hurry, use 1.5 tbsp. If you have time, use 1 or even .75 tbsp
Hello,
I have been making your bread for a while and love it !!! I was wondering if I could substitute milk with vinegar instead of buttermilk for the maple oatmeal bread. I have tried the white,whole wheat and rye..YUMMMM. Haven’t bought a loag of bread in over a year. Thanks.
No–I think the milk will curdle and cause problems. Like yogurt diluted with milk; check the web for other ways, just google “buttermilk substitution”
I don’t have baking stone or a cast iron pan I can use to cook this on. Is there any other way I can do it? Maybe a cookie sheet with parchment paper?
yep, will work, hopefully heavy gauge like https://www.amazon.com/Chicago-Metallic-Commercial-Traditional-Jelly-Roll/dp/B003YKGRPK/ref=as_li_wdgt_ex?&linkCode=wey&tag=arbrinfimiada-20
That is what I use, cookie sheet for epi or fancy cut bread. For rounds I like to use a round terracotta planter base. You know, about 10″ diameter, redish orange, goes under a planter. Before preheating for baking the bread, turn the planter base upside down on the oven rack, toss some corn meal on it, then preheat the oven.
Oops! Put the corn meal on the planter base when you are ready to put the bread on it. Otherwise it will burn.
I also use the large and small terra cotta planter saucers. It is fabulous for making pizza.
Some people line their oven with unglazed tiles on two shelves and then put the bread or pizza on the bottom one and the top one helps the top brown more evenly. And it helps to keep the heat even in the oven. Sort of a make shift bread oven without the wood. That would be an option for the larger, long loaves.
I am the queen of leaving my doughs on the parchment though. I do not like the cornmeal or semolina, etc, on the bottom of my crust. And I am sure I would be a pizza peal/slide fail. When I remove the pizza (or bread) I put it immediately on a cooling rack instead of a plate, tray, or counter so that the bottom stays crispy. I cut the pizza with a large scissors. My kids and husband laugh, but hey, they devour it instantly.
I saw a chef do an experiment using steel instead of a stone and the pre-heated metal actually worked better. The oven spring was beautiful because of the way the heat transfers quickly to the dough. So, for the Epi, I use a large,heavy cookie sheet and again, slide parchment and all right on it.
Another chef uses a deep aluminum tray filled with lava rocks and tosses ice on them after they are pre-heated for the steam. It looked like it steamed well and decreased the risk of cracking the oven window with cold water splashes. I am going to try this one out when I get a chance to buy the lava rock.
John: always use a metal vessel for catching water for steam, never glass or pyrex, as they can shatter– some of our readers have had bad experience with that.
A friend just gave me part of his sourdough starter. Is there a way to incorporate that in the dough I just made?
see our FAQs tab above and click on “Sourdough starter: can I use it with this method?”
absolutely positively without a doubt not only the easiest bread recipe but I swear it smells so good when it was rising for 2 hours I couldn’t wait till tomorrow I had to bake a miniature loaf ohmygod ohmygod ohmygod this is the best I have ever had and if I could make it work anybody could I can’t wait to take 1 tomorrow and the next day and the next day thank you so much
so glad you’re enjoying!
I tried the master recipe, but my loaf did not rise again at all after I had shaped it. I let it rest in a warm kitchen.for 90 minutes . Fresh yeast, lukewarm water, and fresh flour. I did not over work it , I had watched the video and saw how quickly it was shaped. Any suggestions?
Hi Kris,
Our dough doesn’t really rise much when it is resting, but should have good oven spring when baked. Did your bread rise well when you baked it?
Thanks, Zoë
Bought the book – too bad these pictures and descriptions aren’t in it! It really helps explain what’s going on, how much the dough should stretch, what everything looks like etc.
Everyone loves this bread and it’s a hit whenever someone makes soup.
Hi Robert,
We’d love to have a picture for every loaf and each technique in the books, but it’s very expensive to print and we wanted to keep the price reasonable. That is why we offer the website as a companion to our books. We also offer videos, which can be a huge help.
Thanks for visiting! Zoë
I am just beginning to learn to bake homemade bread. I’ve used this recipe a couple of times, and it’s turned out quite well. I had heard that you can use whey in a bread recipe in place of water. Can I do so in this recipe? I tried it this morning, but it seemed like the yeast failed to activate. Any idea what I did wrong? Thanks!
Hi Cassie,
Was your whey warm? If the whey was cold, it may take the bread up to 18 hours to rise. Your dough may just need lots more time to rise. When I have used whey in the recipe, I usually do 50% whey and 50% water.
Thanks, Zoë
The whey felt warm, but seemed to cool pretty quickly. I will try half whey, half water next time and try to be more patient. Thanks for the help!
Hi Cassie,
Did the dough ever rise?
Zoë
I love the bread! I’ve got the first edition of the 1st book, and my loaves come out great!
I am wanting to make them taller though, because they are a little “short” for sandwiches.
My pan is 9″x5″x2.5″. I’ve tried doubling the amount of dough in the pan, but it’s still not tall enough for me. I’m just trying to duplicate the height of a regular loaf of sandwich bread, which I think is about 5″?
Any ideas?
Hi Jason,
Which dough are you using? Here is a good place to start: https://artisanbreadinfive.com/2011/09/12/the-best-school-lunches-start-with-homemade-bread
Thanks, Zoë
Hi Zoe,
Just saw your reply! I was using the master recipe, but i also tried the recipe you linked to in your reply and the other sandwich bread recipes in the 1st book.
Rereading the post you linked to, I noticed I did not cover the pan with the plastic wrap while it was rising. I just left it uncovered. Do you think that could be why it did’t get as tall as I’d like? I’ll try it tonight and report back. Thanks for the great support!
Hi Jason,
If the dough developed a hard skin on the top as it rose, it will prevent it from rising well in the oven. How long did you let the dough sit before baking? If your dough is particularly cold, it may take a bit more of a rise time. On the flip side, if your room is very hot, the dough may need less time. Are you using a baking stone, or just baking on the rack? Do you have an oven thermometer to make sure your oven is true to temp?
We’ll start there and see if we can’t figure this out.
Zoë
Hi Zoe,
I used the master recipe and made a loaf in my loaf pan. This time I covered it with saran wrap and let it rest for 2 hours before baking. It came out higher than the others have been, so I think covering it while rising helped.
I do have a separate oven thermometer I got at BB&B and my oven varies between 10-20 degrees, and once up to 40 degrees difference between the oven’s display and the thermometer! Needless to say I am going by what the little oven thermometer says.
Also, I think I may not be using enough dough. I’m using a grapefruit sized hunk and forming it into a loaf, whereas I think the recipe called for a cantaloupe sized loaf. Quite a difference, and I think the size difference coupled with leaving it uncovered while rising may be my problem.
I am going to try the sandwich bread recipe again this weekend, using a larger portion of dough and covering it while it rises, and will let you know how it goes.
Would it be better to cover it with a warm damp rag rather than plastic wrap?
Thanks so much for your prompt support, I am sorry I did not write back as quickly!
Jason
Hi Jason,
You’ll want to use the plastic wrap to cover the resting loaf, the dough is so wet that it sticks terribly to any cloth!
Thanks and enjoy, Zoë
Have you ever done any kind of roll in the slow cooker? like a batch of dinner rolls?
Hi Barbara,
Here is a post on buns in the crock pot: https://artisanbreadinfive.com/2012/08/02/herb-crock-pot-dinner-rolls-summer-baking
Thanks, Zoë
I baked a loaf last night. It came out looking just like the one in the picture!!! It was almost too pretty to eat, but I did!
Hi CI,
That is fantastic! Thanks for the note.
Cheers, Zoë
My dough does not seem to be rising. I could not find the cake yeast, so i used regular yeast, should I leave it out longer before its refrigerated? It seems to be warm enough 73 in the house.
Hi Loretta,
As long as you didn’t use hot water (which can kill the yeast) then the dough will eventually rise. If you used cool water, it will just take longer for the yeast to activate.
Thanks, Zoë
I just found some fresh yeast and I can’t wait to try your recipe out. I’ve never used fresh yeast and I am hopin it will give it better flavour. I love baking bread at home as it’s sooo therapeutic. It never lasts long. Nothing better then fresh warm home made bread with butter for any time of the day.
Hi Cristine,
Enjoy the bread with the fresh yeast, it is fantastic. I just want to make sure you know that you can make our dough with granulated yeast as well, in fact, all the recipes in the book call for the granulated type of yeast, this is just an alternative for people to try out.
Cheers, Zoue
Hi I was just wondering if I can bake the bread in a dutch oven? I don’t have a pizza stone.
Thanks and kind regards from Luxemburg, Europe
Yes–see our posts on that at:
Baking in a Dutch Oven: https://artisanbreadinfive.com/?p=552 or outdoors https://artisanbreadinfive.com/?p=627
Have you seen our European edition of the book at Amazon UK, at https://amzn.to/fLNCN2 ? Has metrics, etc., written in English. Or on Amazon France: https://www.amazon.fr/MINUTE-BREAD-REVOLUTIONARY-BAKING-METHOD/dp/B00BNYF8XG/ref=sr_1_4?ie=UTF8&qid=1368217880&sr=8-4&keywords=five+minute+bread
Or on Amazon Germany: https://www.amazon.de/Five-Minute-Bread-revolutionary-kneading/dp/0091938945/ref=sr_1_3?ie=UTF8&qid=1368217939&sr=8-3&keywords=five+minute+bread
Thanks so much 🙂 I’ll buy the US version 🙂 No problems converting 😉 THANKS
I’m interested in doing the same thing to make my pizza dough, so I can keep a container in the fridge and pull a fresh dough ball out of the container whenever I want to make a fresh pizza for lunch. Sure beats using pre baked shells & Bobolis.
My dough recipe has olive oil in it it. Will it still work with the oil in it or will the oil separate from the dough over time? Just curious.
Maybe I’ll try it both ways.
we have olive oil dough recipes in all three of our books, click on the book-cover images above
Thanks, I’ll give it a try.
Hi… where do you get a bucket like this with the measurements on the sides?? Haven’t seen one…
Amazon has this one https://www.amazon.com/Cambro-Round-6-Quart-Storage-Container/dp/B0001MRUUU/ref=as_li_wdgt_ex?&linkCode=wey&tag=arbrinfimiada-20 but I think they sell the lid separately.
For the non-polycarbonate version, have to go to King Arthur Flour, at https://www.kingarthurflour.com/shop/items/dough-rising-bucket#5060#
Do you have a recipe for sour dough bread?
Which of our recipes (which book, page number?) are you using. Our doughs develop sourdough character as they age, but you won’t notice that until at least three days of storage (our doughs can be stored between 5 and 14 days in the fridge. Or, add some of your own sourdough starter, see our FAQs tab and click on “Sourdough starter: can I use it with this method?”
I tried this recipe last night and was only going to make 1/2. After 2 hours the dough had not risen at all! So I checked the recipe to see what I did wrong and found that I had forgotten the salt (you would think with only 4 ingredients I could manage!) I noticed you said you could omit the salt so I’m not sure if that’s what went wrong or if it may be something else. Any ideas?
It’s not the salt. I’m guessing that it rose eventually– just leave it out longer. But salt-free bread isn’t very tasty.
It’s true that salt strengthens gluten-structure in dough, but it still should have risen.
Something you may want to do is put river rock (rounded-edge rock about the size of a half dollar) in the broiler tray before preheat. The rock will heat up and when you pour in the water it will tend to not warp the pan and give off better steam.
Hi Doug,
I’ve heard of this, but have yet to try it. Thanks for the suggestion!
Zoë
If a cast iron pizza pan can be used, is it also possible to get the same results with a large cast iron frying pan? I’m trying to figure out if I can use some of the equipment I already have before going out and buying anything new.
Hi Carol,
Yes, if you have a nice big cast iron skillet, you can certainly use it. The sides of the skillet just make it a little trickier to get the loaf in and out of the oven.
Cheers, Zoë
Thanks!
Hi, The actual book says 1 1/2 tbsp of yeast and this recipe calls for 1 tbsp.
Which one is correct?
Hi Estelle,
Both are correct and you can even reduce the amount of yeast even more if you like. Here is a post that talks more about it: https://artisanbreadinfive.com/2007/12/19/low-yeast-version-of-our-master-recipe
Thanks, Zoë
My 9 year old son have become intent on learning how to bake. Today we have the dough rising and tomorrow he said is the test. He plans to serve it to our unknowing family and see what bread they like best. Thank you for helping to make my sons day!
Hi Cristi,
This is so terrific, I can’t wait to hear which they choose! So excited to hear about your young baker, thanks for the note.
Cheers, Zoë
Hi, I love the book. Had it for a while now. I would like to make the Reuben sandwich and was curious to know which Russian Dressing you used as there are clear varieties as well as creamy or did you make your own?
Thank you.
Hi Estelle,
We meant the creamy version of the dressing. Although I don’t have an exact recipe, I recall it is made with mayo, ketchup, pickle relish, lemon juice, salt and pepper. Hope this helps!
Cheers, Zoë
I assumed so. Thank you. I am excited to work my way through every single recipe.
Would your bread cook well in the new Nordic pro enameled cast aluminum? The weight and cost of the pan is a fraction of cast iron .
I’ve used lightweight aluminum and found it needed more greasing than heavyweight, but all bets are off with this kind of surface– it might be great. It’ll certainly work just fine. If you’re using one of our covered-pan methods, obviously, it’ll have to have a cover (not detailed in this post, but check out https://artisanbreadinfive.com/?p=552 or outdoors https://artisanbreadinfive.com/?p=627 )
You may have already addressed this question in an earlier comment, but how would you suggest adjusting your basic bread recipe for use in a dryish climate, at an altitude of between 8-9,000 ft. I can’t seem to get the same dough consistency you demonstrate. (The bread still bakes up deliciously even if it looks a little weird, though. My hubby loves it!)
Have you seen our high-altitude page at https://artisanbreadinfive.com/?p=144
I have not! Thanks for the link. I’ll try it today.
Can this be done with spelt? White flour doesn’t seem to agree with my husband or I.
Yes, but I think it works better with vital wheat gluten– spelt is low in gluten. If gluten is what’s disagreeing with you, not a good idea. Try it with spelt, though you may need to adjust the water.
I have your books and look forward to trying your recipes. Could you please let me know if a Commercial KitchenAid stand mixer with a 5-qt. bowl will be large enough to mix your breads? The one I have is a real work horse and was purchased back in 1990 when they were still made in the USA. For this reason, I don’t want to purchase a larger one. I’m not keen on mixing your doughs by hand, either. Thanks in advance for your help.
Also, for anyone who’s interested, I lived at 4,000 altitude (very dry climate) for 5 years and did a lot of yeast bread baking while there. I can attest to the fact that your high altitude recommendations work. At the time, I had no one to help me, as high altitude recommendations are for between 5,000 and 10,000 feet. The issue I faced was that some of my sea-level recipes worked just fine, while others failed miserably. I had to figure things out by myself through trial and error.
You’ll be fine with the 5-quart, yes. Glad you’ve had good luck with the high-altitude stuff!
Thanks! 🙂
Now to get down to baking…
I have your Book Artisan Bread in 5 and am starting to “get” it. More about that in another section tomorrow.
When a pizza dough recipe calls for 00 flour, what are yoour recommendations for hydration?
In theis case it is a KAF product.
Greg
Full instructions for using “00” flour are in our Pizza book (on Amazon at https://amzn.to/eo10NJ), we don’t have them here on the web.
Ok,so my dough didn’t stretch but it definitely wasn’t too dry, it was squishy, wet and dough-y. Did I not add enough flour to begin with BEFORE it went into the refrigerator?
Our doughs are meant to be wet. Assuming you used typical commercial flour it should have worked. Which recipe, which of our books (page number) are you using? Can also go through our FAQs page above. Check your oven temp with something like https://ow.ly/8CVPU
Hi Jeff,
I just ordered the healthy bread and artisan bread books because I stumbled across the blog via pinterest, so thus far I have just done the master, one of which went in the oven and one in the crock pot (I had re-pinned the crock pot method).
Ultimately I am looking to develop my yeast bread skills, but I’d really like to replace my family’s store bought bread entirely, primarily with whole wheat if possible. I can make a basic artisan “hearth” bread with all-purpose, but beyond that I’m not very proficient.
Suggestions?
Hi Sarah! Sounds like you did fine. The method does not require gluten formation by kneading to stretch is not necessary before going into the chill box. Just make sure all the the ingredients are mixed and no dry flour is showing (or at least very little flour). I often have to mix by with my hands which I find enjoyable. Which dough were you making (master, brioche, peasant)? This will make a difference in texture.
Master.
It also didn’t proof in the oven, so even though I knew not to expect a big rise, it didn’t expand at all. I let it go for a full 90+ minutes on the counter and covered it because I had subbed WW and WW Pastry (I know they won’t behave exactly the same); the texture was GREAT, not too dense, but the loaves were tiny.
Thanks for writing back. I can see lack of gluten might be part of the problem. Both pastry flours and whole wheat do not produce much gluten so if you want more oven spring, try adding some vital wheat gluten and give the dough a little more time after mixing for it’s first rise before tossing it into the chill box. Everything else sounds right on. Love this stuff because it means fresh bread every few days.
Sarah: Pastry flour’s definitely the problem; it’s too low in gluten to swap for the flours we specify. In Healthy Bread, we do call for VWG, so use it if it’s in the recipe.
I think this will solve your problem. Jeff