Back to Basics ~ tips and techniques to create a great loaf in 5 minutes a day.

Note that there is an updated version of this post, click here to view.
Recently we have seen lots of new readers on the website who are asking wonderful questions about how to perfect their loaves. First I’d like to say welcome to the site and thank you for trying the bread. As I bake through the basic Master recipe from ABin5 I will try to answer some of the most frequently asked questions and also introduce you to a few new pieces of equipment I’ve recently started to use that make the whole experience just a little easier. The goal is to create a large batch of dough that stores in the refrigerator for up to two weeks. That’s why our method saves you so much time– all the mixing and prep is divided over four one-pound loaves.
Master Recipe from The New Artisan Bread in Five Minutes a Day: The Discovery That Revolutionizes Home Baking:
3 cups lukewarm water (you can use cold water, but it will take the dough longer to rise. Just don’t use hot water or you may kill the yeast)
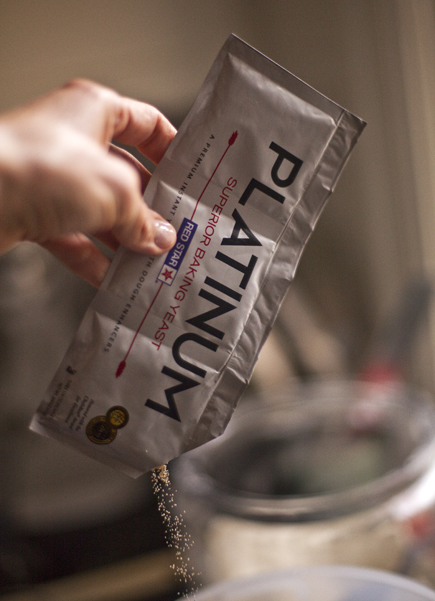
1 tablespoon granulated yeast ( you can use any kind of yeast including: instant, “quick,” rapid rise, bread machine, active dry, or fresh cake yeast*. We’ve always tested with Red Star Yeast and they have a new premium product called PLATINUM, which has worked beautifully in our recipes. You can also decrease the amount of yeast in the recipe by following the directions here. Or you can bake with a sour dough starter, see instructions here.)
*If you use cake yeast you will need 1.3 ounces.
1 to 1 1/2 tablespoons Morton Kosher Salt (adjust to suit your taste or eliminate it all together. Find more information here)
6 1/2 cups (2-pounds) all-purpose flour (we tested the recipes with typical supermarket flour. If you use a higher protein flour check here)
Mixing the dough:

In a 5 or 6 quart bowl or lidded Food Storage Container, dump in the water and add the yeast and salt. Because we are mixing in the flour so quickly it doesn’t matter that the salt and yeast are thrown in together.

(If you are using the fresh cake yeast break it up with a spoon)

Dump in the flour all at once and stir with a long handled wooden spoon or a Danish Dough Whisk, which is one of the tools that makes the job so much easier!

Stir it until all of the flour is incorporated into the dough, as you can see it will be a wet rough dough.

Put the lid on the container, but do not snap it shut. You want the gases from the yeast to escape. (I had my husband put a little hole in the top of the lids so that I could close the lids and still allow the gases to get out. As you can see it doesn’t take much of a hole to accomplish this.)

Allow the dough to sit at room temperature for about 2 hours to rise. When you first mix the dough it will not occupy much of the container.

But, after the initial 2 hour rise it will pretty much fill it. (If you have decreased the yeast you will have to let it go longer than 2 hours.) DO NOT PUNCH DOWN THE DOUGH! Just let it settle by itself.

The dough will be flat on the top and some of the bubbles may even appear to be popping. (If you intend to refrigerate the dough after this stage it can be placed in the refrigerator even if the dough is not perfectly flat. The yeast will continue to work even in the refrigerator.) The dough can be used right after the initial 2 hour rise, but it is much easier to handle when it is chilled. It is intended for refrigeration and use over the next two weeks, ready for you anytime. The flavor will deepen over that time, developing sourdough characteristics.

The next day when you pull the dough out of the refrigerator you will notice that it has collapsed and this is totally normal for our dough. It will never rise up again in the container.

Dust the surface of the dough with a little flour, just enough to prevent it from sticking to your hands when you reach in to pull a piece out.

You should notice that the dough has a lot of stretch once it has rested. (If your dough breaks off instead of stretching like this your dough is probably too dry and you can just add a few tablespoons of water and let it sit again until the dough absorbs the additional water.)

Cut off a 1-pound piece of dough using kitchen shears* and form it into a ball. For instructions on how to form the ball watch one of our videos. Place the ball on a sheet of parchment paper… (or rest it on a generous layer of corn meal on top of a pizza peel.)
*I actually use a pair of Sewing Shears because I like the long blade. I just dedicated a pair to the kitchen.

Let the dough rest for at least 40 minutes, (although letting it go 60 or even 90 minutes will give you a more open hole structure in the interior of the loaf. This may also improve the look of your loaf and prevent it from splitting on the bottom. ) You will notice that the loaf does not rise much during this rest, in fact it may just spread sideways, this is normal for our dough.
You can also try our “refrigerator rise trick,” shaping the loaves and then immediately refrigerating them overnight. By morning, they’ll have risen and are ready for the oven after a brief room-temp rest while the oven preheats (click for instructions).
Preheat the oven to 450 degrees with a Baking Stone* on the center rack, with a metal broiler tray on the bottom (never use a glass vessel for this or it will shatter), which will be used to produce steam. (The tray needs to be at least 4 or 5 inches away from your stone to prevent it from cracking.)
*(or Cast Iron Pizza Pan– which will never crack and conducts heat really well. Be careful to dry it after rinsing with water or it will rust)

Cut the loaf with 1/4-inch slashes using a serrated knife. (If your slashes are too shallow you will end up with an oddly shaped loaf and also prevent it from splitting on the bottom.)

Slide the loaf into the oven onto a preheated stone (the one I’m using is the cast iron) and add a cup of hot water to the broiler tray. Bake the bread for 30-35 minutes or until a deep brown color. As the bread bakes you should notice a nice oven spring in the dough. This is where the dough rises. To insure that you get the best results it is crucial to have an Oven Thermometer to make sure your oven is accurate.

If you used parchment paper you will want to remove it after about 20-25 minutes to crisp up the bottom crust. Continue baking the loaf directly on the stone for the last 5-10 minutes.

Allow the loaf to cool on a rack until it is room temperature. If you cut into a loaf before it is cooled you will have a tough crust and a gummy interior. It is hard to wait, but you will be happy you did! Make sure you have a nice sharp Bread Knife that will not crush the bread as you cut. Or you can tear it apart as they do in most of Europe.

If you have any leftover bread just let it sit, uncovered on the cutting board or counter with the cut side down. If you cover a bread that has a crust it will get soggy.
Enjoy and have fun baking. Bread that is made with love and joy tastes better!
Note: Red Star Yeast is a sponsor of this website and its promotional activities, and provided samples of yeast for recipe testing.
Hi saw on a video that you put your dough in the crockpot, I tried reading through posts to find the details, but couldn’t find anything about the crockpot. Did you put it in the crockpot for an hour AFTER you let it rise for 2 hours? Or tell me when I should. I have my dough proofing now, but love the idea of being able to put my dough in the crockpot. Thanks. Can’t wait to eat it!
check this— https://artisanbreadinfive.com/2012/05/29/crock-pot-bread-baking-fast-bread-in-a-slow-cooker
Hi,
My daughter is allergic to barley an rye. I use King Arthur white whole wheat flour however, I find that the taste is not as good as it could be. Which flour do your suggest to add to improve the taste without flours that include malted barley or rye (such as all purpose flour). I also need to understand the proportions of water with the flour, as in the master recipe of both books.
Thank you,
Stéphanie
Hi Stephanie,
I am sorry, but I am not familiar with all the options that are available to you. Have you tried Bob’s Red Mill or Hodson Mills for other flours that might meet your needs?
Are you trying to replace white whole wheat for the all-purpose flour in our recipes? If so, you are going to need to add more vital wheat gluten and more water. You are best using our recipes written for 100% whole wheat to start.
Thanks, Zoë
Try this for amazing whole wheat flavor. Get yourself a small hand mill for less than $50 and some wheat berries. We use ours daily for amazing bread and pancakes. We have a Victorio brand and it’s been great.
I use about 1-1.5 cups of Bob’s Red Mill Kamut flour in place of some or all of the whole wheat. The bread has a wonderful nutty taste, mildly sweet without the whole wheat “bitterness”. it is a whole grain flour that makes a wonderful loaf when used along with all-purpose flour and a tablespoon of vital wheat gluten.
Fantastic!
I have an old recipe for Nut Rolls. It calls for a large cake of yeast. How much granulated yeast would I have to use to be the same as a large cake of yeast? Thank you.
Hi Dorothy,
The only size I am aware of is the 2oz package, which I would consider to be a large amount for a single recipe.. https://www.redstaryeast.com/products/red-star%C2%AE/red-star%C2%AE-cake-fresh-yeast
Thanks, Zoë
I made up the potato rye recipe and substituted purple sweet potato for the potato.
They turned out pink after baking:
https://rs51.pbsrc.com/albums/f359/rockhop/IMG_2109_zps1229f9bc.jpg~320×480
I find that the dough gets wetter and wetter over the days of storage, but the top tends to become leathery. Is this normal?
Hi Esther,
After a few days of not using the dough it can start to lose some of its body. The act of using it and sprinkling a bit of flour over the dough when you cut a piece off will prevent this from happening. How old is your dough?
The leathery top is caused by having too much air get into the container, so you should shut it a bit more.
Thanks, Zoë
Hi Zoe,
The dough is 3 days old and I keep it fully covered.
This is what it looks like after I have done an envelope fold to enclose the leathery top:
https://s51.photobucket.com/user/rockhop/media/IMG_2110_zpseaee99f5.jpg.html
The container with its cover:
https://s51.photobucket.com/user/rockhop/media/IMG_2111_zps5bcd778f.jpg.html
cheers,
Esther
Hi Esther,
This is a bit of a mystery, your bucket looks just great and I can even see the humidity. Is the bucket very large, compared to how much dough is in there?
Thanks, Zoë
Hi Zoe,
When the dough is fully risen after mixing, it fills up the whole container. I make up a third of the recipe each time and the dough lasts for about 5 days.
cheers,
Esther
Hi Zoe,
Just to let you know, I’m still baking and here’s what I made today using a modified version of your recipe with my sourdough starter in place of commercial yeast:
https://s51.photobucket.com/user/rockhop/media/20150924_223400_zpshosfmjie.jpg.html
Wow– looks like super-authentic hole-structure!
I try to handle the dough as little as possible when shaping (very difficult if there is rye flour in the mix as it gets very sticky) and I let it rest for 100 minutes before putting it in the oven
Nice.
Hey Zoe/Jeff,
Love the posts, and great pictures and illustrations. But HELP….lol
I followed the above to a T,…I did this about 7 days ago, and today Im going to pull a pound of dough out and make some bread. My dough had a little bit of water/liquid on top, but beautiful dough underneath. I pulled upward on the dough and it didnt stretch,..and just broke off, and not in a strong way…just almost runny. Should I add more flour at this point ? I took pictures, but not sure how to attach. Any help would be appreciated. Happy Holidays, Merry Christmas.
I guess I’d say just bake it off and see what happens. Try a 90 min rest after shaping. And go through the Tips and Techniques sections of the books, or our FAQs tab (click above).
After you bake it off, let me know how it turned out. Use lots of flour to shape. What kind of flour are you using?
Wow,..thanks for the quick response. I’m using White Lily- All Purpose Flour. I added a little flour and incorporated with my hand, very little mixing. Will try and form a loaf, and let it rest 90 minutes, and then bake. I just watched the video of you and Zoe making this bread/dough. I may start over and see. But this I have, has such a wonderful smell. Thanks Again.
to salvage the White Lilly batch, just add as much flour as you need to so it looks like our videos, hate to waste good food!
i tried forming a ball, and the dough just would not form into a ball,…was too runny. I tried adding some flour and doing a simple knead in the kitchen aid with the dough hook. I hate to say it, but im going to start over, and try again. Thanks for your help, and Ill post after this batch. 🙂
I love this bread and it has always worked amazing for me but I have not had luck with it lasting as long as you say. If I leave mine any more than a week it starts to sour and tastes like really strong sour yeast dough. It is not a big deal because I usually use it quicker then that but thought I would ask if you knew why. Thanks if you have time!
Yep, that’s a matter of taste, some people definitely prefer dough that’s stored for 7 days or less.
This bread is delicious. I was wondering if I can add ingredients to a shrinking batch, or if it’s intended to simply use it up and start fresh. It certainly never lasts two days; never mind weeks!
Yes, use the pate fermentee method we describe in our books. Not intended for dough with dairy or egg.
Is it possible to divide this into four before refrigerating it if I don’t have a 6 quart container?
Thanks
Sure!
Why does recipe on Gold Medal bag say: “Cover oven windows with a towel” in step 9.????? Thank you
A very few folks have reported that in older ovens without tempered glass, water dripping onto the glass can actually cause it to shatter. By covering the glass surface of the open door with a towel, you prevent that. Remove the towel before shutting the door.
My daughter has egg and soy allergies so for the past several months I have been perfecting my baking skills (breads, bagels and pizza dough mainly). I ran across this “master recipe” and immediately purchased a 6 quart container and a Danish dough hook. I used bread flour and accidentally forgot that last 1/2 cup….I did remember to increase the water as suggested. The dough was wet, but not overly wet. I let it rise to just past the 4 qt mark on the tub (took about 3 hours). Regardless of my mistakes, the first loaf (2 days in fridge) turned out amazing!! I was so proud of myself…my husband and daughter were completely in love with the bread. I made my second loaf today (5 days in the fridge) and for some reason, the crust didn’t get crispy like the first loaf. The taste was there and everyone is fighting over it but I am stumped about the softer crust (I did the steam and the preheat of the stone). I am only going to get three loaves out of this first container. I mixed up my second container full tonight with AP flour and am so excited to see how this one turns out. It is an incredible feeling knowing that I can give my daughter delicious breads (which she missed) that don’t have soy in them! I cannot begin to thank you enough! Have a Happy 2014! P.S. Can’t wait to receive my book from Amazon!!
Hi Michelle,
Thank you for the wonderful note, we’re thrilled you and your family enjoyed the bread!
Is it possible that you didn’t preheat the oven as long on the 3rd loaf? That can make a big differnce in the crust.
Cheers, Zoë
Yes, it is possible….I have made several since then :-)…and they seem nice and crusty when I pull it out, but quickly gets soft (within about 10 minutes of taking it out). I am in the south and right now with the cold, our humidity indoors is about 29% (because of the heating). I am thinking that might have something to do with it? Either way, we don’t complain…we are just so happy to have safe bread our daughter can eat anytime she wants! I was so eager to mix up that second batch (with the AP flour) that I accidentally put four cups of water instead of three (and you can imagine what a mess that was when I tried to pull some out to make dough). We are still over the top excited about this recipe and method! Thanks for responding and Happy New Year!
The crust does go softer some minutes after you get it from the oven. I keep my loaf in the over extra 5-10 minutes. It does not change the quality of the “crumb”, but it does make the crust a bit thicker and crunchier. Another thing is, I cool it on a wire rack so that air passes not only around, but under the loaf. Otherwise the underside becomes soft and soggy. I love the crackling sound it makes when you finally get it out and leave it to cool!
Yep, those racks are the way to go. Often, I find that the crust initially softens, but firms up when completely cooled.
Hi there! I love this recipe. I had made it a few times a couple years back and just tried again this week. The bottom of my loaf is not browning or crisping up. Any suggestions? I use a pizza stone – first time on parchment except last 10 mins, second time straight on e stone. What should I do differently?
Thanks for your help!!
Hi Jessica,
It sounds like you just need to preheat your stone longer. If you have a thick stone it can take 45 to 60 minutes to really get preheated. Thinner stones will take less time.
Thanks, Zoë
For Michael C.- White Lily is very soft wheat flour with an extra low gluten and protein content. Great for pie crust, not so good for bread.
Can I make the rolls and freeze them? That way I can use them as needed? Can I use wheat flour for a healthier dough?
Sure, though I usually just keep dough in the fridge and bake it off as needed. Which of the books do you have, I can direct you to a whole-wheat recipe?
Hello! This is the first bread I’ve ever tried to make and it sort of changed my life. As a college student living alone, my store bread always went stale before I could finish it. Now I deliver it to my friends and they think I’m some sort of bread magician.
Two questions – my bread has always turned out fairly decent on my cookie sheets, which is all I have. Are baking stones a worthwhile investment?
Also, can multiple loaves be cooked at once, or do you suggest baking them one at a time?
Thanks!
I often bake multiple loaves at once, assuming you have a normal-sized oven. Sometimes you have to increase the baking time a bit, maybe 15%. I love the stones, but if you’re happy with the cookie sheets, more power to you! Especially if it’s a heavy-gauge one like https://www.amazon.com/Chicago-Metallic-Commercial-Traditional-Jelly-Roll/dp/B003YKGRPK/ref=as_li_wdgt_ex?&linkCode=wey&tag=arbrinfimiada-20
See also our round-up of stones/irons at https://artisanbreadinfive.com/2010/08/24/pizza-stones-which-creates-the-best-crust
I haven’t used the recipe yet but I would suggest using a cast iron griddle. If you get a stone all you can use it for is baking bread,pizza and such. If you bet the cast iron you can use it as a griddle and also to cook meat.
I’m sure that would work, yes!
I may have read this wrong but what happened to the left-over dough in the tub? Does this method allow for you to keep dough on hand for fresh loaves as and when you need it?
Thanks all!
Exactly!
Where might I find a container like you use to let the dough rise?
Check out our Amazon store at left (2nd page), and also see https://artisanbreadinfive.com/2008/01/18/zoes-bucket-collection-and-the-dough-that-lives-within
Hi, I’m ready to try this put for the first time, but don’t have a baking stone and broiler tray. What can i use as substitues for these materials? Can i use a non_glass cookie sheet or pan instead of broiler tray, and a cookie sheet or alum foil instead of baking stone?
Yes, you can! Heavy-gauge baking sheets are the better substitute, something like https://www.amazon.com/Metallic-Commercial-Traditional-Uncoated-Jelly-Roll/dp/B003YKGRPK/ref=as_li_wdgt_ex?&linkCode=wey&tag=arbrinfimiada-20
Right– never use glass as the receptacle for water to make steam in the oven or it might shatter.
I bought your book for my husband for Christmas and he has made many delicious loaves from it. However, they are always a little damp/moist inside. Tried cooling longer, baking longer to no effect. We use parchment on a baking stone. Any other ideas?
Any chance you’re varying anything? Using different ingredients than what we recommend? In particular, what kind of flour are you using? Some brands have too little protein, usually brands from the Southern U.S. In particular, White Lily. In that case, you need to increase the flour a little or it’s too wet.
If we can’t come up with an explanation, you should just do that anyway.
Nope. Using Gold Medal unbleached all purpose flour; bought new yeast just in case; bought an oven thermometer. We’re baffled.
Have you tried taking the temperature of the bread before removing from the oven? I use a digital instant read thermometer. Some say an internal temp of 190 or above, I use 198 to 205.
Not crazy about internal instant read thermometers, because the reasonably-priced ones aren’t instant, and the temperature depends on your hitting the very center of the loaf. I like 205 for lean dough, 185 for egg-enriched, but again, I rarely use it.
As to the instant read, yes they still take about 10 seconds to finalize but I never go more than 3 to 5 seconds. Still gives a reasonable if not precise measure. As far as expense, I bought a Taylor digital probe style instant read for less than $15 at my local supermarket. I use it all the time and it works great.
I was just wondering how you can bake this bread if you have not a stone or cast iron pizza pan? Is there a tip you can share so that I can bake my bread with out these things. I will eventually get on but until then any suggestions?
Hi Jean,
You can bake the bread right on a cookie sheet. The stone creates a crisper crust, but the results are still great on a cookie sheet.
Cheers, Zoë
Thank you for your reply… and I will let you know how it worked out.
I use a baking stone. I have been brushing my bread with oil since my family prefers a softer crust. Problem is my stone is now oil soaked and the house is starting to get smoky when I bake bread. If I switch to using a cooking sheet would you leave the stone in and place the cookie sheet directly on the stone? Should I transfer the loaf directly to the stone after 20 or so minutes similar to using parchment paper? Do you preheat the stone and then place the bread on the preheated cookie sheet?
Hi Joe,
I think your solution is exactly right. I would put the baking sheet right on top of the preheated baking stone and at the end transfer the loaf directly to the stone to crisp up the bottom crust.
Enjoy, Zoë
Terra cotta planter base plates work well as baking stones. Cheap and can be put into the oven while pre-heating. If it breaks, easy to replace.
I bake a loaf of bread following your instructions. I put a baking pan with water in the bottom oven half hour before baking. I spray the oven every ten minutes. The bread came as good any bakery. Thanks for the really make me a master of bread with out to much complication.
Hi Wanda,
That is terrific! Thanks for the note.
Cheers, Zoë
Recently I bought your book and I am having some problems. First I live out of USA and normally I only can find bleached flour, also I live at 10.000 feet over sea level.
First, my dough is super sticky and I need to add a lot of flour to my hands and surface of the ball so it doen’t sticks. When I let it rest it will lose it ball shape. Finally, the interior is very damp. I have tried to increase the amount of flour (1 cup) but still I can get it right.
Non-US flours typically have less protein. Where are you located, and what brand and type of flour are you using?
But basically, all you need to do is decrease the water (or increase the flour) until it looks like our videos (see YouTube.com/BreadIn5).
Hi Jeff,
I am in Bogota, Colombia. The flour I’m using is an all purpose bleach type. I tried to find more information from the manufacturer but it only says high gluten and protein flour.
I had to increase in 1 3/4 cup of flour to get it similar to the video.
How did it work when baked?
Hi Jeff,
The crust and taste were good. A little dense inside, especially towards the middle of the bread; maybe I must adjust temperature and time of bake. If you like you can follow the link to some photos.
https://flic.kr/ps/9LhSt
Next batch will try to reduce the flour.
Are you doing a full 90-minute rest? Have you tested your oven temp with something like https://ow.ly/8CVPU ? Be sure you’re measuring correctly, like we do (if you’re using volume), see my video at https://artisanbreadinfive.com/2010/04/28/how-we-measure-our-flour-using-the-scoop-and-sweep-method . Or weigh the flours, see video at https://artisanbreadinfive.com/2008/10/18/no-knead-whole-grain-baguette-buns-with-extra-sourdough-kick-this-time-weigh-out-the-ingredients .
Is it possible to bake in a covered iron pan like Jim Lahey recipes?
Sure, closed Dutch Oven baking is a very old method, pre-dating all of us, and invented by (surprise) the Dutch. Lots of instructions on this in our books (all except our first one), or just type “Dutch Oven” into the search bar on our website (not the Google search bar or URL line). Also note that this “Back to Basics” post has been updated to incorporate things we did in the new version of our first book, go to https://artisanbreadinfive.com/2013/10/22/the-new-artisan-bread-in-five-minutes-a-day-is-launched-back-to-basics-updated
Thank you, I have ordered your book and look forward to making bread from your recipes. Love making bread in my Dutch oven. This a great way to have bread to give as gifts as well.
Barb
Fantastic, thanks Barbara!
This recipe call for All Purpose Flour. What adjustments do you recommend for using whole wheat, and/or rye flour, which I very much prefer to do?
First off, there’s an updated version of this post, at https://artisanbreadinfive.com/2013/10/22/the-new-artisan-bread-in-five-minutes-a-day-is-launched-back-to-basics-updated
Then, your question is actually quite complicated. We have lots of whole wheat and rye in the book, and especially in Healthy Bread in Five Minutes a Day, which is mostly whole grain. https://bit.ly/3wYSSN The New Artisan Bread in Five (https://amzn.to/17Rw23Y) has some, but it’s mostly white. In general, whole wheat and rye need more water, but we found that it didn’t store well (the crux of our method) without the addition of vital wheat gluten. See https://tinyurl.com/yfafxk7 or https://artisanbreadinfive.com/2008/10/18/no-knead-whole-grain-baguette-buns-with-extra-sourdough-kick-this-time-weigh-out-the-ingredients. But hard to explain in this small space. See also our FAQs tab above.
Is 6.5 cups of flour equivalent to 2 pounds of flour?
Yes– if you mean all-purpose white flour…
When I weigh the all purpose flour 2 pounds is only 6 cups. I tried this with the gold medal and with bobs red mill. Usually when I weight the water it ends up needing a little more than 3 cups. Is that normal? Which is more accurate? It seems to make a wetter dough when I use the scale.
Hi Jennifer,
When you weigh each cup of flour, using the scoop and sweep method, how much does each cup weigh? We use a 5 ounce cup, which is actually heavier than normal.
The difference may be the protein content of gold medal vs Bob’s red mill all-purpose flours? they may not have the same amount, which will cause one to be wetter than the other.
The water should weigh 8 ounces per cup, so if you are weighing 2 pounds of flour, you’d use 3 cups (24 ounces) of water. Weighing is always more accurate.
Hope that helps? Zoë
Hello – using the sandwich loaf instructions on page 78 of the New Artisan Bread in 5…
I just got a new cast iron loaf pan and it’s a bit larger than other loaf pans that I’ve found (yay!) – I have 2.5 lbs of dough in cast iron – do I need to adjust temps due to the cast iron instead of steel loaf pan, or just follow normal instructions and keep an eye on it? Many thanks – Lori
p.s. I’m so happy with your book, I just bought one for my daughter too!
Hi Lori,
I would keep the temperature the same, but keep an eye on the crust. If it looks like it is browning too quickly, you can pop it out of the pan for the last 10 to 15 minutes of baking.
Thank you and enjoy! Zoë
What adjustments should I make for baking at 6000 ft?
Hi Catie,
Here is a post about baking at high altitude. You should skim through the comments, since there are some great tips from our readers. https://artisanbreadinfive.com/2008/02/10/qa-high-altitude-baking
Cheers, Zoë
Hi Zoe!
Love tthe book and the bread! I had dough in the fridge for 3 weeks and a made a loaf … Do you think it will be ok?
Thanks
Joe
Hi Joe,
Yes, the dough should be just fine as long as the dough has no dairy or eggs. We’ve kept it for up to a month. It may not have the same rising power.
Thanks, Zoë
FIRST TIME A CHARM! SECOND AND THIRD TIMES THE BREAD STUCK TO THE PARCHMENT. HELP!
Is it “pastry” parchment? That kind doesn’t work, it’ll stick. Need something like https://www.amazon.com/gp/product/B001KUWGDS?ie=UTF8&tag=arbrinfimiada-20&linkCode=wey&camp=212361&creative=380725
If that’s not it, then just dust with more flour before laying it on the parchment.
Thanks. I will give it a try. The bread is amazing!
I hope this is a simple question. I am wanting to make two larger loafs rather than 4 small ones from the master recipe. What is the best way to proof said 2 lbs loaf so it doesnt go flat? I am trying to achieve larger free form loafs.
thanks
Which book/recipe are you working out of (with page number of the recipe)? Have you also been through our FAQs tab above?
Sorry for late reply. I teach highschool and finals are here! haha. Ok, i am using the original master recipe from the first book and also the healthy artisan bread in 5. But lets just stick with the original master recipe for starters.
I have not completley gone through all the faqs. I will search to see if i can find what i am looking for. i just want bigger free form loafs from the master recipe.
3 cups luke warm water
1.5 tbls kosher salt
1.5 – 2 tbls yeast
6.5 cups flour
yeilds 4 loafs but i want 2 large loafs haha.
every time i try, the loaf ends up flat when i try to proof for 40 minutes.
thanks
The FAQ you want is “Larger loaves: What adjustments are needed?” But also, consider your shaping step, if you’re not “cloaking” enough, they can spread sideways, which is what you’re describing. Our dough has less structure than traditional– so see our videos on the shaping step: Gluten-cloaking/shaping: https://artisanbreadinfive.com/2010/03/08/new-video-shaping-the-ball-from-a-very-wet-dough Gluten-cloaking/shaping with whole-grain dough: https://artisanbreadinfive.com/2010/02/16/new-video-how-to-shape-a-loaf-using-whole-grain-dough
If all else fails, decrease the water a bit. 1/4-cup?
This article featured was on https://spicearoma.wordpress.com/2014/06/02/artisan-bread-boule/ !
I’ve bought this books and each recipe is so wonderful!
I have been a bread baker hobbyist for many years and your book is very interesting. I truly wanted to make your breads, but I think you made a critical error not including weights or percents-by-weight of ingredients. All serious bread hobbyists know that there are variations in the quality of the grind of flours and the weight needs to be known for more consistent results. Other than that one detail, it is a great book.
Hi Daniel,
Which book do you have? All of our books, but the very first one, have weights. We don’t do baker’s percentages because we’re trying to keep the method simple for those folks who are new to the hobby. If you check out a copy of The New Artisan Bread in Five, you’ll find all the recipes are in measures and weights.
Thanks and enjoy! Zoë
The copy I have is copyright 2007. I will seek out a new copy. Thanks for the corrections. This book has great promise of bringing artisan bread baking to a new generation. I consider this a lost skill. I have enjoyed reading your book, it is very well written.
Best wishes
Hi Daniel,
2007 is the first year our book came out and we didn’t have weights. In the new edition of that book we added the weights. We agree with you that it is the way to bake and we’re hoping it will eventually become the norm.
Thanks, Zoë
Hello,
I made your recipe and refrigerated it overnight and made the bread the next day, it turned out good. I refrigerated the rest of the dough for a little over a week and tried making the bread again. The dough had a different color and texture on the top and a strange smell, after baking the smell and not so good taste was still there. I had refrigerated it in a plastic bowl with a lid and had the lid partially shut with some gaps open. Wondering what happened that made it not turn out like the first time. Thanks
Hi Abby,
If the dough is unused for several days it had a long time for the fermentation process and this will cause the strong smell and flavor that you noticed. If you don’t care for this taste, you can prevent it by simply dusting a very small amount of flour over the top of the dough every few days.
Thanks, Zoë
Jeff and Zoe,
I am a St. Paul home baker and basement beer brewer who had a French Grandmother who created 10-15 loaves by hand every other day for about 50 years. She even had the old butter bell and wooden flour bin drawer that loved to ‘bite’ young children’s fingers. She has since passed, yet I can imagine her being slight jealousy over your simple no knead artisan recipes. Congrats on your success!
On a few occasions, I have noticed a fairly strong ‘winey’ aroma coming off of the dough after a few days (especially with a multi grain creation, or addition of slightly more yeast). It had also imparted into the dough within 2-3 days. I understand the concept of fermentation, but would like to minimize it affecting the normal dough flavor. Any suggestions?
Hi Dean,
What a wonderful gift to have those memories of your grandmother baking.
Do you have a container to keep the dough that has a hole in the lid? I just poke a tiny hole in the lid and that is enough for the gas to escape and prevent the build up of alcohol.
Thanks, Zoë
Hi! I’ve been making this recipe for a few years now and my family loves it. I have three kids and we go through half a batch every day when I’m really on top of it!
However, we just made the leap to do gluten free AND allergen free living to try and pinpoint what’s going on with my 1 year old. I make the simple recipe – water, salt, yeast and flour… any chance the recipe will work with a gluten and allergen free flour like oat flour? Would you have any suggestions? Thanks!
Hi Mandie,
We have a GF book coming out in October: https://artisanbreadinfive.com/2014/04/29/big-news-gluten-free-artisan-bread-in-five-minutes-a-day-is-official-and-available-for-pre-order
You can’t just replace the GF flour for wheat, but here is a GF recipe to give a try: https://artisanbreadinfive.com/2010/01/05/gluten-free-crusty-boule
Thanks, Zoë
Thank you so very much! I appreciate you pointing me in the right direction. And congrats on the new book!
We love this recipe! It was recommended by a friend and we’ve been having a blast with it. Can we get creative with it and mix in olives and herbs? If yes, at what stage do we do this and what is the best way to do it?
Sure– lots on that in the books, which one do you have and I’ll direct you? Otherwise check out our FAQs tab above, or use the “Search” bar at left…
Hi Jeff, I don’t see the answer to this question in the FAQ’s. And in my phone there isn’t a search bar. At what stage would we add in olives? As we’re first mixing, after the first time it rises or into each individual loaf as we cook it? Thanks!
Sorry, forgot this wasn’t in the FAQs. Only a subset of our recipes and methods are available here on the website. Details on olives in the bread are in The New Artisan Bread in Five Minutes a Day, in the Olive Bread recipe. The book’s available on Amazon at https://amzn.to/17Rw23Y
Question:
On your website 1 Tablespoon of yeast is recommended. I followed that the first time.
On the back of Gold Medal Flour package 2 1/2 teaspoons of yeast were recommended or one package. I am following the Gold Medal recipe this time.
Which do I follow? I am so excited about this recipe. Thank you.
Hi Sarah,
We’ve been experimenting with the amount of yeast needed to rise the bread quickly and efficiently. We’ve found that 2 1/2 teaspoons is sufficient. If you use 1 tablespoon it may go a touch faster, but not by much.
Enjoy, Zoë
I have used this recipe and it seems like my bread comes out gummy. What to do?
There’s an update of this post, at https://artisanbreadinfive.com/2013/10/22/the-new-artisan-bread-in-five-minutes-a-day-is-launched-back-to-basics-updated, but that’s probably not going to have the solution. Check through the items on our FAQs tab above, especially “Dense or gummy crumb…” Much more in our books, click above on cover images for the Amazon links.
I made this on Sunday and baked my first loaf last night. It was so easy to shape and delicious! I cannot believe I waited this long to try it! The bread will go well with my homemade soups this fall! Thanks!!
Hi Diann,
Thank you for the lovely note, you made my day! 🙂
Cheers, Zoë
Can you fix the broken link to the refrigerator rise trick? Im a foods teacher wanting to do this with my students.
Hi Jackie,
I will fix the link, but here it is: https://artisanbreadinfive.com/2013/11/22/the-refrigerator-rise-trick-on-crazy-busy-thanksgiving-morning-fresh-rolls-kurbiskernbrot-from-the-german-alps
Thanks, Zoë
Made this bread tons when we lived in Texas, we have since moved to Colorado… Do I need to make any adjustments for high-altitude baking? Thanks! Aggie
Click on the FAQs tab above, then choose “High-altitude baking: How do I adjust the recipes for high-altitude?”
Where can I get a pizza pan/stone like that?
Added amazon links near the picture of the cast-iron, either is a good choice though the cast-iron can’t crack.
Hey There! I have been sitting here reading the blog and enjoying it very much. Late last year I started making my own bread. I’ve had fairly good results but some times I look at my loaf and think “Hmmm something isn’t right” But I just keep on adjusting and I’m getting it. So I came across this recipe and I just finished mixing and now it’s resting for the 2 hrs. I don’t have a stone and I do have cookie sheets. What I was wondering is can I bake a loaf on an upside down cast iron pan? I’m going to try and see how it comes out. I’ll check for your response in the mean time, if it’s a usable method for baking without a stone. Thank You. I’m really getting some good tips from this blog. Have a great day 🙂
Hi Peggy,
One of my favorite baking surfaces is my cast iron baking “stone.” The upside down pan will work well, it’s just the size that will be constricting.
Enjoy, Zoë
Thank You for your quick reply. Yes I did consider that so I will try to bake a loaf that will fit. Thanks again.
You’re welcome Peggy,
Enjoy all the bread! Zoë
Hi Zoe, just a quick update on how the bread turned out, fantastic!!! I use my upside down cast iron pan and a upside down cookie sheet. Both did a great job and the bread is wonderful. Thank You so much for posting your recipe. I love it and so does my hubby.
Hi Peggy.
So glad it came out well!
Enjoy, Zoë
When I half a recipe from your book, by weight, the dough is always needs more water. Why is this?
Hi Andrea,
This is a mystery, since baking by weights should allow you to scale the recipe up or down and get the same results. Are you using a digital scale?
Thanks, Zoë
Is halving a recipe the same as using bakers percentages and half the flour?
Hi John,
Yes, halving the recipe would be the same as using half the flour and calculating based on that.
Thanks, Zoë
Well, bakers percentage BASED on half the flour.
Love this! It is great and just was in looking for!
I made a basic batch yesterday. It hadn’t doubled after the first rise, so it let it sit out about 45 more minutes, then put it in the frig. This morning it has only come up to about an inch over the 2 qt. mark. It also has about 3-4 patches of dry dough on top. There’s not much bubbling going on, either. Do I need to do something, or should I just be patient and see if it raises more in the next day or two? Thanks for the help. (Fellow Minnesotan here!)
Hi Sheila,
The dry patches mean that the lid just wasn’t on quite tight enough. You can sprinkle a tiny bit of water over them.
If the dough doesn’t rise much, it is likely that you used slightly cool water and it will just take longer. If you use cool water it can take up to 18 hours to rise. You can wait or you can shape the dough, let it rest for about 2 hours before baking.
You can also take the whole bucket out of the refrigerator and let it rest on the counter until it has risen more. This will take a while since it is starting from cold.
Thanks! Zoë
Hi Zoe,
Thanks for the advice. I took the dough out of the frig about 5:00 yesterday afternoon (it was a while before I checked the website back for an answer). I did sprinkle water on the dry spots. As of this morning, it is pretty much the same place as before – maybe a titch higher and it’s bubblier than yesterday. I’d like it to develop a nice flavor for baking, so should I just do the waiting game and leave it out until it finally reaches the 6 qt. or so mark, or will that not happen at this point? I don’t want the yeast to be exhausted by the time I’m ready to bake it. Any info you can give is appreciated.
Hi Sheila,
The fermentation is happening, regardless of its slow rise. So, you can try it as is, I wouldn’t leave it out any longer. It is not unusual for the dough to only get to the 4-quart mark, so height isn’t everything. When you shape the dough, you can let it rest for 90 minutes to make sure you get a nice rise.
Also be sure to preheat your stone very well, so you get a good oven spring.
Enjoy, Zoë
Thanks so much for this amazing book and method. My daughters and I often make pita or naan for breakfast and lunch. We have the technique mastered and the loaves puff up so beautifully. My 7-year-old daughter calls them “Whoopie Cushion Bread,” and suggested you call them that in your next book.
I told her you probably wouldn’t be keen on that idea, but thought I’d still pass it along. Miniature foodies. Gotta love ’em.
Hi Becky and Ava,
I absolutely love the name “whoopie cushion bread!” Thanks for the wonderful note, it made my day!
Cheers, Zoë
I am used to covering dough with a towel as it rises after I shape it. You don’t show this. Do I leave it at room temperature uncovered as it rises before I bake it?
We find that a towel will stick to dough that’s this wet. If you’re rising for 40 minutes, you can leave uncovered. If you go 60 or 90 minutes, dust it and cover loosely with plastic wrap. Or, as I prefer, just cover with a roomy overturned bowl.
You’re right. It is a bit moist. I used a light dusting of flour because I shaped it into rolls. I’m glad I just read that it rises in the oven because it’s not doing much yet. I plan to let them rise for 60 minutes. Thanks for the help. These have to turn out beautifully because my daughters were perfect. Momma can’t be outdone.
You’ll get a lighter result if you go a full 90 minutes, but it’s not essential.