Back to Basics ~ tips and techniques to create a great loaf in 5 minutes a day.

Note that there is an updated version of this post, click here to view.
Recently we have seen lots of new readers on the website who are asking wonderful questions about how to perfect their loaves. First I’d like to say welcome to the site and thank you for trying the bread. As I bake through the basic Master recipe from ABin5 I will try to answer some of the most frequently asked questions and also introduce you to a few new pieces of equipment I’ve recently started to use that make the whole experience just a little easier. The goal is to create a large batch of dough that stores in the refrigerator for up to two weeks. That’s why our method saves you so much time– all the mixing and prep is divided over four one-pound loaves.
Master Recipe from The New Artisan Bread in Five Minutes a Day: The Discovery That Revolutionizes Home Baking:
3 cups lukewarm water (you can use cold water, but it will take the dough longer to rise. Just don’t use hot water or you may kill the yeast)
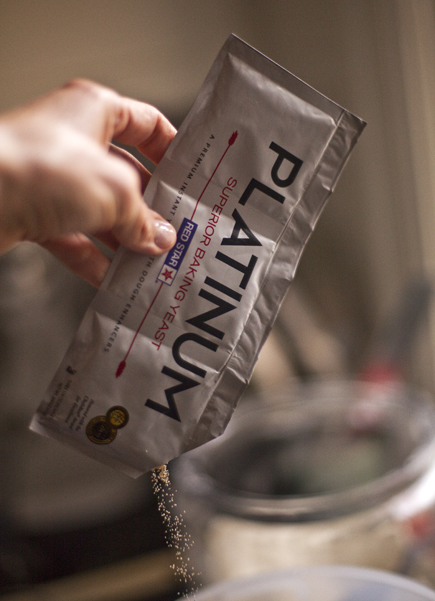
1 tablespoon granulated yeast ( you can use any kind of yeast including: instant, “quick,” rapid rise, bread machine, active dry, or fresh cake yeast*. We’ve always tested with Red Star Yeast and they have a new premium product called PLATINUM, which has worked beautifully in our recipes. You can also decrease the amount of yeast in the recipe by following the directions here. Or you can bake with a sour dough starter, see instructions here.)
*If you use cake yeast you will need 1.3 ounces.
1 to 1 1/2 tablespoons Morton Kosher Salt (adjust to suit your taste or eliminate it all together. Find more information here)
6 1/2 cups (2-pounds) all-purpose flour (we tested the recipes with typical supermarket flour. If you use a higher protein flour check here)
Mixing the dough:

In a 5 or 6 quart bowl or lidded Food Storage Container, dump in the water and add the yeast and salt. Because we are mixing in the flour so quickly it doesn’t matter that the salt and yeast are thrown in together.

(If you are using the fresh cake yeast break it up with a spoon)

Dump in the flour all at once and stir with a long handled wooden spoon or a Danish Dough Whisk, which is one of the tools that makes the job so much easier!

Stir it until all of the flour is incorporated into the dough, as you can see it will be a wet rough dough.

Put the lid on the container, but do not snap it shut. You want the gases from the yeast to escape. (I had my husband put a little hole in the top of the lids so that I could close the lids and still allow the gases to get out. As you can see it doesn’t take much of a hole to accomplish this.)

Allow the dough to sit at room temperature for about 2 hours to rise. When you first mix the dough it will not occupy much of the container.

But, after the initial 2 hour rise it will pretty much fill it. (If you have decreased the yeast you will have to let it go longer than 2 hours.) DO NOT PUNCH DOWN THE DOUGH! Just let it settle by itself.

The dough will be flat on the top and some of the bubbles may even appear to be popping. (If you intend to refrigerate the dough after this stage it can be placed in the refrigerator even if the dough is not perfectly flat. The yeast will continue to work even in the refrigerator.) The dough can be used right after the initial 2 hour rise, but it is much easier to handle when it is chilled. It is intended for refrigeration and use over the next two weeks, ready for you anytime. The flavor will deepen over that time, developing sourdough characteristics.

The next day when you pull the dough out of the refrigerator you will notice that it has collapsed and this is totally normal for our dough. It will never rise up again in the container.

Dust the surface of the dough with a little flour, just enough to prevent it from sticking to your hands when you reach in to pull a piece out.

You should notice that the dough has a lot of stretch once it has rested. (If your dough breaks off instead of stretching like this your dough is probably too dry and you can just add a few tablespoons of water and let it sit again until the dough absorbs the additional water.)

Cut off a 1-pound piece of dough using kitchen shears* and form it into a ball. For instructions on how to form the ball watch one of our videos. Place the ball on a sheet of parchment paper… (or rest it on a generous layer of corn meal on top of a pizza peel.)
*I actually use a pair of Sewing Shears because I like the long blade. I just dedicated a pair to the kitchen.

Let the dough rest for at least 40 minutes, (although letting it go 60 or even 90 minutes will give you a more open hole structure in the interior of the loaf. This may also improve the look of your loaf and prevent it from splitting on the bottom. ) You will notice that the loaf does not rise much during this rest, in fact it may just spread sideways, this is normal for our dough.
You can also try our “refrigerator rise trick,” shaping the loaves and then immediately refrigerating them overnight. By morning, they’ll have risen and are ready for the oven after a brief room-temp rest while the oven preheats (click for instructions).
Preheat the oven to 450 degrees with a Baking Stone* on the center rack, with a metal broiler tray on the bottom (never use a glass vessel for this or it will shatter), which will be used to produce steam. (The tray needs to be at least 4 or 5 inches away from your stone to prevent it from cracking.)
*(or Cast Iron Pizza Pan– which will never crack and conducts heat really well. Be careful to dry it after rinsing with water or it will rust)

Cut the loaf with 1/4-inch slashes using a serrated knife. (If your slashes are too shallow you will end up with an oddly shaped loaf and also prevent it from splitting on the bottom.)

Slide the loaf into the oven onto a preheated stone (the one I’m using is the cast iron) and add a cup of hot water to the broiler tray. Bake the bread for 30-35 minutes or until a deep brown color. As the bread bakes you should notice a nice oven spring in the dough. This is where the dough rises. To insure that you get the best results it is crucial to have an Oven Thermometer to make sure your oven is accurate.

If you used parchment paper you will want to remove it after about 20-25 minutes to crisp up the bottom crust. Continue baking the loaf directly on the stone for the last 5-10 minutes.

Allow the loaf to cool on a rack until it is room temperature. If you cut into a loaf before it is cooled you will have a tough crust and a gummy interior. It is hard to wait, but you will be happy you did! Make sure you have a nice sharp Bread Knife that will not crush the bread as you cut. Or you can tear it apart as they do in most of Europe.

If you have any leftover bread just let it sit, uncovered on the cutting board or counter with the cut side down. If you cover a bread that has a crust it will get soggy.
Enjoy and have fun baking. Bread that is made with love and joy tastes better!
Note: Red Star Yeast is a sponsor of this website and its promotional activities, and provided samples of yeast for recipe testing.
Zoe, I think you’re right about the fridge thermometre. My dough fridge 😉 is in the garage and in the middle of Australian summer it has a really hard time staying cool as the garage gets boiling hot.
I did have enough space for the dough to rise about 50-70%. But I think it about trippled. I’m still learning 🙂
These are great tips! By now I have pretty much all the equipment except the Danish Dough Whisk – sounds like a nice tool.
I keep experimenting with your recipes all the time. I have to admit that I mostly go with the ABin5, because I am not a huge fan of whole wheat, but I do use some of your ideas from the HBin5 as well.
For example, I made a variation of your apple bread
https://cookingrookie.blogspot.com/2010/03/apple-buns.html
and it’s really delicious and the mild apple aroma when it is baking is amazing.
I also made a multigrain bread, which was very good
https://cookingrookie.blogspot.com/2010/03/little-bit-of-everything-multigrain.html
and now have a batch of zucchini dough ready to be baked.
Do you have a forum for your fans to share ideas on their experiments?
Your book literally changed my life – I am now absolutely addicted to bread baking and cooking in general 🙂
Hi Cookie Rookie,
Your loaves are wonderful, thank you for sharing them with us. We are thrilled that you are baking so much and enjoying all the breads. Feel free to share your ideas with us and all those who are following here! If you have any creative ideas for flatbreads they may even find their way into our next book! 😉
Thanks, Zoë
Are you familiar with hemp seed? Any chance you will in the future incorporate some hemp seed into your recipes?
Peggy: No plans for hemp recipes at the moment– we try to keep to mostly easily-available products and this one isn’t (there are exceptions to that in the books, I know!).
Also Peggy, note that we had to edit out the health claims you made for hemp seed. While they may very well be accurate, we can’t put anything out there that we can’t verify ourselves, and we just aren’t familiar enough with this particular seed. Jeff
I just baked this bread today. Firstly, it did not rise as much as yours does in the picture, I thought it may have a good oven spring, but not much. I had my oven preheated to 450 with the baking stone. I followed all the directions , but the base of the crust did not brown after baking it for 35 min, 25 min on the parchment and then directly on the stone for 10 min. The crumb is dense. what did I do wrong?. I had proofed the dough for 60 min. instead of 40 min. after shaping.
Hi Aparna,
Are you using an oven thermometer or going by the ovens gauge? The oven may say it is 450 degrees but it often takes much longer for the stone to reach that temperature. This would cause the undercooked bottom crust, lack of oven spring and dense crumb.
How warm is your kitchen? Did it seem as though the dough was overly soft when it went into the oven? If your kitchen is very warm the dough may have over proofed, which would mean it would not have a nice oven spring.
Thanks, Zoë
Hello,
In my earlier comment I forgot to mention that my dough did rise very well , in fact it had almost tripled in over an hour. So, i was surprised that the loaf did not rise much in the final rise nor in the oven. I will keep on trying until I succeed . Please advise me as to what I had done wrong . The bread does taste good though has more of a sourdough taste.
Hello Zoe, Thank you for your quick response. To answer your question about the oven , I do not have an oven thermometer. Where do I buy one, and how does it work? I depended on the oven Gauge.I thought that the dough was very soft and springy during the first 2 hour rise, and then when I shaped it the next day after taking it out of the fridge the dough was very cold and still quite cooler after the 60 min. 2nd rise. I thought that was the reason it did not rise much the 2nd time. Should I leave the dough out for sometime before shaping? The bread tasted great though, I just hoped it had risen well. How do I shape the dough into a loaf instead of a round one
Thanks again, I love your web site. You have great tips for a beginner like me. I am buying your books as soon as I can.
Aparna: We like this thermometer, or something like it, here on amazon: https://bit.ly/czmco2 It’s inexpensive but works wonders— I’m guessing your temp is low, so you just don’t get proper oven spring.
Doesn’t matter so much about leaving it before shaping, but if it’s whole wheat, go the full 90 minutes at room temp after shaping. But don’t expect much rise at this stage. Question is whether the final product is over-dense to your taste. If not, you’re on the right track. Jeff
Hi,
I am so excited about your blog, and I am definitely going to get your book. I do have a question though. . . I decided to try to make a loaf the same day I mixed the dough, after letting it rest a couple of hours in refrigerator. When I tried to pull out my 1 pound of dough, the dough stretched just a little, and broke off. This did not look like the videos I saw, of the really wet dough that was VERY stretchy and needed to be cut with scissors. What can I do to get the stretch into my bread? I even added slightly less flour than the recipe called for. Though I am using the bleached all purpose flour, could that have anything to do with it? Does it have to be unbleached?
I really appreciate your help!
Lauren: Has to be unbleached, or else the protein content is too low to create the elasticity. Everything will work as billed once you switch. Let us know, though, if you have problems. Jeff
Hi
do you think i can use my cast iron wok without the lid instead of the baking stone?? and put the water bath bellow it.
Dina: I’m a little worried that the bread may stick to it (probably need to grease it, but maybe not). Main issue is that woks aren’t massive, so they don’t have what’s called “thermal mass,” the ability to transfer a huge amount of heat to the wet ball of dough instantly. That’s what gives the best oven spring.
But in the worst case, it shouldn’t be much different than a cookie sheet or silicone pad, so try it! Jeff
Zoe,
My bread turned out absolutely delicious in the cast iron pot. Thank you very much.
Jeff and Zoe-
When I took your class in Phoenix two years ago, and later on the site, I know that you did not think that, generally, the brand of flour did mattered (as between grocery generic and standard brands–ignoring King Arthur) for purposes of the master recipe. The emphasis was on the shaping and water content.
As it turned out, for me, the brand did matter. I was using Safeway brand unbleached flour and getting dense crumb. I switched to Gold Medal, and my crumb is much better. I suspect it depends on the quality of the generic, but I thought that you might be interested.
Michele
Michele: Interesting, haven’t heard that before. Any chance the store-brand stuff was stale? Jeff
Jeff and Zoe,
Thank you so much for providing us with a simple way of making delicious breads. It really is a treat being able to bake wonderful loaves at almost any time.
While on the topic of simplifying things, I have found that I can forgo the water tray step by simply spraying my loaves two or three times in the first 10 minutes of baking. When I do this I still make wonderfully crusty loaves. Furthermore, this works well whether I’m baking the bread in my full-size over or using my little counter top convection oven.
I love using the little convection oven when I’m baking smaller loaves. It cooks very rapidly and turns out beautiful loaves and allows me to save money as I don’t have to heat up the big oven.
Thanks again for showing us this wonderful way of making bread.
Jorge
Jorge: Yep, there are three ways to create the steam environment, yours is one. We detailed this in the second book: the broiler tray, spraying, and baking inside a covered container for 2/3’s of baking time (all on the website here, too, though it can be difficult to find). Jeff
No– This went on for two years–and I am whippin’ though flour. I gave up making the round loaves and concentrated on the flatbreads–can’t wait for the next book.
Then when your video came out, I made a boule using the generic and the loaf was better for the 90 minute proof. Then I started using the Gold Medal and that is when I am seeing great big bubbles in the crumb–just like yours. Flatbreads also more fluffy. Lovin’ it.
Michele
Michele: OK, no way it was stale then (unless it was on the shelf for a long while before purchase, but then you’d have seen an expired purchase-by date).
Gold Medal’s a nice product… Jeff
I have both books and have made probably 20-30 loaves so far (along with almost every mistake you can make). I’m learning to work more by feel now and am even getting cocky enough to try to adapt some recipes. For instance, I would like to make the Vermont Cheddar as a whole grain bread, and make grain substitutions in other recipes. Jeff, I noticed in another post you mentioned substitutions depended on the gluten content of the flour. Is there a general rule about this, like if the gluten content is higher than that called for use less VWG? BTW, the Toasted Millet and Fruit Bread is fanatastic!!
Tracey: See the FAQ about this, click above, re: Flour Varieties, Do I need to adjust…
I’ve seen many posts on food blogs about that “artisan bread in five minutes”, and I have finally get more information about it.
I tried it yesterday : I halved the recipe, and halved the amount of yeast. I baked a small loaf today and it was the best bread i’ve ever made 🙂
Very easy, and it doesn’t need to bake a lot of bread (unlike the sourdough method)
Thanks a lot! I think I’m gonna order the book soon!
it will satisfy the bread craving of a french teenager hehe 🙂
Celine: My brother and I used to come home from high school, and eat a loaf of bread with butter, and a quart of milk! Glad the recipe worked well for you, hope you enjoy the full versions in the books. Jeff
Goodness, that is a beautiful boule! I notice that no matter what I do, my boule spreads quite a bit. Could it be too liquidy of a dough? Thanks!
Hi Betsy,
Yes, it could be that your dough is too wet. Perhaps you are not measuring with the scoop and sweep method? If you spoon the flour into the cup you will end up with too little flour and a dough that is too wet.
Be sure you are using unbleached all-purpose flour as well.
Thanks, Zoë
1. Can I use a Silpat mat (on a cast iron pan, baking stone, or cookie sheet) instead of parchment paper (on a cast iron pan, baking stone, or cookie sheet)?
2. I note that in your brioche recipe (among others), the instructions say that, if I’m not using a baking stone (or cast iron pan) for brioche, that I don’t have to preheat my oven to 350 degrees for 20 minutes, but only for 5 minutes. Does this mean that I can put the brioche loaf (that has rested for 1 hour 20 minutes) into the oven after only 5 minutes of preheating even if, after 5 minutes of preheating, the oven temp hasn’t yet reached 350 degrees?
Thanks Zoe, I am using unbleached all purpose flour, and scooping & sweeping! I’ll keep playing with it, because the bread always tastes so good- just wish it didn’t spread as much as it does. I don’t want a tight, dry loaf either!
Hey Zoe,
Thank you for replying earlier. I bought a thermometer and yes! you were right, my oven was off temperature.
I made the whole wheat bread again, this time, I needed 4.5 cups water instead. Is it ok to add a lil more water if your dough is too dry?
Also, my bread tastes better with a pinch more salt! 🙂 but I still think its a bit dense.
I am using Hodgson gluten, Gold medal whole wheat and all purpose flour and Red Star instant dry yeast.
Please let me know how I can make my loaf light and fluffy.
Thanks
Deepti
Hi Deepti,
Glad that you got a thermometer, now you can be certain of your temperature.
Adding that much more water is going to result in a very wet dough, which will also make your final loaf denser. Did you add the water because it was too difficult to mix with a spoon?
Whole wheat bread is never going to be light and fluffy, but if you want to try adding more white flour and less whole grain that is your best bet for getting a lighter loaf.
Thank you! Zoë
Hi…where i live we dont have unbleached AP flour…..the only kind we have in the market is AP will that work as well??
Judy: I assume you mean bleached AP, and if so, then the answer is that it will not work well in our recipes. It doesn’t have enough protein. You can try decreasing the water (? 1/4 cup) but I’m not at all sure that will work. The dough is likely to be too wet and without structure.
Thank you Zoe,
Yes, I found it hard to mix with a spoon. In your video I saw how you were able to mix it easily, it was not so for me and I thought I should add more (.5 cup)
Dear jeff/zoe
sooo sorry to bother you but as i said in my previous post we dont have unbleached AP flour , we have bleached AP and high protein flour (hpf) , will(hpf) work??
thanks
Judy: Didn’t realize you had access to high protein flour– just decrease the flour by 1/4 cup in the basic recipe.
i have been putting a couple of tablespoons of VWG in my bleached AP flour (mix it with the flour well, then follow the other instructions) and it has helped it preform similar to unbleached.
Kathaleen: Yes, there’s no reason that shouldn’t work as a stopgap for people who are stocking bleached flour.
I started baking bread and such over 40 years ago. I love making bread but found it very tedious.
When I found out about these no knead breads I just went crazy. The problem became, when I shoud start, or I wish I had it now. You seemed to have solved that problem. I live alone and want my bread fresh and small, even a few rolls for the day. I just bought Healthy Bread in Five Minutes a Day, I have the other out of the library, I do that to see if i want to buy, and I do.
Thanks for this new inovation in baking, where were you 40 years ago?
Thanks
Hi Rosemarie,
We are thrilled that you like the books and hope you enjoy all the bread you bake. We are here if you have any questions!
Happy baking! Zoë
Well, I have both books and started experimenting several weeks ago, and have made 3-4 batches so far.
Each one seems better.
I couldn’t resist a $6.80 25 pound bag of flour at Sams Club, even though it’s bleached and enriched, it makes wonderful bread with your basic recipe, and it’s costing me about 30 Cents per loaf.
Tonight I made cinnamon rolls, and they were the best I have ever had. The chewiness and crust were terrific, better than Cinnabon. I baked them at 375 degrees.
One problem I have been having with both bleached and unbleached mix has been a rather thick overcooked crust.
I even lowered the temp to 400 and it’s still a pretty hefty crust. Any thoughts?
Hi Ron,
Are you using an oven thermometer and a baking stone, these two things will help you create a great crust. If your oven is too hot or cool it will adversely effect the baking time and create a touch crust or an undercooked crumb. If your oven is too low, such as 400, it will take your bread too long to bake and then the crust will be too think by the time the crumb is finished setting.
Baking on a stone will help to keep the oven temperature even. That combined with the steam should give you a crust that is thin and crisp.
I hope this helps! Zoë
Excellent advice Zoe. I raised the temp to 450, and let the loaf rest for 90 minutes this time, it turned out perfect!
I have been using a stone and water pan all along, but I don’t think I let the loaf rest long enough, and kept lowering the temp thinking it would help the crust.
I have been using a small round cake pan for the water, this time I placed it on the bottom rack instead of the bottom of the oven.
Do you use hot tap water or boiling hot water?
This time I ended up with left over water, when I had it on the floor, it all evaporated, but it’s harder to pour it in.
I also made my first pizza today, mixed results, but I’m excited to experimant further.
Any feedback on the Sams Club $6.00 bread flour? lol
Ron: You can use hot water, cold water, or even ice cubes, but I usually use hot tap water.
Haven’t used a lot of bread flour, but you can probably use it if you increase the water a bit (about 1/3 cup per batch), see FAQ above on using different types of flours and how you adjust for them.
Zoe and Jeff, I want to thank you for your books, they have opened up an exciting new area in my cooking life.
We had just bought a Kitchen-aid Mixer while remodeling our kitchen, so I stumbled onto your book while looking for bread recipes for my new mixer.
I was not up to the kneading, thus the mixer.
Well, I will now need to find other uses for the mixer as I don’t need it for my bread baking.
I never dreamed it could be so easy and economical to bake great breads!
Glad it’s working for you Ron…
How long is the dough good in the refrigerator for?
Hi KimA,
It depends on the type of dough you are talking about. Each recipe in the books specifies how long you can store them. If you are referring to the Master recipe it is 2 weeks.
Thanks and enjoy! Zoë
I was wondering if you can bake two loaves in the oven at the same time, or if it would be better to bake one larger loaf? Would I need to increase the baking time for either of these? Thanks!
Hi Katie,
I do that all the time and it doesn’t really require much additional baking, unless they are huge loaves. Just be sure to give each loaf enough space on the stone to expand.
Enjoy, Zoë
Too dark a crust?
I’m using an oven thermometer, and keeping the temp at 425-350 but it browns in 15-20 minutes and by the time 30-45 pass, it’s darker than I like it. It has a good chew,but a dark flavor.
The crumb is beautiful, not too wet or dry
I let it rest 60 minutes on the warm .stove over the oven.
Should I try spritzing the surface of the loaf with water before putting it in the oven?
Yes, I do use a cup of hot tap water in a pan below the loaf, and I use a pizza stone under my cast iron pizza pan.
Hi Ron,
Are you using convection heat by any chance?
Is your oven a Wolf, Viking or other professional style oven?
What kind of dough are you baking?
Let me know some more details and we can help you figure this out.
Thanks! Zoë
Oopps, meant 425-450 degrees
Hi Zoe, we have a new Frigidaire Gallery Gas Convection range.
I was using a pizza stone before, I give it about an hour preheat, now I got a lodge cast iron pizza pan, so I just put it on top of the stone. I figure it’s similar to a stone oven.
But I have been having the same problem with both Boule and Olive Oil dough.
I tend to remove it from the oven when the crust looks good, but then the crumb is damp.
Last night I left a Boule loaf in for about 35-38 minutes, and the crust is too done, but the crumb perfect;.
Hi Ron,
Are you using an oven thermometer? Could it be that your oven is running a bit hot? Where in the oven is your rack? If the stone is too high in the oven the loaf will burn before the crumb is done.
You don’t need to use both the stone and the cast iron at the same time, one or the other is fine.
Thanks, Zoë
Just a quick message to say “thanks!” No questions. My sister pointed me to your site, as she has bought your books. I’ve always been afraid of bread-making, but this looked so easy…and it was! Got a very edible (but not perfect) loaf the first time. Need to adjust temperature next time, but I’m impressed. Will go order the book now. 🙂
Thanks Matt,
I’m thrilled you are baking the bread. Let us know if you have any questions as you bake through the book!
Cheers! Zoë
Thank you so much, i found this recipe in a magazine that my dad has and my son decided to rip it to pieces playing with it after the first time i made it. Iam so glad i found it again, it just seems that 3 cups of water is not enough because it is very dry! The last time I made it, it would not rise in the oven, any idea on how to make it wetter and to get it to rise? I follow the recipe exactly and have to add more water at the end to make the dough look like your dough..Seems like im not doing something right..please help!! Thank you so much, Ninya
Ninya: Something’s wrong, if you’re following this recipe exactly it shouldn’t be dry. How are you measuring, see my post on measuring the flour at https://artisanbreadinfive.com/?p=1801. What kind of flour are you using? Are you swapping in whole wheat flour, or other partial WW product? Are you using “white” whole wheat?
Those all require considerably more water.
this feel kinda dumb asking but better safe than sorry…
Instead of using measuring spoons to get 6 1/2 cups flour can I just use a normal kitchen scale and weigh out the two pounds of flour? It seems so much easier to me and less of a hassle doing it that way.
Ninya: Yes— go to the FAQ (above), and click on the question about weighing the flour.
I received a copy of your book a few months ago and have made many recipes since. ALL of my loaves taste great, but are ALL very small. What am I doing wrong? Should I include more dough in the loaves? Am I over-shaping it? (A VERY hard process anyway) I would appreciate any guidance you would give, as my bread right now is a total embarrassment, and I am just about ready to give up.
Hi Lina,
Here is a video on shaping the loaves that may be helpful: https://artisanbreadinfive.com/?p=1715
If you make the loaves larger, you need to let them rest longer and bake longer. Are you baking them as a free form loaf or in a bread pan?
Here are some FAQ that may fit what you are going through, let us know if any of this helps! https://artisanbreadinfive.com/?page_id=1479
Thanks, Zoë
Your video helped a lot with regards to shaping. Thanks!
I have made both free-form boule and loaf breads like broiche and buttermilk bread. They all turn out too small.
For the broiche, I even baked it in a smaller loaf pan than called for, but to no avail.
As for the buttermilk bread, I pretty much corrected the problem by using 1/2 lb. more dough. On the one occasion that I made it without refrigerating, however, when I used this much dough in one loaf, it overflowed the pan.
My boule (as I mentioned) tasted fantastic, but did not miraculously puff as your illustrations indicate. I concluded that I must not have added enough flour, but I haven’t tested my hypothosis yet.
I use active dry yeast…should I be using something different? I also use King Arthur Flour, but if anything, my dough is too slack, so I don’t worry about the protein content.
Again, thanks for all of your guidance.
Hi Lina,
Here is a post about baking loaf pan breads that may help: https://artisanbreadinfive.com/?p=904
Are you using the scoop and sweep method of measuring the flour? If you spoon the flour into the cup it will end up being too little flour and the dough will be too wet.
The type of yeast will not matter at all.
Thanks, Zoë
Om my! I’m so excited! I’ve just made my first loaf and it is SUPERB. A bit dense as I think I didn’t cook it for long enough and I used strong bread flour instead of all purpose but SO SO much better than the bland, soggy stuff that comes out of my bread machine. Thank you, thank you. I’m off to buy a copy of your book now. And thanks for this site, it’s so helpful to be able to look up issues and questions. GENIUS!
CF: Yes, using bread flour will throw off the water ratio. Check out the FAQs page under “Flour Varieties… Can I…”
Not sure why you didn’t answer my earlier question (maybe it was a dumb question!), but I’m still confused (other than your bread recipes, my baking is limited to one birthday cake a year):
I note that in your brioche recipe (among others), the instructions say that, if I’m not using a baking stone (or cast iron pan) for brioche, that I don’t have to preheat my oven to 350 degrees for 20 minutes, but only for 5 minutes. Does this mean that I can put the brioche loaf (that has rested for 1 hour 20 minutes) into the oven after only 5 minutes of preheating even if, after 5 minutes of preheating, the oven temp hasn’t yet reached 350 degrees?
This may seem like a stupid question, but I’m genuinely confused. I have a very reliable and accurate GE Monogram oven, and it does NOT preheat to 350 degrees in only 5 minutes.
Rebecka: In general, except in the largest of ovens, you can get away with that. If you’re finding that things aren’t getting done properly with that short of a preheat, just go 10 minutes and see if you prefer the result.
But no, the oven probably won’t be completely up to temp in 5 minutes.
hi i made my 4th batch yesterday and today when i checked on it i knew that it has less flour than alwayes can i add a little flour today and bake it tomorrow.
can this be done
thanks
HI Dina,
You can add more flour. Let is sit for a couple of hours after adding to allow the flour to absorb the extra water.
Thanks, Zoe
Been using your master recipe for a while now and have had no problems with the whole wheat/unbleached recipe for shaping and baking.
I get into trouble when I use whole wheat white/unbleached. The dough is much wetter, but I deal with it by using lots of flour for shaping. The resting period (up to 90 minutes) produces a “flat bread” look to the dough for it spreads tremendously. Cutting slits on the dough is difficult. I would best describe the end results as looking like a ciabatta loaf.
I reduced the water content a bit without much success. I’m wondering if substituting one cup or more of whole wheat white with whole wheat would not solve this? On the other hand, I prefer the taste of www.
Any tips?
Luc: You need vital wheat gluten (VWG) if you want to push the ratio of whole grain flour (white whole wheat won’t make a difference). Here’s our post on that: https://artisanbreadinfive.com/?p=142
You might like our second book, Healthy Bread in Five Min/Day. It’s high in whole grain and depends on VWG, and can be found at https://bit.ly/3wYSSN
I have a question about the “bucket” size. I have an older rubbermaid container, but it’s very wide and not so tall. It would definitely fit the dough, but is the container supposed to be tall as opposed to wide? Or doesn’t it matter if it expands outward and not upward?
thanks. I am looking forward to making my first whole grain healthy bread from your book
Debbie: It should be OK. Sometimes all that surface area encourages drying out the dough, but I know Zoe uses that shape and it’s fine.
Thanks for the advice I put 2tbl flour and it turned out great
ur metheod is realy foolproof
Dina: Excellent!
Jeff,
I have your second book and your master recipe is the one I use on page 54. I do use VWG as directed. I use stone ground organic white unbleached flour – 4g protein per 30g (inlieu of whole wheat) with unbleached white – 4g protein per 30g in the proportions included in your recipe.
When I use whole wheat, the dough is tighter and doesn’t loose its shape as much when its resting.
Hi Luc,
The problem may be the way the www is ground. If it is a courser grind of flour it will not form as much gluten and therefore make for a wetter dough, which does not hold its shape. Many people have found that adding a bit more VWG to the dough is helpful or decreasing the water by a couple of tablespoons.
I hope this helps, Zoë
Thanks Zoë, I’ll try out your recommendations and l’ll let you know how they turn out.
Luc
Brenda and those gaining weight with bread: I’ve been diabetic for years and learned to count and exchange carbs. When I eat bread, I leave off all other carbs like potato, rice, etc. Only lean, unfried meat and vegs. If eating pasta, cut your pasta in half, increase sauce and enjoy your bread!!!
Do I have to use a pizza stone to have a good loaf of bread? I can not afford one. I’m okay with the crust being softer. Thanks!
Debbie: You can do the bread on a cookie sheet, yes the crust won’t be quite as good. An inexpensive option is an unglazed quarry tile from a home supply store, people swear by them and they’re a few dollars. Jeff
Thank you Jeff! Ordered the book today!
I love that cast iron stone! I need to find me one of those.
I have a question though. I am trying to switch over to extra virgin coconut oil and I was wondering if I could replace that where it says to use a neutral flavored oil. I know coconut oil has a flavor, but it’s not overpowering I’ve heard. I am thinking about the 100% whole wheat loaf bread I think it’s on page 92 in the healthy breads book.
Heather: Assuming the manufacturer says you can heat coconut oil to 350F, this should be fine– but check with the manufacturer, I don’t know if coconut is meant to be heated. I bet the flavor will be nice, possibly even better than neutral-flavored oil in this situation.
Extra virgin coconut oil has a smoke point of 350F. I will definitely be trying this next week since we have to eat pizza made from your dough weekly 😛