Back to Basics ~ tips and techniques to create a great loaf in 5 minutes a day.

Note that there is an updated version of this post, click here to view.
Recently we have seen lots of new readers on the website who are asking wonderful questions about how to perfect their loaves. First I’d like to say welcome to the site and thank you for trying the bread. As I bake through the basic Master recipe from ABin5 I will try to answer some of the most frequently asked questions and also introduce you to a few new pieces of equipment I’ve recently started to use that make the whole experience just a little easier. The goal is to create a large batch of dough that stores in the refrigerator for up to two weeks. That’s why our method saves you so much time– all the mixing and prep is divided over four one-pound loaves.
Master Recipe from The New Artisan Bread in Five Minutes a Day: The Discovery That Revolutionizes Home Baking:
3 cups lukewarm water (you can use cold water, but it will take the dough longer to rise. Just don’t use hot water or you may kill the yeast)
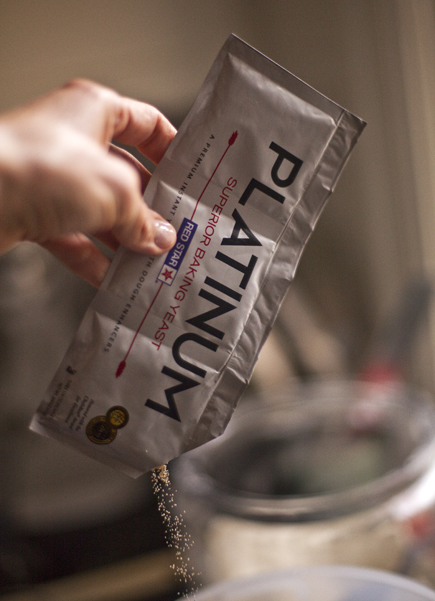
1 tablespoon granulated yeast ( you can use any kind of yeast including: instant, “quick,” rapid rise, bread machine, active dry, or fresh cake yeast*. We’ve always tested with Red Star Yeast and they have a new premium product called PLATINUM, which has worked beautifully in our recipes. You can also decrease the amount of yeast in the recipe by following the directions here. Or you can bake with a sour dough starter, see instructions here.)
*If you use cake yeast you will need 1.3 ounces.
1 to 1 1/2 tablespoons Morton Kosher Salt (adjust to suit your taste or eliminate it all together. Find more information here)
6 1/2 cups (2-pounds) all-purpose flour (we tested the recipes with typical supermarket flour. If you use a higher protein flour check here)
Mixing the dough:

In a 5 or 6 quart bowl or lidded Food Storage Container, dump in the water and add the yeast and salt. Because we are mixing in the flour so quickly it doesn’t matter that the salt and yeast are thrown in together.

(If you are using the fresh cake yeast break it up with a spoon)

Dump in the flour all at once and stir with a long handled wooden spoon or a Danish Dough Whisk, which is one of the tools that makes the job so much easier!

Stir it until all of the flour is incorporated into the dough, as you can see it will be a wet rough dough.

Put the lid on the container, but do not snap it shut. You want the gases from the yeast to escape. (I had my husband put a little hole in the top of the lids so that I could close the lids and still allow the gases to get out. As you can see it doesn’t take much of a hole to accomplish this.)

Allow the dough to sit at room temperature for about 2 hours to rise. When you first mix the dough it will not occupy much of the container.

But, after the initial 2 hour rise it will pretty much fill it. (If you have decreased the yeast you will have to let it go longer than 2 hours.) DO NOT PUNCH DOWN THE DOUGH! Just let it settle by itself.

The dough will be flat on the top and some of the bubbles may even appear to be popping. (If you intend to refrigerate the dough after this stage it can be placed in the refrigerator even if the dough is not perfectly flat. The yeast will continue to work even in the refrigerator.) The dough can be used right after the initial 2 hour rise, but it is much easier to handle when it is chilled. It is intended for refrigeration and use over the next two weeks, ready for you anytime. The flavor will deepen over that time, developing sourdough characteristics.

The next day when you pull the dough out of the refrigerator you will notice that it has collapsed and this is totally normal for our dough. It will never rise up again in the container.

Dust the surface of the dough with a little flour, just enough to prevent it from sticking to your hands when you reach in to pull a piece out.

You should notice that the dough has a lot of stretch once it has rested. (If your dough breaks off instead of stretching like this your dough is probably too dry and you can just add a few tablespoons of water and let it sit again until the dough absorbs the additional water.)

Cut off a 1-pound piece of dough using kitchen shears* and form it into a ball. For instructions on how to form the ball watch one of our videos. Place the ball on a sheet of parchment paper… (or rest it on a generous layer of corn meal on top of a pizza peel.)
*I actually use a pair of Sewing Shears because I like the long blade. I just dedicated a pair to the kitchen.

Let the dough rest for at least 40 minutes, (although letting it go 60 or even 90 minutes will give you a more open hole structure in the interior of the loaf. This may also improve the look of your loaf and prevent it from splitting on the bottom. ) You will notice that the loaf does not rise much during this rest, in fact it may just spread sideways, this is normal for our dough.
You can also try our “refrigerator rise trick,” shaping the loaves and then immediately refrigerating them overnight. By morning, they’ll have risen and are ready for the oven after a brief room-temp rest while the oven preheats (click for instructions).
Preheat the oven to 450 degrees with a Baking Stone* on the center rack, with a metal broiler tray on the bottom (never use a glass vessel for this or it will shatter), which will be used to produce steam. (The tray needs to be at least 4 or 5 inches away from your stone to prevent it from cracking.)
*(or Cast Iron Pizza Pan– which will never crack and conducts heat really well. Be careful to dry it after rinsing with water or it will rust)

Cut the loaf with 1/4-inch slashes using a serrated knife. (If your slashes are too shallow you will end up with an oddly shaped loaf and also prevent it from splitting on the bottom.)

Slide the loaf into the oven onto a preheated stone (the one I’m using is the cast iron) and add a cup of hot water to the broiler tray. Bake the bread for 30-35 minutes or until a deep brown color. As the bread bakes you should notice a nice oven spring in the dough. This is where the dough rises. To insure that you get the best results it is crucial to have an Oven Thermometer to make sure your oven is accurate.

If you used parchment paper you will want to remove it after about 20-25 minutes to crisp up the bottom crust. Continue baking the loaf directly on the stone for the last 5-10 minutes.

Allow the loaf to cool on a rack until it is room temperature. If you cut into a loaf before it is cooled you will have a tough crust and a gummy interior. It is hard to wait, but you will be happy you did! Make sure you have a nice sharp Bread Knife that will not crush the bread as you cut. Or you can tear it apart as they do in most of Europe.

If you have any leftover bread just let it sit, uncovered on the cutting board or counter with the cut side down. If you cover a bread that has a crust it will get soggy.
Enjoy and have fun baking. Bread that is made with love and joy tastes better!
Note: Red Star Yeast is a sponsor of this website and its promotional activities, and provided samples of yeast for recipe testing.
What am I doing wrong?! I follow the recipe to the T… But everytime the bread bakes up, the crust is too hard! I’m not getting the little air bubbles in the center, just chewy bread! Should I be using more yeast? I allow it to rise at least an hour, I take the temperature of the water before sprinkling in the yeast. I’ve tried lowering the oven temp, just made chewier bread. I left the water out if the baking… Just a hard crust thats not golden!!! Any tips?
jennifer: Which book are you using, which recipe and page number?
Jeff-
I am using the master recipe that is located on this link.
https://artisanbreadinfive.com/2010/02/09/back-to-basics-tips-and-techniques-to-create-a-great-loaf-in-5-minutes-a-day
Jennifer: Read the tips on the our FAQs tab (click above). Much more information in our books.
I had to use Robin Hood enriched wheat flour with bran (Maxima?) to make the master recipe. I used about 7 cups of flour and the dough has risen, but it’s very wet – is there anything I can do to fix this before I try to bake a loaf of bread? (I have this flour, bleached white cake/pastry flour, as well as kamut flour, and spelt flour on hand.)
Thanks,
Lorraine
Lorraine: Just work some more flour into it till it looks like our videos (click above).
Hi! I love this site even though it makes me super hungry every time I visit.
I had a question regarding baking on stoneware. My pampered chef baking stone says not to preheat it but in every other stoneware recipe I’ve seen the opposite. I don’t want it to crack and unfortunately I don’t have the money to buy another stone. (Though your link to Old Stone Oven products does look reasonably priced, I just don’t have it right now.)
Thanks for your help!
Maris: That’s why Pampered Chef (PC) says all their stones break when our readers use them… that people are preheating them (as per our book and as you say, all the other brands). That’s fine, but my problem is that the bread won’t come out anywhere near as well if you don’t preheat. So I’ve been avoiding the PC for this reason. I’d also worry that it would stick if you started cold.
If you try our method with the PC stone, do it the way they recommend (so the stone doesn’t crack), and please let us know how it comes out…
I have used a PC stone at 500 preheat and it did not crack, it just turned black. I had no idea it wasn’t made for preheating.
Jen: Some people, seems like a minority, report no trouble pre-heating PC stones, despite manufacturers instruction. I wasn’t one of those– cracked on first use.
Regarding cracked pizza stones: It has been my experience that most people who crack a pizza stone have recently rinsed it in water. This causes it to absorb moisture that can’t get out of the stone fast enough when heated, so it cracks. If you let it air dry after rinsing for at least one day, then it should never crack, even when heated to 500 degrees F. Remember, just because it looks dry, doesn’t mean it is dry inside!
Hi Dellbert,
Thank you for the reminder, it is important to let your stone dry. We actually recommend not washing them in water, but scraping the burnt bits off. https://artisanbreadinfive.com/2010/08/24/pizza-stones-which-creates-the-best-crust
Thanks, Zoë
Dellbert: No, my PC stone cracked on the first used, after pre-heating (which manufacturer said not to do). It’d never seen water.
Mine cracked in the Oven.
I’d baked a few days prior on it and left it in the oven unwashed. On Pizza Friday, I opened my oven and it was in 2 pieces (Pampered Chef round pizza stone). I’d used it about 15-20 times.
I used it anyway. Crack and all.
Hi Angela,
Unfortunately, this isn’t an unfamiliar story with the pampered chef stone. Here is a post about some other pizza stones we have tried: https://artisanbreadinfive.com/2010/08/24/pizza-stones-which-creates-the-best-crust
We are thrilled that you are baking so much homemade bread and pizza!
Thanks, Zoë
I have used my pampered chef 5 times now and it has not cracked yet (crossing my fingers). I do leave it in the oven until it is completely cooled down. I thought maybe taking it out after it is so hot cools it down too quickly??? just a thought.
I’m reposting this response since I’m not seeing it above.
As far as my pc stone experience I left the (dried) pc stone on my rangetop in front of the exhaust vent while preheating my oven. I kept turning the stone to ensure even heating. If your oven vents outside you may want to try preheating the stone at a very low heat like 200 or less.
Before baking I seasoned the stone with olive oil. The finished loaf wasn’t as brown on the bottom as I would have liked so next time I will use parchment paper and then finish the last few minutes without the paper. I also made sure to have the steam tray on the bottom-most rack of my oven.
One other note: my dough was rather dry so if starting with a wetter dough you may want to use the parchment technique in this article.
Jeff and Zoe, you are genius! I baked 2 loaves today and have been telling all my friends on FB how amazing, delicious and easy your basic recipe is. Your instructions are spot on, the videos were extremely helpful too. I will be saving a lot of $ as my husband is a bread-a-holic. I sent him pictures on his cell phone (he’s at work) and his reply was, “save me some!!” Thanks again for your hard work putting this book together and inventing this technique.
Thanks Dee!
Thank you for the master recipe. It is very convenient making enough dough for several days worth of bread. I having been using the NY times recipe and method in the past. I decided to try baking this bread in a preheated covered cast iron vessel. I baked the bread at 450 for 20 minutes covered. Uncovered I baked another 25 minutes until nicely browned. I check to see the internal temperature reached 210. The bread was wonderful.
Great Dorothy. We have a post on this at https://artisanbreadinfive.com/?p=552 or outdoors https://artisanbreadinfive.com/?p=627
I’m such a fan! I have all 3 books and I’m officially HOOKED!
I never dreamed of making bread in my life until a friend send me the recipe. The rest is history.
I bake 1-2 a week and love to bring them to potlucks! Pizza night is the family favorite!!! Thanks for making bread making so fun and accessible.
Wish I had seen/read this web site earlier! I too am a victim of a PC stone fracture! I didn’t realize they were that fragile! 🙁
Hi Kathy,
Sorry to hear about the stone, so frustrating. You may be happiest with a cast iron “stone.” https://artisanbreadinfive.com/2010/08/24/pizza-stones-which-creates-the-best-crust
Thanks, Zoë
I just wanted to mention that I do not have a stone at all.
Being too desperate to wait until I could afford one before I tried this recipe, I used a heavy, black baking sheet. I put it in the oven to heat up, following the same instructions as for a pizza stone. It has worked so well that I have not bothered to buy one. (Just for the record, I did try with an aluminium baking sheet and it didn’t work anywhere near as well, as you would probably expect.)
Natalie: Heavy metal is not a bad substitute at all; I have the Chicago Metallic commercial-thickness aluminum like https://www.amazon.com/Chicago-Metallic-Commercial-Traditional-Jelly-Roll/dp/B003YKGRPK/ref=as_li_wdgt_js_ex?&linkCode=wey&tag=arbrinfimiada-20
The key is the thickness– aluminum works but not thin stuff.
Hi, I am loving this bread. Went around to a friends house for soup and bread, with 3 loaves, it quickly became a BREAD and soup night, everyone was asking about it, and the poor store bought “french stick” was left in the bread basket.
Having said that the bottom crust is driving me nuts, I’ve finally figured out how to get a beautiful top crust, but the bottom crust always seems to be chewy still. I am using a pizza stone and recently got an oven thermometer, so I know have a better idea of what the temperature is in my oven (surprisingly different to the dial). I am using this master recipe & I have ABI5. Thanks, Anthea.
Hi Anthea,
Try letting your stone preheat longer. This is often the trick to getting a nice bottom crust. For a thicker stone you may want to let it preheat about 45 minutes.
Thanks for spreading the word to your friends! 🙂 Zoë
Love your book. Love the bread!
I have a quick question for you –
Whenever I cook my loaves – they always bake into the weirdest shapes! I always dust and slash and I’m pretty sure I slash deep enough – but they always morph into the craziest shapes. For instance, I did a scallop shape yesterday and it turned out great, except for the part of the bread on either side of the outer-most slashes. it puffed out so big and almost broke off from the main section. i hope this is making sense, i’m trying my best to describe what is happening.
i am following all the instructions exactly. using a unenriched, unbleached flour. letting the dough rest before putting it in the oven, etc.
any tips??? thanks!
ashley
Ashley: Try a longer resting time, increase from the 40-min default in the book. First try 60 min, they could even go to 90. The resting loaf will experience a little more expansion before the (chaotic) oven-spring begins; that’s what’s giving you the unpredictability.
should i dust and slash BEFORE i let it rest? or dust and slash right before i put it in the oven? thanks!!!!!
Ashl: Right after the rest, just before you put it into the oven.
Thanks!! I will try it tomorrow and let you know how it goes!
ash
re the deli rye – I would like to bake this bread using spelt flour instead of all-purpose because my daughter and I are trying to adhere to the Eat Right 4 Your Type which says for type O blood, which we are, grains should not be eaten as they are detrimental to our systems. I know that when using spelt flour to replace AP flour one should use 25% less water than the original recipe calls for but that is not combining it with rye flour. Do you have any suggestions as to how I could proceed? Thanks.
Hi Elle,
I would start with even less water, because the spelt has less gluten and will not have the same structure. If the dough seems too dry, you can always add more water. Have you made the rye the way the recipe was written? This will give you some sense of how wet the dough should be.
Let us know how it goes.
Zoë
I was wanting to try the master recipe for hamburger buns. This is my first time ever trying your recipe and I am super excited, but don’t want to mess anything up. Any hints for a first timer?
H Andrea,
Here is a post on making hamburger buns that may help: https://artisanbreadinfive.com/2010/03/16/suvirs-lamb-burger-on-a-sesame-seed-bun
Enjoy, Zoë
I’ve been hearing about Sprouted Wheat Flour recently, and that it is more nutritious than regular whole wheat flour. Is this something I can substitute cup for cup with whole wheat flour? Do you have any recipes specifically using Sprouted Wheat Flour?
Hi Lauren,
We have been hearing lots of requests for sprouted wheat flour, but have not tried it yet. I will try to hunt it down and give it a try.
Thanks, Zoë
i was wondering if it’s ok to let the dough rest for over 90 minutes before putting it in the over. Like overnight on the counter, maybe loosely covered with plastic wrap?
Hi Tara,
When the dough is out on the counter the yeast is active and if you leave it out that long the dough will be over proofed and not have any oven spring. You can do as you described, but just leave it in the refrigerator to rise slowly overnight. In the morning, just preheat the oven and then bake as normal.
Thanks, Zoë
I am SO excited to try this! I have a cast iron skillet (12″), a cast iron dutch oven, and a crock pot and I’m excited to try baking loaves in each.
My question is this: can dough be stored in loaves or does it have to stay in the bucket? I’m just thinking it might save even more time when it comes time to bake if I divided up the dough between plastic bags. (And would they need to have small holes in them too?)
Thank you!!
Hi Sara,
You can certainly store the dough in separate portions, if that fits better in your refrigerator. If you use a zip lock bag, just make sure the dough has plenty of room to expand and there is a tiny vent for the gas to escape.
Enjoy, Zoë
thanks zoe!!
Hi! I would love to bake some loaves for friends, but more often than not, I wouldn’t be able to give the bread to them right out of the oven. So, my question is, how should I store the loaves to ensure freshness and the crust doesn’t become soggy or dry out for 1-2 days before giving them to friends?
Thanks!
Stella: Unfortunately, there’s no way to give a nice loaf stored for one or two days when you make it without preservatives. You can try freezing it, but it won’t be that great.
Do you have a whole wheat version of this bread?
Maureen: Lots of WW in https://bit.ly/3wYSSN , also can try https://artisanbreadinfive.com/?p=1087
I have limited room in my fridge for a giant bucket. If I am making the master recipe from the healthy breads book but cutting it in half, what size bags/bucket do I need?
Jenny– half the size we specify for a full batch, so 2.5 or 3.0 quarts will do it.
Thank you for posting! I’ve got a limited budget and can’t buy every cookbook I want, but this won is high on my wish list now. I made two loaves this morning — one in the oven and one in the SLOW COOKER. No kidding. Ran across a blog on slow cooking ABin5. Kids thought the slow cooker version was the best, but I had a preference for the oven. Still, it was great bread and using the slow cooker meant no rising time and no heating up the house with the oven. Excellent!
Hello,
I have been baking your bread for about 2 months now. I find the end result is acceptable but there are a few issues I am consistently experiencing. You talk about the bread “singing” when you take it out of the oven. I have never experienced this. The other issue is that the bread always seems heavy. It does not have the airy texture I see in the pictures you post. My dough rises well and it is browning better but still not like your pictures. I have used the water in the pan and the spritzing methods. Does the “singing” mean anything…like it is done? And how do you get the light and airy texture? I am having my best luck with the Italian Semolina. All of my bread tasts good but the texture is just not right.
Thanks, Jackie
Hi Jackie,
Here is a post that may help your loaves: https://artisanbreadinfive.com/2008/02/10/qa-dense-crumb It is often solved with a longer resting time before baking.
The singing happens when you get a really great crisp crust. If your loaf isn’t singing, it can be the oven temperature or that your not baking long enough. Not all loaves will have this.
Thanks, Zoë
I was wondering if this recipe works in the crock pot? If it does do I still have to let the dough sit for 30 minutes before putting into the crock pot?
Kitty: It does. See our crock-pot instructions at https://artisanbreadinfive.com/2012/05/29/crock-pot-bread-baking-fast-bread-in-a-slow-cooker
I received a Kitchenaid Mixer for my birthday and I would love to use it to make this bread. Has anyone tried it for this recipe and would it effect the results?
Hi Lisa,
We state in every recipe in our books that you can use a stand mixer to make the dough.
Thanks, Zoë
I am so excited! I am trying this again tonight and going to pray over it to rise. I made it GF last time and it rose a little bit. I found another flour and I am hopeful. I am considering doubling the yeast. I may make 2 batches one with regular and one with double! either way please wish me luck! OH I REALLY want some bread!
Hi Caitlin,
This dough wasn’t designed for g-f flours and won’t really work as a G-F bread. You will have much better luck with the g-f doughs we have developed in HBin5 for those flours: https://artisanbreadinfive.com/2010/10/25/gluten-free-crusty-boule-the-video
Thanks, Zoë
I have regular salt not kosher does that make a difference?
Hi,
If using fresh yeast, are you saying to use the whole 2 lbs for this recipe? The picture looks like it’s a lot more than one tbs, but wanted to make sure since the recipe does not specify the amount for the fresh.
Hi Nicole,
The post says to use about 1.3 ounces of fresh yeast, which is just more than half of the 2-ounce block.
Thanks, Zoë
Hi! I just wanted to drop a line to express my appreciation with the books and the method. I’ve been making the Master Recipe for a year and a half, and have been trying to spread the word (by mouth). My mom and my sister are recent converts, and my coworkers almost expect the bread at all potluck faculty dinners. (I brought four loaves with me last time expecting to have some to bring home to my husband. All that was left were the crumbs clinging to the bread knife. I also took bread to a previous faculty function, and two of my coworkers argued over the leftovers.) Your book has really changed and transformed my life. I have a baking stone (luckily not a PC one), and it never leaves my oven. I think it keeps the entire oven temperature more stable. I’ve linked back to this post on my blog. Please let me know if that is okay. (The other two books are on my gift lists!)
Thanks Susan! Especially thanks for the link rather than re-printing our recipe, which a lot of sites do. Much appreciated.
Hi! Just tried your recipe for the second time with a loaf in the oven now. Here is my concern: I used a big bowl to mix ingredients following recipe and had a wooden spoon to stir. What I noticed is that the dough was lumping in the mixture and would not mix. I added water to it and resolved to use my hands to gently squeeze dough in hopes to combine it. This all lasted maybe 10 minutes or so tops before covering to rise.
Is this the right consistency? The dough did rise, level off in the fridge and bubble. It was easy to work with with as well. Any guidance?.
Hi Celeste,
You may want to watch some of our videos to see if the dough is the same as ours. If you had an easy time working with it and the bread came out well, then it is fine. Is your concern that it took so long to mix together? That won’t hurt the dough at all, but it is more work than we intended. You may want to try using a Danish Dough whisk, which you can find a link to on our Amazon page.
Thanks, Zoë
Hi! Can i still adjust the remaining dough by adding water to it even though they have been in the ref for 48 hrs already? The first batch I baked was not so successful? The crust was too hard. The recipe i used was the soft american white bread, but it ended up like the boule dough.
You can- but may also have to add a little flour and let it re-ferment on the counter for 2 hours.
But… for softer crust, brush it with oil or melted butter before baking. Adding water probably won’t help.
Thank you!
Hi, I know the dough is easier to use when refrigerated. However, if you just bake after the initial rise, I’m assuming that you don’t need the long rest time. Can you confirm? thank you!
Mary: Yes, you can cut the rest time in half– experiment and see what you think.
I can’t wait to try some of these. They look so good, and healthy. One question. What changes would you advise for HIGH ALTITUDE baking (of these recipes)?
Thank you ~ Rocky Mountain High! 😉
Helen: See our books, or the FAQ above, scroll down to the high-altitude FAQ
Thanks to share this recipe, it seems delicious and love too much bread it is because I never tried to do it yet, but I will follow your directions for sure.
Hi Jeff and Zoe,
I work in a kitchen gadget shop and recommend your way of baking bread all the time to our customers and give them the name of your book/website.
I was wondering if it would be okay to share this post with the master recipe on our shops facebook site.
https://www.facebook.com/KitchenomicsNorthBay
Everyone who I have referred to your site loved it and the bread they made.
Have a wonderful day!
Sue
Hi Sue,
So glad you are enjoying the bread and thank you for spreading the word to your shoppers. Here is our policy on sharing recipes: https://artisanbreadinfive.com/2010/01/02/can-i-use-your-recipes-on-my-website-in-my-class-or-in-a-publication
Thanks, Zoë
So, all I need to know before trying this for the first time is – when your dough is resting, is it resting uncovered? If so, does it not form a “skin”? Is this just part of the process that makes a great crust?
Hi Lisa,
For dough that is resting less than an hour we generally don’t require covering, because our doughs are so wet a skin doesn’t seem to form. If your house is particularly drafty or dry, then by all means cover it, it won’t hurt the dough at all.
Thanks, Zoë
Would I be able to bake this bread in a normal cast iron cooking pan, not necessarily a pizza pan or a baking stone? I’m not able to buy something new but really want to try this recipe, Thanks!
Hi Olivia,
Yes, as long as your cast iron pan is large enough to get the bread in and out easily, then you will have great success!
Enjoy, Zoë
I use my PC stone and preheat it. I have not had a problem. My bread has been coming out more like a soft bread instead of a crispy crust. Not sure what’s going on with that.
Shelly: Which recipe are you using (which book, which page number)?
I’m using Artisan bread in five minutes a day page 26 the master recipe. I did read on this website that you need more water using King Arthur flour. I added more water, then a little more flour and it’s got a crispier crust now. I also bought the healthy bread book but have not made it yet. I have the book on my kindle and do not like the idea of having a cookbook on an electronic reader. I love my original book and the bread! It’s the only bread my family eats now. Thanks!
great Shelly!
I just came back from a visit with my cousin. We only ate the bread she baked from your recipe, it was soooo good I can’t wait to make some. Thank you
Thanks!
I love the rustic bread and have had great success with your recipe. I’ve just started dough to bake Friday night for an early Saturday morning bake sale. My question is about packaging. How would you recommend that I wrap the bread so it will look beautiful for the sale but not end up effecting the crispness of the crust?
Thank you!
Lynn: Unfortunately, any wrapping, especially plastic, will soften the crust. There’s nothing you can do about that, unfortunately. In the best bake shops, the stuff sits on the shelf unwrapped. But it doesn’t stay fresh for long that way— bread starts to stale two hours after it’s out of the oven, and wrapping in plastic slows that by preventing evaporation and drying.
But then you lose the crust. If you can bake as soon as possible before the sale, I’d try to bring it unwrapped, or at the very least, just in paper bags (not plastic) because they allow for some breathing.
But that would mean baking Saturday AM, which is just what you’re trying to avoid, I know.
Very interesting — that explains why bakers are known for doing all their baking at insanely early hours!
Does the enriching of flour have any difference in the outcome? The flour I use is white, AP, unbleached enriched flour.
Hi Doug,
No, it is generally just to add vitamins and minerals to the flour. They are such small amounts that they shouldn’t effect the way the flour functions in our recipes.
Thanks, Zoë
This may be a dumb question, but because of this post I am going to buy a Danish Dough Whisk, and I’m seeing 11- and 14-inch sizes, and I don’t know which will work for me better (or if it would make any difference). My vessel is a 5qt plastic ice cream tub, which is not as tall as the 6qt tub shown here.
Anybody have any experience, recommendations?
Hi RubeRad,
You can probably get away with the smaller whisk with your 5-quart bucket, but if you think you may ever use the 6-quart I think the larger whisk is easier to use.
Thanks, Zoë
All right, large it is — thanks for the advice!
I just started yesterday, cut off the first loaf today. waited, waited, waited…no rise. Baked anyway. Then cut off another loaf, waited, waited waited and waited more…no rise.
Question. Our Co-op offers a ton of different grinds on flour. This was WW pastry flour. There isn’t just a “whole wheat” option so any suggestions on the grind of flour?
Do you think that was the issue?
Hi Sarah,
Since you are writing this note here, on the Back to Basics post, I am assuming this is the recipe you are using? If so, there are two reasons your dough is not rising. This recipe is written for all-purpose flour, which creates much more gluten structure than whole wheat flour and absorbs water differently. If you want to make a whole grain loaf, you will need to use one of our whole grain recipes, the result will be much better!
The second issue is the Whole Wheat Pastry Flour. It is specifically ground to have even less gluten, so that pastries come out tender and not tough. This flour will have even less structure than regular whole wheat, so you won’t have the rise you’re looking for.
Which book are you using? I can suggest flours based on the recipe you want to use.
Thanks, Zoë
Thank you for creating this book. I’m finally able to create fresh bread daily for my family AND its so delicious and accessible for even the unwashed such as myself.
I can’t wait to order the rest of your books.
Hi Ashlie,
Thank you for the note, we are so pleased that you are baking and enjoying all the bread!
Cheers, Zoë
It is important to add the pan with water in the oven. My oven has space for just the bread to go in. Will that affect the bread?
Thanks
D
Hi Diamondheart,
The steam in the oven effects the crust of the bread. Without it the crust will be dull looking and not as crisp. You can also try baking in a Dutch oven, if that will fit better? https://artisanbreadinfive.com/2010/12/27/three-ways-to-get-steam-into-your-oven-for-a-great-crust-new-video
Thanks, Zoë
I try to make this recipe for two times, but don’t know what happen, every time after I bake, the dough not rise and texture is not soft (I think I can say it is tough). I keep try again, but after two hours rise my dough still not flat on top, is it ok I still put it in refrigerator? Thank you.
Hi Elaine,
Yes, it is ok to put the dough in the refrigerator after two hours, even if it is not flat on the top.
What type of flour are you using? Are you baking on a stone? Any more details will help me figure out what is going on with the loaves.
Thanks, Zoë
Hi Zoë,
Thank you very much to answer my question, I just use the regular unbleached all purpose flour. And I don’t have stone, so I use a corning pot to replace the stone. Last night I try to make a dough again, but when I stir the ingredient together, I found out it seems little bit dry, so I put 2 more table spoon water in the dough, is it ok? and after 2 hours the dough the top still not flat, I still put it in refrigerator, now I take it out, shape it and plan to let it rise for 90 minutes, hope this time can bake a beautiful artisan bread.
Regards,
Elaine
Hi Elaine,
What brand of flour are you using? Some require additional water.
Thanks, Zoë
I forgot the brand ( because back to home, I like to put the flour in a jar) but I bought it from ALDI, now I change to Pillsbury.
Hi Zoë,
Sorry I have too many question, I watch the video, before Jeff put the bread in oven, he use a knife to cut on the bread surface, and make it so beautiful, I try to do this, but when I cut on the bread, the bread pretty soft and not easy to make it, is it I let it rise too long time? (after I took out from refrigerator, I let it rise 90 minutes.) And if the dough over rise, after I bake it, is it the texture will be really tough? Thank you very much.
Dear Zoë,
Sorry, me again. I think this time I’m finally success to make the bread, just the bread came out from the oven, I can “hear” the bread “singing”! lol
Hi Elaine,
That is wonderful, I love it when the bread sings! So glad this loaf was successful for you. Sounds like everything if going well now!
Let me know if you have any other questions! Zoë
My first batch of dough is rising and looking great so far – very excited! Thanks so much for the wonderful recipes and videos.
Hi Fiona,
Great, thanks for the note!
Enjoy the bread! Zoë
can you just substitue the white flour you are using for whole wheat flour to make whole wheat bread?
Hi Katie,
Great question, you really can’t swap them out without making some adjustments. Whole wheat flour absorbs more water than all-purpose white flour, so your dough will come out too dry. If you want to add just a portion of whole wheat, you can just add a couple more tablespoons of water per cup. But, if you want 100% whole wheat, then we recommend using vital wheat gluten, like we do in our second book HBin5. https://artisanbreadinfive.com/2009/10/26/our-new-book-healthy-bread-in-five-minutes-a-day-is-released-tomorrow-get-yourself-some-vital-wheat-gluten-and-make-our-whole-grain-master-recipe
Thanks, Zoë
I just ordered AB in 5 and was wondering if you can use a stand mixer to incorporate all ingredients instead of mixing by hand.
Sure can Eddie!
Hi Jeff, I just used my stand mixer and my dough turned into a ball immediately. Does this mean I have to add more water? What happens if I don’t add water. Will it still work?
Hi Jenny,
What kind of flour are you using? If the dough is too dry it will require a longer resting time before baking and it may not store well for the full 2 weeks.
Thanks, Zoë
Hi Zoe,
Here’s what I did. I panicked. Took the dough out, added 1 tsp of water to the bottom of the container and covered it with plastic. 2 hours later, it rose but the top wasn’t smooth. Given how it looked before I put the plastic on, I gave it a chance. I threw the whole thing into the crockpot for 2.5 hours and it came out really nice! My kids loved it and hubby loved the fact that it tasted like store bought but without the preservatives. Next time, I would love to add olives to it. Have you tried an olive bread?
Hi Jenny,
That is great, so glad it came out well and you all enjoyed it. We love olives and have an olive bread ( or two) in each of the books! 😉 You can either add them to an entire batch or roll them into already made dough.
Cheers, Zoë
I’ve made tons of the 1lb loaf with great success but I’d like to try and downsize to make some small rolls. Since I don’t quite trust my hand at sliding six little rolls off a pizza peel on to my stone, would it be alright if I floured a piece of foil and slide them on to the preheated stone to bake with the foil under them?
Thank you!
Actually, I decided to be brave and try it without the foil. I VERY generously floured my peel and got them on to the stone successfully!
It’s the little victories 🙂
Jennie: Foil, parchment paper, or a greased cookie sheet would have worked. Or your solution…
today intial tried out on the bread… came out good and easy. Can u provide a small amount of loaf and put in gram measurement so i can weigh ingrads. That will help me a lot of… Great recipe and i love to bake the bread this way.
Rachel: Our second book (https://bit.ly/3wYSSN) has some gram equivalents and our third (https://amzn.to/eo10NJ) has even more. Otherwise just type into a Google search bar:
16 ounces in grams
… or anything like that, then hit “Enter.” It will return the amount in grams (or whatever you requested).