Braided Black-and-White Pumpernickel and Rye Loaf
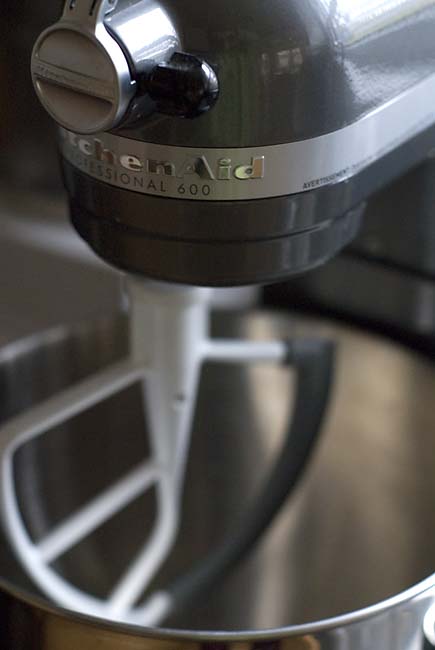
Given all the baking I do, you’d think I’d have started using a stand mixer years ago. But believe it or not, I’ve recipe-tested for three books using nothing but a wooden spoon or a Danish dough whisk.
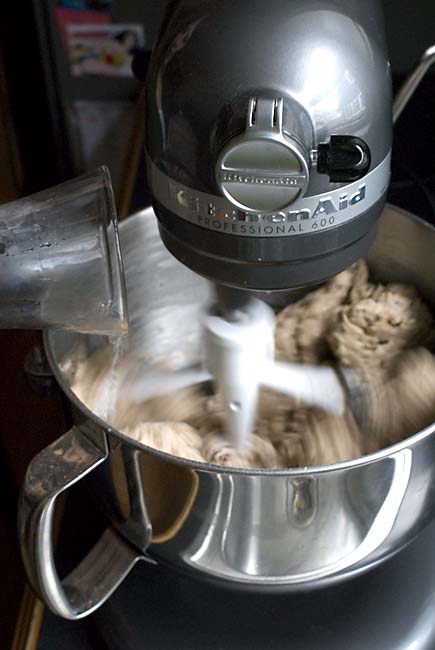
Well, I’m tired. So above, my new KitchenAid Professional 600 series, 6-quart capacity stand mixer, which is an outstandingly beautiful piece of industrial design that hasn’t really changed its look in about 100 years. More on the mixer in a bit.
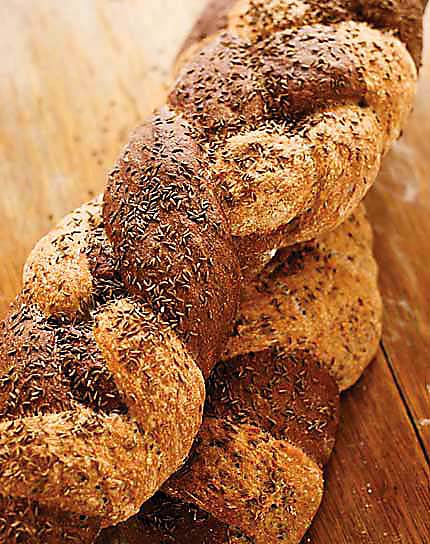
So many doughs, so little time. I’m hooked on this machine, especially when I have to make more than one dough for a recipe, like in this very beautiful Braided Black-and-White Pumpernickel and Rye Loaf from two doughs in Artisan Bread in Five Minutes a Day (this photo by Mark Luinenburg):
You can find a whole-grain version of this loaf in The New Healthy Bread in Five Minutes a Day.
I went with the larger motor (575 watts) and the 6-quart bowl because I make a lot of bread, and sometimes in double-batches from my books (about 13 cups of flour), and if you do that, you need this size mixer. But if you’re sticking with single batches, you’re fine with the 5-quart bowl and the smaller wattage motors, something like these smaller mixers. I definitely preferred the models with the bowl-lift design rather than the tilt-back mixer head, but play with both before you buy. It’s just a matter of preference but I feel like my wet dough is going to drop outside the bowl when you pull the mixer head back back on the tilt-head models.
You’ll need two doughs for this recipe, rye and pumpernickel, from our first book, where we had people mix the yeast and salt into the water first, then add the flours. But you can start with the flours, and whisk in the yeast and salt before adding wet ingredients; it doesn’t really much matter unless you’re using vital wheat gluten (in which case, you have to mix the dry ingredients together first to prevent clumping). Either way, it’s a snap to mix in the KitchenAid, use the dough hook attachment for the larger machines, and the paddle attachment for the smaller ones (note that KitchenAid calls the paddle a “flat beater”):
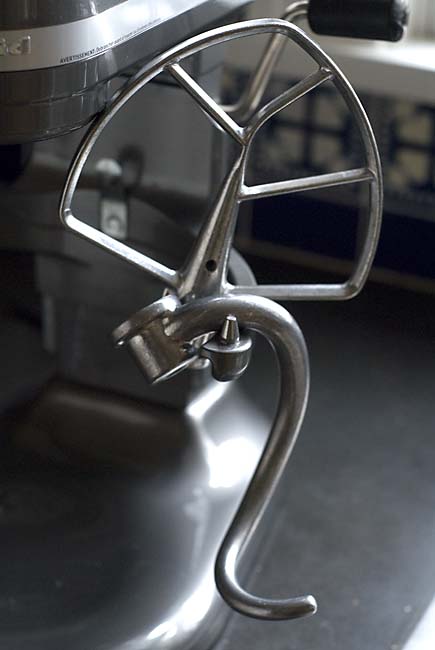
This machine comes with the flat beater, top, and the dough hook:
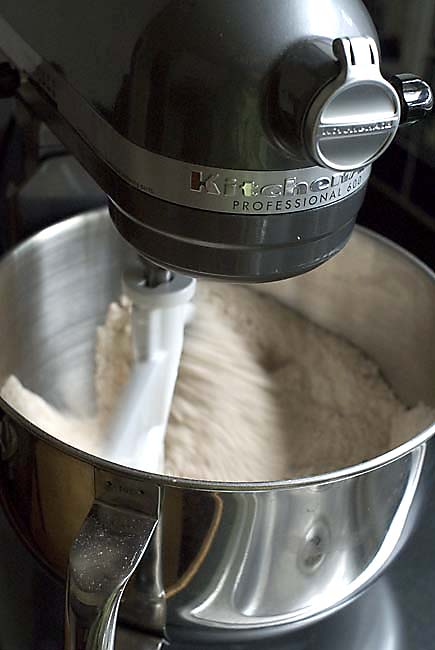
First mix your dry ingredients for the rye dough (briefly) on lowest speed in the bowl:
1 tablespoon granulated yeast, instant or active-dry (1 packet)
1½ tablespoons kosher salt (can reduce to 1 tablespoon to taste)
1½ tablespoons caraway seeds, plus more for sprinkling on the top
1 cup rye flour
5½ cups all-purpose flour
Turn the mixer on and off if continuous mixing throws flour overboard–I find that the dough hook actually works better in this size mixer but if you have the smaller capacity machine, you may prefer the flat beater. Now gradually add the 3 cups of lukewarm water and mix per your mixer’s instructions (different brands are different):
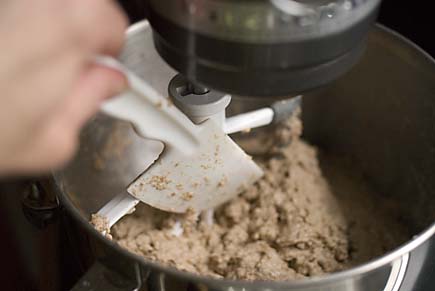
A soft wet dough will form (don’t add more flour); you may need to scrape down dough that sticks to the beater– turn off the mixer (KitchenAid says to unplug it!) and use a plastic or rubber spatula:
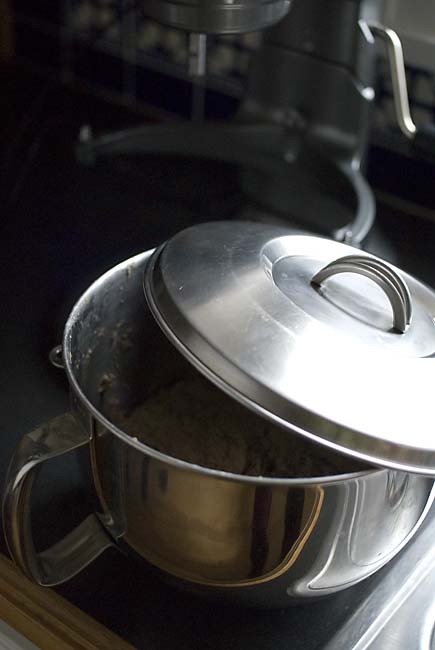
Either the 5 or 6-quart bowl is large enough to accommodate full dough-rising over the next two hours at room temperature, or until the dough begins to flatten on top. If you didn’t buy KitchenAid’s optional non-sealing lids, you can use a pot lid which won’t make a perfect seal even when seated on top (you don’t want an airtight seal). You can store in the same bowl in the fridge after this initial rise, and use the dough within the next two weeks:
You can buy extra bowls and lids from KitchenAid, and you may need them if you do Black-and-White Pumpernickel. Here’s the ingredient list for the Pumpernickel dough, same mixing instructions but this dough only stores under refrigeration for 8 days:
Pumpernickel: Dry ingredients
1½ tablespoons unsweetened cocoa powder
2 teaspoons instant espresso powder or instant coffee powder
1½ tablespoons caramel color
1 cup rye flour
5½ cups all-purpose flour
1 tablespoon granulated yeast, instant or active-dry (1 packet)
1½ tablespoons kosher salt (can reduce to 1 tablespoon to taste)
Pumpernickel: liquid ingredients
3 cups lukewarm water
2 tablespoons molasses
Now, on to shaping the Black-and-White braid:
½ pound (orange-sized portion) stored Pumpernickel dough (see recipe)
½ pound (orange-sized portion) stored Deli-Style Rye dough (see recipe)
Water for brushing loaf
Caraway seeds for sprinkling on top of loaf
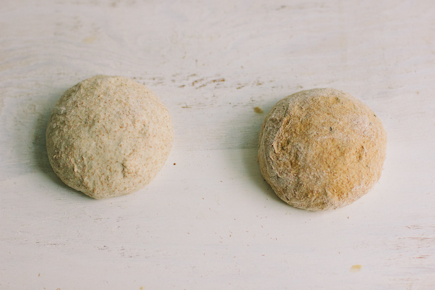
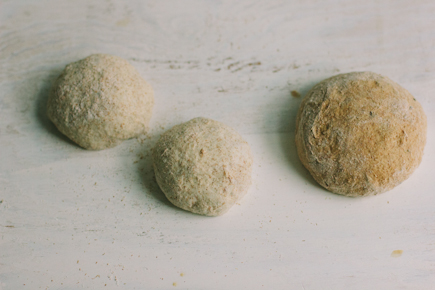
1. Dust the surface of the pumpernickel dough with flour and cut off an orange-size piece. Dust the piece with more flour and quickly shape it into a ball by stretching the surface of the dough around to the bottom on all four sides, rotating the ball a quarter-turn as you go.
2. Dust the surface of the rye dough with flour and cut off an orange-size piece. Dust the piece with more flour and quickly shape it into a ball by stretching the surface of the dough around to the bottom on all four sides, rotating the ball a quarter-turn as you go. Cut the ball in half and form 2 balls.
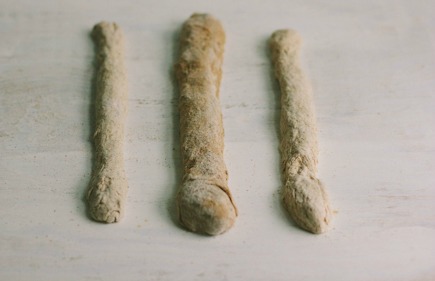
3. Roll each ball between your hands (or on a board), stretching to form 3 long ropes of equal length (the pumpernickel rope will be thicker because its dough ball was twice as large). If the balls resist shaping, let them rest for 5 minutes and try again—don’t fight the dough.
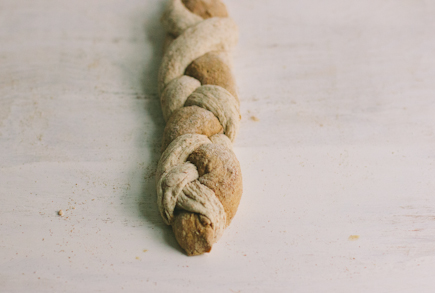
4. Line up the 3 ropes, keeping the pumpernickel rope in the center. Braid the ropes, starting from the center and working to one end. If you’ve never done a 3-stranded braid before, it’s simple—just remember to drape one of the outside strands over the center one, then do the same with the other outside strand. Repeat till you reach the end and then pinch the strands together. Flip the loaf over, rotate it, braid from the center out to the remaining end, and pinch the ends of the strands together. This seems to produce a loaf with a more uniform thickness than when braided from end to end (though if you like, just braid from end to end).
5. Allow the loaf to rest, loosely covered with plastic wrap, on a pizza peel prepared with cornmeal or lined with parchment paper for 90 minutes (40 minutes if you’re using fresh, unrefrigerated dough). Alternatively, you can rest the loaf on a silicone mat or a greased cookie sheet without using a pizza peel.
6. Thirty minutes before baking time, preheat the oven to 425°F, with a baking stone placed on the middle rack. Place an empty metal broiler tray on any other rack that won’t interfere with the rising bread.
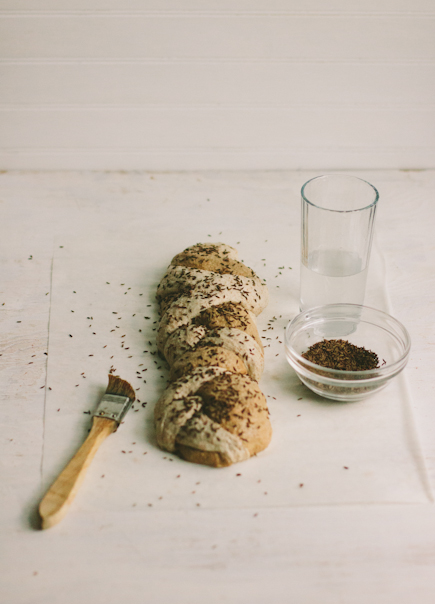
7. Just before baking, use a pastry brush to paint the loaf with water, and then sprinkle with caraway seeds.
8. Slide the loaf directly onto the hot stone (or place the silicone mat or cookie sheet directly on the stone if you used one). Pour 1 cup of hot tap water into the broiler tray, and quickly close the oven door (or see my video for steam alternatives). Bake for about 30 to 35 minutes, until richly browned and firm. If you used parchment paper, a silicone mat, or a cookie sheet under the loaf, carefully remove it and bake the loaf directly on the stone or an oven rack two-thirds of the way through baking. Smaller or larger loaves will require adjustments in resting and baking time.
9. Allow the bread to cool on a rack before slicing and eating.
Note: KitchenAid provided the stand mixer pictured for testing and use in this post. BreadIn5.com is reader supported. When you buy through links on the site, BreadIn5 LLC earns commissions.

I have a Kitchen Aid mixer and was using it all of the time but I got sick of cleaning it so I went back to manual but with I change.
I use a Danish wisk to start but then once it gets tough, I switch to a small flat silicone bench or bowl scraper. (I got my from King Arthur).
I use that to really dig and fold the dough to get all of the dry bits mixed. It is SO much easier than the spoon or danish wisk alone.
I enjoy all your recipes for breadmaking but am sort a “saver”. I hate to waste the saran wrap used to keep the moisture in each loaf when rising. I have taken to preparing a cup of water with a tablespoon of corn starch and taking it to near boiling in the microwave. I brush a heavy, wet coat of this liquid all over the surface of the loaf as soon as I am done preparing the loaf for rising. It does two things 1) It keeps the surface from drying out when the loaf is rising and 2) It provides an easily toasted surface coating which allows the bread to brown nicely when it is baked.
Just a note from someone who hates to use things once and throw them away.
Thank you, this is great. If it is a round loaf I put a large glass bowl over instead of plastic, but that does not work for loaf pans longer loafs.
Thanks for this post. I’ve used my Kitchenaid 6 quart in the past. However, I never thought of letting the dough rise in the bowl.
Thanks for saving on cleanup. Makes things easier.
I’ve started using my Pro for almost all of my bread. My current kitchen doesn’t have enough room for me to knead dough successfully by hand. I tend to let my dough rise in the bowl in the oven several hours after I bake something.
Looks great! I’ll be trying it tomorrow (no caramel color in the house, and I think I’m out of molasses).
Just a note, I’ve been using my Pro 600 for no-kneads for a few years without issue. I start with the paddle for a few seconds to combine, then switch to the hook for a quick stir, maybe 90 seconds to two minutes. I picked this up from PJ Hamel at KAF and it works every time.
Thanks again!
I’ve been using the mixer all along – the aging arms just like it better. 🙂
I’ve use the same rye and pumpernickel mix from ABin5 to make a marble rye – love it.
My question for today – Zoe or Jeff probably saw the pretzel buns, slider size, in the Star Tribune today. Very cute – I’m already trying to figure out to make them with AB. That dough looks like it might be a little stiffer than AB. I saw Zoe did one before where she “poached” soft pretzels in somewhat similar technique. How can I adapt AB to the recipe, which is sweeter and with butter?
Hi Linda,
I haven’t had a chance to see those buns yet, but I will check them out. We are working on a bun that sounds just like this, so we’ll let you know when we’ve got that figured out.
Cheers, Zoë
The paddle and hook can be washed in the dishwasher, they will just darken and not look so pretty. I hand wash as it only takes a minute that the machine saves! I use the dough hook all the time (ever since your first book came out) on your dough and when making a bigger batch (always!)it is harder on the motor with the big paddle and the dough hook works better.
By the way I have all your books and love them all, give them as presents and have converted many to your method. I bought the bigger 6 QT. mixer so I could make bigger batches, my older 5 QT. is now being used in a small restaurant and still going strong. I think they just came out with a 7 QT. Thanks so much for all the years of great bread, Heidi
PS, I do not sell KAid mixers but could!
Maybe I am doing something wrong but the I have been making the 5-min a day bread with a bowl and silicon spatula and I simply can not imagine it being any easier. Should I be mixing it more than I am? This method is somewhat new to me. Previously I had been making the no-knead bread with the overnight rise then bake after 8-18 hours so I am not sure if this method requires more mixing than I am doing.
Hi Rachel,
As long as there is no dry bits of flour, then you are mixing enough. Here is a post on the basic recipe: https://artisanbreadinfive.com/2010/02/09/back-to-basics-tips-and-techniques-to-create-a-great-loaf-in-5-minutes-a-day
Cheers, Zoë
Just to amplify Zoe’s comment about making sure there are no bits of flour left after mixing. Unmixed flour does not add to the flavor of the bread. Only fermented flour tastes good. So you want to make every effort to make sure all the flour you add is well mixed.
Flour incorporation comes in two stages. The first stage is as you describe in No Knead Bread. That process just mixes the compontents of water, flour, yeast and salt. The next stage of mixing is increasing gluten formation. Higher gluten formation is why you use mixers and knead it by hand, etc.
The high protein flours we have available today contain sufficient gluten to get an OK bread rise just by mixing such as is done in No Knead Breads.
What bakers are finding out is that the new mixers using the high protein flours allow higher gluten formation which makes for lighter breads, smaller crumb, etc.
In the oven now! I made a larger (2 lbs) and did a four-strand braid. Never done it with two colours, so I mixed up the order. Still looks cool, though!
We can’t wait for it to cool!
Thanks again
This post surprised me until I read how much flour, i.e. the large batches you do.
I am a household of 1 and a half batch lasts a week so I follow the same procedure as Brian: whisk and then spoon. Great results and I get a little arm workout.
I am 57 and a “scratch” cook. I have resisted a mixer to keep using my arms and it makes me think before creaming butter and sugar for sweets I definitely don’t need 🙂 !! – plus even those sweets I tend to make small batches unless I am giving some away.
Wonderful instructions on the braid – thank you!
I would like to use spent grain from our home brewing in our bread. I use your master recipe from your first book. Can you provide some instruction?
Hi Melinda,
I would try adding a cup of the spent grain* to the Master recipe. You may need to add a touch of water or flour to create the right consistency. If you add any more than that, you may need to add some vital wheat gluten to the mix. You can read about it here: https://artisanbreadinfive.com/2009/10/26/our-new-book-healthy-bread-in-five-minutes-a-day-is-released-tomorrow-get-yourself-some-vital-wheat-gluten-and-make-our-whole-grain-master-recipe
*I just spoke to Jeff, who used to make his own beer and he suggested that the spent grains may still have the hulls on them, which would make them too tough to eat and not suitable for bread baking. Is that the case with yours?
Thanks, Zoë
Thank you! Can I only add it when I make the dough, or do you think I can add it on baking day?
Wow. I’ve just made Naan for the first time. It’s past 11:00 p.m and we are tearing the last pieces apart. It tastes great!! I can just imagine how it will be as a pizza crust.
You guys are the best!
What’s the next book you’re working on, if any?
Cakes? (yum)
Publisher will kill us if we pre-announce! look here on the site in August for an announcement. There are sweets in all our books though…
Hi Zoe and Jeff,
I am planning on making the pumpernickel bread from Artisan Bread in 5 Minutes and started looking into buying caramel color. I ran across several articles discussing a concern surrounding the process used to create caramel color (it seems that there are 4 classes of caramel coloring, and that 2 of them are made with ammonia and have carcinogenic properties). I contacted King Arthur Flour to find out which class their caramel coloring product falls into, but haven’t heard back. Do either of you know anything about this and could you provide some direction in the matter?
Thanks!
Bella
Not aware of these controversies but you can make it yourself and you can be sure it doesn’t have additives. See Healthy Bread in Five, or we have the recipe for homemade caramel color here, at https://artisanbreadinfive.com/2008/10/26/pumpernickel-bread-how-to-make-your-own-caramel-coloring
I used your recipe for the 5 minute white bread dough and it came out great. Now I want to make a rye bread. Can I use the rye recipe for your braided pumpernickel/rye bread but substitute the rye flour. Thanks
No, that won’t work, you need to blend rye and wheat flours, which of our books do you have and I can direct you to a recipe.
Jeff,
I don’t have any of your books yet. I saw the white bread recipe on the internet and that one was great. Please let me know the recipe for making a rye bread dough similar to the white Artisan Bread in 5 Mins. Thanks,
Gary
Our publisher would kill us if we put all our recipes here on the website! All of our books have rye recipes, click on the book images above to be directed to each book’s Amazon site.
I am anxious to make your pumpernickel bread. I am looking at the recipe p. 67-69 from Artisan Bread in 5 minutes a Day. King Arthur no longer carries caramel color. Is it necessary? I have black cocoa that I have used in another recipe for Pumpernickel which gave me a perfect color. I am unsure if the caramel color is just for color or has an important taste component. Thank you for any help you can give me.
Barbara
It imparts a slight bitterness which is typical in most pumpernickels that you’ve tried, but it’s not essential. Many recipes use cocoa as you mentioned, you could try that or just go without. Cocoa without sweetener is a bit bitter, like caramel color. You could also try making your own liquid caramel color, but then you have to decrease the water in the recipe a little. We have this in the updated version of your book, or here on the website at https://artisanbreadinfive.com/2008/10/26/pumpernickel-bread-how-to-make-your-own-caramel-coloring/