Braided Peasant Bread
Braiding doesn’t just have to be for sweets. I found myself with some 2-week-old dough (truth be told it was closer to 3 weeks) and it was a little wet to shape a nice tall boule. We always recommend using older dough for flatbreads or baking it in a loaf pan, since it can lose some of its rising power in the later stages of storing. Well, it turns out this older dough makes a wonderful braided peasant bread loaf, with lots of flavor and a really open crumb. Because the braid isn’t as domed as a boule, the older dough has all the rising power it needs.
My dough was made with all-purpose flour, a bit of rye, whole wheat and Platinum yeast by Red Star. Like I said, it was almost 3 weeks old, but this technique can also be done with fresh dough and really any of our doughs, not just the Peasant dough recipe will work great.
Braided Peasant Bread
1 1/2 pounds dough (Peasant or Master or Challah or Spinach Feta or any other dough from The New Artisan Bread in Five Minutes a Day or Healthy Bread in Five Minutes a Day)
Flour for sprinkling
To form the braid:
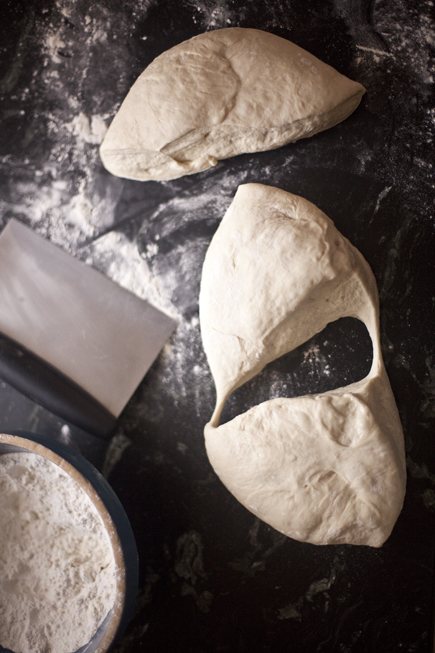
Cut the dough in 3 equal pieces. Jeff and I tend to use a Bench Scraper for lots of bread baking tasks, including dividing dough.
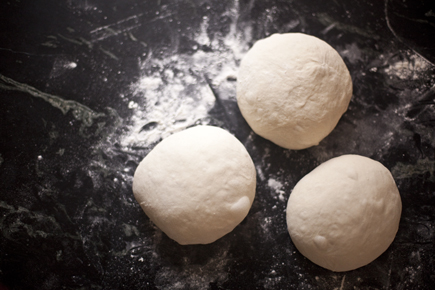
Form the pieces into balls. This extra step just helps make a uniform rope to braid.
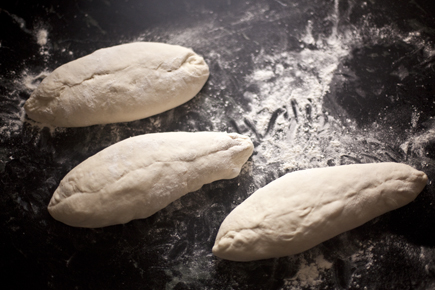
I like to use the letter fold method to get the ropes started. This is the same technique you’d use to make a perfect baguette.
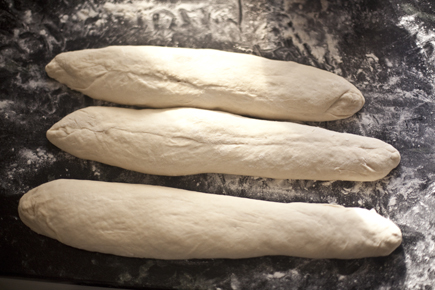
Stretch the dough into ropes. Because you’ve handled the dough it may resist being stretched, so just let it rest for 5 minutes before continuing. If your kitchen is dry, lay a piece of plastic wrap over the dough.
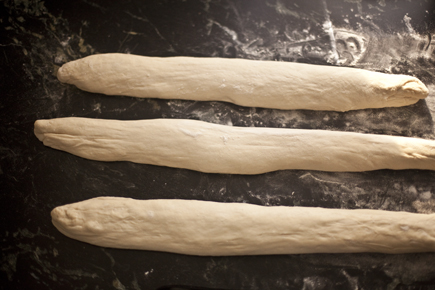
Now it should stretch easily. They should be about 15-inches long.
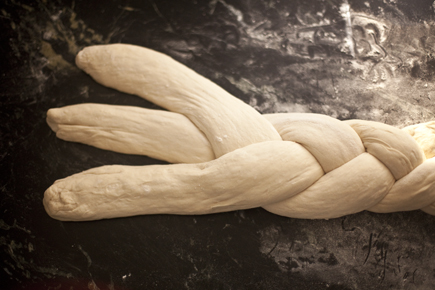
Braid the dough, starting at one end.
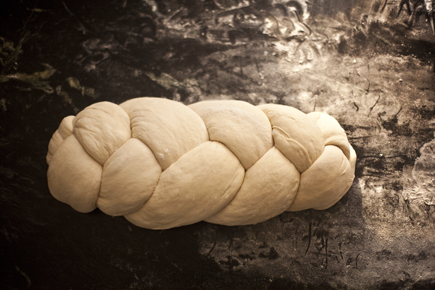
Once it is braided, tuck the ends under the loaf.
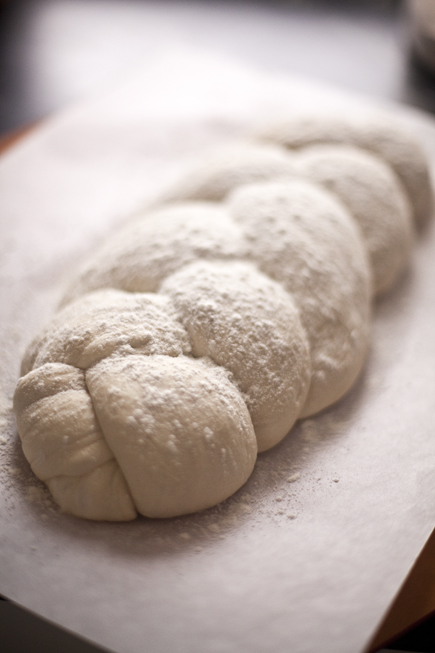
Lay the braid on a baking sheet prepared with parchment paper or a Silicon Baking Mat. Let rest for at least one hour, but up to 1 1/2 for a more open crumb.
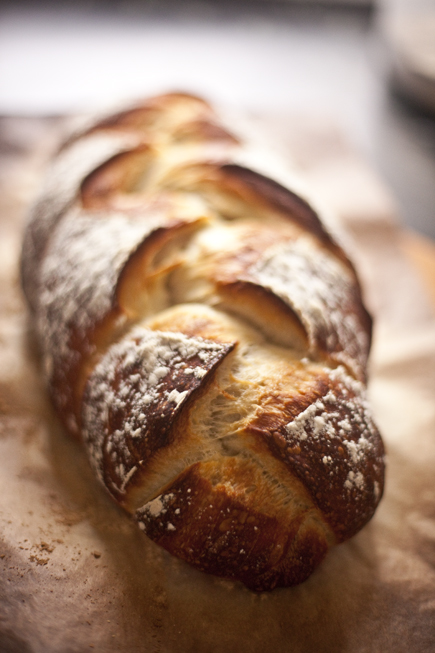
Preheat the oven to 450°F (If you use a dough other than peasant or master then check the recommended baking temperature.) Add steam to the oven, just as you would for the Master recipe.
Bake for about 35 minutes or until deep brown.
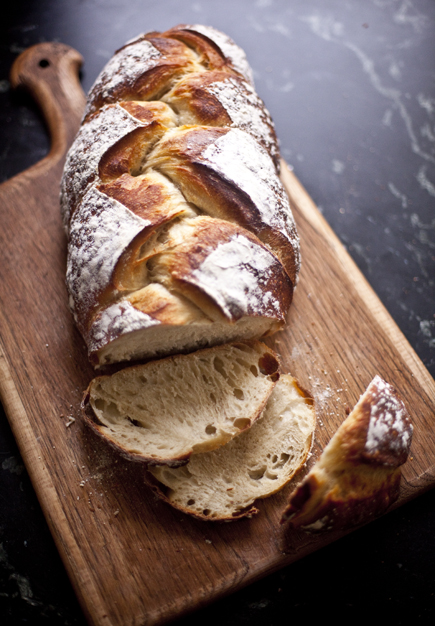
Allow to cool completely. Enjoy!
Related Posts:
Chocolate and Cocoa Nib Braided Loaf Bread
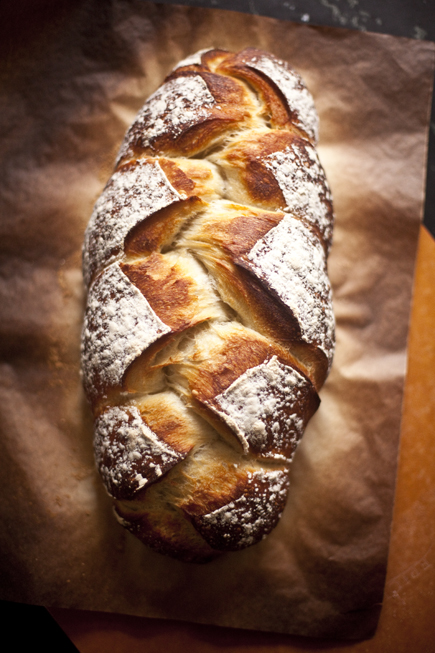
Beautiful!
Can I bake any of your breads and freeze them baked?
Hi Sue,
Yes, you can freeze the baked bread or the dough, which ever you prefer.
Thanks, Zoë
Sue, Baked bread freezes beautifully. Just don’t forget to wet the surface of the frozen loaf (passing it under running water works great!) before popping the frozen loaf in the oven at about 410F. About 7 min. for a small diameter french bread. It will be just like it was freshly baked with a nice crisp crust.
This is stunning!!! Thank you!
P.S. Could you direct me to instructions for the envelope fold method, please? Ty!
Hi L,
I put a link in the post to the letter fold method.
Thanks, Zoë
I sure would like to see a video on the envelope technique. I’ve yet to get it to come out correctly.
Hi Harry,
I put a link in the post to the letter fold method. Great idea for a video too!
Thanks, Zoë
I bet that loaf would make a delicious grilled sandwich!
Hi,
How long are the ropes?
Thank you,
Sharon
So gorgeous, Zoë!
No steam for baking this one?
Hi Lynnea,
If you are using the Peasant or Master recipes, then you do want to use steam.
Thanks, Zoë
After seeing this picture I had to make this bread! I made it last night. The braid is beautiful (I’ve braided bread before so that wasn’t a challenge for me), the crumb is soft, the crust is chewy, the flavor absolutely amazing, BUT I didn’t get that deep, dark brown color that makes this loaf so beautiful. I used a water bath in the oven for steam. Do I have to “spritz” throughout the baking to get that brown color? What is the trick? I do have convection but didn’t use it. Would that have helped?
Hi Andrea,
Do you have an oven thermometer? Is your oven gas or electric?
Thanks, Zoë
Zoë,
My oven is electric and I do have an oven thermometer (and last I checked the oven was pretty accurate). I can bake convection or not. I baked the loaf without convection.
Andrea
Hi Andrea,
Have you baked our dough before and had a success with the crust? Were you using the master recipe?
Thanks, Zoë
I make lots and lots of bread (both yours and other) but have never been able to get that really brown crust without an egg wash. I used the peasant bread recipe.
Andrea
P.S. There is always ABin5 pizza dough in our frig! LOVE it! We make pizza at least once a week, sometimes more.
Hi Andrea,
Try baking the loaf at 475°F for a few minutes less time. You can also try adding a tablespoon or two sugar/honey to the dough. For some reason you just aren’t getting the caramelization on the crust.
Enjoy all the pizza and breads! Zoë
Thanks! I’ll try it and let you know how it works! It is really delicious bread, browned or not!
Great Andrea,
Let me know if that helps!
Enjoy, Zoë
Zoe,
I tried the braided artisan bread again. I added a tablespoon of sugar, used the 475 and baked it in the upper part of the oven rather than the middle. Success! It’s much more browned so now it looks as good as it tastes! Thanks for the tips.
Andrea
fantastic!
I’ve been enjoying all three books, and lately the HBin5 is getting a workout. I hope you can help me find an answer to a shopping mistake. I went to the specialty grocery store without a shopping list and came home with oat groats instead of buckwheat groats. Any suggestions on using oat groats in a whole grain bread?
Hi Betsy,
So glad you’re enjoying all the bread. I think you can use them just as you would the buckwheat? I’ve never tried it, but I’d give it a go. I always mix up a half batch when I am experimenting.
Let me know how it goes! Zoë
I tried the substitution making a variation of the Vollkornbrot recipe. I used oat groats, old-fashioned rolled oats, and honey in place of the wheat berries, rye flakes, and molasses. I haven’t made the original Vollkornbrot recipe, but based on what I know about the properties of the grains I thought it would be worth the try.
The loaf came out of the pan as described in the original print recipe. The interior is dense, moist, and chewy. I’m going to try baking a little longer next time as the crumb has an under-cooked appearance in the lower half of the loaf, especially toward the mid-section. The oat groats add a nice texture, a little crunchier on the outside but still with some bite on the interior. I can’t see the rolled oats in the finished product but I figure that is probably because the bran in oats is not as tough as it is in rye.
I’m going to try another loaf, this time to bring in to work, for more opinions on the final product.
Yes, density is the problem you’re fighting in this style of German bread. This may take a lot of experimentation.
This loaf looks gorgeous! Can’t wait to try it. My question, though, has more to do with storage/travel: I’m planning on making a baguette to bring to my parents’ house next week for a family dinner, as well as two loaves of rye. I’ve been looking for a good way to travel with it (I’ll be taking the subway and trains) — any ideas? Obviously I don’t want to use plastic, but I also can’t imagine how wrapping whole loaves in parchment is going to work. I would love your thoughts/recommendations! Thanks!
The truth is that fresh bread without preservatives doesn’t travel all that well– they stale quickly, especially all-white flour loaves. Consider rye or whole-grain versions. I’d move these in a paper bag. But if they sit for longer than 4 hours after baking, they’re not going to be great.
Thanks, Jeff. Thankfully it’s literally just over the river and through the woods — from NYC to suburban NJ, so they shouldn’t have to sit in a paper bag for too long. I assume once I arrive I should take them out of the bags immediately to breathe? And are paper bags just as good as the parchment-like ones that bakery loaves come in? Sorry if this is a stupid question!
You want something that breathes– a bit. So plastic is no good. I don’t think you need to buy anything special. Brown paper is just fine.
Thanks! Cross your fingers for me.
Hi Jeff, one more, probably very stupid question. Since you mentioned time being a factor in traveling with fresh loaves, I was wondering if it would be better to bake early and let them cool completely before packing (in the brown bags, of course) or if I should just bake as close to the time of my departure as possible, even packing them a bit warm if necessary. Sorry again if this seems like a silly question but thank you for your advice! Just want to bring the best loaves to the family table.
Well, if you put hot bread into even breathable paper bags, yes, they’ll get soft crusts. I’d let them cool at least partially. Maybe bake them to come out an hour before they go into the bags?
Thanks, Jeff! They did soften a tiny bit but they were a huge hit. Even my brother said the baguette (with a schmear of brie, of course) tasted like Paris. Big compliment coming from someone who’s spent years in Europe!
Fantastic!
I have a question regarding the pâte fermentée method (not cleaning the container between batches, and leaving a bit of the old dough behind when you mix in a new batch):
Is this safe to continue indefinitely, or do you ever need to stop and clean the dough container?
Thanks!
Unless there’s egg or butter in the mix (in which case you shouldn’t do it at all), I can’t see any reason to stop and clean the container. Unless, and this is a big unless…
… unless you see mold growing anywhere on the container or on the dough. That’s a different story. You can recognize mold– see https://artisanbreadinfive.com/2010/01/26/gray-color-on-my-dough-is-there-something-wrong but apply the same logic to whatever you see on the container.
How can I subscribe via email? Can’t find it anywhere?
Look at the left side, near the top, right above our YouTube link you’ll see an orange square with a white design inside, that’s our RSS subscription button.
Hi,
I am in New Zealand and would like to make this recipe, as well as the original artisan loaf in the book. I am unsure how to adjust for the protein content in the flour, though. There are no American brands here. The flour I have is 22% protein and the ingredient is simply wheat flour. Do you have any suggestions as to how I should adjust the recipe? I have the book but it’s in the U.S. 🙁
They must measure protein differently than in the U.S. and in Europe; I can’t make any sense of that high of a protein level. I think you’re going to just have to start with our level of hydration and see how it looks in comparison with our videos:
• Gluten-cloaking/shaping: https://artisanbreadinfive.com/2010/03/08/new-video-shaping-the-ball-from-a-very-wet-dough
• Gluten-cloaking/shaping with whole-grain dough: https://artisanbreadinfive.com/2010/02/16/new-video-how-to-shape-a-loaf-using-whole-grain-dough
Then take it from there adjusting the water level…
Hi,
I have a flour question. On page #10 in the New Artisan Bread it states to add 1/4C more water when using the King Arthur Unbleached Flour in the Master Recipe. I made the Limpa tonight. How do I figure out how much water to add to a recipe that has different types of flours added. For example the Limpa has 5 1/2C AP Flour, 1C Rye Flour. Other recipes have Wheat Bran, rolled oats, whole wheat four and AP flour. Is there an amount of water per cup of high protein AP flour to add to each recipe when using a higher protein flour? Thank you. PS For the Limpa I use a little less than a 1/4 C. I think the dough looks a little to wet. I’ll find out when I bake it.
It depends on how much white flour was in the recipe. For 6.5 cups of AO white flour, we said adjust with .25 cups, so just calculate the proportion based on the amount of white flour. For example, if the recipe called for only 3.25 c of AP, then adjust the water by 1/8 cup (.125 c).
The only recipe that says to leave the lid cracked for 2 days (after making) is the recipe for the Master Recipe. Should the lid be cracked open for 2 days for all of the recipes?
PS The Limpa turned out great…Mmmmm
Yep– the rest of the recipes are sketchier, so the book wouldn’t be 7,000 pages long!
I just want to say Thank You! for making bread baking so easy. I’ve always loved baking, but yeast breads have never been my “strong suit”. I just baked my first loaf of bread from your book, and although it’s not perfect, it tastes like bread from the bakery. I’m looking forward to trying more of your recipes and techniques. Bless you!
Hi Amy,
We are thrilled you tried the recipe and are enjoying the bread you baked! Thank you for the lovely note!
Cheers, Zoë
How did you store 2 and a half week old dough? I want to have dough on hand in the fridge but I don’t know how.
Well– that’s our method– which of our books do you have and I’ll direct you.