sourdough pizza

Sourdough Pizza

Making sourdough is a favorite pastime for many, but within the last few weeks thousands more have joined the club, as yeast is suddenly hard to find on the grocery store shelves. We here at Breadin5 have been making sourdough for years, and while we have a post on our Easy Sourdough Starter, we realized there are many more things to make with our no-knead bread method. We had some requests for a sourdough pizza crust, and we are delivering (pun intended).

We know that flour is also scarce, and the bread flour called for below may not be available to you right now. Since different types of flours have different protein levels (and this of course effects the recipe), we have included a video on mixing flour and adding more water if necessary. If you need help finding flour, good places to look are local bakeries (they sometimes will sell flour to customers), and restaurant supply stores.

Sourdough Pizza

Note: You’re going to need a sourdough starter. If you haven’t started one yet, please check out our post for Easy Sourdough Starter. Our method uses whole wheat flour, but I used bread flour (same proportions) in mine for the pizza.

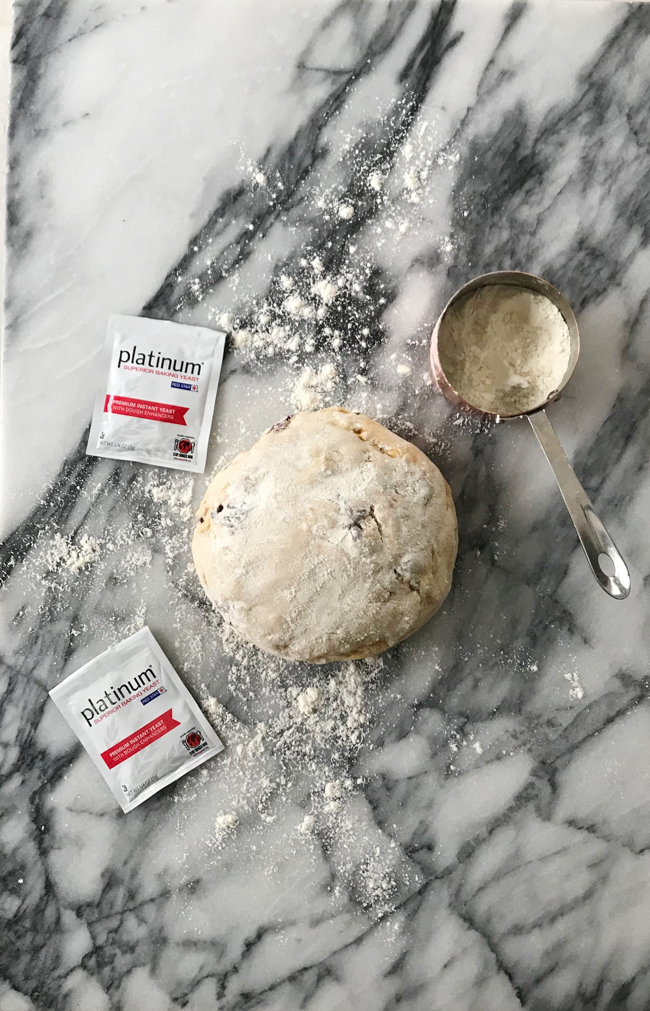
Flour has different protein contents depending on the type and brand, which can effect how much water to use. If you mix your dough and it seems dry, more water can be added. We have included a video below so you can see how your dough should look, and add water accordingly.

We have instructions in our Healthy Bread in Five Book for ‘semi’ sourdough – using some of the starter along with yeast to give a milder sourdough flavor. Check out page 390 for details.

Extra dough can be portioned into 10-ounce balls and frozen, if desired. Wrap each ball in plastic wrap, and then place in a freezer safe bag. Dough can be pulled out the night before using and thawed in the refrigerator overnight.

If you need extra help rolling out pizza dough and transporting it to the oven, there’s more on that in the video.

2 cups lukewarm water (see note above)

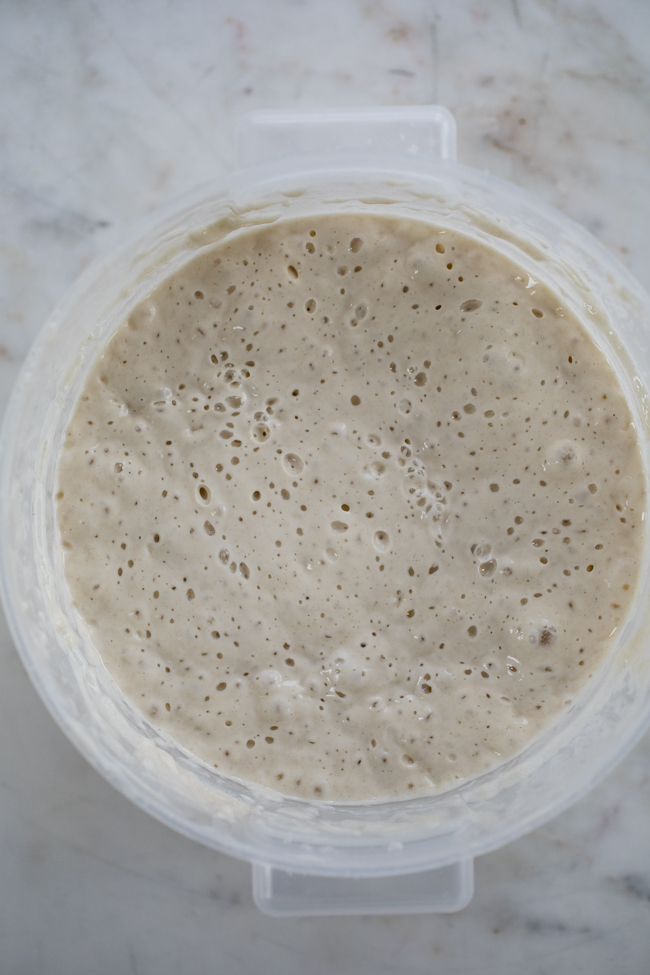
3 cups activated levain (sourdough starter)

1 tablespoon kosher salt

1 tablespoon granulated sugar

1/8 cup olive oil

6 cups [840 g] bread flour

Mix the water, activated levain, salt, sugar, and olive oil together in 5-quart container or the bowl of a stand mixer.

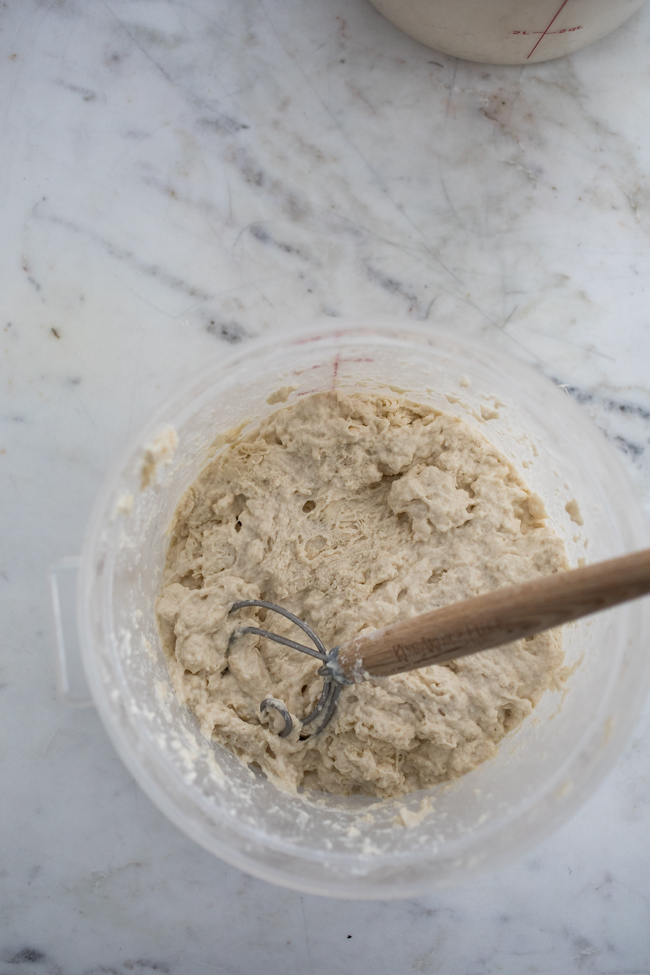
Mix in the flour with a Danish dough whisk or a heavy duty stand mixer. Cover (not airtight) and allow it to rest at room temperature until the dough rises, two hours or more (sourdough can take a lot longer to rise than commercial yeast. I let mine rise for 4 hours at room temperature, then moved it to the fridge overnight, where it continued to do a slow rise).

If your dough looks dry (which may happen depending on what type of flour you are using) you can add more water. Here’s how your dough should look– see the video below:

The dough can be used immediately after it’s initial rise, though it is easier to handle when cold. Refrigerate it in a lidded (not airtight) container and use for pizza over the next few days.

Preheat a baking stone at your oven’s highest temperature for at least 30 minutes. Sprinkle a pizza peel liberally with flour. Dust the surface of the refrigerated dough with flour and cut off a 10-ounce piece. Dust it with more flour and quickly shape it into a ball by stretching the surface of the dough around to the bottom on all four sides, rotating the ball a quarter turn as you go. Cover the dough with a piece of plastic wrap or kitchen towel, and let rest for 20 minutes.

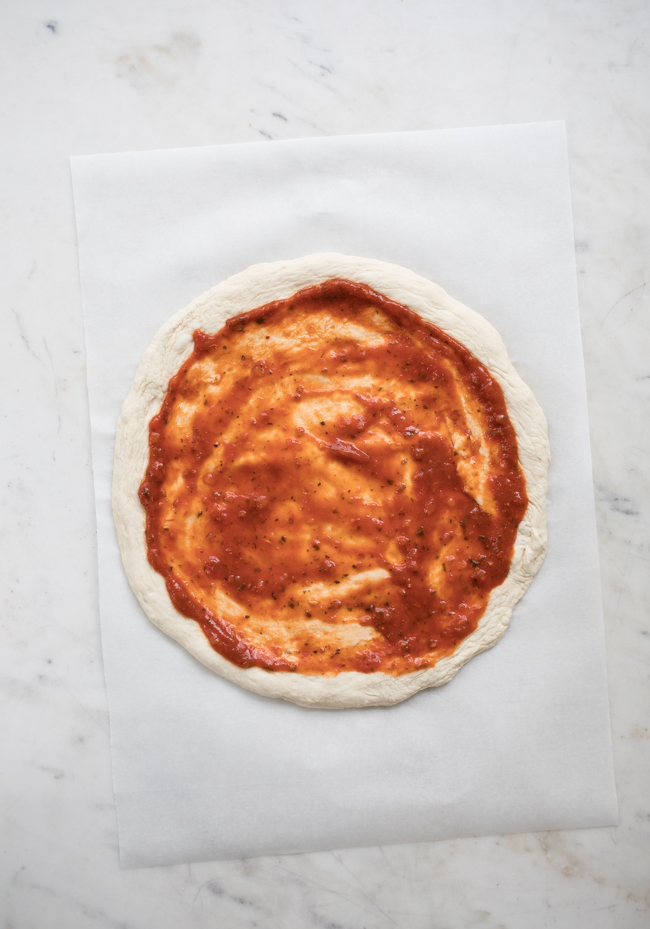
Flatten the dough with your hands and/or a rolling pin on a work surface, or directly onto a wooden pizza peel, to produce a 1/8-inch thick round. (You can also put it on a piece of parchment paper for ease. Note that your crust won’t brown as nicely if doing so! Parchment is shown in the photos below because I needed to move the pizza around to take photos. Also, my kids prefer a lighter crust. But if you want a dark crust, use a pizza peel.) Dust with flour to keep the dough from adhering to the surface. Use a dough scraper to unstick the dough as needed, and transfer to a pizza peel if you haven’t stretched the dough out on one already. When you’re finished, the dough round should have enough flour under it to move easily when you shake the peel.

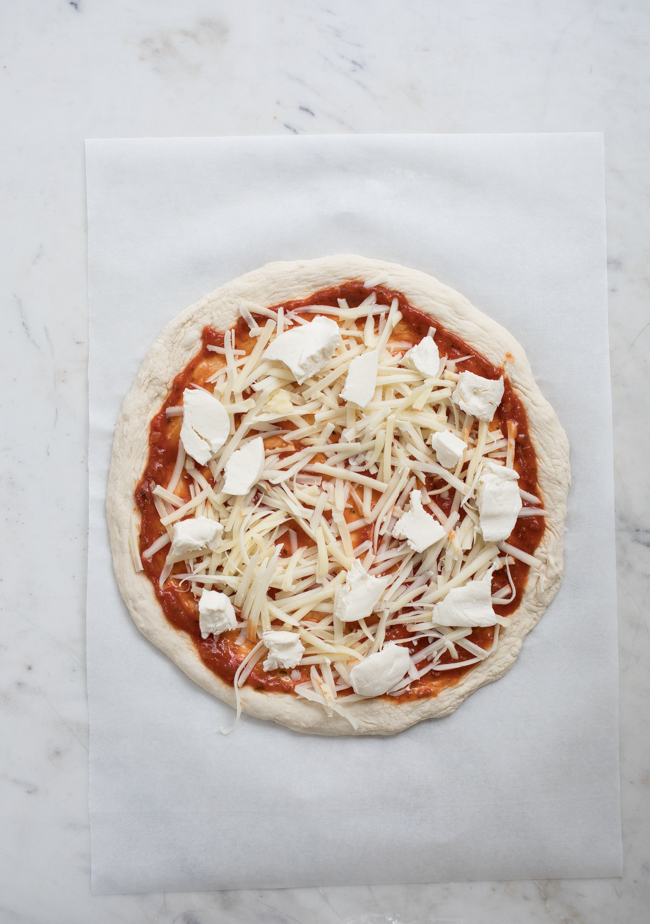
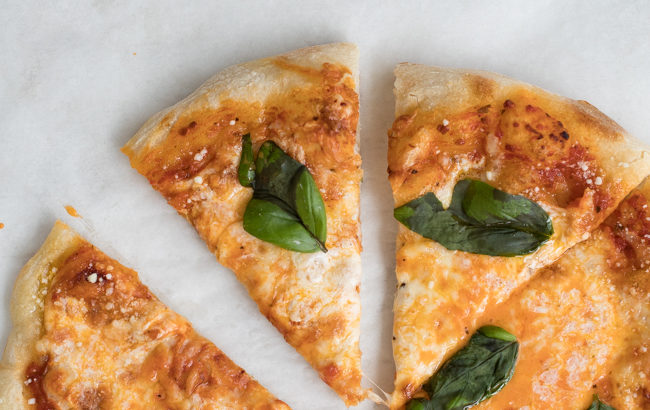
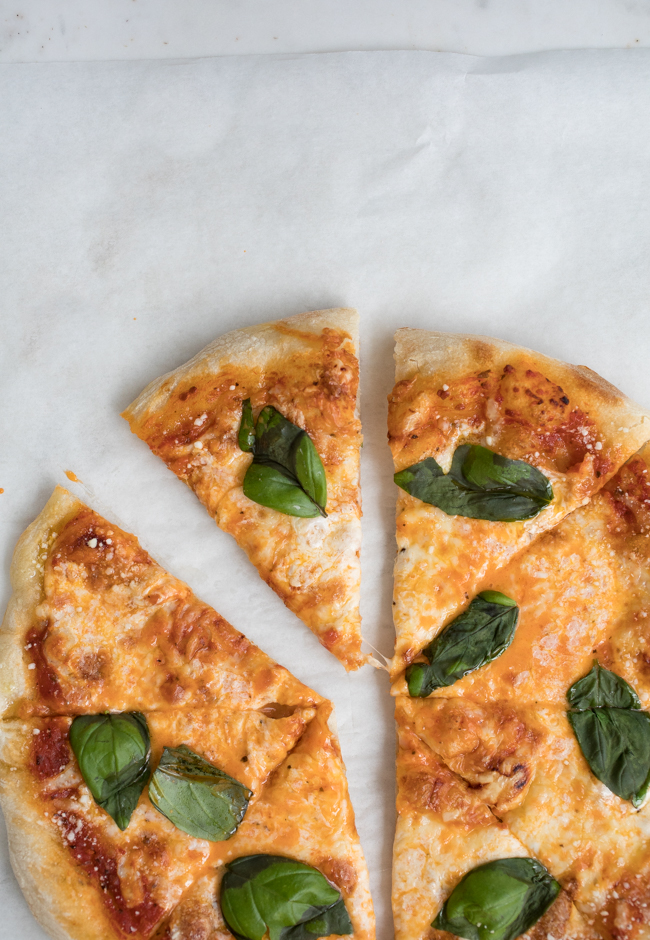
Add toppings to your pizza (I kept mine simple: sauce and cheese, with a scattering of basil leaves after the pizza emerged from the oven). Slide the pizza onto the preheated stone. Check for doneness in 8 to 10 minutes, and turn the pizza around in the oven if one side is browning faster than the other. I took my pizza out earlier for a lighter crust (my kids’ preference), but you can take your crust as dark as you like.

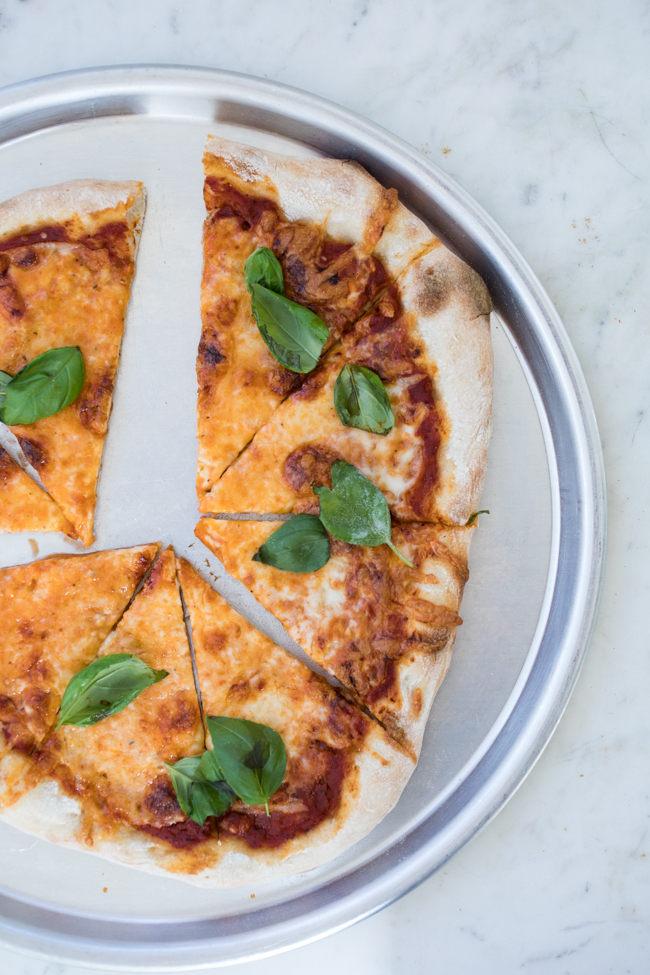
Allow to cool slightly, preferably on a wire cooling rack. Cut into wedges and serve.

Here’s another video for rolling out the pizza dough here (you can find the full video on Instagram):

You can also do cracker-crust pizza with this dough, or any of our lean doughs.

Truck Stop Cinnamon Rolls!

Fresh baked truck stop cinnamon rolls

Making cinnamon rolls is hands down one of the most popular ways that folks use our brioche dough. Not only is this an easy dough to prepare, but since it can be used for up to five days after being made, there is the potential to eat cinnamon rolls every day of the week. Of course, we stand by the phrase “all things in moderation,” but it’s still nice to know that there’s a way to make every Monday morning more enjoyable.

Truck stop cinnamon rolls are not much different than our regular buns, they are just significantly bigger (each one can serve two. Or more?). They are perfect for brunch or company; a special indulgence.

Read More

Mardi Gras King Cake

Mardi Gras King Cake, named for the three kings who came to bring gifts to Jesus, is traditionally served during Mardi Gras in New Orleans and throughout the South. Not only is it decorated with the colors of the festival, but it also has a hidden trinket in the dough. I’ve used an almond, but in New Orleans bakers often use a ceramic or plastic doll to represent the baby Jesus. The person who gets the slice with the trinket is responsible for making the King Cake the following year.

There are many versions of this sweet bread, depending on the traditions of different families. Our version from Holiday and Celebration Bread in Five Minutes a Day is made with Brioche dough which has nutmeg, cinnamon, and raisins added into it.  The dough can be Braided and/or formed into a Couronne (crown shape) as I have done here. Some bakers even use a cream cheese and praline filling, but we went with a more traditional filling.

Read More

Soft Pretzels – (How-to Video on Shaping the Dough)

Homemade Soft Pretzels Recipe | Artisan Bread in Five Minutes a Day

Part of the essence of the perfect New York pretzel is the way they look. Philadelphia has a pretzel culture too, but you’d never confuse it with its northern cousin, due to the shape. Philly has figure-8 knots and New York has well… pretzel shape. Admittedly, it’s nostalgia that makes me partial to the New York version. And you really should serve these homemade soft pretzels with mustard to complete the experience, grainy preferred.

Read More
Panettone Monkey Bread

Panettone Monkey Bread

We are big fans of sweet dough (especially around the most wonderful time of the year), and while we often choose gigantic cinnamon rolls, we will never say no to monkey bread. Over the years we’ve made Classic Monkey Bread, Pumpkin Spice Monkey Bread, and even Crock Pot Monkey Bread, and now we are adding Panettone Monkey Bread to the list. The Panettone dough comes from our Holiday and Celebration Bread in Five book (a fabulous Holiday gift, wink wink), and works well in this adaption; it’s studded with orange, lemon, and dried fruit, coated in sugar and butter and then more sugar and butter. It’s the perfect way to start out Christmas break (or even just Monday morning).

Panettone Monkey Bread

(For step-by-step instructions, check out our Instagram highlights!)

Panettone Dough (from Holiday and Celebration Bread in Five)

1 1/2 cups (340g) lukewarm water (100F or below)
1 tablespoon (10g) Red Star Platinum Yeast
1 tablespoon (17g) kosher salt
1/2 cup (170g) honey
8 large eggs, room temperature
1 cup (2 sticks | 225g) unsalted butter, melted and slightly cooled
1 teaspoon lemon extract
2 teaspoons pure vanilla extract
2 teaspoons lemon zest, grated
2 cups (340g) mixed dried and/or candied fruit (I used a mixture of dried cranberries and candied orange peel, but golden raisins, dried pineapple, dried apricots, and dried cherries are all good options.)
7 1/2 cups (1065g) all-purpose flour

Filling

9 tablespoons unsalted butter, plus more for greasing the pan

1 cup (200g) granulated sugar

1 tablespoons plus 1 teaspoon ground cinnamon

1/4 cup brown sugar

1/4 teaspoon salt

1 to 2 tablespoons Triple Sec (optional)

Generously butter a 9 x 4 x 4-inch Pullman Pan or 10-cup Bundt pan.

Dust the surface of the refrigerated dough with flour and cut off a 1 1/2 pound (cantaloupe-size) piece. Divide the dough into about 30 equal pieces. Roll the dough into small balls. If the dough is sticking to your hands, coat your palms with a small amount of soft butter. Melt 5 tablespoons butter in a bowl. Combine the granulated sugar and cinnamon in a second bowl. Drop the dough balls into the butter and then coat them with the cinnamon sugar.

Place the balls in the prepared pan.

Allow the dough to rise for about 1 hour.

Preheat the oven to 350F, with a rack placed int he center of the oven.

Just before putting the pan in the oven, melt the remaining 4 tablespoons butter, and then add any remaining cinnamon sugar, the brown sugar, and the salt. Add the triple sec and stir to combine.

Set the pan on a baking sheet, just in case the caramel bubbles over the top. Bake for about 40 minutes, or until caramelized and set.

Allow the bread to cool for 5 minutes.

Invert the loaf onto a serving tray.

Lesaffre Yeast Corporation (Red Star) provided yeast samples for recipe testing, and sponsors BreadIn5’s website and other promotional activities.

Pumpkin Star Bread

Pumpkin Star Bread for Thanksgiving

Our Holiday Star Bread was quite popular last year, so we decided to come up with yet another version: this one with pumpkin filling and sprinkled with sanding sugar. Our original version is filled with sugar and holiday spices, but we’ve also tried it with jam and Nutella, so if you are interested in playing around with recipe, there is also room for your own interpretation! This beautiful bread made it into our newest book, Holiday and Celebration Bread in Five Minutes a Day, and it is one of the prettiest, easiest and most sensational breads to make for a family gathering or work party.

Pumpkin Star Bread

(For step-by-step instructions, check out our Instagram highlights!)

2 pounds Brioche dough, Challah, Amish Milk Dough or our White Bread Master dough (from Holiday and Celebration Bread in Five Minutes a Day) (note that the enriched doughs will produce a richer, thicker bread)

Pumpkin Filling

1/2 cup unsweetened pumpkin puree
1/4 cup light brown sugar
1 tablespoons unsalted butter
1/2 teaspoon ground ginger
1/2 teaspoon ground cinnamon

Pinch salt

Egg wash (1 egg mixed with 1 tablespoon water and a pinch of salt)

For the pumpkin filling: Combine the pumpkin puree, sugar, butter, ginger, cinnamon, and salt in a small saucepan and heat over low heat, stirring continuously until the butter has melted and the sugar has dissolved. Turn up the heat to medium and continue to heat the mixture, stirring constantly, until the mixture comes to a boil (the mixture is quite thick, so you need to look for slow bubbles). Once the puree is bubbling, turn the heat down to medium-low and cook the mixture for about 5 minutes, still stirring. Remove the puree from the heat. Cool to room temperature, then chill in the refrigerator for at least 30 minutes before using.

For the star bread: Divide the dough into four equal pieces. Roll the pieces into balls, and let rest for 20 minutes, covering with plastic wrap.

With a rolling pin, roll out all the dough balls into 10-inch circles. Place one of the circles on a piece of parchment paper. Put a couple tablespoons of the pumpkin mixture on the round and spread evenly.

Place another circle on top of the first circle, and spread a couple more tablespoons of pumpkin. Repeat with one more circle, then place the final circle on top. (I like to chill the star for 20 minutes at this point; it helps make cutting and twisting a little easier.)

Place a 2 1/2-inch biscuit cutter (or other round object) in the center of the circle, and then use a bench scraper to cut the circle into 16 equal strips (starting at the circle and out to the end), cutting through all the layers.

Take two pieces of dough, and twist them away from each other twice. Repeat around the whole circle.

Pinch the ends of the pairs of strips firmly together to create the star (you should end up with 8 points).

Remove the biscuit cutter. Transfer the star on the parchment to baking sheet. Cover the star gently with plastic wrap and let rise for 45 minutes to 1 hour, until a bit puffy. During this time, preheat the oven to 400F. Before putting into the oven, brush the star with egg wash and sprinkle the center with sanding sugar, if desired. Bake for 20 to 30 minutes, until golden brown.

Remove from the oven and let cool on a wire rack for 15 to 20 minutes. Best eaten the day it’s made.

Lesaffre Yeast Corporation (Red Star) provided yeast samples for recipe testing, and sponsors BreadIn5’s website and other promotional activities.

apple brioche braid

Apple Brioche Braid

A popular recipe on our site is the Raspberry Brioche Braid, a pastry Zoe came up with to mimic a Danish braid without quite as much work. Since berries are now behind on us and we look forward to cold days and even colder nights, I decided to try my hand at an Apple version of Zoe’s creation. Since my children devoured the braid in moments I can assure you that is it in fact, quite delicious, and a perfect way to start a day, or end one.

Apple Brioche Braid

(For step-by-step instructions, check out our Instagram highlights!)

1 pound brioche dough made with Red Star Platinum Yeast (I’ve used the brioche dough from The New Artisan Bread in Five Minutes a Day, and the Amish Milk Dough from Holiday and Celebration Bread in Five Minutes a Day, but you could also use Challah dough or one of the enriched doughs from our The New Healthy Bread in Five Minutes a Day book or even Gluten-Free Artisan Bread in Five Minutes a Day)

Quick Apple Filling

2 cups grated Gala apple

1/4 cup apple cider

2 tablespoons granulated sugar

Pinch salt

Cream Cheese Filling

4 ounces cream cheese

1/2 teaspoon lemon zest

1/4 cup granulated sugar

Egg wash (1 egg mixed with 1 tablespoon water) for topping braid

Icing

1 cup powdered sugar

1 tablespoon unsalted butter, melted

1 tablespoons water

1 tablespoon brandy (optional)

Pinch salt

To make the jam: Place the grated apple, apple cider, sugar and salt into a pan and stir together. Simmer over a medium/low heat for about 20 minutes, stirring often, until most the juice has cooked into the apples. Set aside and let cool to room temperature. (The mixture will still look very ‘grated’, but the apples will continue cooking as the bread bakes.)

To make the cream cheese filling: mix the cream cheese, zest and sugar in a bowl until smooth.

Take a one pound piece of dough from the dough bucket (weighing on a scale is the easiest way, but if you don’t have one, a grapefruit-sized piece will do) and roll the dough into a 9 x 12-inch rectangle. Make sure to use enough flour that the dough doesn’t stick to the surface or the rolling pin. TRANSFER THE ROLLED OUT DOUGH TO A SHEET OF PARCHMENT. Spread the cream cheese filling down the center of the dough, about 1 inch wide.

Top the cream cheese with about 1/2 cup of the apple filling. You can add more, but some may leak out of the braid as it is baking. There may be a little jam left over to serve with the baked braid.

Cut 1/2-inch thick strips of dough with a pastry or pizza cutter. (Try to get an even amount on both sides, but it’s okay if it doesn’t happen.)

Lightly twist the top two strips of dough, then cross them over the top of the filling. Do not pull the dough too thin or it may break as it rises and bakes. Continue that same routine of twisting the pieces and crossing them over each other on top of the filling, until you are at the bottom. If you find an odd piece of the dough, that doesn’t have a mate, just twist it and place it over the filling. When you get to the end, tuck the loose pieces under the loaf, so they are secure and won’t pop out when baking.

Place the braid and parchment onto a baking sheet, cover loosely with plastic and allow to rest for about 1 1/2 hours.

Adjust an oven rack to the middle position, and preheat the oven to 350°F.

Just before baking, brush the loaf gently with the egg wash.

Bake the loaf for about 30 minutes or until golden brown (I like to bake this braid on two layers of baking sheets, to keep the bottom from browning too quickly). Allow to cool before topping with the icing.

To make the icing: place the powdered sugar in a medium bowl. Combine the melted butter, water, brandy, and salt together, and pour it over the powdered sugar, whisking until smooth. It should come off a spoon in a thin drizzle.

Red Star Yeast sponsored this post, and provided yeast samples for recipe testing.

crock pot challah

Crock Pot Challah

crock pot challah

Hey, this is Jeff here, writing the intro to Sarah’s beautiful post, photos, and re-cap of our recipe for Crockpot Challah from Holiday and Celebration Bread in Five Minutes a Day.

Challah’s become a familiar American bread, brought here by Jewish immigrants, and round ones like these are traditional on Jewish New Year, which starts Sunday night. In my family (and in Jewish bakeries), the Challah is studded with raisins or other sweet fruit, in the hopes of ringing in a sweet and happy new year. For today’s rather unconventional baking option–in the crockpot–Sarah decided to skip them, to help the crockpot succeed in baking the loaf all the way through. We’ve been putting crockpot options in our books ever since we did the second edition of our basic book (The New Artisan Bread in Five Minutes a Day). The craziest part about crockpot baking for us: the crockpot version of our basic French round loaf (boule) was the most popular post ever on this website.

A NOTE ON FLOUR FOR CHALLAH: There’s just one difference between the challah dough in Holiday and Celebration in 5, and the original in The New Artisan Bread in 5, and that’s bread flour. Holiday and Celebration has recipes for some complicated shapes, and the bread flour option gives you a drier, firmer dough that’s a little easier to handle and shape. The original, made with the same amount of all-purpose flour works great in the crockpot too. And if you’re looking for whole grain challah, check out The New Healthy Bread in Five Minutes a Day, or even gluten-free challah, in Gluten-Free Artisan Bread in Five Minutes a Day.

Crock Pot Challah

Challah Dough (makes about 4 loaves)
1 1/2 cups lukewarm water

1 tablespoon Red Star Platinum, Active Dry, or Quick-Rise yeast (1 packet)

1 tablespoons kosher salt (or other coarse salt)

4 large eggs at room temperature, lightly beaten

1/2 cup honey

8 tablespoons (1 stick) unsalted butter, melted (can substitute 1/2-cup of any vegetable-based oil, including olive oil)

7 cups unbleached bread flour (or all-purpose, see note above)

Mix the yeast, salt, eggs honey and melted butter with the water in a 5-quart bowl, or lidded (not airtight) food container.

Mix in the flour, using a heavy-duty stand mixer (with paddle), a Danish, dough whisk, or a wooden spoon, until all of the flour is incorporated.

Cover (not airtight), and allow to sit at room temperature for about two hours.

The dough can be used immediately after the initial rise, though it is easier to handle when cold. Refrigerate the container and use over the next 5 days.

Three-Strand Challah Crock Pot Braid

On baking day: Dust the surface of the refrigerated dough with flour and cut off a 1-pound piece. Divide the dough into 3 equal pieces. Dust each piece with more flour and quickly shape into a ball by stretching the surface of the dough around to the bottom, rotating the ball a quarter-turn as you go.

Gently roll and stretch each dough ball, dusting with flour so your hands don’t stick to it, until you have a long rope about 3/4 inch thick, about 15 inches long. You may need to let the dough relax for 5 minutes so it won’t resist your efforts.

crock pot challah

Lay the three ropes side by side and, starting from the middle of the loaf, pull the left strand (rope) over the center strand and lay it down; always pull the outer strands into the middle, never moving what becomes the center strand.

crock pot challah

Now pull the right strand over the center strand. Continue, alternating outer strands, but always pulling into the center. When you get to the end, pinch the strands together.

crock pot challah

Flip the challah over so that the loose strands fan away from you. Start braiding again by pulling an outside strand to the middle, but this time start with the right strand. Braid to the end again, and pinch the strands together.

crock pot challah

Join the two ends to form a circle. Place the braid on a piece of parchment.

crock pot challah

Lower the dough into a 4-quart crock pot. Be sure to follow the manufacturer’s instructions for proper use.

Turn the temperature to high and put on the cover. (Not all crock pots behave the same, so you should keep an eye on the loaf after about 45 minutes to make sure it is not over-browning on the bottom or not browning at all. You may need to adjust the time or temperature according to your machine.)

Bake for 1 hour. To check for doneness, it should feel firm when you gently poke the top of the loaf with your finger.

crock pot challah

The bottom crust should be nice and caramel colored, but the top of the loaf will be quite soft and pale. Some folks desire a softer crust, so they’ll love this loaf. You can place the bread under the broiler for 5 minutes or until it is the color you like, with a rack positioned in the middle of the oven. Let the loaf cool completely before serving. This loaf, especially when baked in the crockpot, is sensitive to that–if you eat it warm, it may seem underbaked or gummy.

crock pot challah

Happy New Year!

Instant Sourdough Brioche

I’ve used Red Star Yeast in my recipes since the very first book in 2007, so I was super intrigued when they introduced the Platinum Instant Sourdough Yeast. It’s the perfect entry into sourdough baking, if you don’t have the days to create a sour starter, nor the hours and hours to let each loaf rise. This yeast contains real sourdough starter, which is activated along with yeast, to create an instant loaf of real sourdough, without the wait. Here is the Brioche recipe from Holiday and Celebration Bread Book made with the Platinum Instant Sourdough. You can use this Super Fast Sourdough Brioche for anything you’d make with Brioche, but it has the extra depth of flavor you get from a sourdough starter. The strength of that flavor will increase as the dough rests and we found that the dough behaved best within the first 3 days of storing it in the refrigerator, after that we froze the dough to use later.

Read More

Brötchen! GF book is released in Germany: “Glutenfreies Funf-Minuten-Brot”

Gluten-Free Bread in Five Minutes a day was first published in the US (in English, of course), and now in Germany (in German of course), where it was published this Spring by Unimedica. “Glutenfreies Funf-Minuten-Brot” is available all over Germany, on AmazonDE, and even in the US.

Here are some Brötchen (German for “little bread”), based on an egg-white enriched dough which creates an incredible crust and crumb. This is BreadIn5’s first post with instructions for baking with wheat OR gluten-free flour! The egg-white especially lightens up the gluten-free version. Note: these pictures are of the wheat-based brotchen.

Brötchen (makes about 10 or 11)

2 pounds Master Wheat Recipe Egg-White Enriched (see below) or Gluten-Free Master Recipe Egg-White Enriched using the Gluten-Free All-Purpose Flour Mix

Preheat the oven to 450F, with an empty metal broiler tray on any shelf that won’t interfere with the rising brötchen.

Cut off 3-ounce (peach-size) pieces of Egg White-Enriched Dough (see below) and quickly shape into balls, then pinch to form an oval shape. Allow to rest, 2 inches apart, on a baking sheet prepared with oil, butter, parchment paper, or a silicone mat for 20 minutes.

Brush the tops with egg white and cut a single lengthwise slash into the top of each roll, using a serrated knife.

Place the baking sheet in the oven, pour 1 cup of hot water into the broiler tray, and quickly close the oven door. Bake the rolls for about 25 minutes, or until richly browned. Serve slightly warm.

Egg-White Enriched Wheat Dough: Put 3 egg whites into the bottom of a measuring cup, then add water to bring the total volume to 3 cups of liquid in the Master Recipe (or on page 53 in New Artisan). All other ingredients and measurements are the same. Refrigerate for up to 5 days before freezing in 1-pound portions. This dough is great for brotchen, but you can use it for other rolls or bread as well. The egg-white variation for the gluten-free dough is at the
Gluten-Free Master Recipe.

Need help with your Gluten-Free Dough? Here’s a video to show you what it should look like!

You can also bake the Brötchen as a boule, if you want!