Easy Sourdough Starter (with new troubleshooting tips)
Before we even start, if you’ve already tried this recipe and are having trouble getting your sourdough starter to the “very-active” stage, or if your loaves aren’t rising well, or if they’re too dense, you can skip to the Troubleshooting tips below… scroll waaaay down. If you’re new to this page, start right here:
Here’s a great method for and easy sourdough starter from Chapter 11 of The New Healthy Bread in Five Minutes a Day. (The recipe also appears in Chapter 12 of The Best of Artisan Bread in Five Minutes a Day) You can create a sourdough starter (in French, levain); without fear and without dedicating your whole day to the project. It only takes a few minutes a day to get starter up and running. It takes a while to get your starter strong enough to actually use in a batch of bread, but until it is ready to go, you can always bake any of the other yeast-based recipes in the books, or from the Master yeast-based method.
Sourdough starter just needs flour, water and a container to keep it in. Nothing special or fancy. Just make sure the container can hold at least two quarts of starter. You’ll see some Baking Bloopers below of what happens if your container is too small (or if you seal a glass container. Spoiler alert: don’t).
Once you have created your starter you can use it to bake beautiful loaves, with or without added yeast. The flavor is incredible and you will still be making a large batch of dough and storing it for up to a week, so you will do the work on one day for many loaves.
To make the starter:
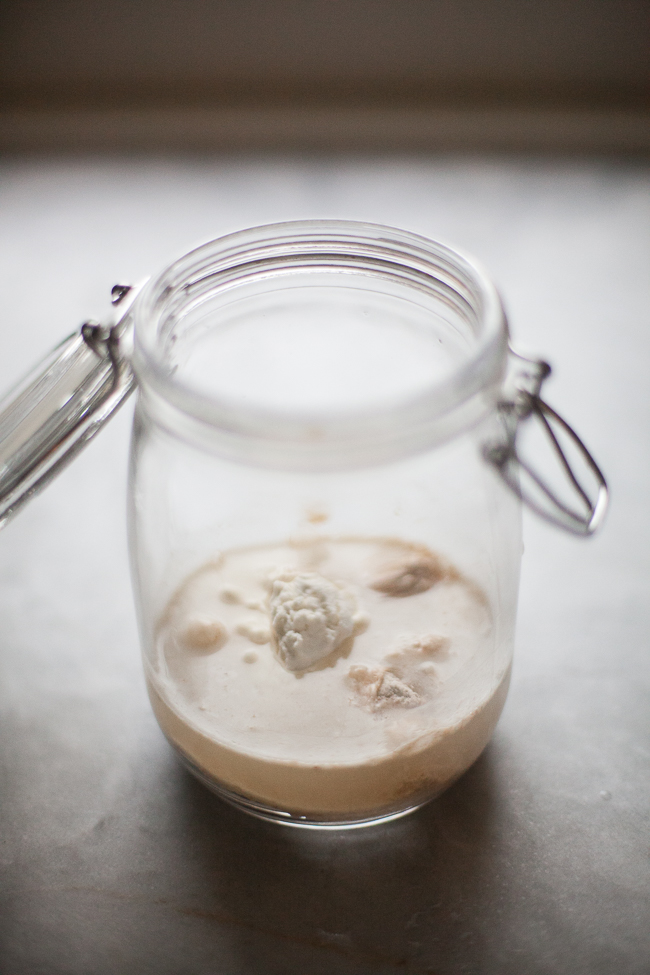
Day 1: In a clean Jar or container* add 1/2 cup flour (unbleached white, whole wheat, rye, brown rice) and 1/2 cup water. That’s it.
*the jar needs to be big enough to hold 2 quarts and it needs to be open to the air, since you want to gather the natural yeasts from the flour and the environment. If you seal your jar, you won’t collect the yeast and/or the jar may actually explode. Yes, I said explode, see picture at the bottom of the post.
Stir the flour and water. Let this mixture sit for 2 days on the counter at room temperature.
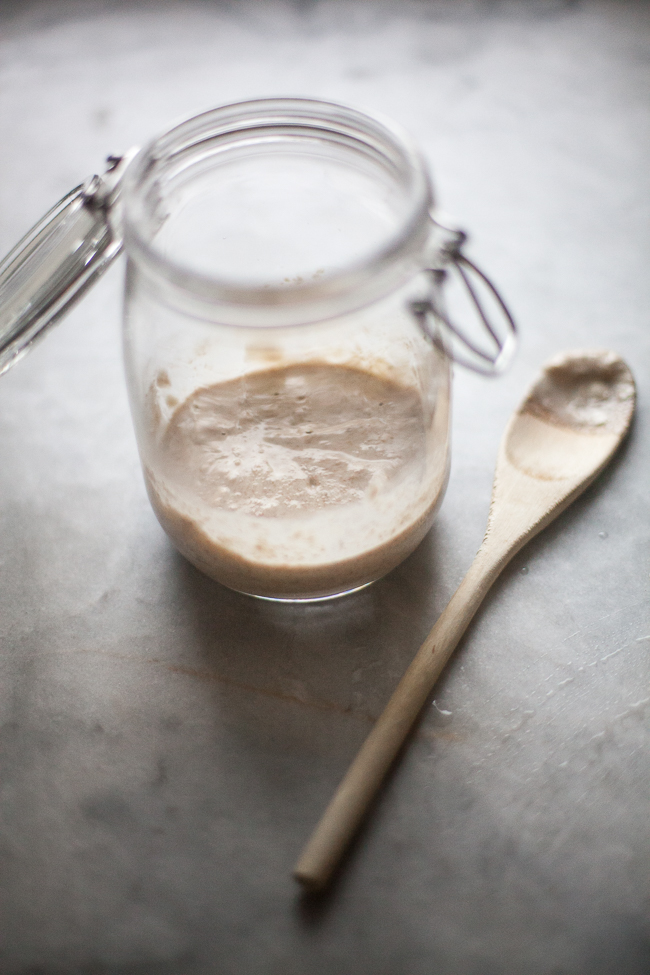
Day 3: You should see bubbles forming in the starter. That’s the sign you are off to a great start. If you don’t see any bubbles on day 3, leave it for another day.
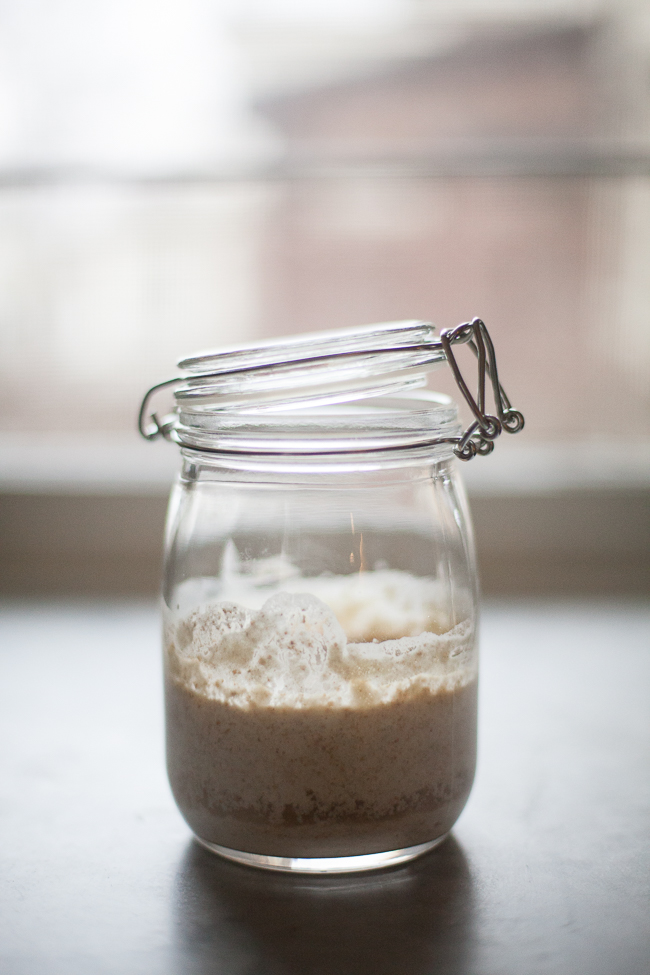
If you have bubbles, add 1/2 cup flour (you don’t have to stick to the same kind you used on the first day I like to make mine with a combination of whole wheat, rye and white flour) and 1/2 cup water. Str together and let sit for one day.
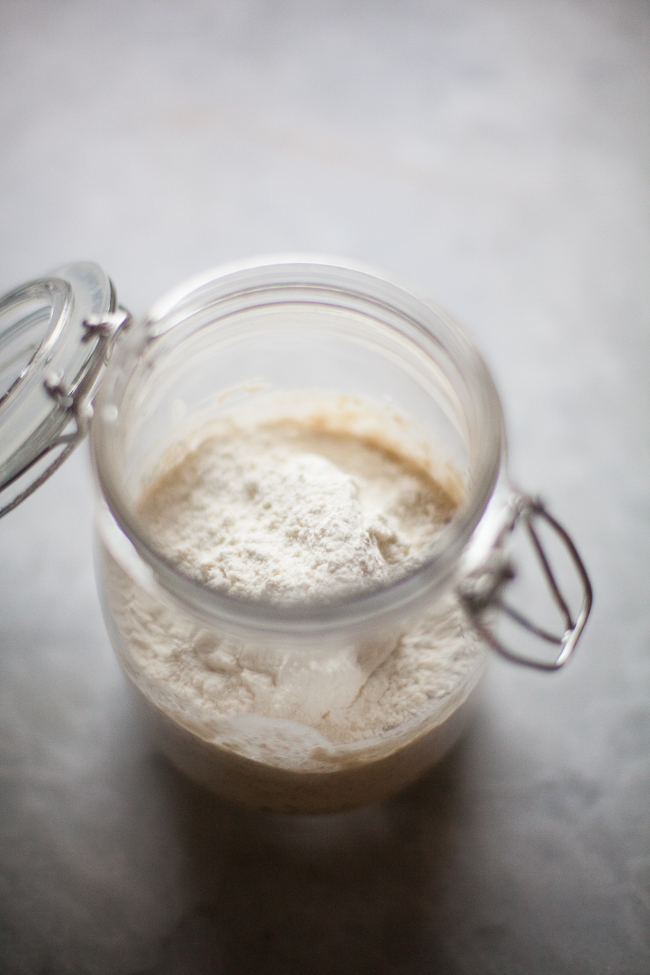
Day 4, 5, 6: Add 1/2 cup flour and water to the jar and stir on each of these days to build the strength of your starter. Let sit at room temperature after stirring.
By the 6th day your starter should seem mildly bubbly and it will have a pleasant sour smell building up. Add more flour and water so you have at least 3 1/2 cups of starter to use in a batch of dough.
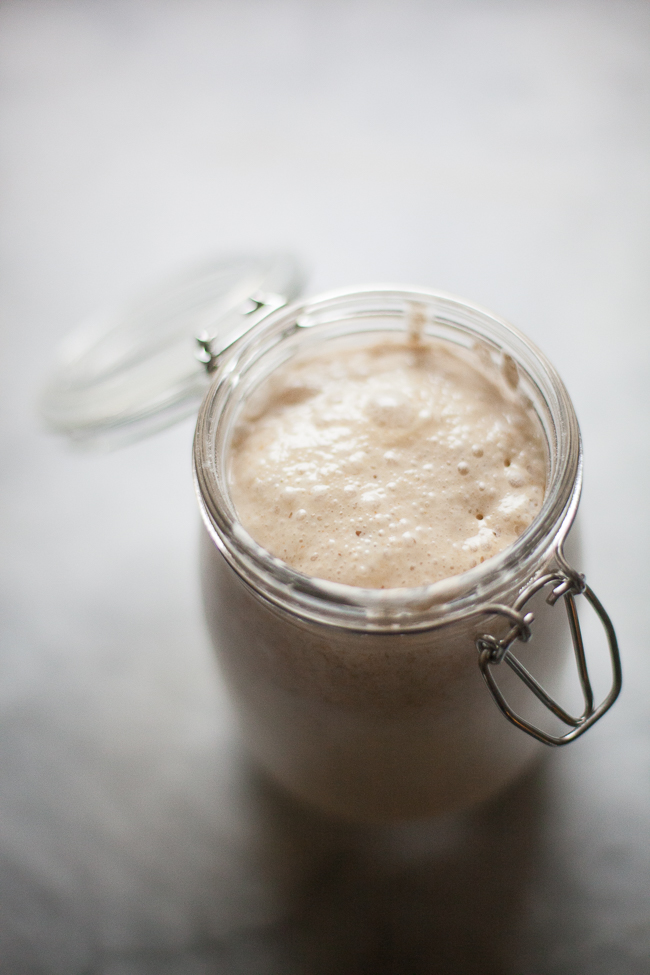
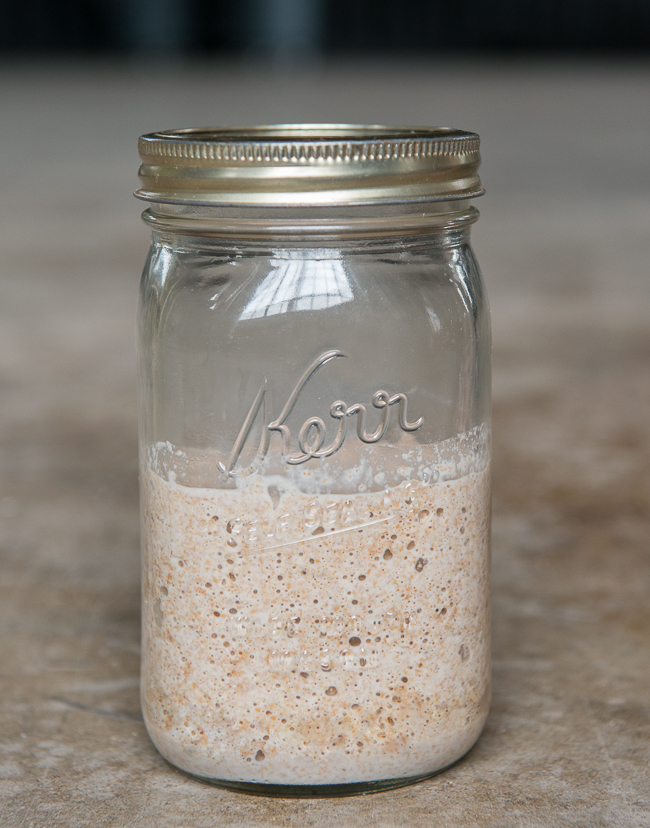
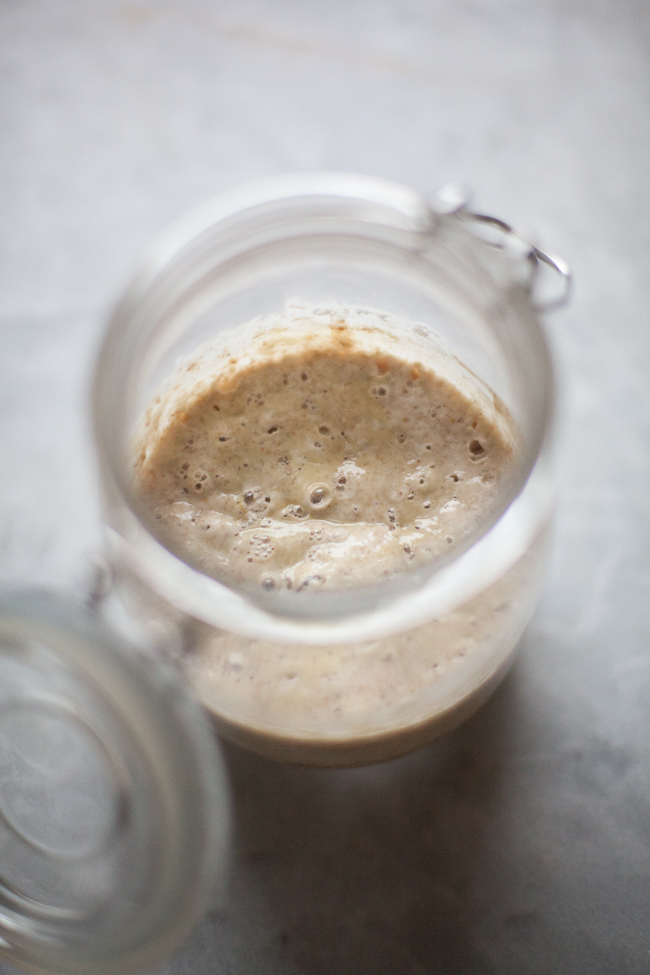
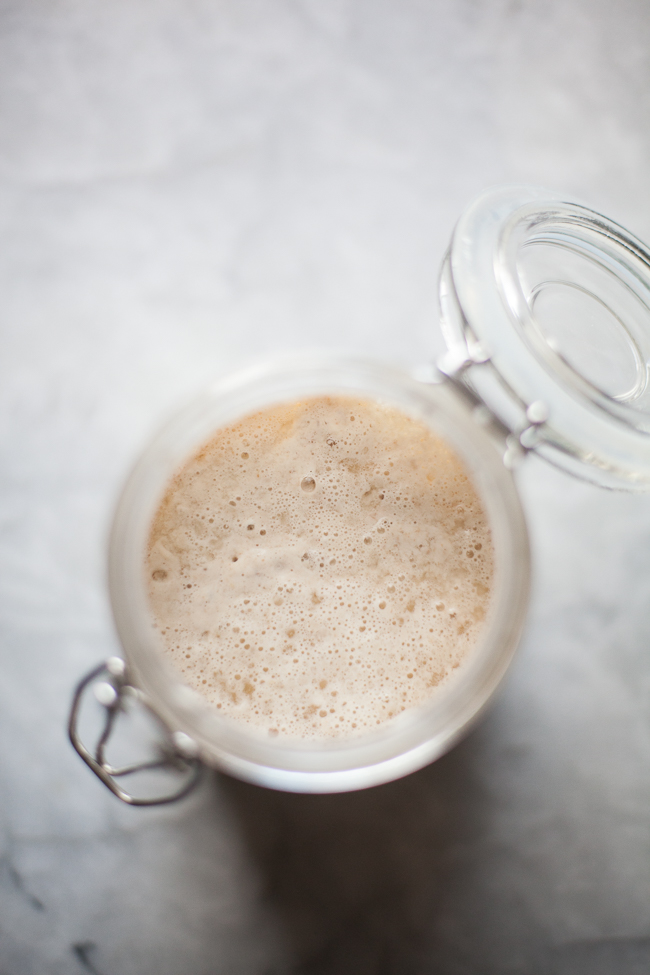
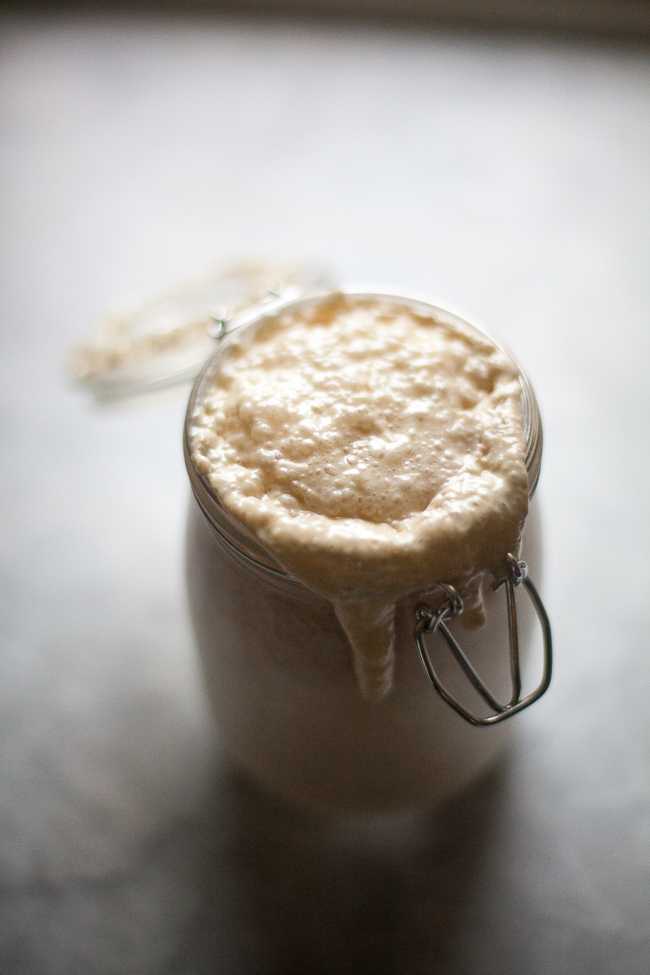
Day 7: Once it is nice and strong, the starter will be actively bubbling and puffy.
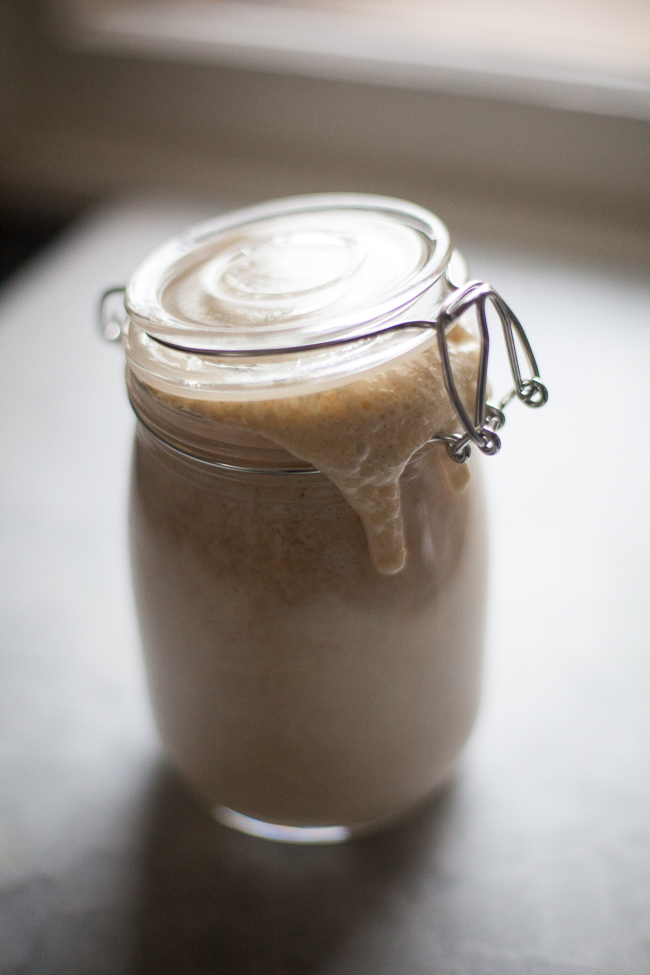
If your container isn’t big enough, the starter may try to escape. You’ll notice I never snap the jar shut.
The starter’s ready to use in any of the recipes. After incorporating starter into a recipe (keep scrolling down), you’ll need to store what remains. If you’re using it soon, it’ll be good in the fridge for a few days, but if you won’t be baking for a while, try drying-out starter: Mix in as much flour as you can get it to absorb, and refrigerate in a non-airtight container. This will preserve the starter without the need for feeding. Re-activate within a month for new loaves, or the starter will die out. You can also freeze a starter, either dried-out or not, for up to a month or so, but you’ll have to bring it back to life by feeding it again for a few cycles. Reactivating dried-out starter: Defrost and scoop starter out of its storage container into a larger one, and work in water until it’s a very loose pancake batter. Then add back new flour until it’s the consistency of a thick pancake batter. That’s your first feeding cycle; continue until active.
Here is a basic rule to using sourdough in your recipes, but for WAY more information and specific recipes check out chapter 11 of The New Healthy Bread in Five Minutes a Day. You will also find information about how to store your sourdough long term and how to reactivate it if you haven’t used it in many months.
To bake with your starter: Use about 3 cups of the activated sourdough starter for a full-batch of dough, which make 4 to 5 pounds of dough. This means that you need to decrease the water in the recipes by 1 1/2 cups, and the flour by 1 1/2 cups. Adjust the water and flour to create a dough that looks and feels just like what you get with the yeast-based recipes. Depending on the strength of your sourdough starter it may take 2-12 hours for your dough to rise. This slow rise is part of the beauty of a natural lavain bread.
If you want to use your sourdough in combination with commercial yeast, you can use half as much starter (replacing just 3/4 cup flour and 3/4 cup water). Some people like the lighter sour flavor and it gives beginner bakers a sense of insurance to add the yeast.
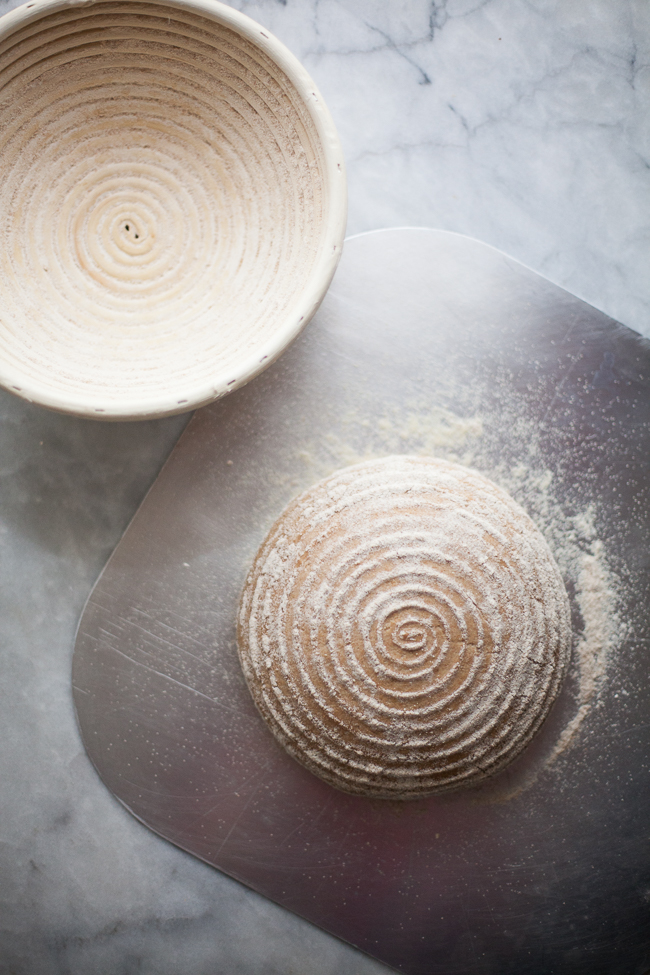
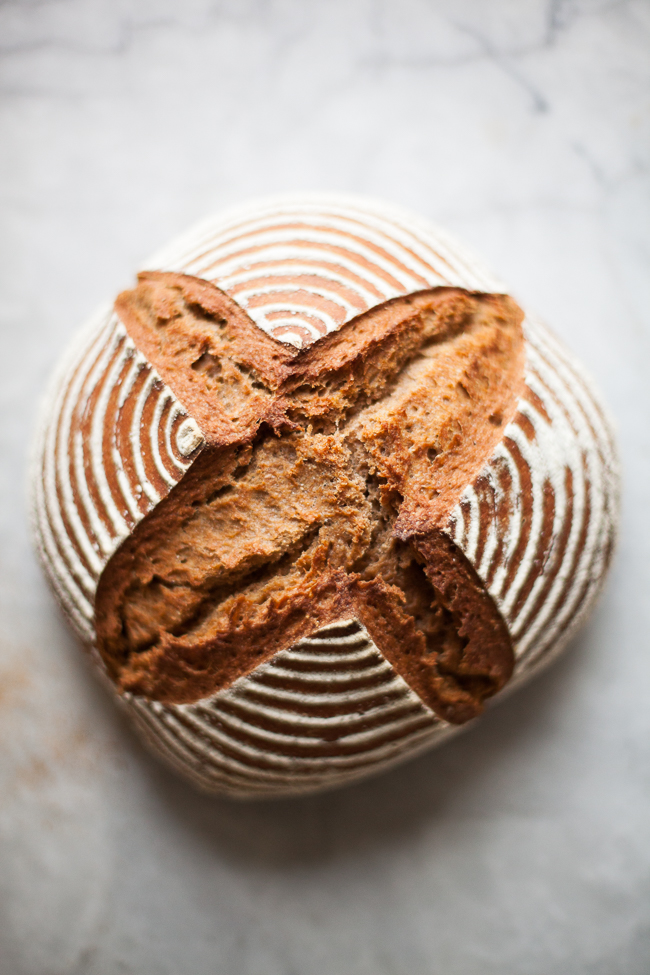
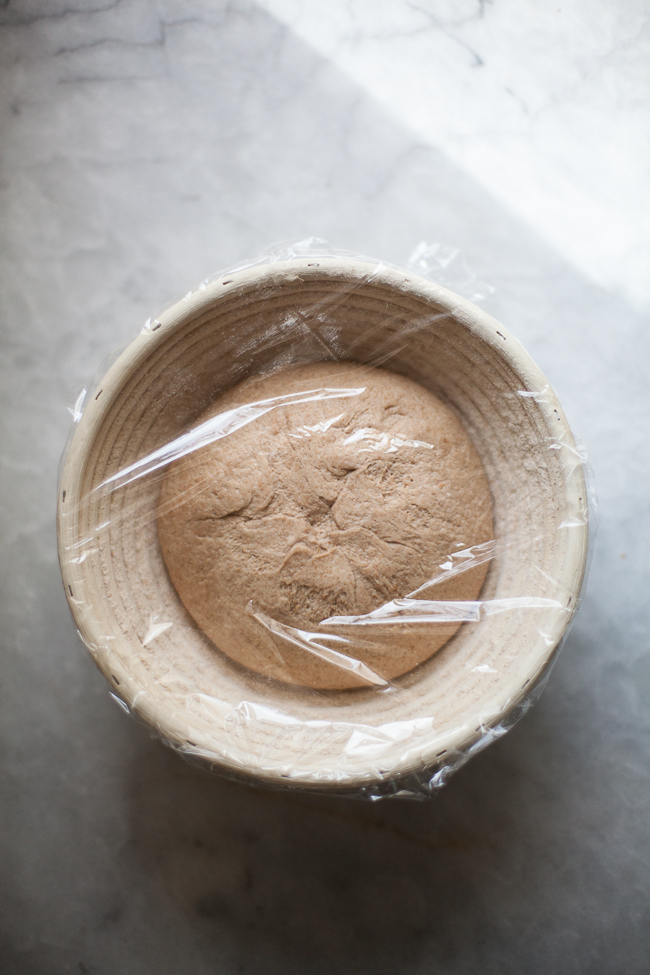
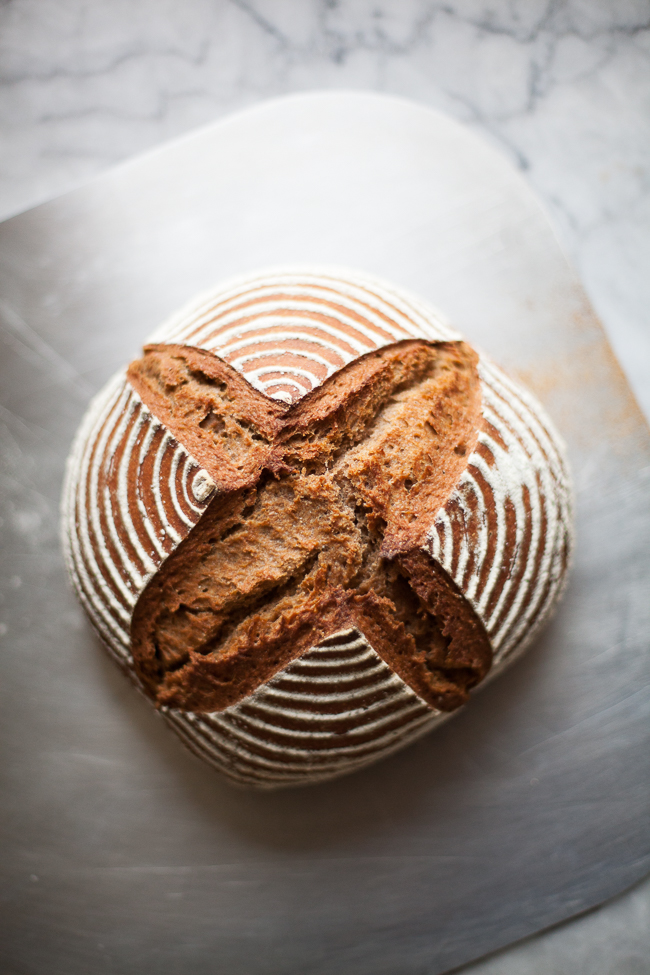
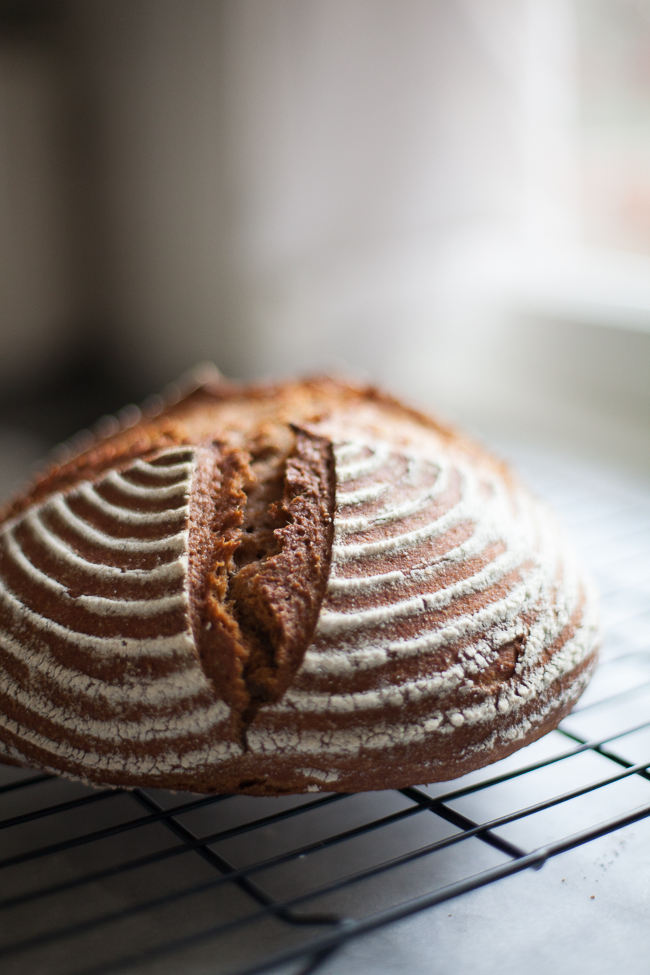
Shape and bake as you would any of the recipes. This one is proofed in a Round Basket/Banneton and baked on a preheated Baking Stone.
Baking Bloopers:
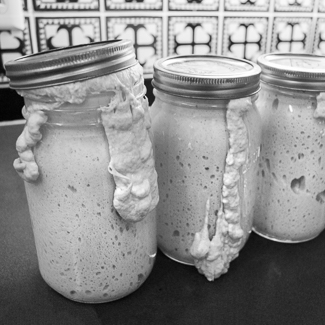

This why you never want to use a screw top glass jar for your starter. If you have a really large glass jar that will fit the dough, be sure to poke a hole in the top of the lid so the gas from the yeast can escape.
Troubleshooting tips: If your starter is stalled and it isn’t getting to the very active stage seen in the Day 7 pictures above, or if your loaves aren’t rising well, or if they’re too dense:
- Manage your expectations: Your first loaf should give you the nice, open hole structure of sourdough bread. But if you store the dough, it won’t yield an “open” crumb. You’ll get smaller, more uniform holes, but sourdough flavor will still be there (and will intensify over the storage life of the batch).
- Increase the temperature: getting a starter to look like the Day 7 pictures requires a warm environment, and in cool weather, or anytime at all, you may have better results by storing the developing starter in a oven with the heat off, but with the oven light on. Many people have better results in the summer for this reason, but the problem of course… is that everyone likes to bake bread in the cool seasons!
- Be patient! Depending on local conditions (especially cool/cold kitchen temperatures), initial activation could require fourteen days of feeding, rather than seven. Most often, the process slows down around Day 4 or 5, so don’t give up—keep feeding throughout those days. That said, if you do give up, the discarded levain-attempt can be incorporated into yeasted batches. If at any stage dark liquid collects on top, don’t worry about it. Just mix this in as you feed/expand your starter.
- Feed/expand twice-a-day rather than once: You’ll be giving the growing micro-organism colony more food to eat.
- Transfer to a clean jar for every feeding: Contamination with poorly-rising microorganisms could be the culprit in a slow-to-expand starter.
- Whole-grain flours get started more easily, because the beneficial micro-organisms are more plentiful in the external coat of the grain-seed. That means whole wheat or rye flour (US rye flours are mostly whole-grain flour). If you’re making white-flour recipes, you can always switch out the “feeding” flour once it gets started and is vigorously fermenting.
- Consider using filtered or bottled water: If your local water supply is high in chlorine, that can inhibit wild yeast growth. Alternative: let your tap water sit overnight in an open container, which dissipates the chlorine.
- If you’re bread isn’t rising well, it may be that your starter isn’t quite active enough before use. One fail-safe way to test for this is to take a spoonful of starter and drop it into water. Really “gassy” starter, with lots of bubbles, will float on the surface. If it doesn’t float, keep feeding for a few more days, and be patient.
Note: BreadIn5.com is reader supported–when you buy through links on the site, BreadIn5 LLC earns commissions.
Making my second batch of bread this week. I’m going to use my sourdough starter. My first batch was very wet and never got to the folding stage as seen on your video, no matter how much I floured my hands. Should I decrease the amount of water?
Hi Dana,
Yes, and/or increase the flour. The starter may be a bit wetter than our, so you’ll need to make adjustments.
Thanks, Zoe
Hey Zoe – I had heard of a method were you make the starter similar to your steps above, but then they said you could keep your starter in the refrigerator for long periods of time and you feed it weekly but also discard some of the old starter before refeeding it. I have tried this and when I want to bake with the starter, I take the jar out of the refrigerator and activate it on the counter for 2 days or so. Is this a legitimate approach? Is it safe to do? I don’t bake too often but LOVE sourdough. Any tips on how to keep a starter on hand? Maybe I should just dry/freeze as you mentioned above 🙂
Thanks for all the information on this site! love your books too!
Sure, it’s a very legitimate approach! If you like the flavor, it’s working, and no reason to think it’s unsafe. In healthy sourdough, beneficial wild yeasts and bacteria out-compete detrimental micro-organisms (like mold spores) for the limited food-supply (flour and water in your starter). That said, if it develops mold, that has to be thrown out, see our FAQs page on this for how to recognize, at https://artisanbreadinfive.com/2010/01/26/gray-color-on-my-dough-is-there-something-wrong/
Incredible!
I have been baking sourdough for years, much before I read your books… When I got your book I was so happy, it simplified life: no more storing sourdough! I made a good batch and before it finished I simply added another batch! over the leftovers of the first one… no more mess and caring!
Try it, just use your first leftovers to make a new dough, it’s super simple!
That’s right, but I do think the emphasis on sourdough is very important because it eases the most sophisticated thing in sourdough “maintaining it fed and alive”… and that’s the point I got after reading your book few years ago.
Thanks again
and yess I forgot: your books are veeeery good and practical!
Thank you so much for giving us back such an elemental thing like homemade bread!
Have been loving your book and going to attempt sourdough this week! If I make the master recipe to add to the starter, do I omit the yeast?
Hi Laura,
You can make bread with just the starter or add a bit of yeast for insurance. Either way works. As you feel more confident with the process you can change it up to use less yeast.
Enjoy, Zoë
Hello – I was hoping to clarify the daily feeding quantities, as my levain tends to get a little too thin (I think), and my loaves are not holding their shape well (I am using VWG).
Daily feedings are to be 0.5 cup water and 0.5 cup flour, correct? So, that would be 118g water and 65g flour? Using this ratio seems to produce a levain that is thinner than a thick pancake batter for me. I’m getting great flavor, but the loaves are a bit on the flat side (although none goes uneaten ;)).
I’m trying to do the 100% Whole Wheat Bread With Olive Oil from “The New Healthy Bread In 5 Minutes A Day” using the levain. I’ve tried adjusting the flour and water to account for the thinner levain, but have yet to get a great looking loaf. It’s super helpful when you cite weights in your instructions in addition to the volume measurements. To use the levain in your recipes, I’ve understood to use 910g of levain, while reducing water by 354g and reducing flour by 195g; is this correct?
Thanks in advance for your guidance.
For whatever reason, your flour is absorbing less water. Just decrease the water a little bit in your in the levain so that it looks like a thicker Batter than what you’re getting. In general you can use absolute measurements with natural sourdough
The recipe + sourdough starter works!….kinda. Not sour enough for me but I’ll let the starter ‘ferment’ a bit longer & try again.
HELP!: The crust is terribly hard to chew! but the crumb is perfect. What’m I doing wrong?
(BTW, I use an instant-read thermometer & aim for bread center at 210 degrees…quite helpful.)
The flavor will develop with more time and re-feedings, or if you store the dough once it’s mixed. About the crust: Assume you’re checking oven temp with something like https://ow.ly/8CVPU, can get tough results if too cool or too hot. Using a stone, something like https://www.amazon.com/Old-Stone-14-Inch-16-Inch-Baking/dp/B0000E1FDA?&camp=212361&linkCode=wey&tag=arbrinfimiada-20&creative=380725 … also helps with crust.
Hi, I have two of your books and love them. I use them all the time for my family of 7 and rarely buy bread now. I just recently started experimenting with sourdough from The New Healthy book. I have a couple questions. Other recipes seem to talk about discard. Is this necessary? I have just been using the starter and re-feeding the leftovers until I have enough for another batch.
When I see pictures of sourdough online it seems like there is a lot of rise in the jar. Mine doesn’t do this. It smells acidic and has bubbles on top. Is this a problem? I have only made a couple loaves and they seemed to rise okay but i made them in a bread pan because the dough was a bit loose. Maybe add more flour? To the starter or the dough? The flavor was good and I will keep experimenting.
Have you been through all the troubleshooting tips at https://artisanbreadinfive.com/2020/04/20/easy-sourdough-starter-with-new-troubleshooting-tips/
Scroll to the bottom…
Longtime 5-Minute A Day bakers, first time writers 🙂 Happy 2023! We live in Vermont (chilly kitchen) so put the starter in the oven with the light on after 3 days of it doing nothing at room temperature. It started bubbling, but also developed a skin/thin crust on top. I added flour and water and mixed the skin back in but it’s lumpy. Might be the oven with the light on it a bit too warm but wondering about that skin/crust. Thanks!
Welcome!
It’s not a big deal, but you can prevent that by loosely covering the vessel with something. Just be sure it’s not airtight or the container could explode, causing injury (gas will be forming).
Good to know! I have fed it twice as of today and it’s gently bubbling. The skin/crust mostly got absorbed when I stirred it. The oven light tip works well! It does smell a bit cheesy which I think is a good thing.
In the book I talk about a “slightly barnyardy” smell–but it isn’t unpleasant. Also, I just added this trouble-shooting tip (and others) to the post:
If you’re not getting the rise you like, it may be that your starter isn’t quite active enough before use. One fail-safe way to test for this is to take a spoonful of starter and drop it into water. Really “gassy” starter, with lots of bubbles, will actually float on the surface of the water.