10 Things I Wish I’d Put into My Books
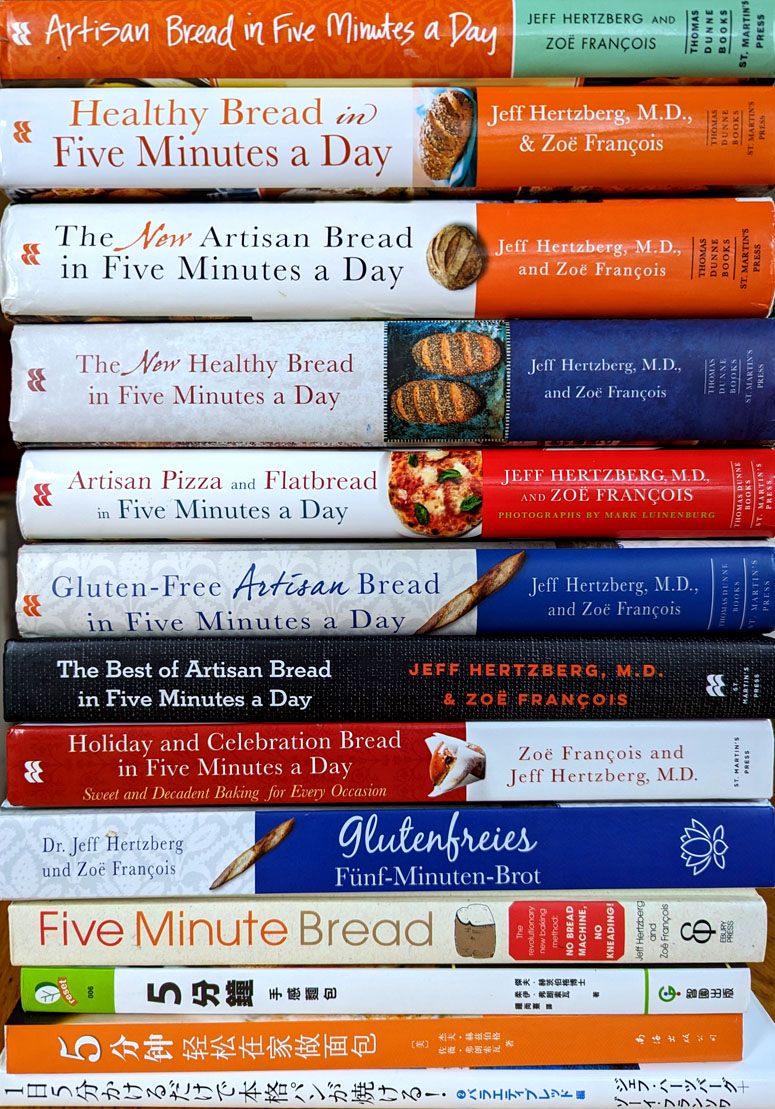
It’s been 17 years since I published my first bread cookbook, meaning I’ve spent more than 17 years learning, tweaking, experimenting with, and obsessing about bread. I included many of those discoveries and realizations in the next seven books, but needless to say I’ve thought a lot about what I’d do differently if I had it to do all over again. As author James McBride once said, “If I had known so many people were going to read that book, I would’ve written a better book.” Just kidding—I still stand by my original recipes, tips, and techniques. But if I knew then what I know now, here’s what I would’ve included:
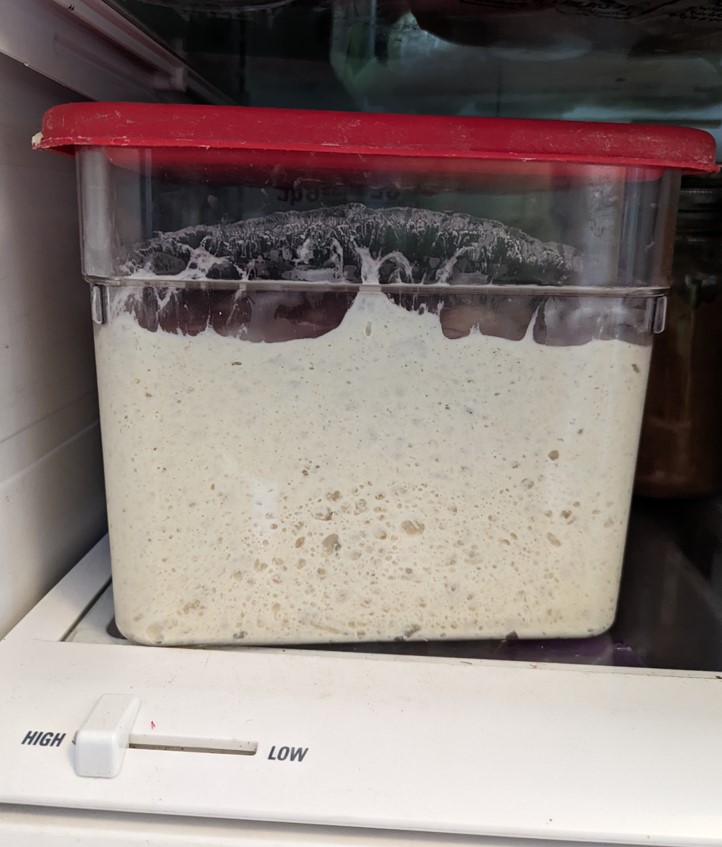
1. Always store the dough for at least a few days before you bake a loaf from a new batch: In as many words, I do say this in the books, but I didn’t want to deny readers from having fresh, hot bread ASAP. Years of trial and error, however, and sampling many, many loaves of bread (cue tiny violin), have convinced me that slightly aged dough is far superior to Day One bread. This means that you might have to stagger batches, but it’s worth it. The flavor deepens and improves in the refrigerator. The crumb develops a more open, “custard-crumb” effect. If you really can’t wait, using a little pre-fermented dough (“pâte fermentée“) can approximate the effect, but not quite as much as aging the dough, which I think reaches its peak at about the halfway point of the recipe’s storage recommendation. That said…
2. …Always use a little old dough (“pâte fermentée“)—about a cup or so—to jump-start flavor in the new batch, and don’t bother washing the dough bucket unless it has eggs or dairy. This is another great lazy-person trick (and laziness is what motivated me to simplify bread-baking in the first place). Just build the new batch on top of the old. And consider turning your old dough into a “sponge.” First, measure out all your ingredients for your new batch. Then, dilute your cup of old dough with water from the recipe, adding a little of the recipe’s flour, and mixing until it’s like thick pancake batter. Add a pinch of the recipe’s yeast, and let it sit overnight before incorporating into the mix. Fully aged dough can be frozen to be used this way, and that’s how I usually do it.
3. Always use a little rye flour in basic white doughs: As little as a tablespoon or two of rye in a four-pound batch deepens flavor and improves the character of white bread. Try this with my basic white-flour recipe and you’ll see what I mean. Whole wheat flour has a similar effect, though not as dramatic. Either way, it takes just a little to heighten and enhance the flavor of white bread without sacrificing its classic deliciousness.
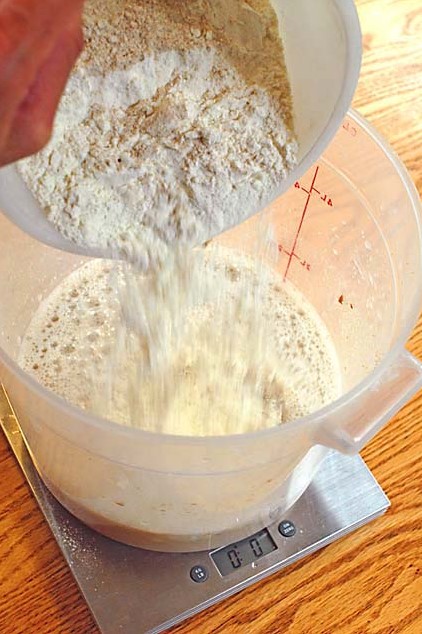
4. Weigh your ingredients: Forget about cup-measures. When my 2007 book was published, it, and most U.S. recipes were written for cup-measures; my subsequent books give weights as well as volumes. With the availability of inexpensive digital scales, the food world’s recognized weights as a more accurate way to measure ingredients, especially flours. If I were starting now, all my recipes would be in metric weights only, which yield much more intuitive numbers. The basic recipe in tip #1 above would be based on 1,000 grams of flour, and 750 grams of water (or 75% hydration by “Baker’s Percentage”).
5. Rise times may vary. Don’t sweat it. In my first book (2007), I called for 1.5 tablespoons of yeast, which is a lot for four pounds of dough. I wanted there to be zero chance of failure, because this book was aimed at non-bakers, many of whom think of yeast as the great bogeyman of the kitchen. And yes, that high yeast dose meant that in pretty much any kitchen, at pretty much any temperature, you’d get full and fast rising, with the dough at least doubling in volume within two hours. But some readers found the yeast flavor too strong, so in subsequent books, I called for 1.0 tablespoon of yeast. But that means that sometimes the rise isn’t complete in two hours, especially if the water or the room is cool. Don’t sweat about this– just let it go longer if it doesn’t seem to have doubled. All this is especially true in the recipes calling for eggs– to prevent slow rise there, let your eggs come to room temperature before using in recipes, and per USDA recommendations, refrigerate egg dough at the two-hour mark. Speaking of slow rising–I’ve started mixing my salt with the flour, rather than the water. My guess is that this doesn’t make much difference, but salt has some inhibitory effect on yeast, and salty water may slow your initial rise. This becomes more of an issue when you go to 1 tablespoon or less of yeast, or if you’re trying cool-water rising. Which brings me to…
6. Consider the low-yeast version of my recipes: I embraced this practice too late for my first book, but you can considerably decrease yeast, even from the 1 tablespoon that I now consider standard for a 4- to 5-pound batch. Many people seem to prefer the flavor and consider the longer initial rise time to be worth it. If you try this with egg-enriched bread, the USDA recommends that it go into the fridge at the 2-hour mark, and it will not have doubled by that time. Don’t worry, it’ll catch up during dough storage. Check out my post on the low-yeast version. If you really want to try a slow rise, which some people find heightens flavor, use cool or even cold water. But expect the rise to take days, and don’t do this with egg or dairy doughs.
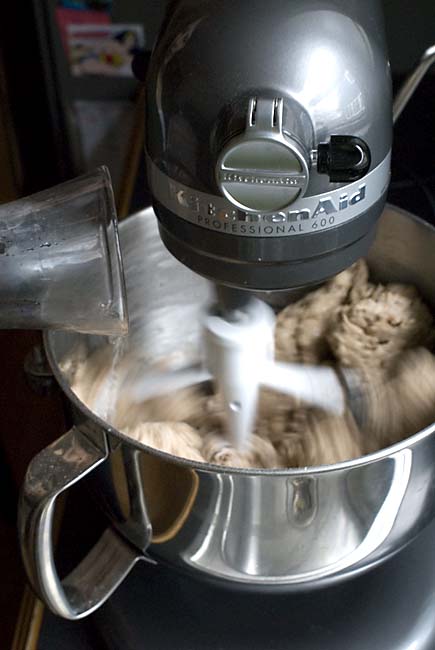
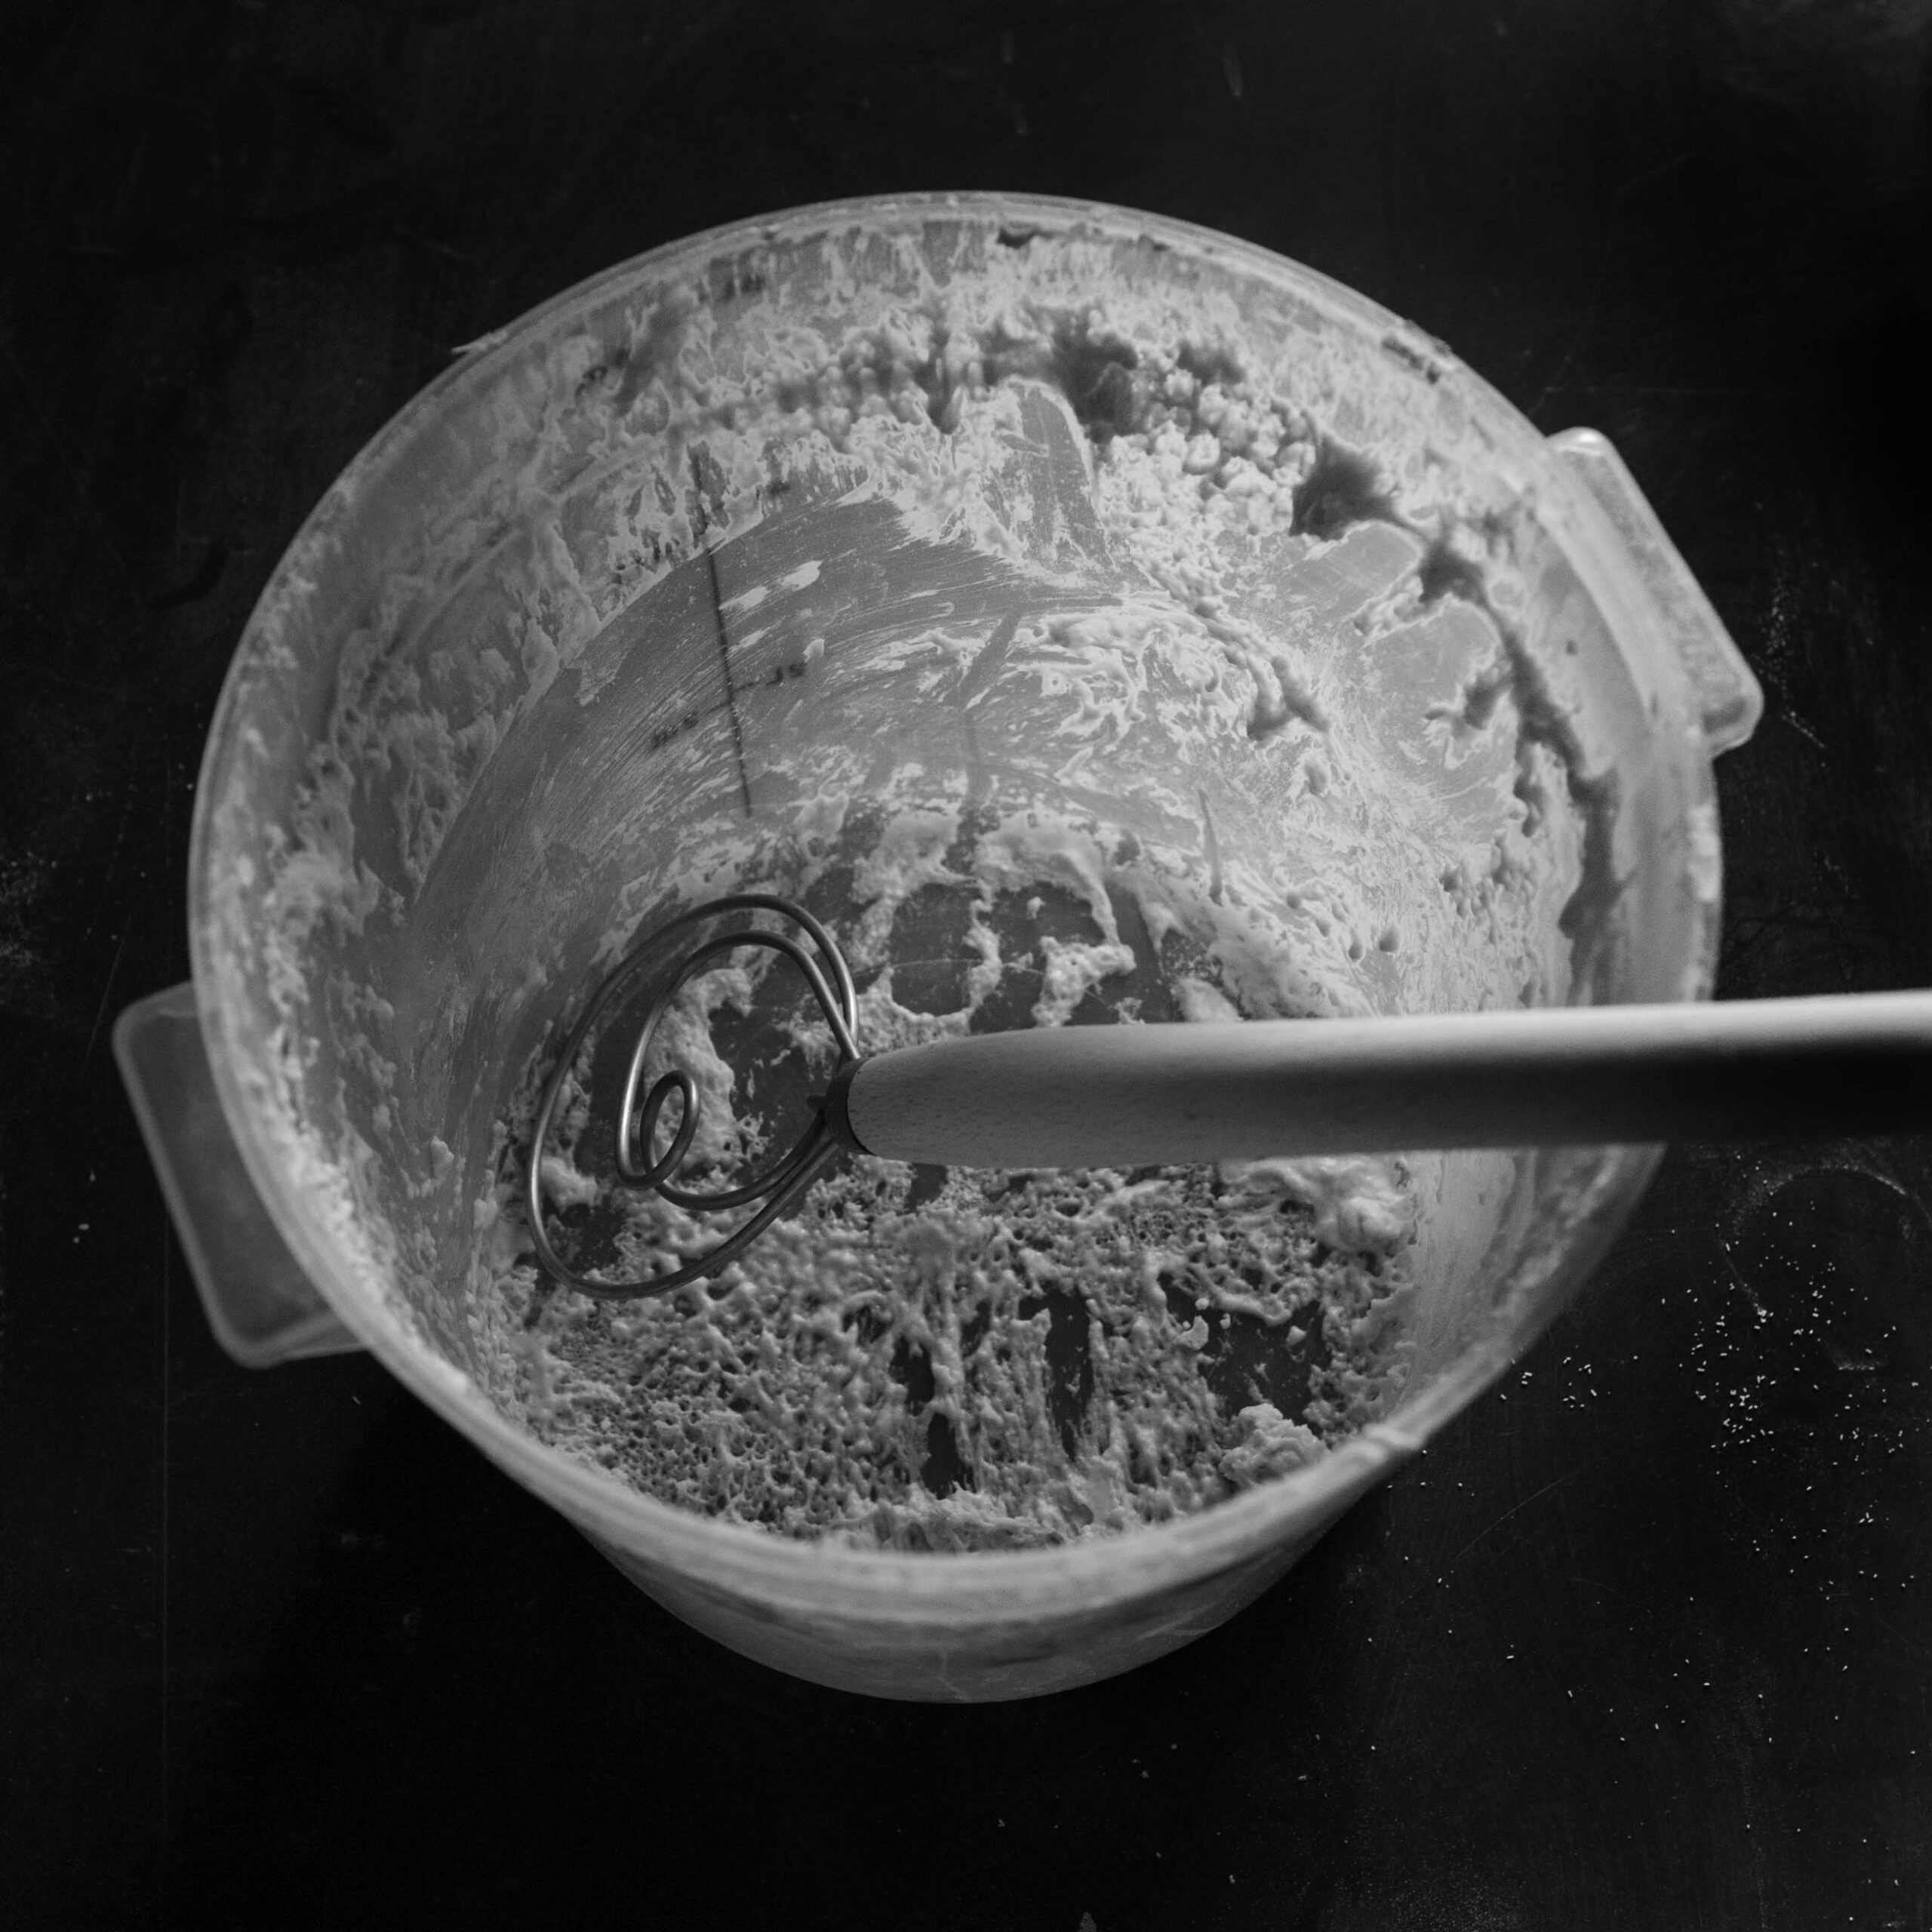
7. Get a stand mixer, and use the dough hook: In the early days, I always mixed by hand. It was satisfying, worked just fine, and it proved that you don’t need special equipment to bake bread at home. But if you’re making dough frequently, like I am, or if you have wrist or shoulder problems, the stand mixer is a miracle. I like the six-quart machines, the bowl-lift variety, because the “tilt-head” models can drip dough all over when you tilt back the head. And the six-quart capacity allows you to rise and store the dough in the same vessel in which you mixed. While I’ve used a Kitchen-Aid exclusively (my first one is going strong at 10 years), I’ve heard great things about other premium brands as well (disclosure: Kitchen-Aid sponsored a post here on the website when I reviewed the machine I use today). In my books, I make a distinction between using the dough hook versus the “paddle/flat beater” attachment to mix wet dough. Bottom line: I think the dough hook works better, regardless of your machine’s capacity (yes, that is the paddle attachment in the photo above, I loved the blur 😊). If you make recipes from my gluten-free book, the results are definitely better if you use a stand mixer. Gluten-free flours really like to be fully emulsified for best results.
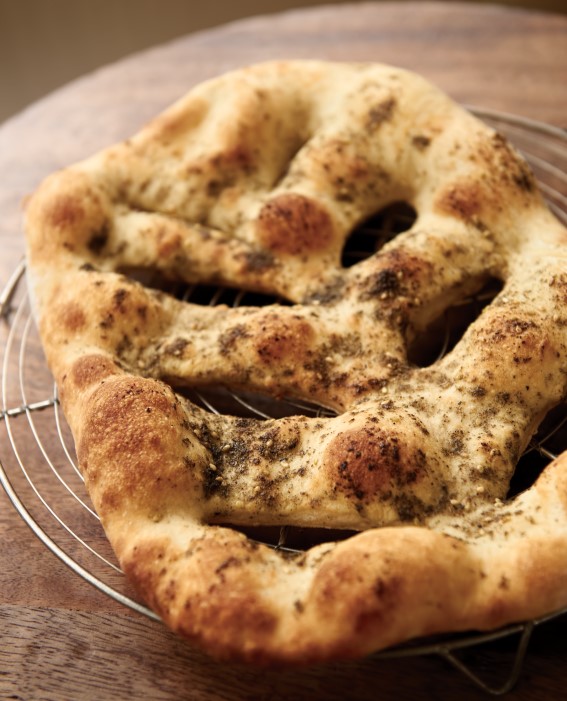
8. Fully aged dough loses some rising power, but it still makes great and flavorful flatbreads, like the fougasse above, or any pizza, from my Pizza and Flatbread book. That book is out of print and hard to find, but I have a fougasse recipe here on the website. Truth be told, pizza and flatbread have been my favorite adventures in bread, and fully aged dough works great here. You don’t need an exuberant rise with pizza or flatbread.
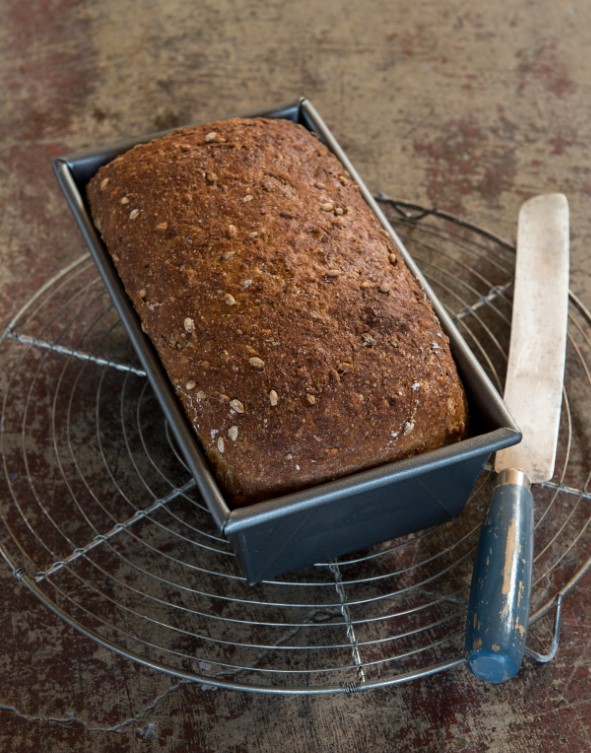
9. It’s OK to lower the oven temperature for loaf-pan breads like this one, especially for recipes high in whole grain flour: In the books, I tried to keep everything simple and consistent, so virtually all the lean breads (those made without eggs, sweetener, or much fat) are baked at 450F. Some readers, in some ovens, found that the breads were over-browning before the interior was fully baked, especially in deeper pans. If this is the case for you, turn down the heat to 400F and bake longer–it can be an hour or more for a big loaf-pan bread.
10. Sacrilege alert! Freezing bread works: I spent years as a home-based consultant and author, testing bread recipes all the time, with 24-hour access to my kitchen—and plenty of fresh bread. I found myself hacking off hunks of it all day, and eating it with butter, cheese, and jam. At one point, I must have been eating at least a half-pound of bread a day. Even if it’s whole grain—and it wasn’t always—that can’t be healthy. I had to stop the madness! If like me, bread is your weakness, consider removing the temptation: slice the bread as soon as it’s cool. Reassemble the loaf, put it into air-tight storage (I use two layers of plastic produce bags), and freeze. You can chisel off a slice (or other reasonable portion!) with a table knife, then defrost or toast. It’ll still better than anything you can get in the supermarket.
BONUS ITEM: NUMBER 11:
11. Let 1 pound (or bigger) round or loaf-pan breads rest for 90 minutes (not 40), and cover them while resting: In my first books, I called for a 40 minute rest after shaping the basic 1-pound ball-shaped bread, and for that very short rest-time, the dough surface doesn’t dry out much. Unless you’re in a very dry environment (the desert, or winter anywhere). Some people found that the rise was restricted following those directions. To take your breads to another level, cover the resting shaped loaf with plastic wrap or a roomy overturned bowl, and go for 90 minutes. Skinny loaves, or rolls–can stick with short resting times.
Note: BreadIn5.com is reader supported. When you buy through links on the site, BreadIn5 LLC earns commissions.
I have the original book. If I want to purchase an updated book that incorporates much of the information above, would I purchase The New Artisan Bread in Give Minutes a Day? Thank you.
Not exactly, and I don’t want you to be disappointed. In parts, yes, but not emphasized, which is why I did this post. My advice would be to take it out of the library before buying (can’t believe I’m saying this!).
I love your thorough honesty, And yes, I started by checking out your first book from the Library and photocopying recipes.
Heheheheheh
I have 3 of your books and have been following you for years. Thanks for the e mails. Can we have them more often??
Hahahah! Thanks for your support, it means a lot. Unfortunately, the books are not my only job, and it’s tough to find the time. I’ll work on it though!
I love all the books and have them since they first started coming out, buying them as gifts for my non bread baking friends. While I had made bread often before loved the wide variety and the whole process. The new tips, especially how to incorporate a little from the last for the new and the rye flour trick, can’t wait to use these.
Thanks for the kind words!
I love your books and have 5 of them. I will incorporate these into them. Lately my breads have been “gummy” inside after baking, not sure what I am doing wrong, I have not had this problem before. Thanks for the new tips!
Hmmm, that’s very surprising if it hadn’t been happening before. The changing how you’re measuring? You may have to decrease the water a bit.
That would be so frustrating. I am wondering if you have changed flour sources lately. Different flours behave differently.
Love, love, love this post! Such very helpful!
Fantastic, for some reason this was incredibly fun to work on.
I’ve been a fan since the first recipe came out, and I actually have a pre-publication proof of the first book that I found at a used book store.
While the master recipe is great, our favorite is the semolina bread, followed by the pumpkin brioche (made into cinnamon rolls). I got my German neighbor hooked on the method to make her own Brotchen when you posted about that on the website.
I actually have the olive oil bread in the oven as parmesan peppercorn knots as I type.
One of these days I’ll actually get around to trying your deli rye – I’ve been using Bernard Clayton’s corn rye (with the overnight onion starter) for over 30 years and it comes close to what I grew up with (NY/NJ ethnic communities), but I’d sure love to see if an easier recipe like ABin5 can produce something similar. Any chance for a good NY “hard roll”?
With the deli rye– it’s better as it ages (within limit)–as above.
I think you mean a Kaiser Roll, and I’ve tried to do it, check out: https://artisanbreadinfive.com/2009/03/03/free-book-giveaway-who-can-fix-my-kaiser-rolls/
… but my dough doesn’t quite have the dough strength. It might work better with bread flour as a swap for the AP– but you’d have to experiment.
My brother and I and our families live all over the country and are big bakers, including your Bread in Five recipes. About a year ago we became huge advocates of your rye bread and experiment regularly. I now commonly replace 1/4 to 1/3 of the AP flour in your basic recipe with rye flour. A naturally sweet and savory version includes adding raisins and crushed walnuts. So great to see this concept in your article!
Awesome! That recipe is how I started with improvisation.
Thanks for the upgraded tips. Another kudo – I am especially grateful for the recipes for rye and pumpernickel. That type of bread has become hard to find in any non-fluffy or affordable form.
yep! It basically doesn’t exist in stores anywhere. Specialty bakeries yes, but it isn’t always good.
Thanks for sharing all this great info! I will definitely put these tips into practice.
Love your thoughtful insight into what you have learned over the years! Experience is a key here Thank you.
PS I totally agree with all especially #1! Thanks Jeff
I have been a follower since the first book, now have 5. My 3 daughters have and use also. Am going to get the GF one, as youngest is gluten sensitive and I cannot do on my own! I know you will save me.
Thanks for your dedication, and yes I am a carb addict.
Thanks for the kind words, everyone!
I began making bread with your first Bread in 5 book right after it came out so many years ago. It was the no-knead method that caught my attention. Then Healthy Bread in 5 came out with the whole grains I wanted to use, and then the New Healthy Bread in 5 minutes a day! I absolutely love this bread journey I’ve been on!
My friends and family have raved about my homemade breads for years and I have had the knowledge that my bread was made with only the best healthy ingredients and none of the commercial ingredients and additives I didn’t want. Vollkornbrot, Betsy’s Seeded Oat and the Crock pot bread in the summer are some of my special favorites.
Thank you, thank you for these ten tips- I will be writing those notes in, right on the recipe pages in my book along with all my other notes entered over the years. Thank you for turning your hobby into such a gift shared with all of us!
Thanks so much for the very kind words. This was great fun, and always has been for me.
I carry over 200 grams of Master Recipe dough from one batch to the next, and it makes fantastic bread. (I set it aside in a mason jar when I make a new batch of dough so I don’t forget to later.) Let it rise a touch, and stash it in the fridge for up to two weeks. Take it out, let it warm up and rise a bit, and it’s ready to add to the next batch. (I actually warm mine using my sous-vide wand.)
Yeast, yeah. The Master Recipe calls for 10 grams, I usually use about 5-7. I think I picked that up from Cook’s Illustrated about ten years ago.
I don’t know where I picked up the tip about lowering the temp, but I’ve been doing that a while. Mine bakes at 420 and comes out wonderful.
I’ve been making this bread weekly for my wife’s breakfast for about six years now. She loves it.
Fantastic, I do some version of all of those now. Except generally, all whole grains.
Love your recipes. Thanks for all the tips. I just measured all ingredients out using a scale and grams. Trying my first batch of whole wheat bread.
It will work!
Jeff,
I have followed your (and Zoe’s) posts from the beginning as well as buying your books. So so helpful for a novice baker, Now I am noting on social media a big increase in sourdough use and recipes….although your Artisan Bread books have mention, it seems secondary….I am interested in comments in that regard.
Still love your posts…..keep them coming. Thanx Alan
Two of the books have entire sourdough chapters:
1) https://artisanbreadinfive.com/BestOfArtisanBread
2) https://artisanbreadinfive.com/healthy
… or you can find my post on sourdough here on the site, with lots of comments, by typing the word “sourdough” into the Search Bar above.
Why is your dough not considered sourdough? Since it does sour somewhat in the refrigerator I think of it that way.
Well…because there are purists out there in the bread-baking world, and they have a point. My method depends on commercial yeast for rising, even though natural yeasts in the flour start to add flavor when you store. I’d have to agree that the flavor development is not really what you get with true sourdough (no added commercial yeast). In general, I’ve found that busy people don’t want to invest the time for the difference in flavor that you get from true natural sourdough without commercial yeast (including me!). And also– some people don’t like the flavor of true sourdough–that’s just a matter of taste. That said, my formula for natural sourdough is in two of my books, and I do it once in a while when I have time:
BestOfArtisan: https://artisanbreadinfive.com/BestOfArtisanBread
NewHealthy: https://artisanbreadinfive.com/healthy …
… or a version here on the website, just type “sourdough” into the Search Bar above.
Thanks to your books, I haven’t bought a loaf of bread in more than 13 years. It gave me confidence to branch out into other types of bread baking as well, including sourdough. (By the bye, I often incorporate sourdough discard in a new batch of your dough)
So nice to hear. When I do sourdough, I do the same. My grandmother, who inspired the books, would have been appalled at the waste! There’s good flavor in there.
Your post arrived at the perfect time, the day before starting a batch of bread with your recipe for the first time. I study many bread baking processes, and it’s time to start exploring yours. So I included some aged dough that I am baking this morning and added a bit of rye flour. Will bake next week. I do so appreciate your dedication and generosity. My bread will turn out wonderfully, but if not as great as I would like, practice will be the key. One of the qualities of a successful baker (in my opinion) is a high tolerance for failure. Lucky if you have chickens when the result is intolerable, but then there are plenty of wild birds who are hungry in January.
Love that metaphor! Yes, you definitely have to tolerate failure and experimentation
Hi Jeff:
Your favorite book of mine is the pizza and flatbread one.
For New Year style thin crust pizza, how long should you let the rest? I have found that there is a lot of spring if you baked the pizza the same day the dough was made.
It’s great to wait 40-60 minutes after shaping the ball– it’ll be easier to get it very thin if you do that, see https://artisanbreadinfive.com/2012/01/25/secrets-of-cracker-crust-pizza-plus-our-tv-segment-with-saturday-night-lives-colin-quinn/
It’s no exaggeration to say that your gluten free bread book changed my life! When I had to give up wheat I thought I was stuck with the dry tasteless store brands forever, but the bread I make from those recipes is amazing. Now I have a grandson and DIL who are also wheat free and making delicious bread for them too is so heart filling. Thank you for your amazing book, I’ve recommended it to so many fellow travelers on the GF path. If you ever wanted to explore GF sourdough I would certainly be on board!
Thanks for the kind words… I haven’t tried gluten-free sourdough, but people here on the website have experimented with it, apparently successfully. If you type the word sourdough into the search bar above, you can see how this works for weight-based starter, and I think this could be a starting point for gluten-free sourdough starter. I’d be skeptical about long-term storage of such a dough based on this.
I love your bread making ways and have two of your books. My daughter has celiac and I would like to you use the GF book more often but I really dislike having to make the flour blends. I wish your recipes listed the individual ingredients rather than calling for the #1 or #2 flour blends.
Ah, three of my books do exactly this, in their gluten-free chapters:
BestOfArtisan: https://artisanbreadinfive.com/BestOfArtisanBread
NewArtisan: https://artisanbreadinfive.com/artisan
NewHealthy: https://artisanbreadinfive.com/healthy
Not as many recipes, but you make the recipe with individual ingredients rather than the flour blends I thought people would want who are making ONLY GF breads. Another approach would be to break down the proportions of flours in the blends and apply them to individual recipes in the Gluten-Free book. Some arithmetic there, it’s true.
I e had your book the newer edition for forever. I think a decade lol. Finally actually trying to bake a loaf of bread now for the first time after seeing this post on Facebook float by! Wish me luck 🙂
Luck! Thanks for trying the recipes…
Thank you for this humble and helpful post! My family has had a wonderful year of delicious bread since I discovered your New Artisan Bread in 5 book. Feeding five growing kids on a budget is no joke, and constantly having nutritious dough in the fridge, ready to bake, has helped make it possible. I wish you and Zoe could see the 3-year old reenacting baking your bread in a Dutch oven in his play kitchen!
Just made our favorite sandwich bread – the buttermilk bread – using four of your tips from this post. The kids noticed the positive difference and I couldn’t believe how easy you had made it to get even better results!
So glad to hear all this… Thanks for trying my method!
I love how you add these tips and details on your website so that we can improve our method and you’re still responding to our questions, even after 17 years! Most of all, I’m so grateful you didn’t do some of these things early on. I have always appreciated the way the recipes are easy for anyone to use. I have a scale now, but I didn’t before and I would have never tried this method if I needed one first. Need I mention that your recipes 17 years ago are still better than most store-bought bread? So please keep doing it all, hehe!
Because the method is so easy, I sent the star bread recipe to my siblings living overseas over Christmas break. We prepared the dough recipe ahead of time and then we gathered on a video call for several hours and had fun making this together. Thanks again!
RC, thanks so much for the kind words, so glad you are enjoying the recipes!
When you say to let the spinner sit overnight- in the fridge or on the counter?
Sorry, I think you have a typo in here… Let the spinner?
Definitely meant sponge mixture- from old dough. Should that be in fridge until you add remaining flour or at room temp?
I do it overnight at room temperature. I’m guessing it will work in the refrigerator, but it’s going to take several days to develop flavor so I don’t do that.
Thank you for this update. I have your 2013 edition out of the library right now. Since I live by myself I anticipate always cutting the recipes in half. Can I get away with a 2 quart storage container? Most brands seem to offer a choice of 2 or 6 quarts, but not 3. Fridge and freezer space are at a premium. Thank you!
Yes, but just barely. Keep an eye on it and if it starts to get away skim off some and put it in another container
Thanks so much for your prompt reply and warning. Since my intentions don’t always align with reality, I think I’d best skip the 2 quart. I’ve just found a round container for flour that’s the same diameter but taller. I can just mark it myself with a dry-erase marker or painter’s tape. Thanks again for your willingness to take questions!
I bought the first edition of your book when it came out, and now that I work from home I’m back in the swing of baking bread. So easy–shape and rise in the morning, bake, then there’s fresh bread for dinner! And I’m so happy I’ve stumbled onto this post. I’ve been experimenting a bit with different flours (it’s been a great way to use up some extra masa in the cupboard! Today I used 1/8 part whole wheat flour and 1/8 part bread flour and the rise is amazing already.) I only use a packet of yeast (2 1/4 tsp) and do a longer bulk ferment and have been really happy with the results. I’m still playing with scoring/improving hydration to prevent blow-outs and improve designs, as well as adding in stretch and folds, and it’s been so fun!
Fantastic Mari, so glad the recipes are working for you!
Hi Jeff,
I am new to your bread making method. I have tried to make bread the old way with limited success (did not get a good rise, bread texture was more cake like). I made my first Master Recipe today and ran into a problem. I made a half recipe and cut your measurements in half (weight method, metric). My values were very close to your weights (water: 340g, flour: 455g, etc). When I put everything in my stand mixer the dough was very, very dry, not the wet dough I have been reading about. I had to add 168g of water (though that was probably to much) to end up with a wet dough that would conform to the bowl it was in.
Any ideas on what I did wrong?
Will my dough be usable?
Thanks for your help,
Mark
This is a puzzle, because your ratio is exactly the same as mine, assuming you didn’t make some mistake with the scale (it happens). The only explanation to come I can come up with is that your flour was different than the one I tested with for the recipes. That was Gold Medal, unbleached all-purpose U.S. flour. If you used bread flour or any other high protein flour, the dough is going to be too dry. Even if the measurement was exactly right. What brand of flour did you use, what type, and where are you located?
I’ll reach out…
I’m interested in the holiday/celebration bread book that you mention is hard to find. How do you suggest I can acquire a copy?! Kind regards – Elise
I’ll reach out…
Great post. My wife and I have been making bread using your recipe for over 10 years. In what must be a really strange coincidence, we were talking about the bread yesterday and I mentioned that I had learned 2 things that were hopeful to our bread making:
(1) letting the dough sit in the fridge for several days make a better tasting and better “feeling” bread; and
(2) our world changed when we started letting the bread cool, slicing it and then freezing it (we flash freeze it then put in Zwilling resealable vacuum sava bags).
Now today, literally the next day after that conversation, I see this post. Now to see if some of the other tips can be incorporated into our workflow.
Terrific, check back if you have questions!
If you add the rye flour to your basic recipe, do you recommend removing an equivalent amount of the all-purpose flour, or is that only necessary if you are substituting a large amount?
Also, is there a big difference between incorporating some old dough into your new batch using the steps that you outlined above compared to your description on page 62 of your revised/updated edition of your book (simply adding it into the water of the new batch?
Thanks!
Yep, remove some of the white flour as you suggest. And between those two approaches… Those are the same!
I have your original book and absolutely love it. I’ve been tweaking the recipe just to incorporate fresh milled flour, but was wondering if your other books actually covered that subject.
Thanks for the kind words! There’s nothing on that in the books specifically, but I did a post here on the website– just type “Using Fresh-Ground” into the Search Bar above.