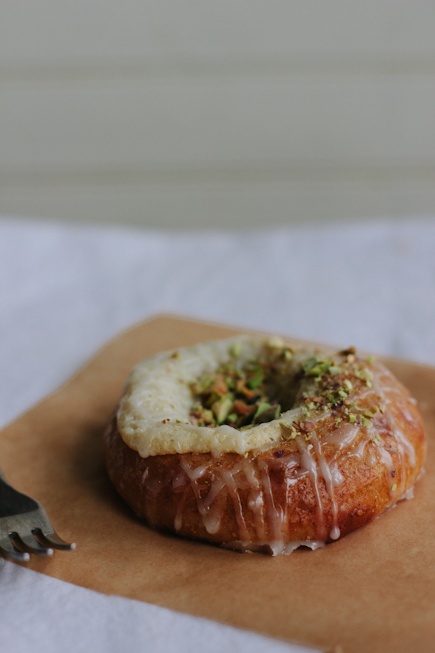
If you have whole wheat brioche dough or other enriched dough (see below) in the fridge; and you want something sweet that isn’t a lot of work, this is the recipe for you. See below for links to other enriched dough recipes here on the website that also work beautifully, but this one gives some whole grains. You’ll also need almond paste, goat cheese, and pistachios. If you’re not a goat cheese fan, swap in cream cheese, lemon curd, or orange curd.
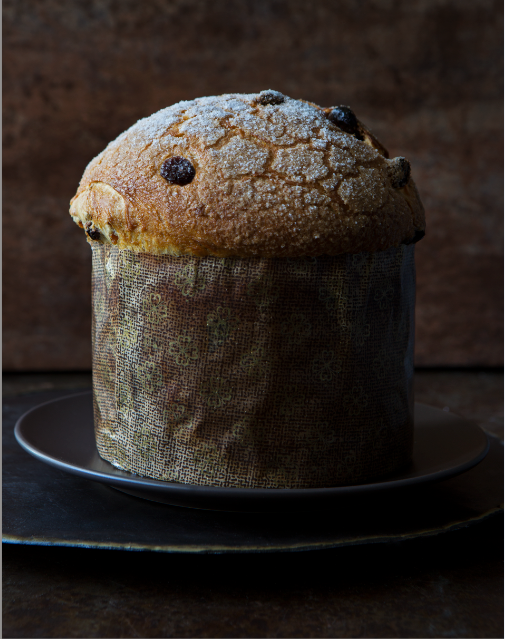
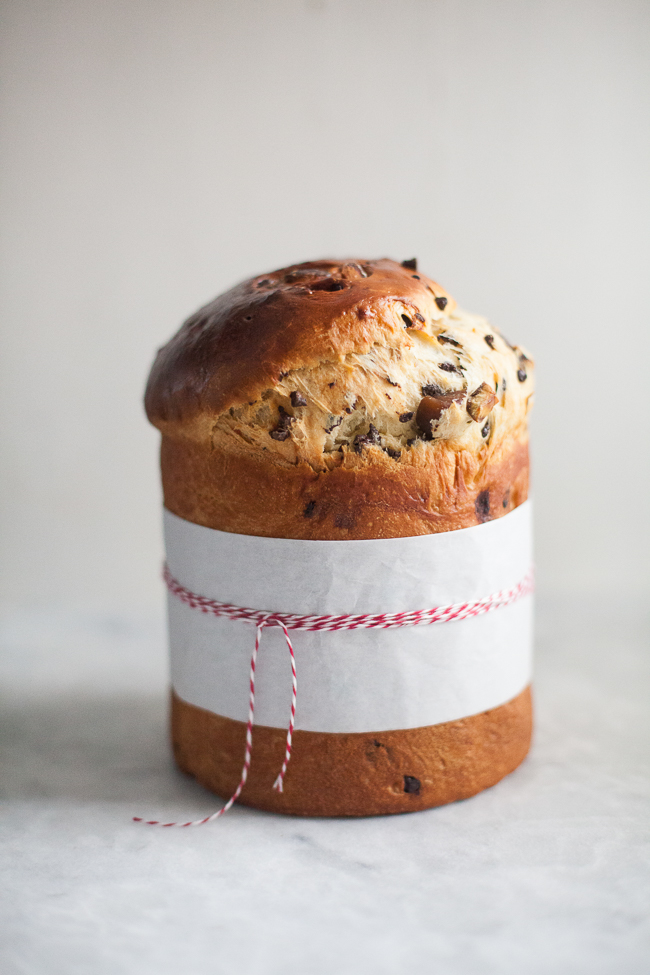
Panettone is a traditional Christmas bread sold all over Italy during the holidays and now, the world. It has a great origin story (which might be true!). A young nobleman by the name of Ughetto Atellani fell in love with the daughter of a poor baker named Toni. In order to impress her, Ughetto disguised himself as a pastry chef’s apprentice in her father’s bakery. He creates a tall fruit studded bread to present to her father, calling it “Pan de Toni.” The bread, rich with eggs and butter, sweet with honey, scented with vanilla and lemon zest, with the finishing touch of dried and candied fruits was a success in the bakery and wins the admiration of the lady and the father’s respect. The baker blesses the marriage and Ughetto marries the daughter.
Today this sweet loaf is no longer just for Christmas, appearing at other holidays throughout the year and served sliced and toasted for brunch and as a dessert with a selection of cheeses and sweet wines. The traditional method for making panettone was done over the course of several days, and included long sessions of kneading and allowed for up to 20 hours of rise time in order to create a flavor that is both sweet, but also has a complexity caused by the fermentation of the dough. In today’s recipe, you can get these great flavors without having to labor over it quite so much. Although you can bake the bread after only a few hours of refrigeration, if you let it sit for 24 hours it’ll develop its full flavor and will be easier to work with.
If you’ve never had roasted chestnuts, they are one of the sweetest and creamiest of nuts and the absolute perfect pairing with chocolate–and the stuff of Holiday memories. This elegant chocolate chestnut bread is from Holiday and Celebration Bread in Five Minutes a Day and is super easy to make. If you have a tall panettone mold, it makes a really festive loaf for the holidays or a great gift, along with the book. You can also bake this in a loaf pan or even muffin cups. And check out the Instagram video here!
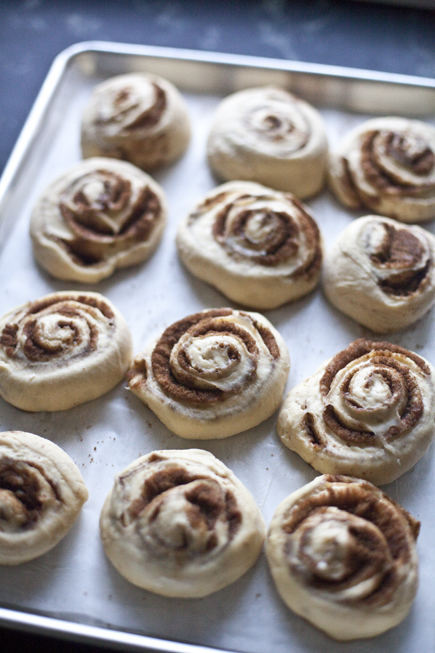
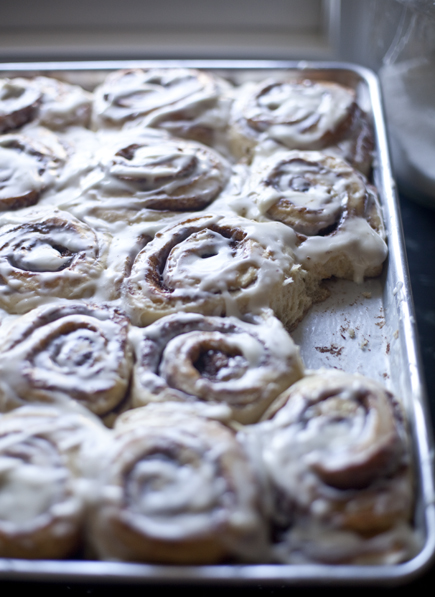
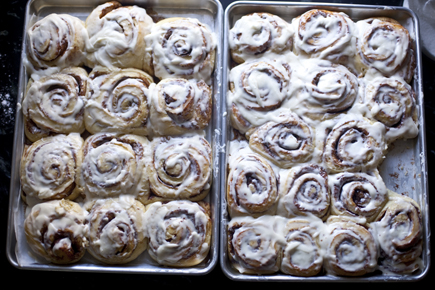
Put the rolls on a baking sheet prepared with parchment, you can also use a Silicone Baking Mat, covered them with plastic wrap, stuck them in the refrigerator to rise overnight, or do a ninety-minute rise at room temperature.
Preheat the oven to 350°F,
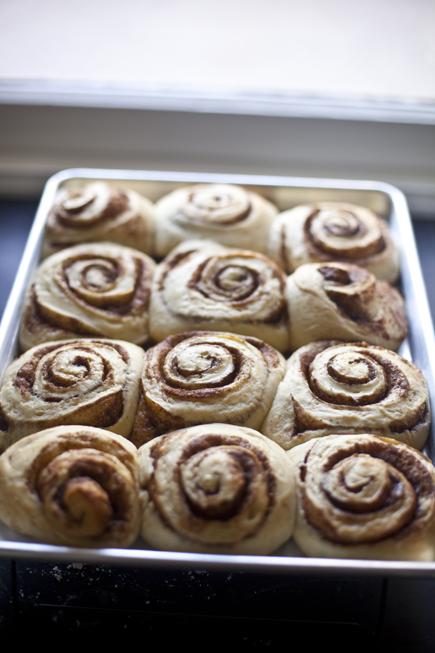
…and bake them for about 30 minutes.
As they bake, make the icing, and spread the icing over the rolls while still a bit warm, so it melts all over.
Note: Red Star Yeast is a sponsor of BreadIn5’s book promotion and other activities, and provided free samples of Red Star and Platinum yeast for testing.
BreadIn5.com is reader supported–when you buy through links on the site, BreadIn5 LLC earns commissions.
‘At no other time (than autumn) does the earth let itself be inhaled in one smell, the ripe earth; in a smell that is in no way inferior to the smell of the sea, bitter where it borders on taste, and more honeysweet where you feel it touching the first sounds. Containing depth within itself, darkness, something of the grave almost.’ – Rainer Maria Rilke
I’ve got peaches and apples in my kitchen. Summer is gently fading, and autumn is slipping in with an occasional cool breeze, a golden leaf here and there. I don’t know how August is already over, but here is September with its crisp ciders and juicy pears. I’m ready for bread-making again, and am starting the cooler months off with this brioche cake.The juicy peaches and the apple-cinnamon flavor are a good combination; a perfect intermingling of the seasons.
Filling 1 small apple, peeled and grated (I used a Gala apple) 1/4 cup granulated sugar Pinch salt 1/2 cup brown sugar 1/2 teaspoon cinnamon 2 tablespoons butter, melted 1 cup peeled and diced peaches
Glaze 1 cup confectioner’s sugar 2-4 tablespoons water
Remove 1 pound of dough from your dough bucket, and place it on a generously floured surface. Knead the dough a few times, and shape into a ball. Cover with a tea towel and let rest on the counter for 15-20 minutes.
While the dough is resting, peel the apple, and then grate it directly over a clean dish towel. Wring out the dish towel over a small bowl or liquid measuring cup, catching all the apple juice. Set the grated apple aside to use later. Pour the apple juice into a small saucepan, and add the granulated sugar and salt. Bring to a boil over medium heat, and let simmer until the liquid is reduced by half and starting to turn sticky. Remove from the heat and let cool slightly.
Add the brown sugar and cinnamon to the slightly cooled apple juice, and stir to combine. Add the grated apple pieces and stir again to combine. Set aside.
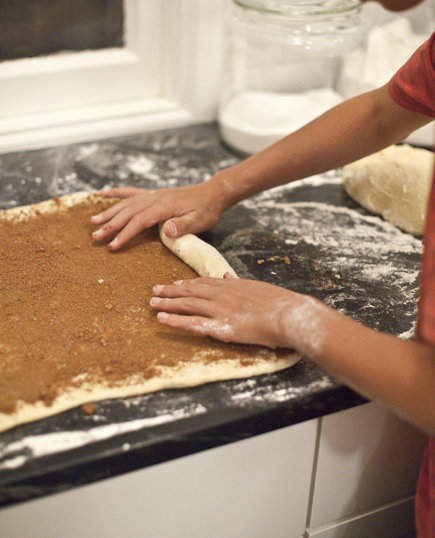
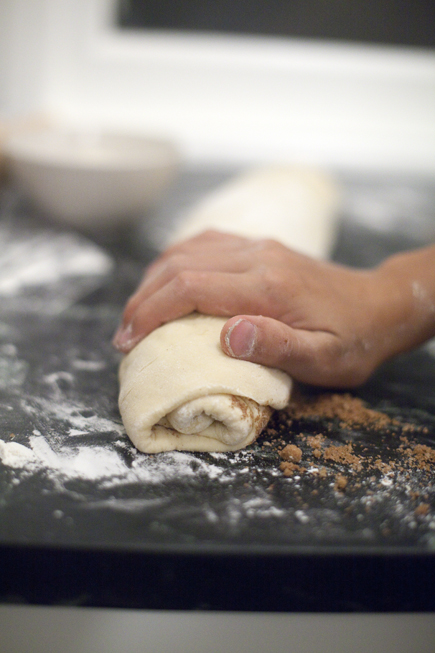
Once the dough is ready, roll it to a 1/4-inch thick rectangle, using flour as needed to keep it from sticking to the counter. Brush the melted butter over the dough. Use an off-set spatula to spread the apple-sugar mixture evenly over the butter, leaving a 1/2 border around the edges. Sprinkle with the chopped peaches. Starting with the long end of the dough, carefully roll the dough into a log. Gently transfer the log to a prepared sheet pan (you may need to use a bench scraper or spatula to help move it). Mine fit on the sheet pan diagonally. Chill the log in the refrigerator for 20 minutes, or until firm.
Using a scissors or sharp knife, gently cut the roll into half lengthwise so the layers of dough and filling are visible, but leave one end still attached by about 3/4-inch.
With the cut sides facing up, gently press together one end of each half, and then lift the right half over the left half, and continue until you have braided the entire roll. Press the ends together.
Starting at the cut end, gently spiral the braid into a circle, no bigger than 9-inches across, making sure not to leave any holes or gaps. If any peaches fall out, tuck them back inside the braid. It’s okay if a little filling leaks around the edges, too.
Place the ring of the spring form pan around the bread. Cover with plastic wrap or a dishtowel and let the dough rise in a warm place for 1-1/2 hours, until puffed and touching (or almost touching) the sides of the pan.
Adjust an oven rack to the middle position, and heat the oven to 350F.
Remove the plastic wrap, but leave the spring form pan around the dough. Bake for about 25-30 minutes, or until the bread is golden brown. Remove from the oven and let cool on a wire rack for 15 minutes. Gently remove the spingform ring from the bread (if it’s sticking, use a thin knife or off-set spatula to help release it).
For the icing Put the powdered sugar into a medium bowl. Add 2 tablespoons water, and mix until combined. If the icing is too thick, add more water, 1 tablespoon at a time, until the desired consistency is reached. Drizzle over warm the warm bread.
Best eaten warm. Enjoy!
Note: BreadIn5.com is reader supported–when you buy through links on the site, BreadIn5 LLC earns commissions.
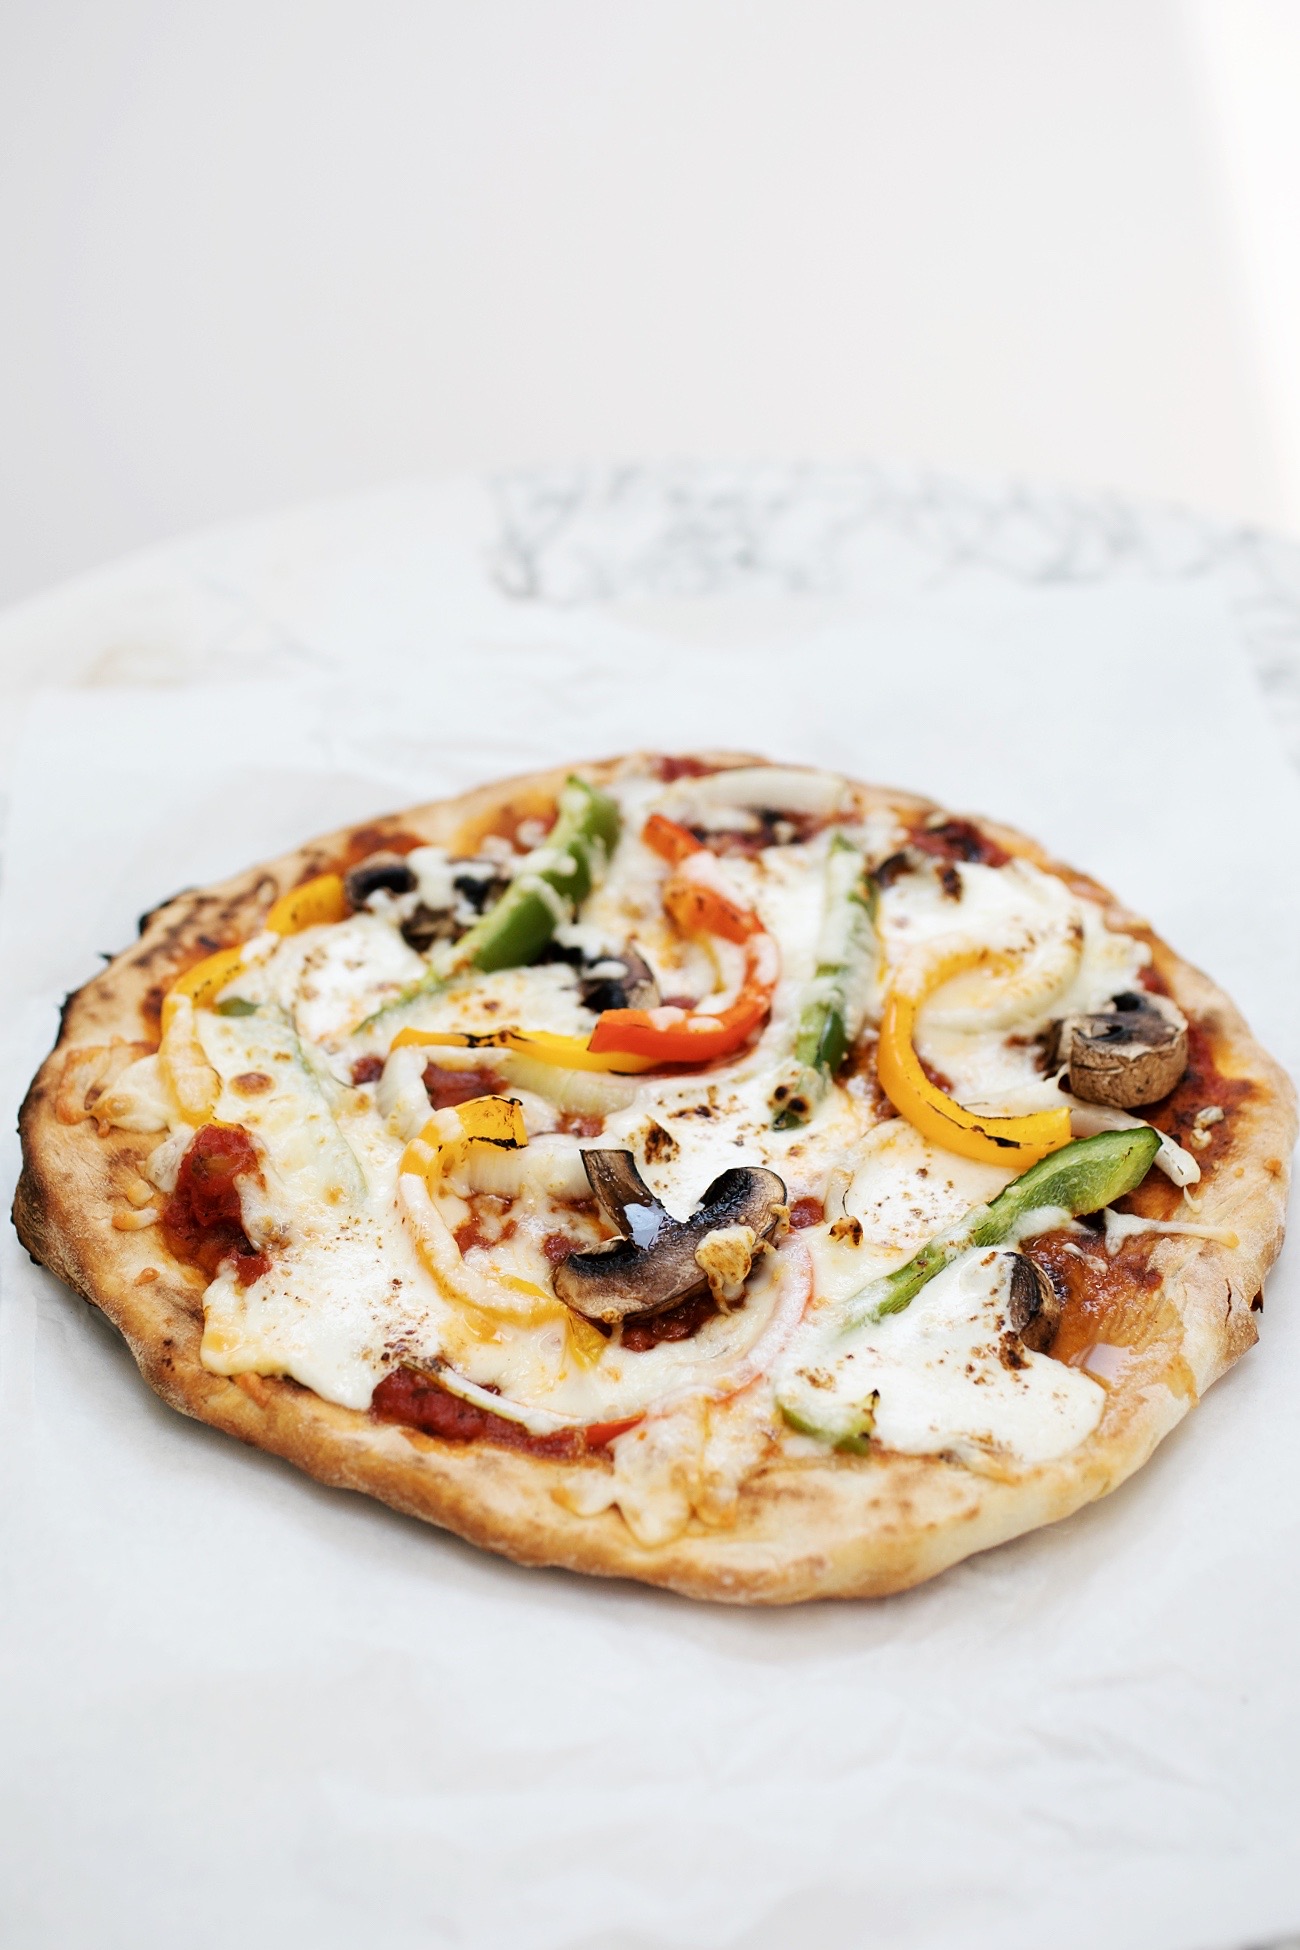
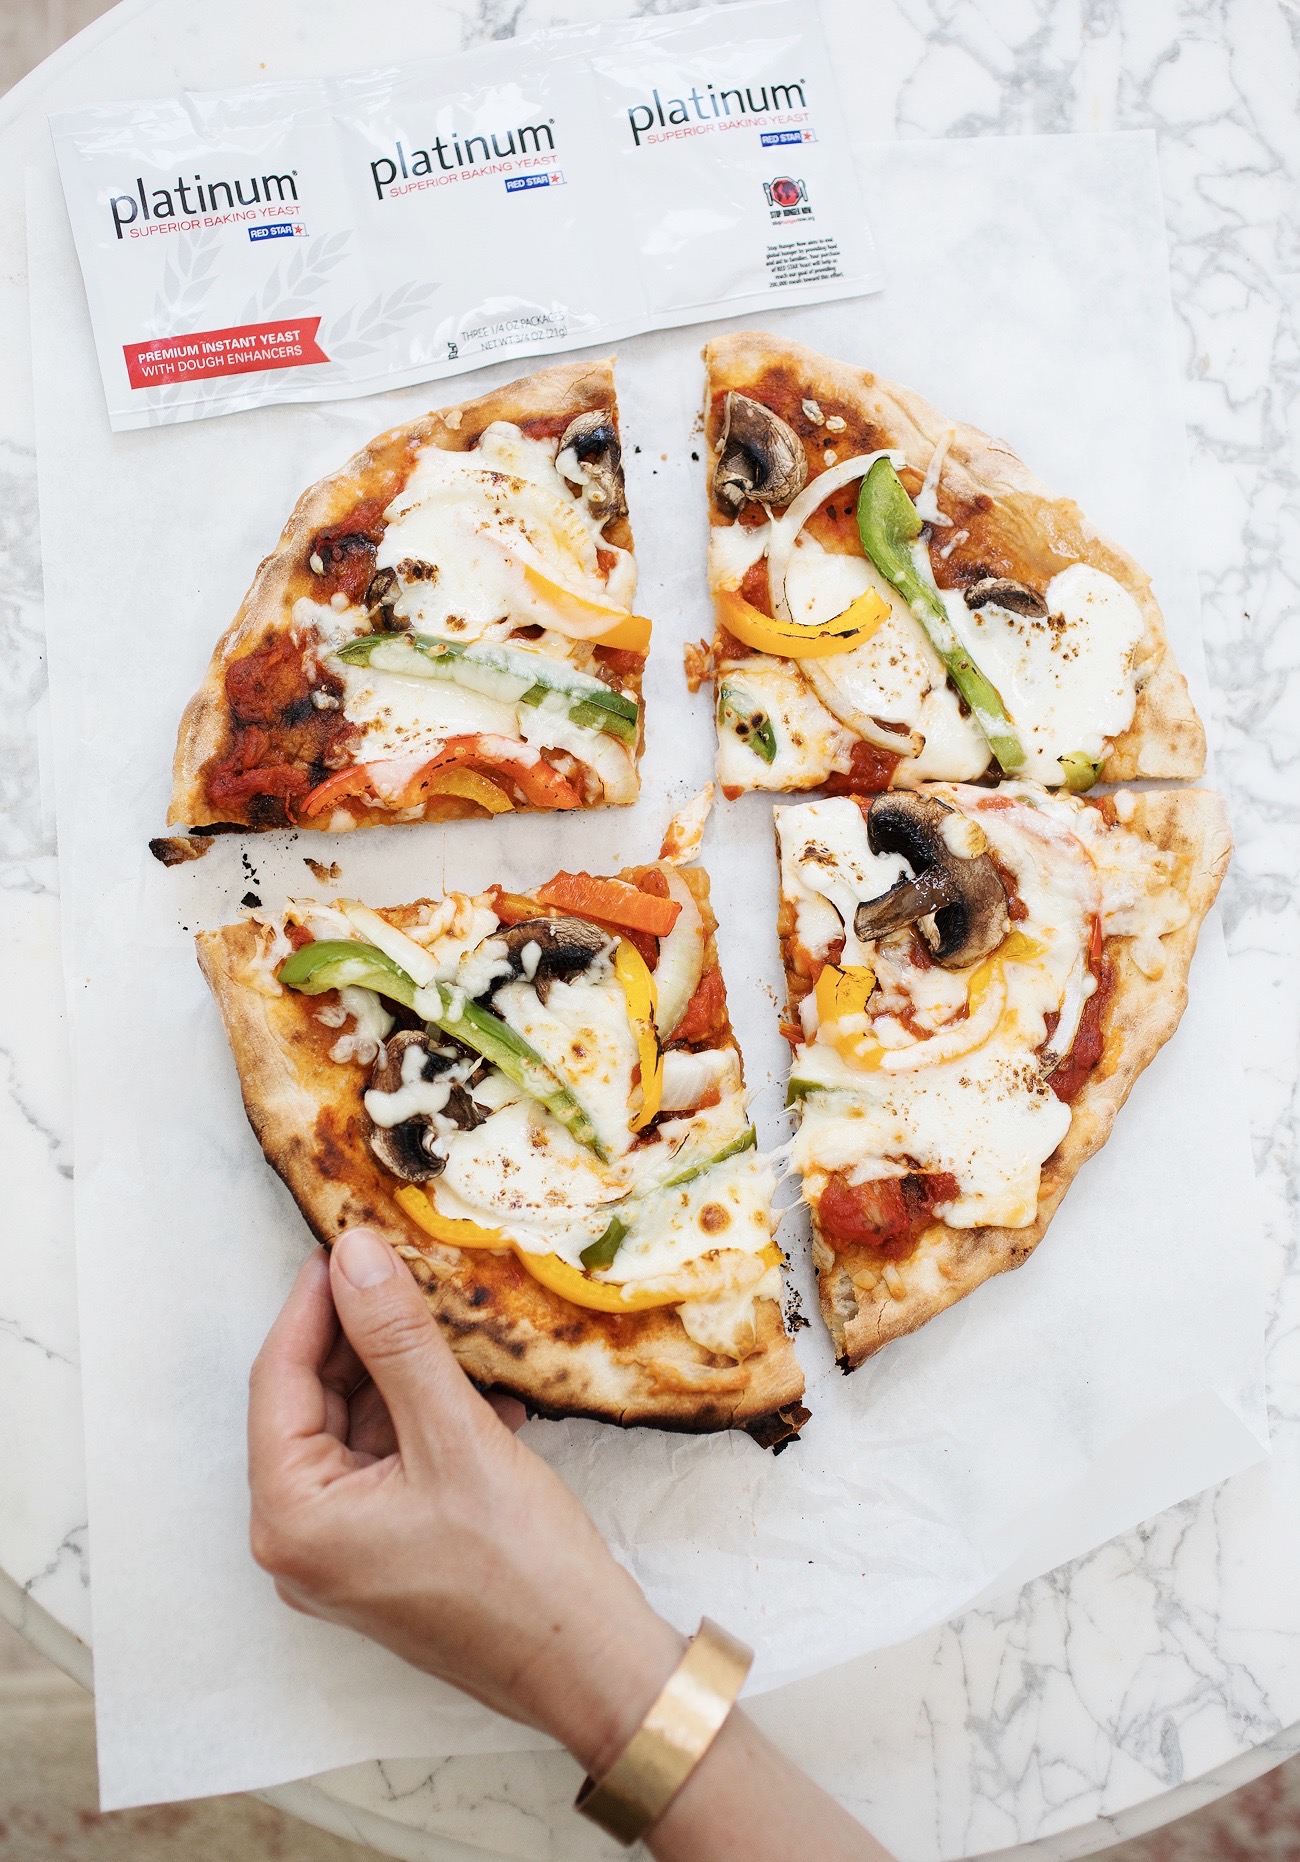
Grilled pizza is a favorite summer pastime for us; we have spent many hot summer days making everything from Pesto Pizza to Breakfast Pizzas. Today we want to share one of our favorite pizzas with you: Grilled Pizza with Summer Veggies. We keep our crust crisp by grilling one side, flipping it, and then adding just enough fresh veggies and cheese. Eating a slice of warm, grilled pizza is truly magical.
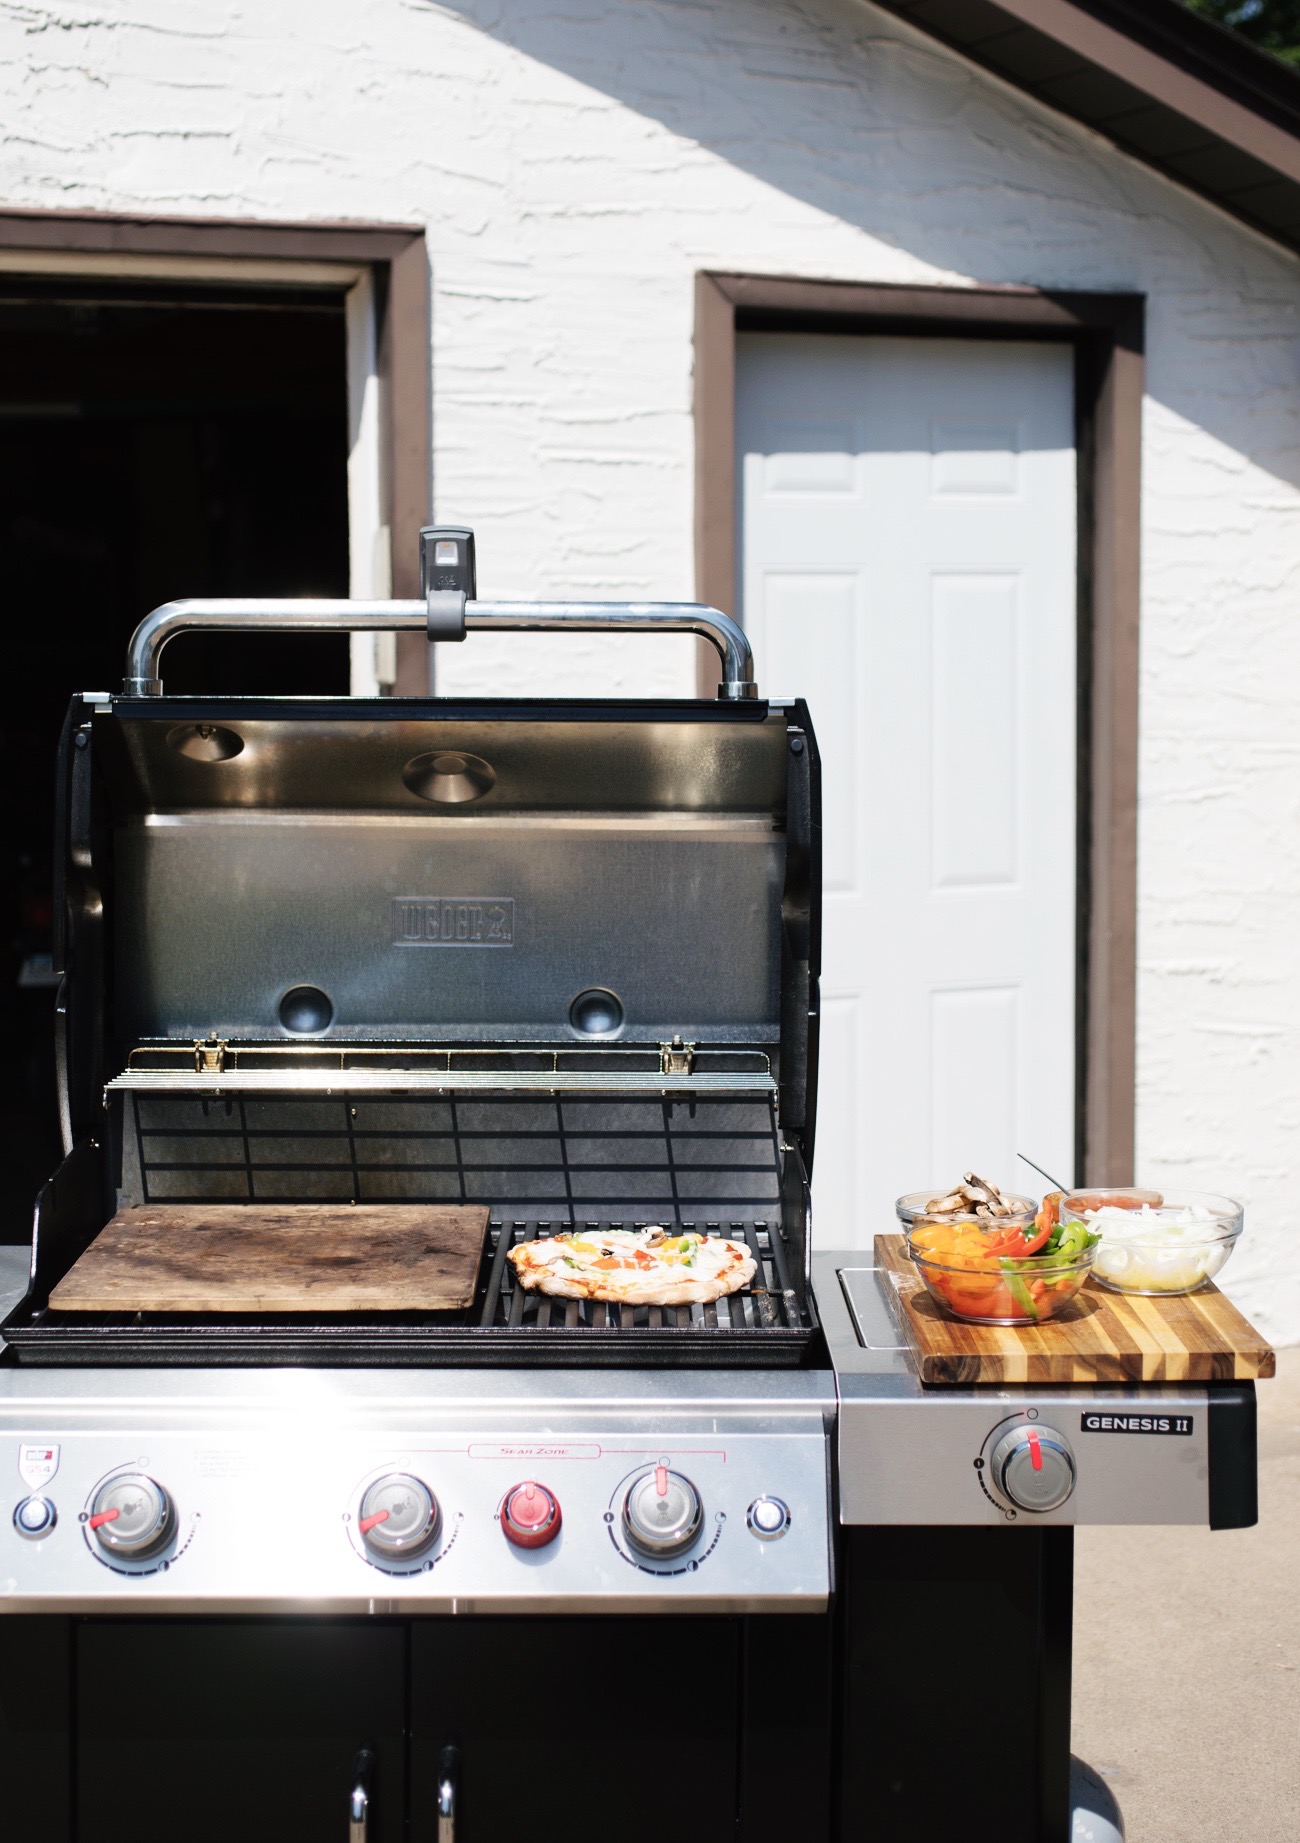
Below you will find our directions to making pizza on the gas grill. Please note that we do call for a baking stone in our recipe, but you can attempt this right on the grates if you don’t have one (but a baking stone does make things a little easier). If you only have a charcoal grill, we have a post here on how to use that.
3 cups lukewarm water 1/8 cup olive oil 1 tablespoon granulated yeast 1 tablespoon sugar or honey 1 tablespoon kosher salt 7 cups bread flour
Ingredients for finishing
1/3 cup pizza sauce
1/2 cup of bell peppers (we used a mixture of green, red, and yellow), sliced thin
1/4 cup yellow onion, sliced thin
1/4 cup mushrooms, sliced thin
3/4 cup mozzarella cheese, shredded
For the dough
Combine the warm water, olive oil, yeast, sugar, and salt in a 5-quart bowl; preferably, in a lidded (not airtight) plastic container or food-grade bucket. Mix until all of the flour is incorporated using a stand mixer or dough whisk. Cover, and allow to rise at room temperature for 2 hours. You can use the dough right away, or refrigerate it for up to 14 days.
To Grill the Pizza Heat your gas grill: Place a baking stone on the primary burners. Turn all burners to high and let heat up for 20 minutes. After they have heated, turn the side without the stone down to low heat.
While your grill is heating, pull out a 10 ounce piece of dough from your bucket and quickly form it into a ball. Let it sit on the counter while you gather your toppings.
Roll the ball out into a 1/8-inch-thick round. If the ball is resisting just let it sit for about 5 minutes and it will relax and allow you to work with it.
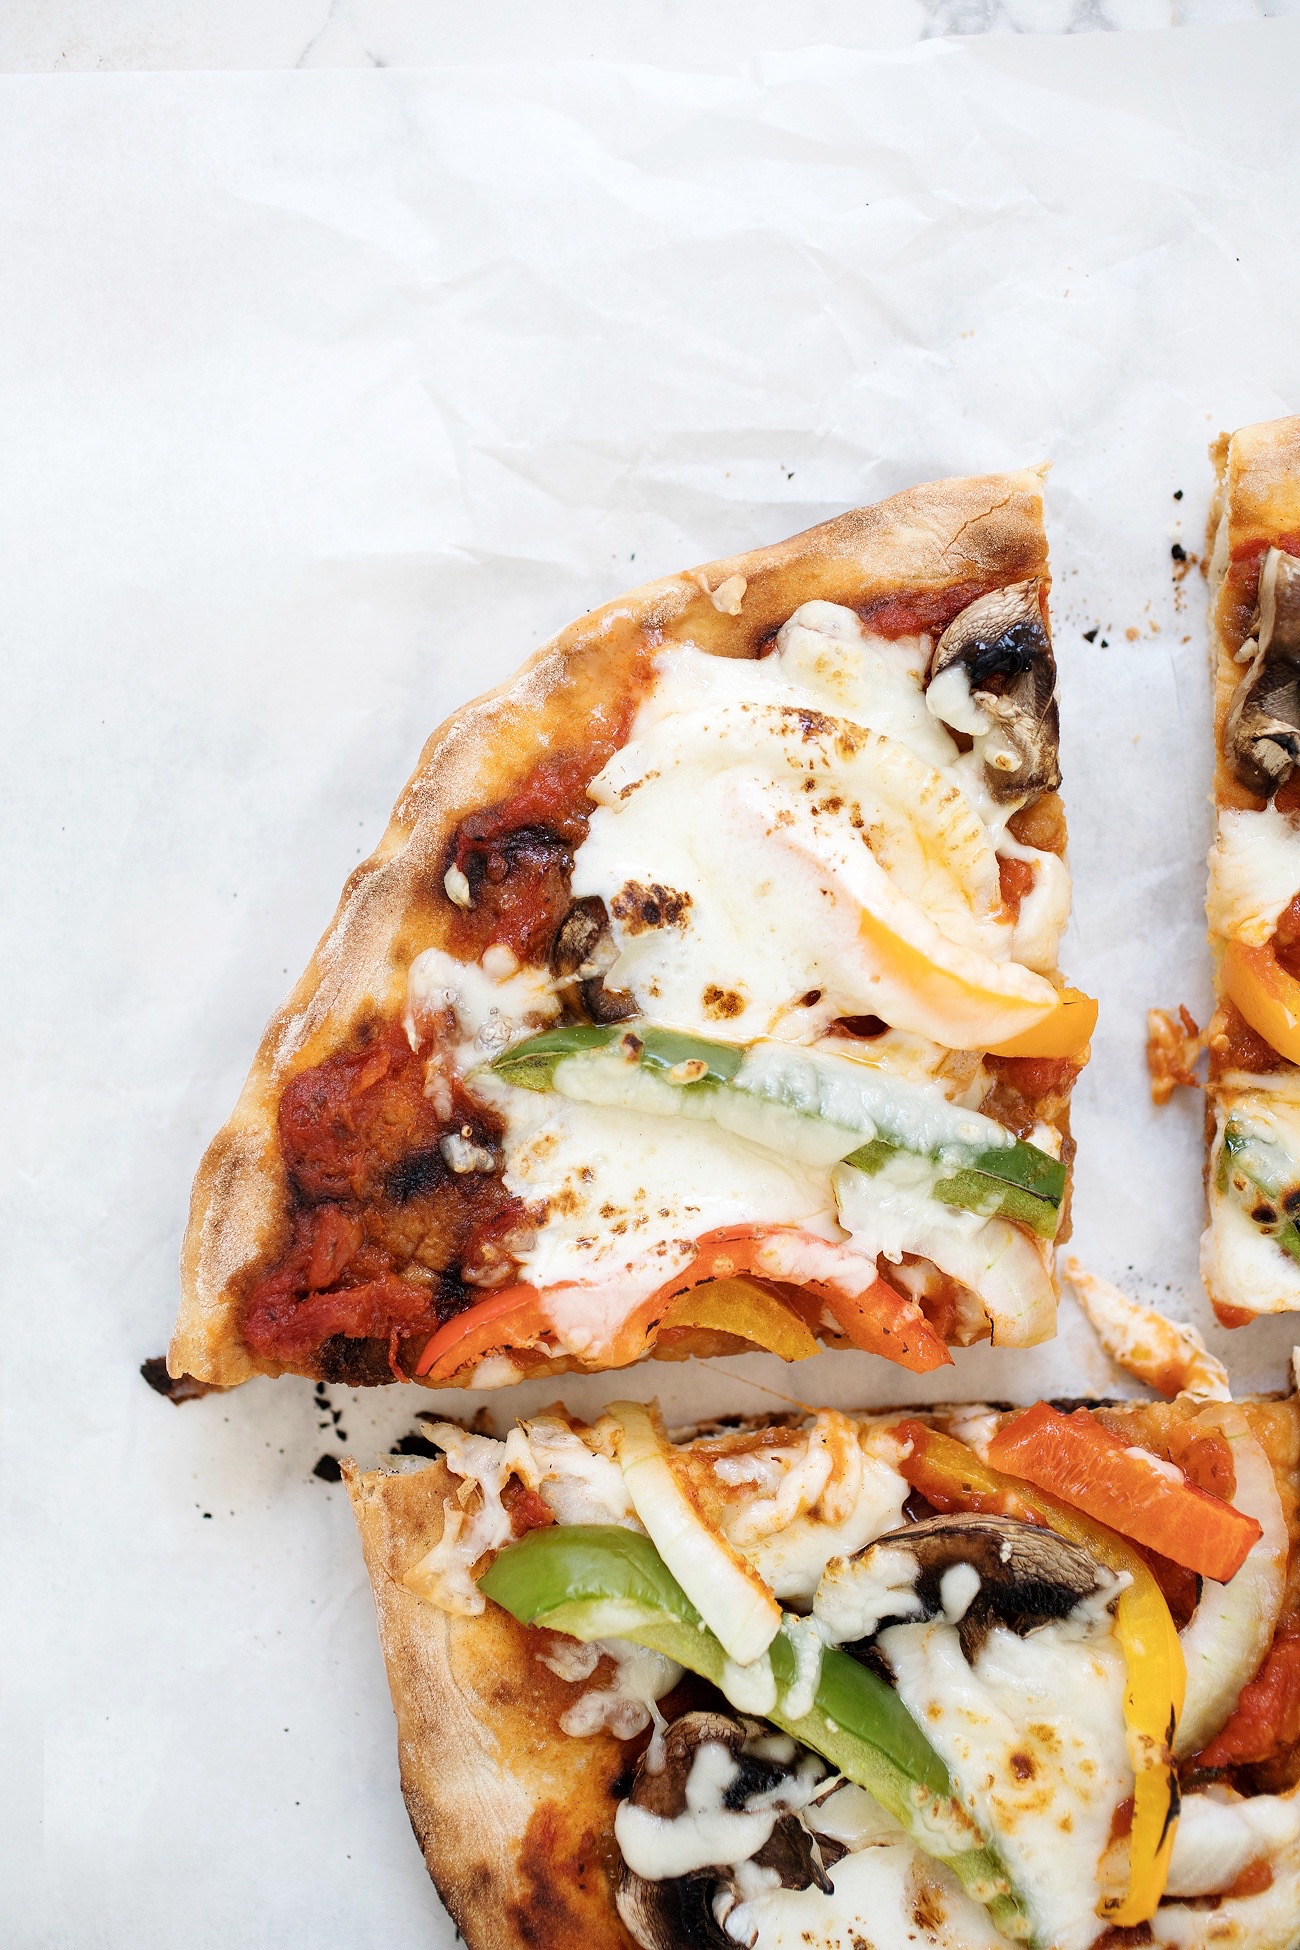
Using a floured pizza peel, place the shaped pizza dough over the pizza stone. Let it cook there until the top starts to bubble and the bottom creates a char to your liking. Remove the pizza from the grill and place on a nearby work surface. Making sure the charred-side is up, top your pizza: cover the pizza with sauce, veggies, and then the cheese.
Then, using your pizza peel, bring the pizza back to the grill, and finish cooking. Place over the hot side again, keeping a very careful watch. As soon as your char-marks look great, slide the pizza over to the cool side and cover the grill. Let cook for 4 to 10 minutes, until the cheese has melted. Remove the pizza from the grill, move to a wire rack, and let cool for a minute or two. Slice into pieces and serve.
Tip: If your pizza cheese won’t brown on the grill, you can use a kitchen torch to give it some color.
Note: Red Star Yeast provided yeast samples for recipe testing, and sponsors BreadIn5’s website and other promotional activities.This website is reader-supported; BreadIn5, LLC earns affiliate commissions when buying products through links on this website.
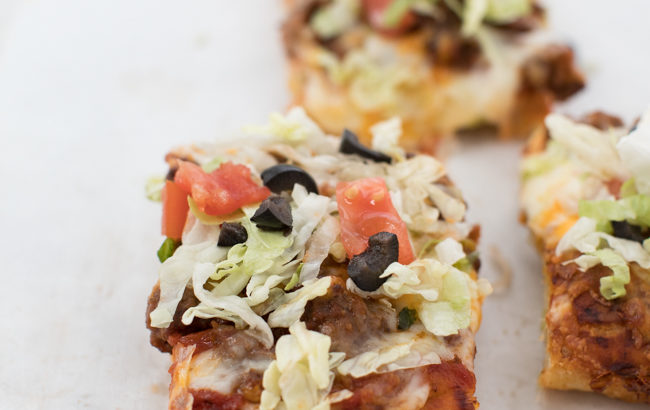
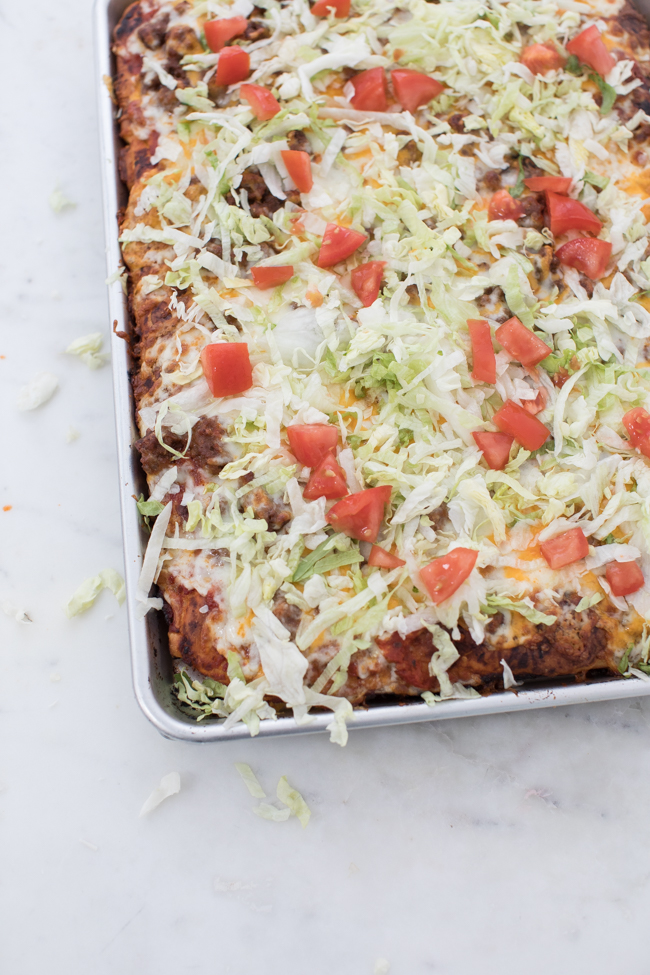
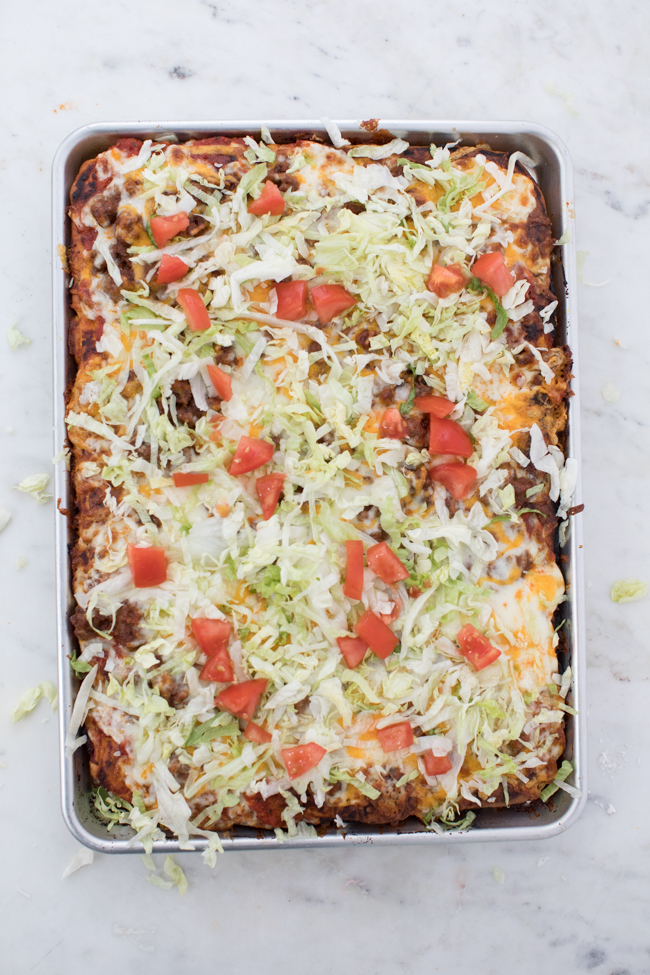
Throughout college, many weekends were spent eating pizza. This was for several reasons: pizza was delicious, and affordable, but most importantly, my boyfriend delivered pizza. This made pizza often free, which was better than affordable and even better than delicious. One particular pizza his pizza-chain made was “taco” pizza: a very American take on the taco, with tomato sauce and cheddar cheese, and then topped with shredded lettuce and fresh tomatoes. It was my favorite; somehow the fresh lettuce and tomato on top complimented the crust and melty cheese underneath perfectly.
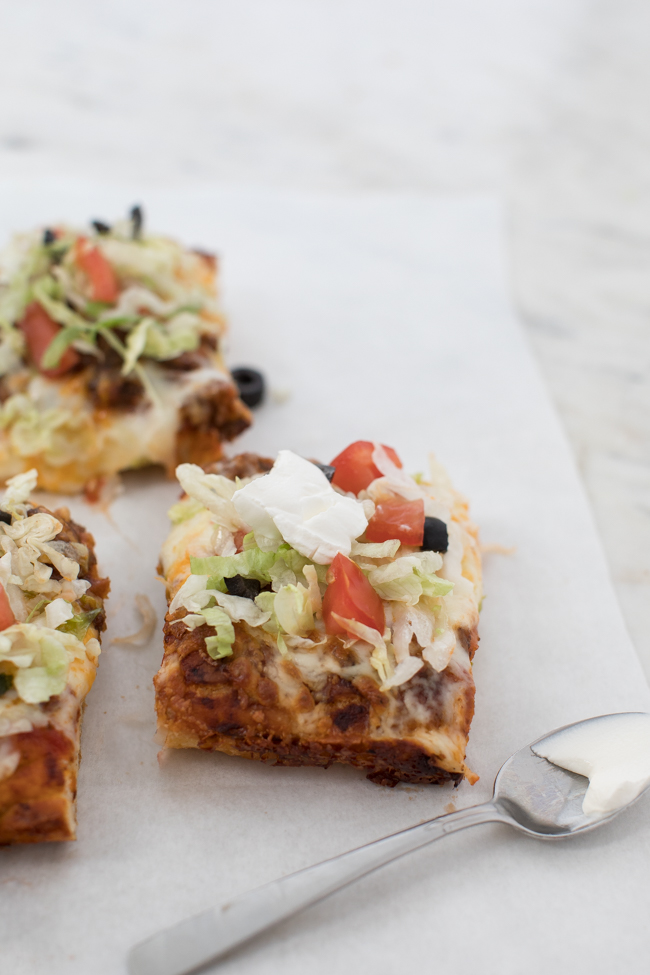
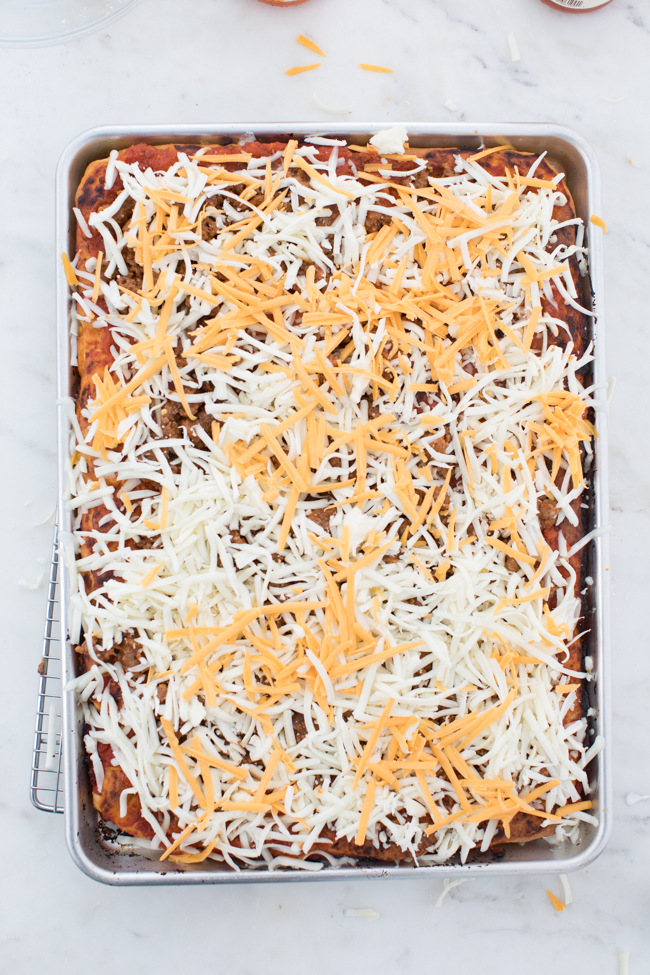
I decided to recreate this pizza in sheet pan form, just in time for Super Bowl Sunday. I was feeling nostalgic for taco pizza, and this pizza also reminded me of the famous taco dip my mom would make for any and all events – layers of sour cream, cheese, lettuce, and black olives. This pizza has some of that, plus a delicious, thick crust and melted cheese. Our version here is very American and also pretty Midwestern (my family always opted for no spices and beans in both pizza and dip form), but I have listed in the recipe ways you can bring more flavor to your pizza if desired.
A few notes: The second layer of tomato sauce can be replaced with salsa, if you would like your pizza with a little more kick. Refried beans can also be added to the pizza along with the ground beef (or in place of it). You can replace the mozzarella and cheddar with Monterey Jack and/or Colby (just make sure you replace them with a cheese that melts well).
3 cups lukewarm water 1/8 cup olive oil 1 tablespoon yeast 1 tablespoon sugar or honey 1 tablespoon kosher salt 7 cups bread flour
Ingredients for finishing 5 tablespoons olive oil 1 1/4 cup tomato sauce
1 pound ground beef, cooked with your favorite taco seasoning (drain the grease from the meat before topping pizza) 2 cups grated mozzarella
1/2 cup grated cheddar cheese
2 cups shredded lettuce
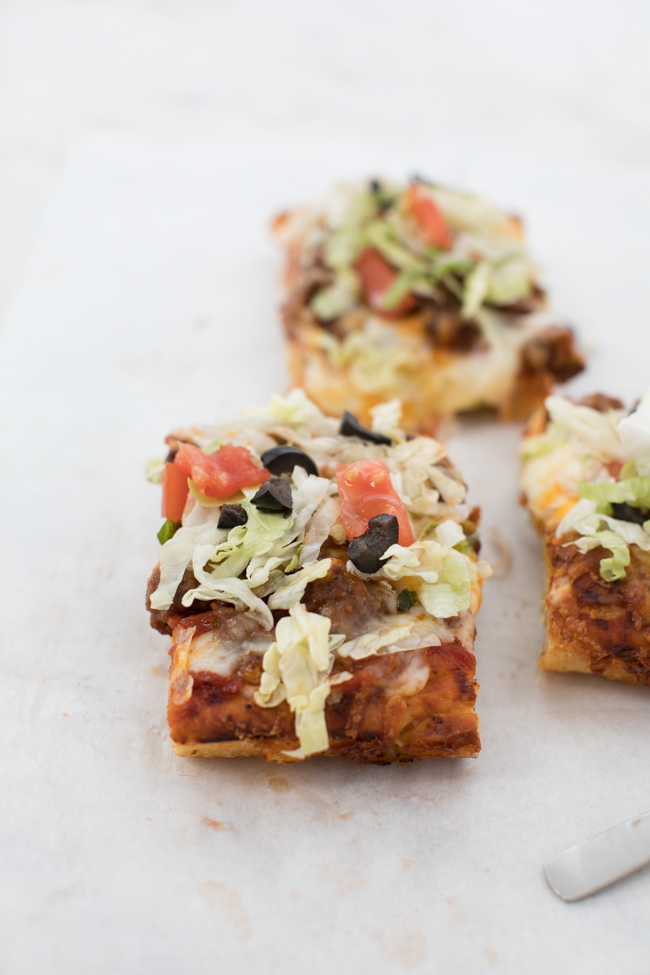
chopped fresh tomatoes, black olives, sour cream, jalapeños, guacamole, etc
For the dough Combine the warm water, olive oil, yeast, sugar, and salt in a 5-quart bowl; preferably, in a lidded (not airtight) plastic container or food-grade bucket. Mix until all of the flour is incorporated using a stand mixer or dough whisk. Cover, and allow to rise at room temperature for 2 hours. You can use the dough right away, or refrigerate it for up to 14 days.
Remove 2 pounds of dough from your dough bucket, and place it on a generously floured surface (for a thinner crust, use 1 1/2 pounds). Knead the dough a few times, and shape into a ball. Cover with a tea towel and let rest on the counter for 15-20 minutes.
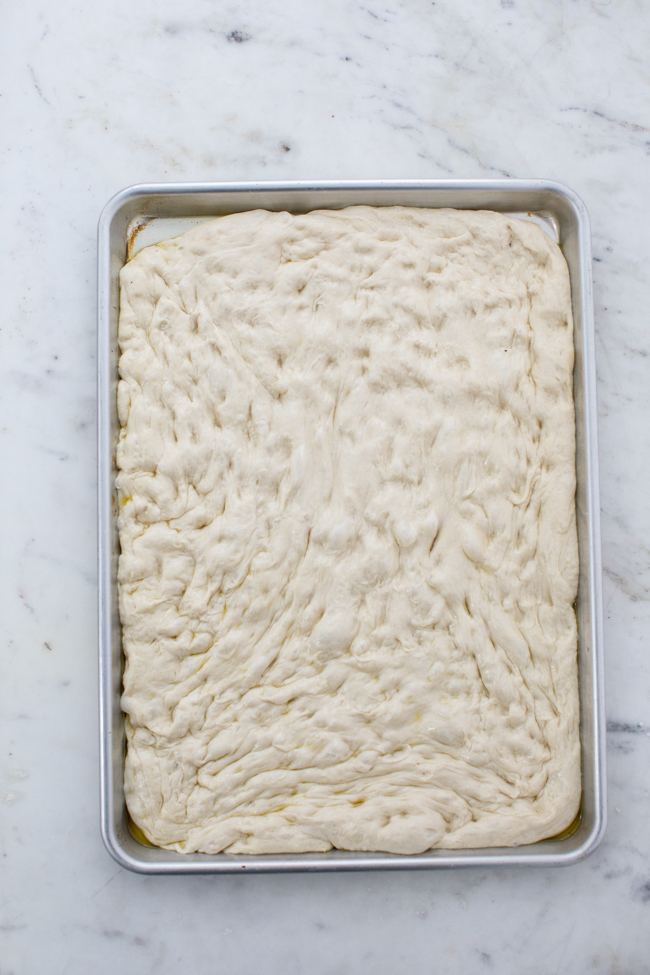
Put your stone or pizza steel on the middle rack in your oven, and preheat the oven to 500, letting the oven preheat for a good 45 minutes. Spread 4 tablespoons of olive oil on a half sheet pan, making sure to oil the inside rim. Gently stretch the dough into a rectangular shape, and lay the dough onto the pan. Drizzle 1 tablespoon of olive oil on top of the dough, and use your fingers to work the dough evenly so it covers the pan (if the dough begins to resist, let it rest for 10 minutes and try again).
After the dough has rested, work it again as best you can so it evenly covers the pan. Let it rest for 30 minutes while the oven is preheating.
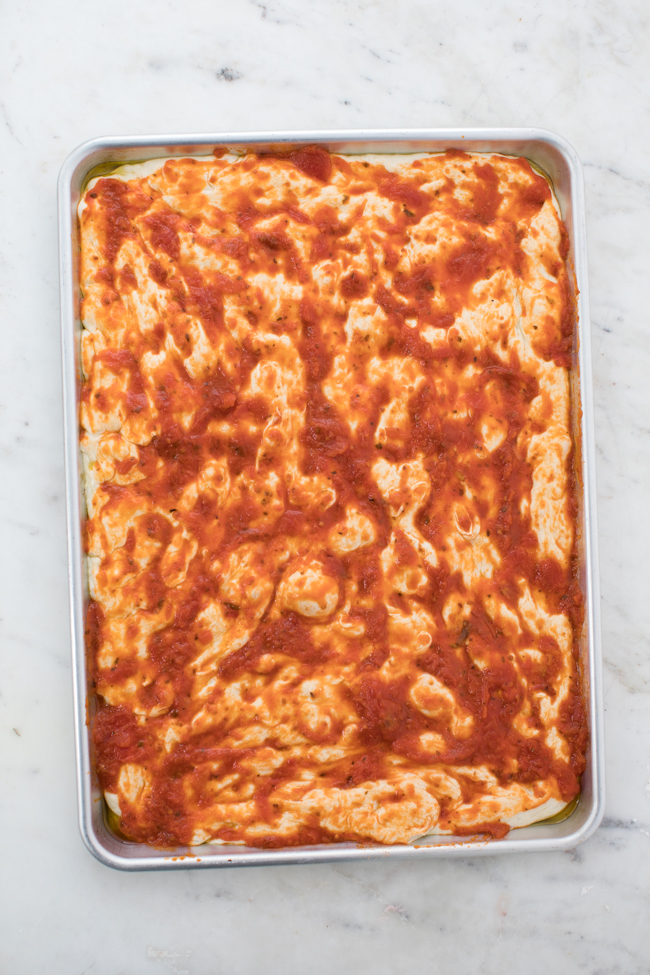
Spread 3/4 cup of tomato sauce evenly over the pizza. Bake for 8 to 12 minutes, until the edges of the crust are light golden, and the sauce starts to caramelize around the edges. The bottom of the crust should also be light golden brown and crisp.
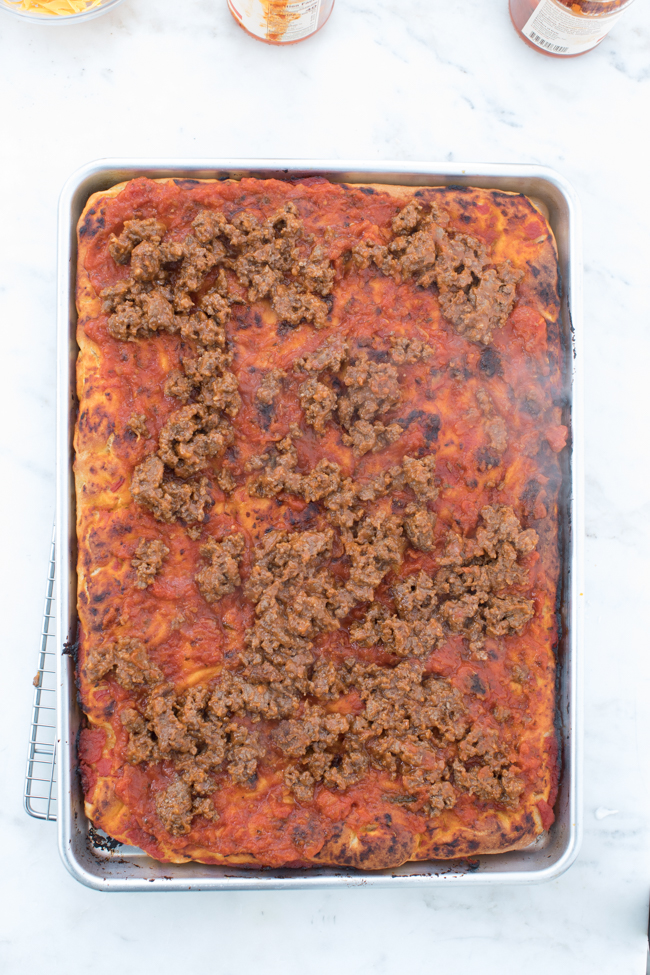
Remove the pan from the oven. Carefully spread another 1/2 cup of tomato sauce (or salsa!) over the pizza, then top with the ground beef.
Cover with the grated cheeses, and carefully put the hot sheet pan back on the stone. Bake again for 10 to 15 minutes, until the cheese is melted and the crust is golden brown underneath.
Cover the pizza with shredded lettuce, fresh tomatoes, olives, and whatever other ingredients your heart desires. Serving guacamole and sour cream on the side is a nice idea.
Enjoy! We hope your team wins!
Note: BreadIn5.com is reader supported–when you buy through links on the site, BreadIn5 LLC earns commissions.
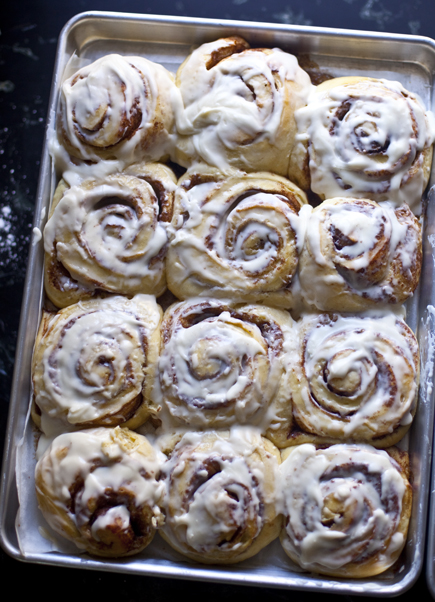
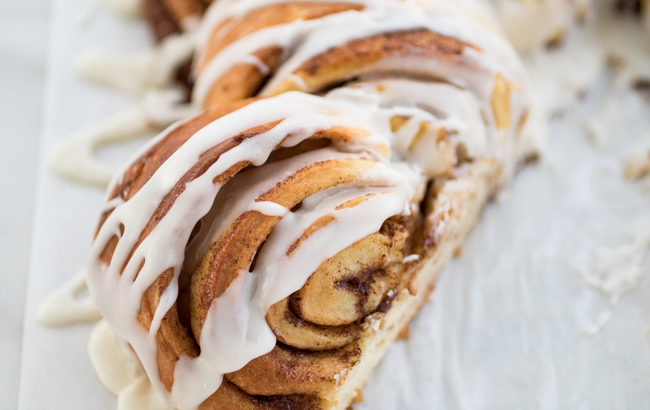
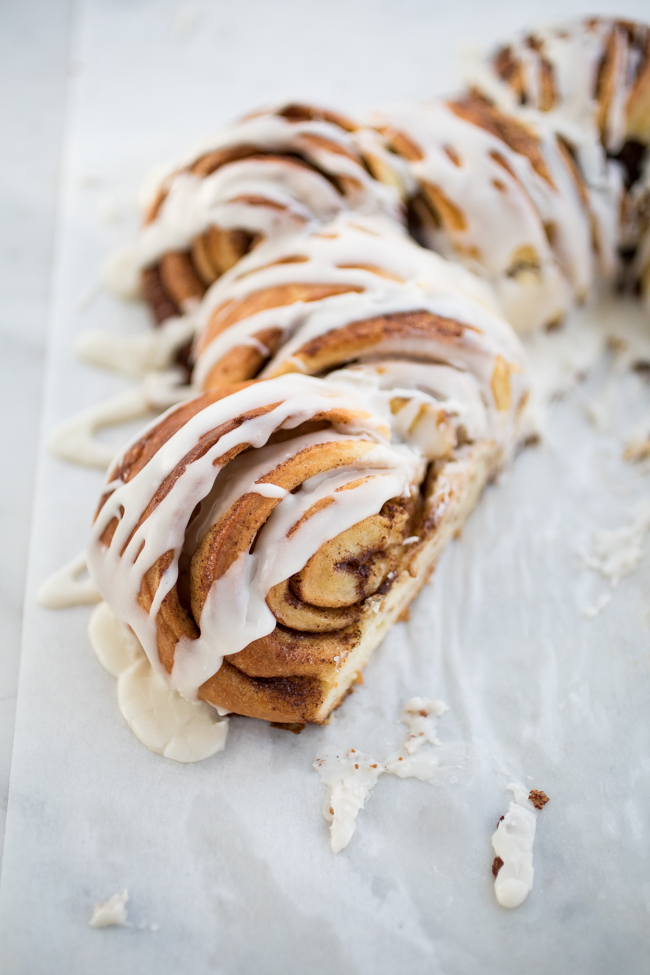
This tea ring is an ultra fancy cinnamon roll, baked as wreath and topped with an Eggnog Glaze. The cuts and twists of the dough make for a super-festive bread that is actually really easy to make, so don’t leave this one just for the holidays.
Mix in the flour without kneading, using a heavy-duty stand mixer (with paddle/flat beater), a Danish dough whisk, or a wooden spoon. If you’re not using a machine, you may need to use wet hands to incorporate the last bit of flour. The dough will be loose but will firm up when chilled (don’t try to use it without chilling).
Cover (not airtight) and allow to rest at room temperature until the dough rises for 2 hours.
The dough can be used as soon as it’s chilled after the initial rise, or frozen for later use. Refrigerate the container and use over the next 5 days.
In a small bowl, combine the melted butter, sugar, and cinnamon.
Dust the surface of the refrigerated dough with flour and cut off a 1 1/2 pound (small cantaloupe-size) piece. Dust the piece with more flour and quickly shape it into a ball by stretching the surface of the dough around to the bottom, rotating the ball a quarter-turn as you go.
Using a rolling pin, roll the dough out to a 1/8-inch-thick rectangle, about 14 x 18 inches. As you roll out the dough, add flour as needed to prevent sticking.
Spread the butter mixture evenly over the dough.
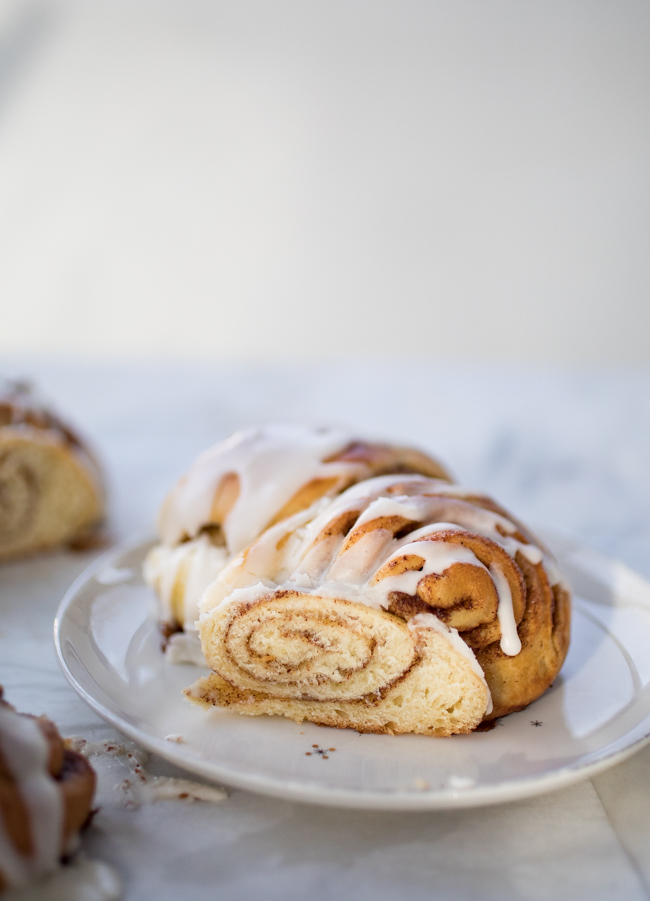
Starting with the long side of the dough, roll it up into a log. Pinch the seam closed. Stretch the log until it is about 1 1/2 inches thick. Join the 2 ends together. Place on the prepared baking sheet. Stretch the dough to make sure you have a nice, wide opening in the middle of your wreath, but leave plenty of room around the edge.
Cover loosely with plastic wrap and allow to rest at room temperature for 40 minutes.
Preheat the oven to 350F, with a rack placed in the center of the oven.
Brush lightly with the egg wash. Make evenly spaced cuts all the way around the wreath about 1 inch apart. The cuts should go just about to the bottom of the ring, but not quite to the bottom.
Gently pull every other piece to the outside of the ring and then twist that piece to face up. Do the same with the remaining pieces, but have them face up on the inside of the ring. The ones on the inside of the ring may not lay flat on the baking sheet, which is fine.
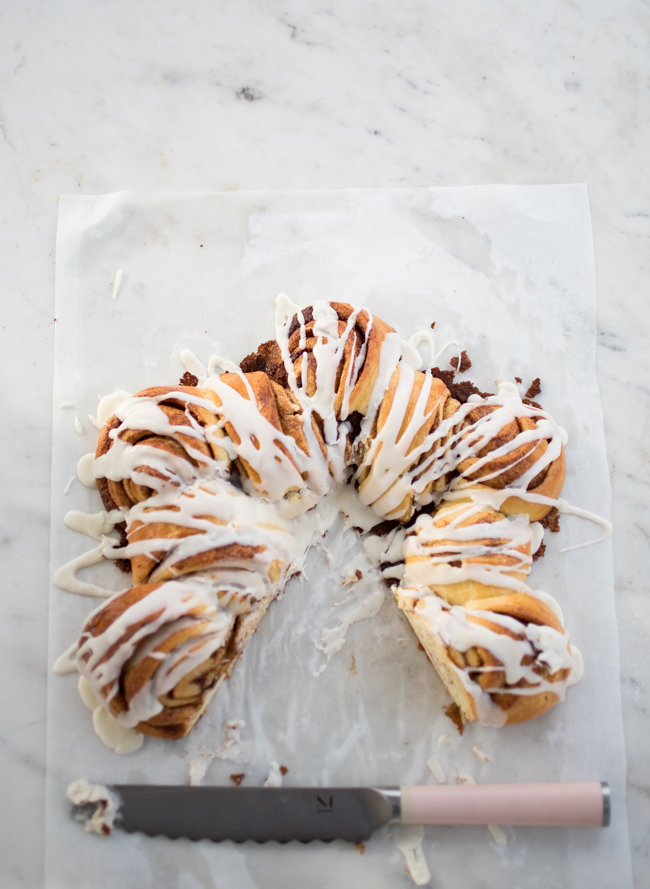
Bake for 25 to 32 minutes, until golden brown and well set.
Make the glaze: In a small bowl, mix together the melted butter, 2 tablespoons egg nog, and vanilla until smooth. Add the confectioners’ sugar and mix until the mixture is smooth. Add more eggnog (or bourbon!), 1 tablespoon at a time, until the desired consistency is reached. Pour the glaze over the warm braid, then serve.
Eat and enjoy!
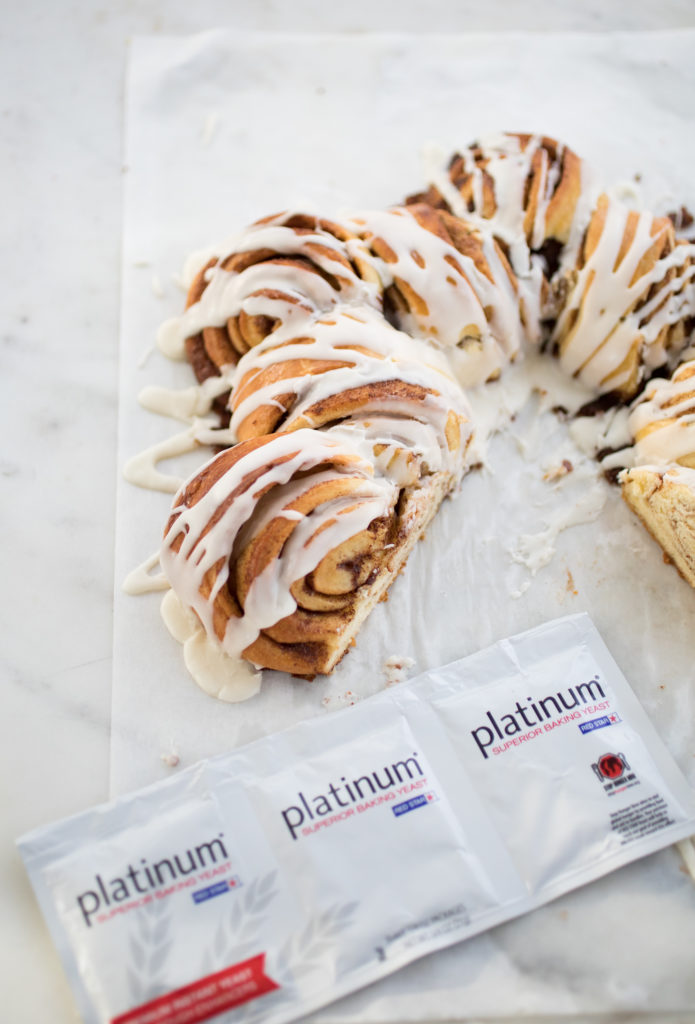
Red Star Yeast provided yeast samples for recipe testing, and sponsors BreadIn5’s website and other promotional activities.BreadIn5.com is reader supported–when you buy through links on the site, BreadIn5 LLC earns commissions.
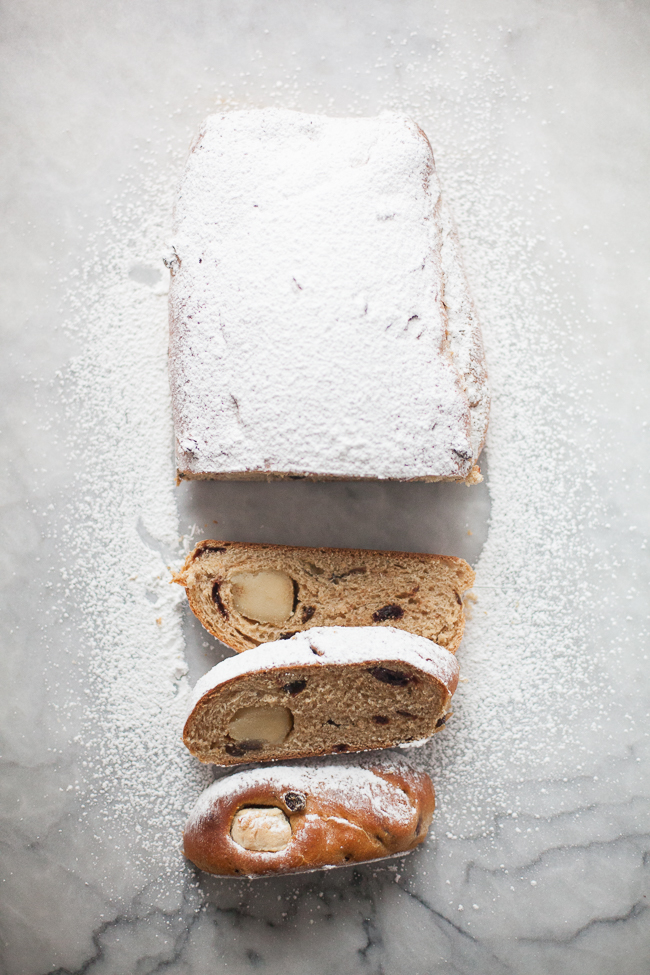
Christmas Stollen is a wonderful German baking tradition this time of year. A sweet loaf that is studded with dried fruit, spiced with cardamom and a special treat of almond paste runs through it. Once it comes out of the oven it is traditional to slather the warm loaf in butter then roll it in sugar, but we skip the extra butter and dust it with a thick layer of confectioners’ sugar to look like the snow outside. This loaf actually holds up very well for a couple of days and that makes it a great gift for the holidays.
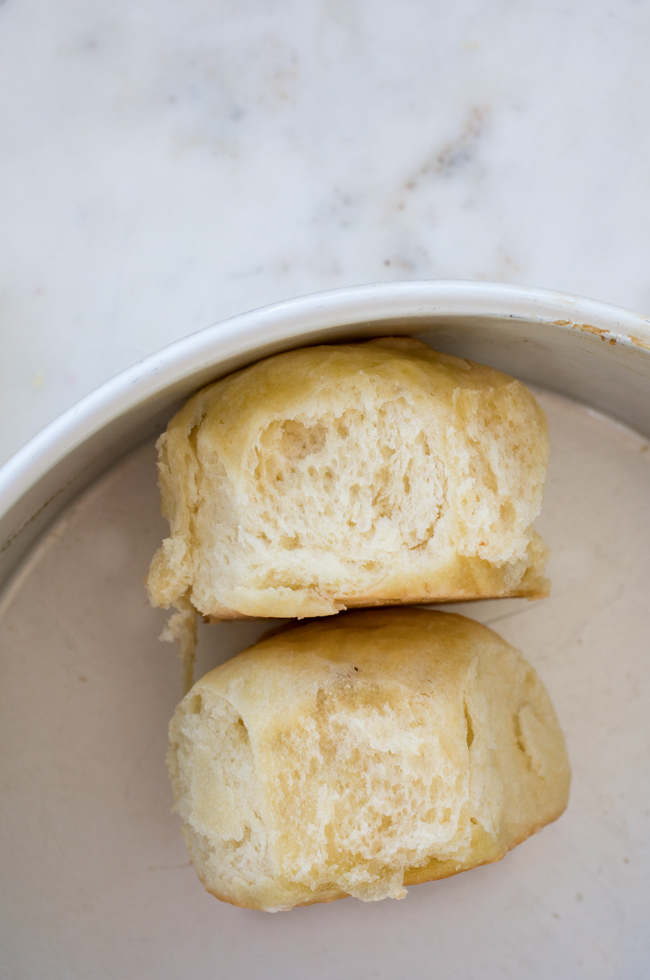
Hawaiian Buns are a delicious treat: they are soft, and sweet, and perfect for both snacking on or serving with a warm meal. The most famous are, of course, the orange package of King’s Hawaiian buns found in your local supermarket. While the supermarket brand doesn’t contain pineapple or honey, those two ingredients were often used by Portuguese immigrants in Hawaii in the early 1900’s when refined sugar was scarce or too expensive to purchase. Our no-knead brioche and challah doughs already contained honey, so with just a little tweaking (and some pineapple juice and vanilla), we found ourselves with a great version of these famous buns, just in time for Thanksgiving dinner.
We have more Thanksgiving bun recipes on our site (Herb Crock Pot Dinner Rolls! Soft Pull Apart Buns!) and you can find links to them here. We also have a Thanksgiving round up post, complete with many of our sweet breads, plus a homemade-bread stuffing recipe, that you can check out here.
Hawaiian Buns
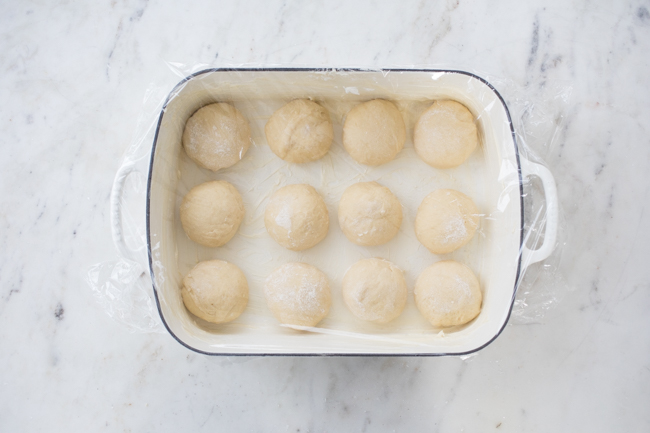
Fresh pineapple juice will not work here; the enzymes in fresh destroy the yeast. Some people heat the fresh juice with good results (this will kill the enzymes), but I’ve found canned to be the easiest (and cheapest) method. The pineapple juice can inhibit the yeast, so we use extra here to insure a good rise, and soft, tender buns. Having your eggs at room temperature will also help the dough rise quicker. The juice can also cause the melted butter to curdle when mixed, so I keep them separate until everything is mixed together. You can shape the buns the night before serving and let them do a slow rise overnight in the refrigerator.
1 cup [240 g] lukewarm water (100F or below)
1/2 cup [120 g] canned pineapple juice (fresh will not work here, see note above), room temperature
2 tablespoons yeast
1/4 cup [50 g] granulated sugar
1 cup [2 sticks | 226 g] unsalted butter, melted
1/2 cup [170 g] honey
1 tablespoon pure vanilla extract
5 eggs, room temperature, lightly beaten
1 tablespoon kosher salt
7 cups [990 g] all-purpose flour
In a liquid measuring cup, mix together the water, canned pineapple juice, yeast, and sugar.
Pour in the flour and begin to mix, slowly adding the water/pineapple mixture. Use a Danish dough whisk to combine all the ingredients together (this can also be done in a heavy-duty stand mixer fitted with a paddle). The dough will be loose but will firm up when chilled; don’t try to work with it before chilling.
Cover (not airtight), allow to rest at room temperature for 2 hours, and then refrigerate.
The dough can be used as soon as it’s thoroughly chilled, at least 3 hours. Refrigerate the container and use over the next 3 days.
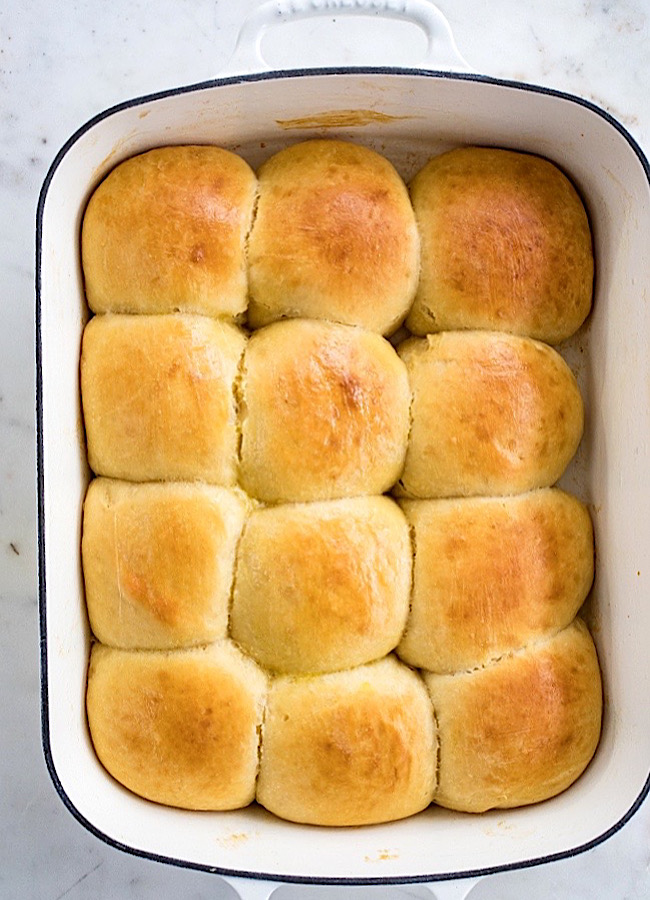
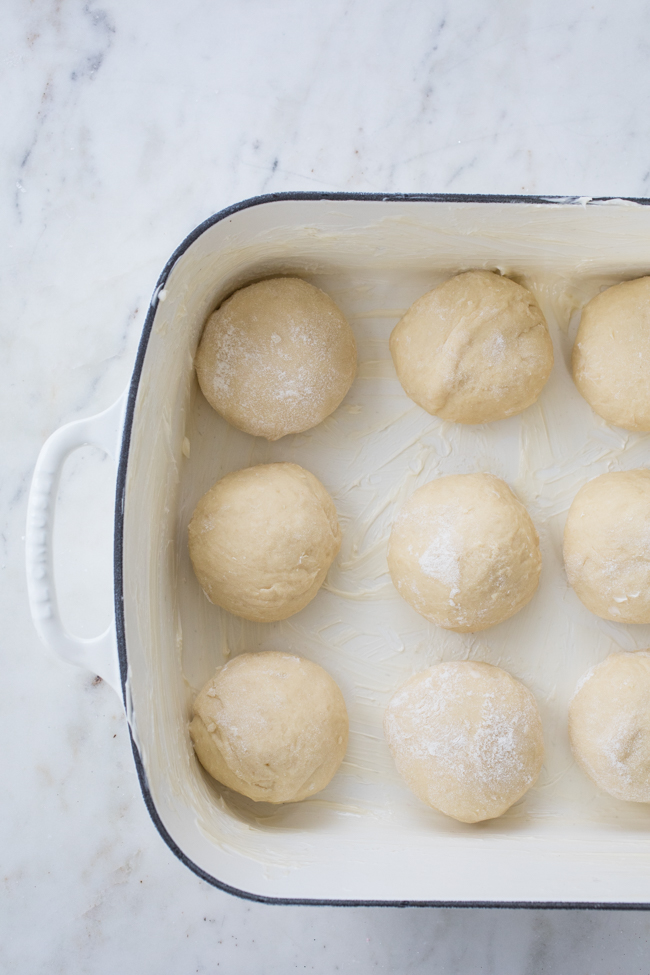
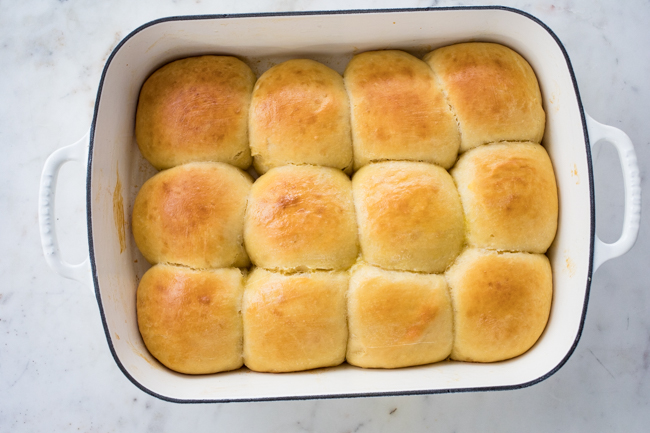
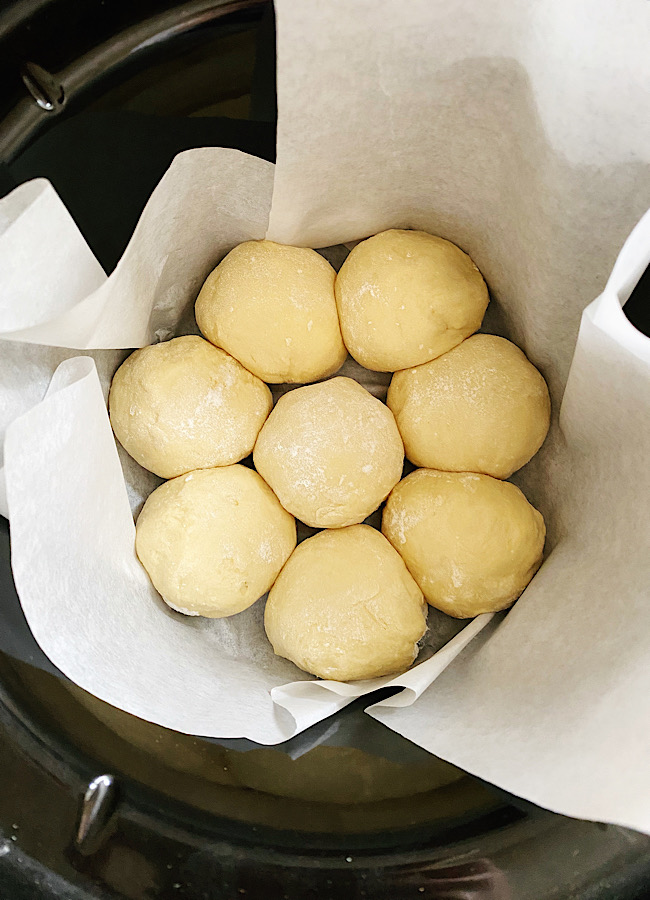
On baking day, cut off 1-pound (grapefruit-size) piece of dough and divide the dough into 8 pieces. Quickly shape the pieces into balls. Place the balls in a greased 8 x 8-inch baking dish, or an 8-inch cake pan. If you want more than 8 buns, as shown in the photos, double the quantity of dough used, or pull cut 2.5 ounce pieces to make the amount needed. If you want pull-apart buns, nestle the buns close together. Cover and allow to rest for 1 hour. Brush the tops with egg white (this will give them some shine).
Bake the buns at 350F for 16 minutes. Brush the tops of the buns with melted butter, then bake for 5 to 8 more minutes, until the tops are golden brown. Remove the pan from the oven, and brush the tops with more melted butter.