Mini-Wreath Loaves with Bread Flour
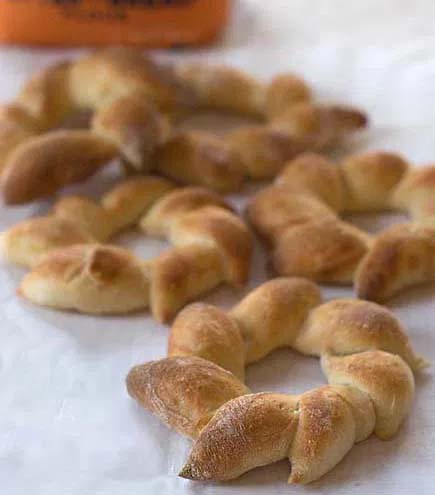
People often ask us why I only used all-purpose flour (where we called for white flour) in The New Artisan Bread in Five Minutes a Day. Why not “bread” flour, which is higher in protein and is often considered traditional in bread? Well, not in all traditions. French baguettes, for example, are typically made with lower-protein flour for a more tender, and less chewy crumb. And we knew most of our potential book users already had all-purpose flour in the house. But sometimes, a stiffer dough is desirable, like when something really needs to hold its shape, like these wreath-shaped, well… bagels. You can always swap bread flour into our recipes that call for all-purpose, just by adding a little extra water (details below).
Today’s treats weren’t really bagels, since I didn’t boil them before baking, but they did start life shaped just like our regular bagels. Then, they get the snipping treatment like our Pain d’Epi (wheat-stalk bread, a French trick of the eye)…
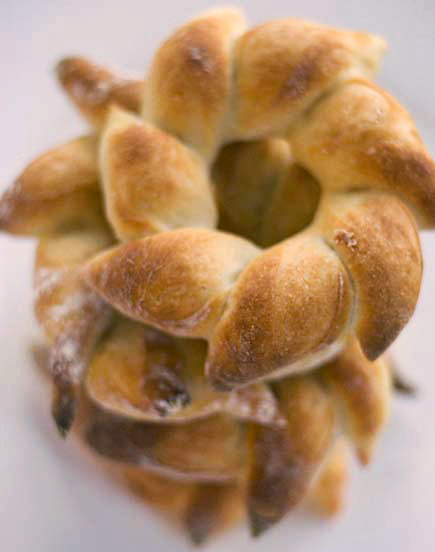
I’ve been doing a round version of the Pain d’Epi for years–take a ring-shaped bread and cut it like an Epi–kind of like a wreath. Seems you ought to be able to make little ones: (wreath-bagels). I thought this would be easier to accomplish with higher-protein flour (for a stiffer dough), so I tested with bread flour. And they certainly held a beautiful shape–just look at the pictures.
I used our basic white-flour recipe, but since I was swapping in bread flour, which is higher in protein and absorbs more water, I increased the water by 1/3 cup (see our FAQ for details on adjusting for other flours). This will work for any of our recipes that call for all-purpose flour–you need a little less than 1 tablespoon extra water for each cup of bread flour that you swap for all-purpose. Today, I weighed the flour and water on a digital scale— the normal recipe (with all-purpose flour) calls for 2 pounds of flour and 1.5 pounds water, but since I was using bread flour, I used more water; that extra 1/3 cup works out to a total of 1 pound, 10 3/4 ounces of water…
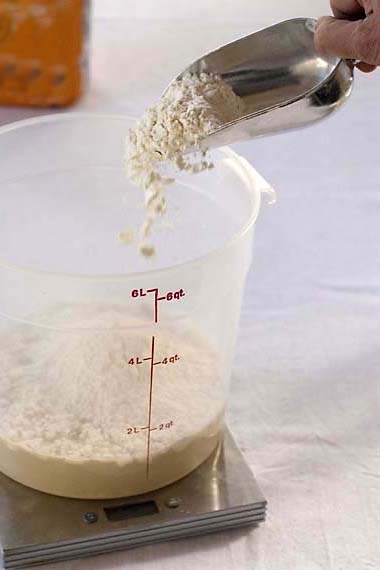
(… for more about using digital scales click here.) I used a Danish dough whisk to mix the water, salt, yeast, and flour, but a wooden spoon would have been fine too. You can see that it’s wet, but not as wet and shapeless as our all-purpose flour basic white dough when first mixed:
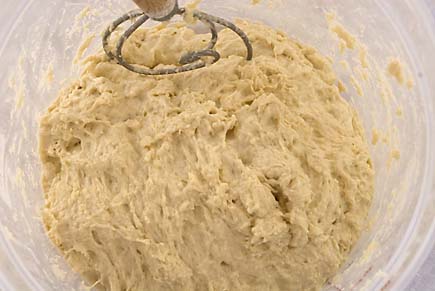
After about two hours of rising at room temperature (assuming you started with lukewarm water), it can go into the fridge, where it can be stored for up to two weeks, though I used my stuff right after the 2-hour rise.
Preheat the oven to 450 degrees F, with a baking stone near the center of the oven and an empty metal broiler tray on any other shelf that won’t interfere with the bagels. In most ovens, 20 or 30 minutes will be enough, in others you may need up to 45 minutes (check temp with an oven thermometer). Dust the surface of the dough with flour and snip off 3-ounce portions of dough (the size of small peaches). Despite the fact that the dough isn’t kneaded, wet dough like this one sets up structure and stretch on its own:
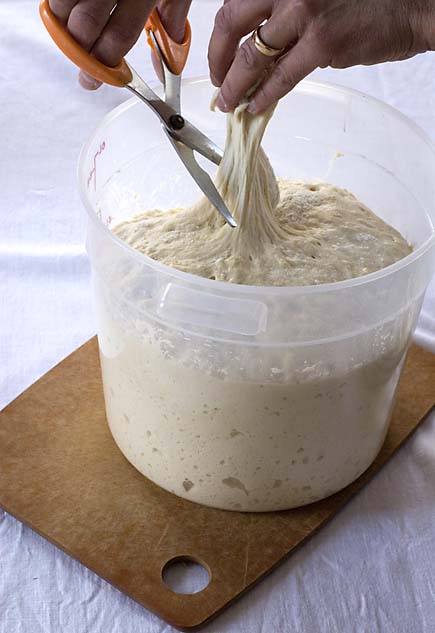
Dust with flour and shape the piece of dough into a smooth ball as we described in the Basics post, and then poke your thumbs through:
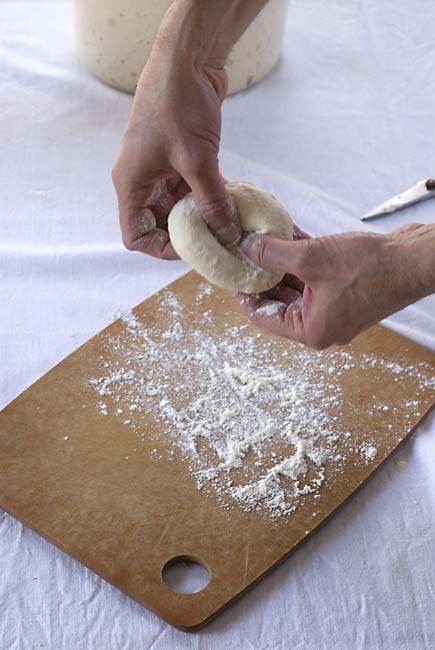
… and start stretching…
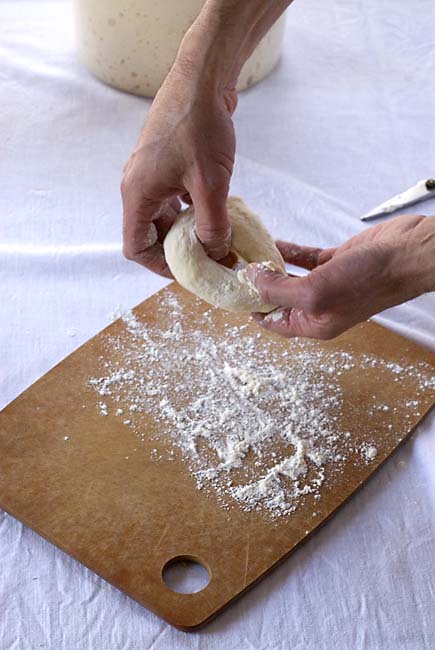
Keep stretching, dusting with flour as needed, until the hole is about three times the width of the sides, otherwise the bagel-hole will close up:
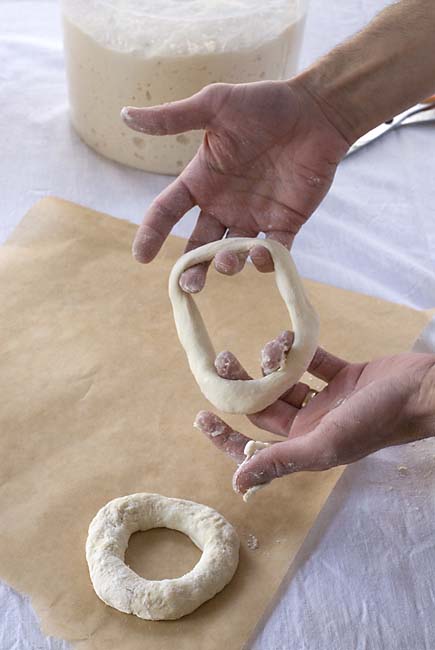
Lay them on parchment paper or a silicone mat rated to the baking temperature. They’ll partially shrink back when you put them down.
Cover loosely with plastic wrap if you’re in a dry environment, and allow to rest for 20 minutes. You won’t see much rising during that time.
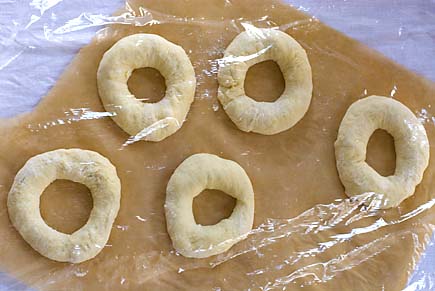
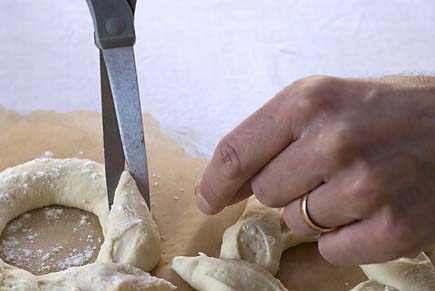
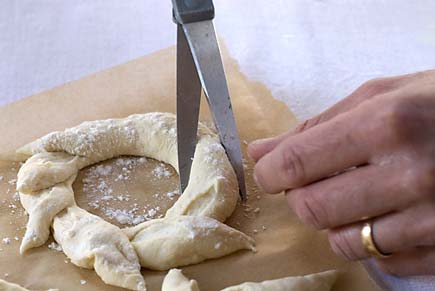
Dust with flour and use a kitchen shears to snip down nearly all the way through, cutting at a shallow angle (about 30 degrees). Deflect the cut pieces sideways, away from the center of the bagel:
Get under the parchment with a pizza peel…
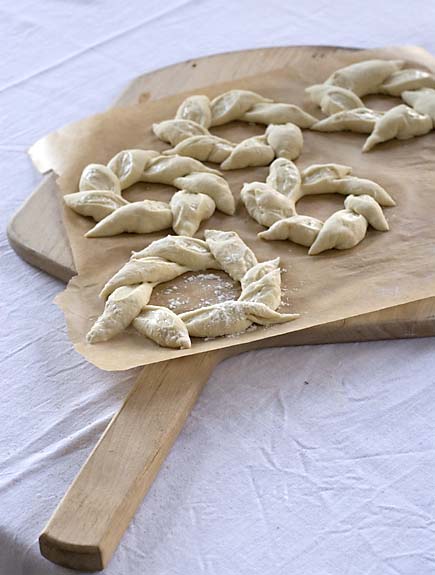
… and slide the whole thing, paper and all, onto the hot stone. Carefully pour 1 cup of water into the metal broiler tray (cover the glass oven window with a towel before approaching with water to prevent cracking of the glass), or check out our post on steam alternatives for other ways to generate steam in the oven. Slide into the oven and bake with steam for about 15 to 20 minutes at 450F, or until richly browned.
You can enjoy these slightly warm…
Note: BreadIn5.com is reader supported–when you buy through links on the site, BreadIn5 LLC earns commissions.
Good morning! This recipe sounds like exactly what I’m looking for for Thanksgiving. I’d love to make it with at least 50% WW flour. Maybe using white WW, or WW bread flour? I also have HB5, is there a recipe in there that might work? Any suggestions would be appreciated. Thanks!
Hi Sandi,
You can make this shape with almost any of our recipes, but the shape may change slightly with a softer dough.
Thanks, Zoë
Jeff, your explanation of the differences between bread flour and all purpose flour was excellent……very informative to novice bakers like myself……Thank you
For all my breads, I put the parchment paper on the pizza peel right away. Then I don’t have to slide the paper onto the peel.
This looks festive and delish with some cream cheese! I’m not seeing the portion of salt and yeast. 1 tsp salt? 1/4 tsp of yeast? Thank you
Hi Teresia,
Here is the recipe, but to get the best shape use bread flour: https://artisanbreadinfive.com/2013/10/22/the-new-artisan-bread-in-five-minutes-a-day-is-launched-back-to-basics-updated/
Thanks, Zoë
How can I do this without a baking stone ?
Our stuff works without the stone, it just won’t be as crisp. A heavy duty baking sheet will work
Hi, I just purchased the “New Artisan Bread In 5 Minutes a Day”, and see that you say to use a “paddle” attachment if using a stand mixer. I’m a complete novice. I received a Kitchen Aid stand mixer for Christmas last year, but have yet to use it. I see attachments called “dough hook”, but nothing called a paddle. Can you help me understand which is the right attachment to use? A link to a picture would be great! I did search, and looked on YouTube, but didn’t see any results.
Thanks, and happy holidays!
KitchenAid calls this tool the flat beater. Does that help?
Sure does! Thank you, Jeff!