Easter Recipe Round-Up!

There are a wealth of Easter recipes to choose from, right here on the site, click here to access them. It’s the first five on the list. Enjoy!

There are a wealth of Easter recipes to choose from, right here on the site, click here to access them. It’s the first five on the list. Enjoy!
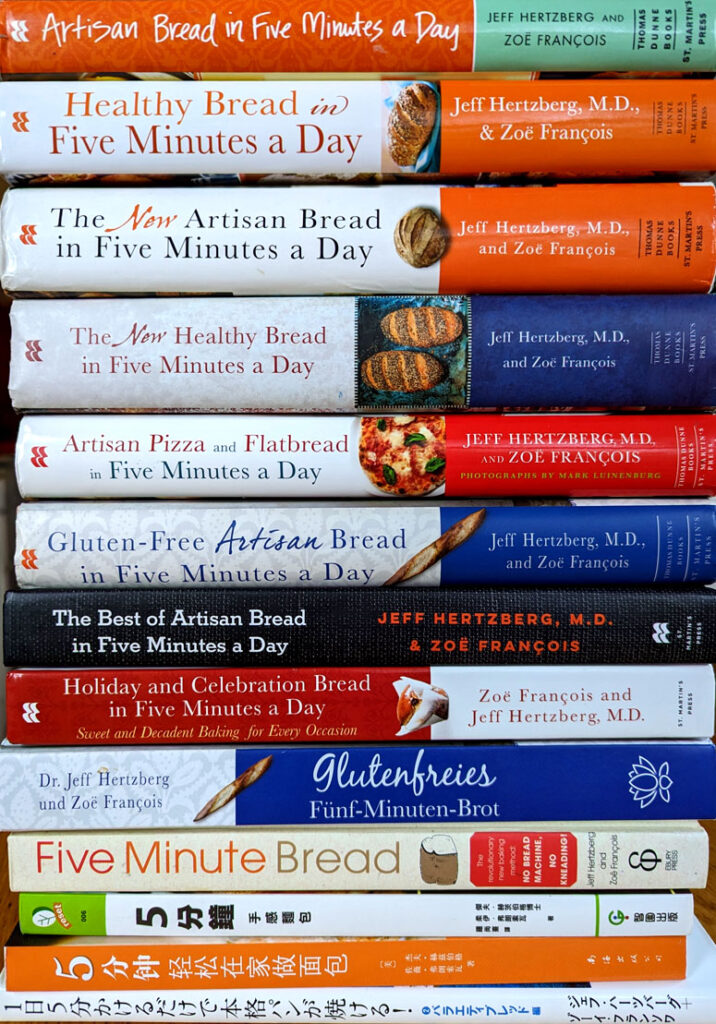
It’s been 17 years since I published my first bread cookbook, meaning I’ve spent more than 17 years learning, tweaking, experimenting with, and obsessing about bread. I included many of those discoveries and realizations in the next seven books, but needless to say I’ve thought a lot about what I’d do differently if I had it to do all over again. As author James McBride once said, “If I had known so many people were going to read that book, I would’ve written a better book.” Just kidding—I still stand by my original recipes, tips, and techniques. But if I knew then what I know now, here’s what I would’ve included:
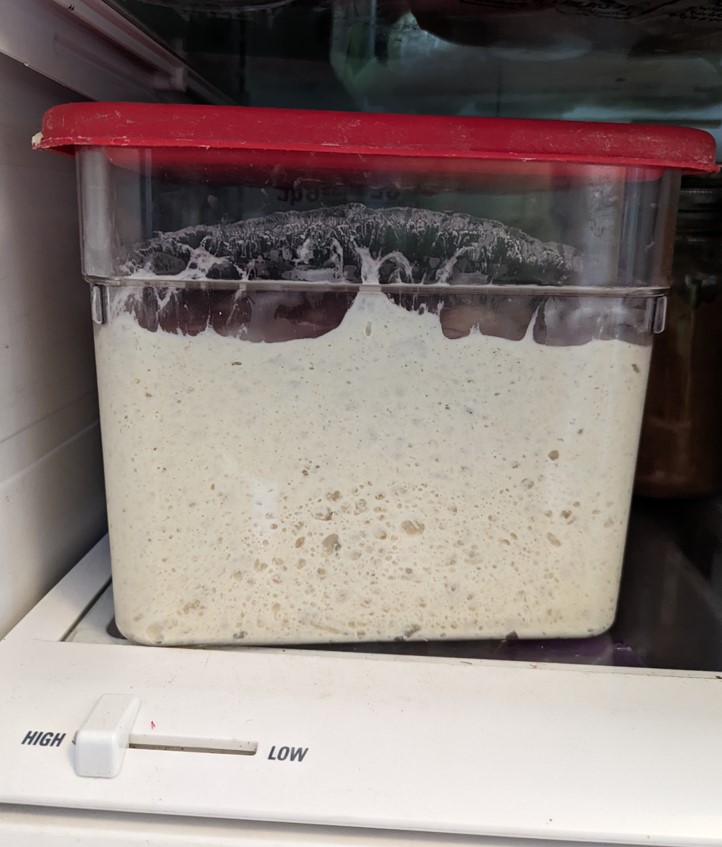
1. Always store the dough for at least a few days before you bake a loaf from a new batch: In as many words, I do say this in the books, but I didn’t want to deny readers from having fresh, hot bread ASAP. Years of trial and error, however, and sampling many, many loaves of bread (cue tiny violin), have convinced me that slightly aged dough is far superior to Day One bread. This means that you might have to stagger batches, but it’s worth it. The flavor deepens and improves in the refrigerator. The crumb develops a more open, “custard-crumb” effect. If you really can’t wait, using a little pre-fermented dough (“pâte fermentée“) can approximate the effect, but not quite as much as aging the dough, which I think reaches its peak at about the halfway point of the recipe’s storage recommendation. That said…
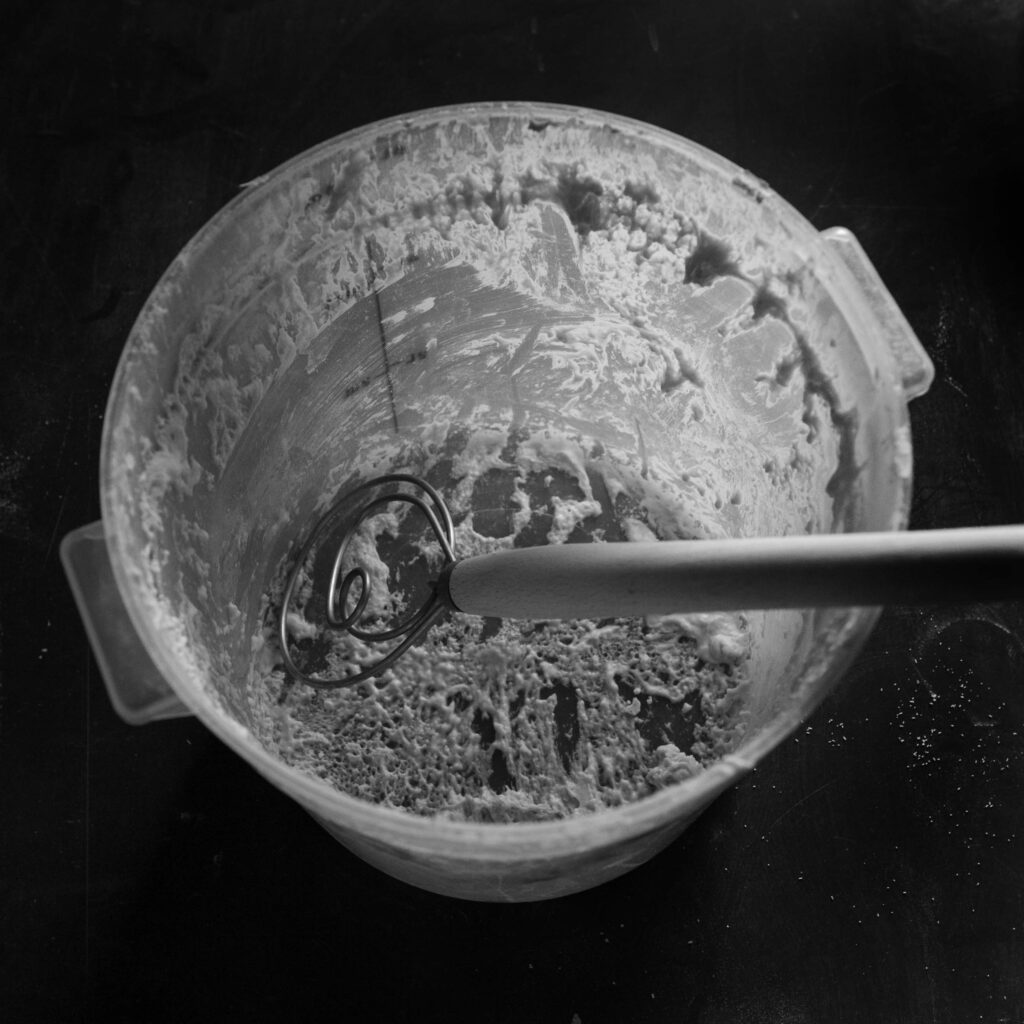
2. …Always use a little old dough (“pâte fermentée“)—about a cup or so—to jump-start flavor in the new batch, and don’t bother washing the dough bucket unless it has eggs or dairy. This is another great lazy-person trick (and laziness is what motivated me to simplify bread-baking in the first place). Just build the new batch on top of the old. And consider turning your old dough into a “sponge.” First, measure out all your ingredients for your new batch. Then, dilute your cup of old dough with water from the recipe, adding a little of the recipe’s flour, and mixing until it’s like thick pancake batter. Add a pinch of the recipe’s yeast, and let it sit overnight before incorporating into the mix. Fully aged dough can be frozen to be used this way, and that’s how I usually do it.
3. Always use a little rye flour in basic white doughs: As little as a tablespoon or two of rye in a four-pound batch deepens flavor and improves the character of white bread. Try this with my basic white-flour recipe and you’ll see what I mean. Whole wheat flour has a similar effect, though not as dramatic. Either way, it takes just a little to heighten and enhance the flavor of white bread without sacrificing its classic deliciousness.
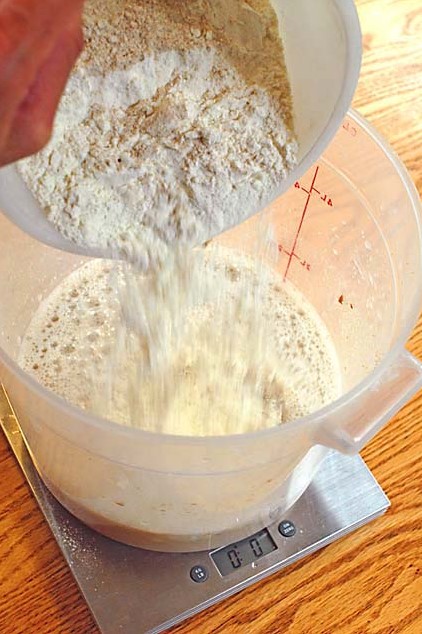
4. Weigh your ingredients: Forget about cup-measures. When my 2007 book was published, it, and most U.S. recipes were written for cup-measures; my subsequent books give weights as well as volumes. With the availability of inexpensive digital scales, the food world’s recognized weights as a more accurate way to measure ingredients, especially flours. If I were starting now, all my recipes would be in metric weights only, which yield much more intuitive numbers. The basic recipe in tip #1 above would be based on 1,000 grams of flour, and 750 grams of water (or 75% hydration by “Baker’s Percentage”).
5. Rise times may vary. Don’t sweat it. In my first book (2007), I called for 1.5 tablespoons of yeast, which is a lot for four pounds of dough. I wanted there to be zero chance of failure, because this book was aimed at non-bakers, many of whom think of yeast as the great bogeyman of the kitchen. And yes, that high yeast dose meant that in pretty much any kitchen, at pretty much any temperature, you’d get full and fast rising, with the dough at least doubling in volume within two hours. But some readers found the yeast flavor too strong, so in subsequent books, I called for 1.0 tablespoon of yeast. But that means that sometimes the rise isn’t complete in two hours, especially if the water or the room is cool. Don’t sweat about this– just let it go longer if it doesn’t seem to have doubled. All this is especially true in the recipes calling for eggs– to prevent slow rise there, let your eggs come to room temperature before using in recipes, and per USDA recommendations, refrigerate egg dough at the two-hour mark. Speaking of slow rising–I’ve started mixing my salt with the flour, rather than the water. My guess is that this doesn’t make much difference, but salt has some inhibitory effect on yeast, and salty water may slow your initial rise. This becomes more of an issue when you go to 1 tablespoon or less of yeast, or if you’re trying cool-water rising. Which brings me to…
6. Consider the low-yeast version of my recipes: I embraced this practice too late for my first book, but you can considerably decrease yeast, even from the 1 tablespoon that I now consider standard for a 4- to 5-pound batch. Many people seem to prefer the flavor and consider the longer initial rise time to be worth it. If you try this with egg-enriched bread, the USDA recommends that it go into the fridge at the 2-hour mark, and it will not have doubled by that time. Don’t worry, it’ll catch up during dough storage. Check out my post on the low-yeast version. If you really want to try a slow rise, which some people find heightens flavor, use cool or even cold water. But expect the rise to take days, and don’t do this with egg or dairy doughs.
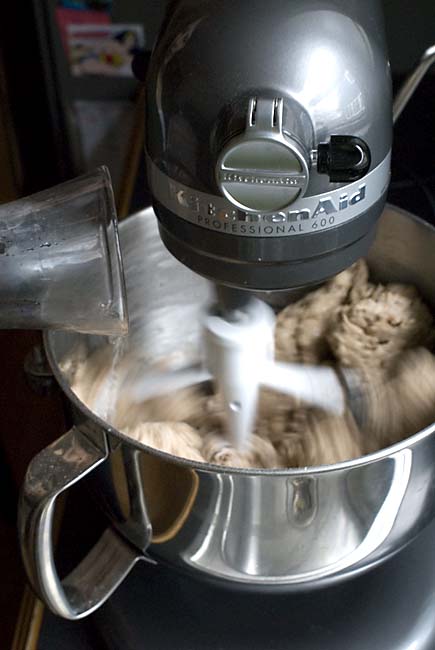
7. Get a stand mixer, and use the dough hook: In the early days, I always mixed by hand. It was satisfying, worked just fine, and it proved that you don’t need special equipment to bake bread at home. But if you’re making dough frequently, like I am, or if you have wrist or shoulder problems, the stand mixer is a miracle. I like the six-quart machines, the bowl-lift variety, because the “tilt-head” models can drip dough all over when you tilt back the head. And the six-quart capacity allows you to rise and store the dough in the same vessel in which you mixed. While I’ve used a Kitchen-Aid exclusively (my first one is going strong at 10 years), I’ve heard great things about other premium brands as well (disclosure: Kitchen-Aid sponsored a post here on the website when I reviewed the machine I use today). In my books, I make a distinction between using the dough hook versus the “paddle/flat beater” attachment to mix wet dough. Bottom line: I think the dough hook works better, regardless of your machine’s capacity (yes, that is the paddle attachment in the photo above, I loved the blur 😊). If you make recipes from my gluten-free book, the results are definitely better if you use a stand mixer. Gluten-free flours really like to be fully emulsified for best results.
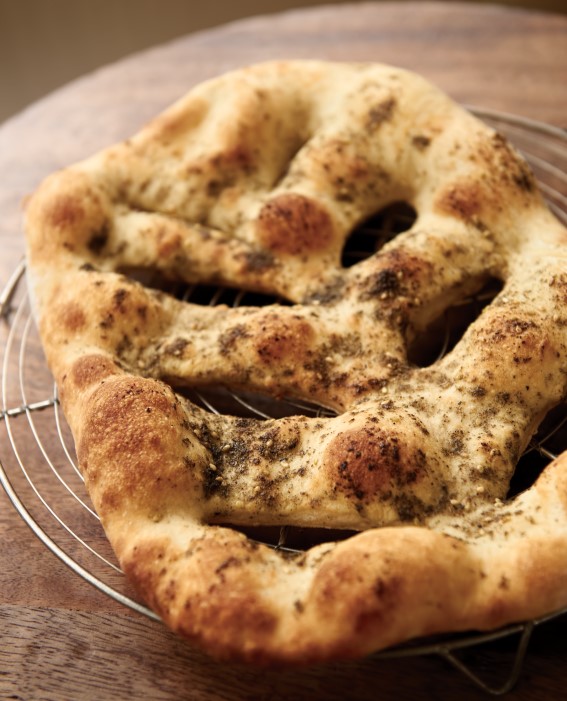
8. Fully aged dough loses some rising power, but it still makes great and flavorful flatbreads, like the fougasse above, or any pizza, from my Pizza and Flatbread book. That book is out of print and hard to find, but I have a fougasse recipe here on the website. Truth be told, pizza and flatbread have been my favorite adventures in bread, and fully aged dough works great here. You don’t need an exuberant rise with pizza or flatbread.
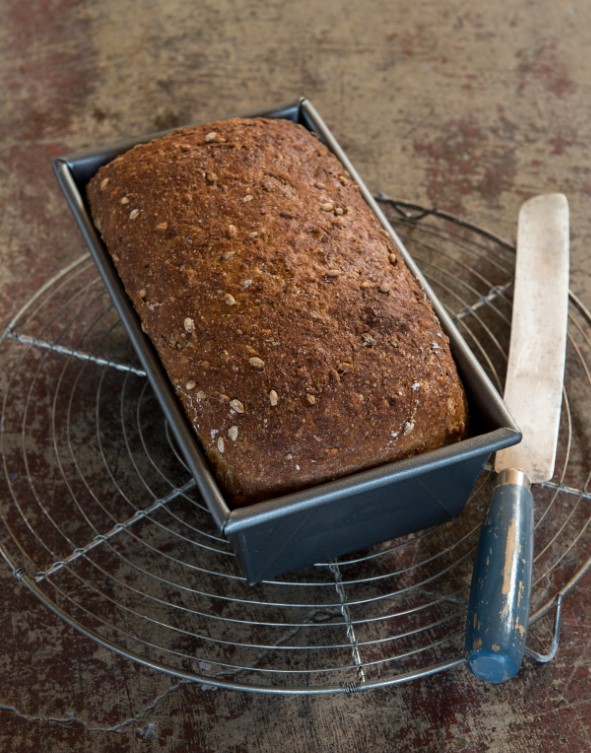
9. It’s OK to lower the oven temperature for loaf-pan breads like this one, especially for recipes high in whole grain flour: In the books, I tried to keep everything simple and consistent, so virtually all the lean breads (those made without eggs, sweetener, or much fat) are baked at 450F. Some readers, in some ovens, found that the breads were over-browning before the interior was fully baked, especially in deeper pans. If this is the case for you, turn down the heat to 400F and bake longer–it can be an hour or more for a big loaf-pan bread.
10. Sacrilege alert! Freezing bread works: I spent years as a home-based consultant and author, testing bread recipes all the time, with 24-hour access to my kitchen—and plenty of fresh bread. I found myself hacking off hunks of it all day, and eating it with butter, cheese, and jam. At one point, I must have been eating at least a half-pound of bread a day. Even if it’s whole grain—and it wasn’t always—that can’t be healthy. I had to stop the madness! If like me, bread is your weakness, consider removing the temptation: slice the bread as soon as it’s cool. Reassemble the loaf, put it into air-tight storage (I use two layers of plastic produce bags), and freeze. You can chisel off a slice (or other reasonable portion!) with a table knife, then defrost or toast. It’ll still better than anything you can get in the supermarket.
BONUS ITEM: NUMBER 11:
11. Let 1 pound (or bigger) round or loaf-pan breads rest for 90 minutes (not 40), and cover them while resting: In my first books, I called for a 40 minute rest after shaping the basic 1-pound ball-shaped bread, and for that very short rest-time, the dough surface doesn’t dry out much. Unless you’re in a very dry environment (the desert, or winter anywhere). Some people found that the rise was restricted following those directions. To take your breads to another level, cover the resting shaped loaf with plastic wrap or a roomy overturned bowl, and go for 90 minutes. Skinny loaves, or rolls–can stick with short resting times.
Note: BreadIn5.com is reader supported. When you buy through links on the site, BreadIn5 LLC earns commissions.
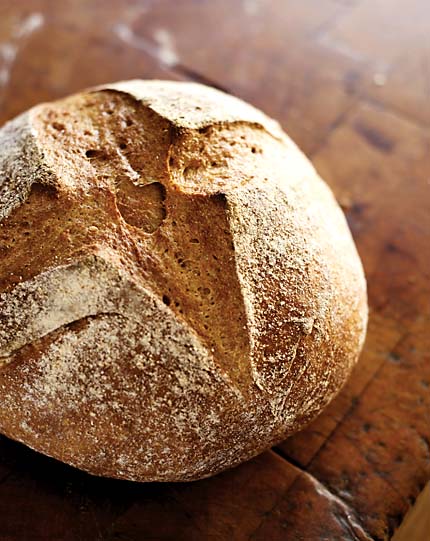
(photo by Mark Luinenburg)
Like many people, my wife, Laura, and I live far from family, so this time of year, we’re always reminded that you have to find family wherever you land. Well, we have landed; this is our thirty-sixth year in Minnesota. Over the years we’ve been lucky to be invited for Thanksgiving dinner by friends with a large and warm family, some of whom travel in from all over the state (and nation!) for the annual get-together. And it’s a potluck, so no surprise, I always got the request for bread and a traditional Thanksgiving stuffing. That stuffing, although it doesn’t appear in any of my books, became my most requested recipe from friends. Back in 2009, I published it here on my website, and I thought I’d reprise it, because I recently made it for my mom, who is a lifelong dyed-in-the-wool roasted-in-the-bird stuffing believer. Well, she loved the oven-baked stuffing. One key to creating rich flavor without a bird is to use your poultry broth without skimming the fat. The second revelation was (and this is sacrilege for me): you don’t have to use homemade bread. At my mom’s place, I used a mix of ordinary white and whole wheat sandwich bread from the supermarket. Not artisan bread at all. The forward flavors are poultry broth, herbs, and egg (stuffing is really a kind of eggy bread pudding), so it turns out that the bread really plays second fiddle here.
That said, I usually do make stuffing from homemade loaves like in the picture above, with the crusts left on for flavor and texture. The Peasant Bread from my first book is a great choice. The white-flour Master Recipe works, but I usually swap in 1 cup of whole-grain rye and decrease the white flour by 1 cup. If you want something lighter, decrease the rye-swap to 1/2 cup (whole wheat flour works the same way). Or use challah (you don’t have to make it in a crockpot like on that link). My go-to poultry broth recipe is from The Joy of Cooking, but any traditional broth recipe will work.
OK, let’s make some stuffing…
Read More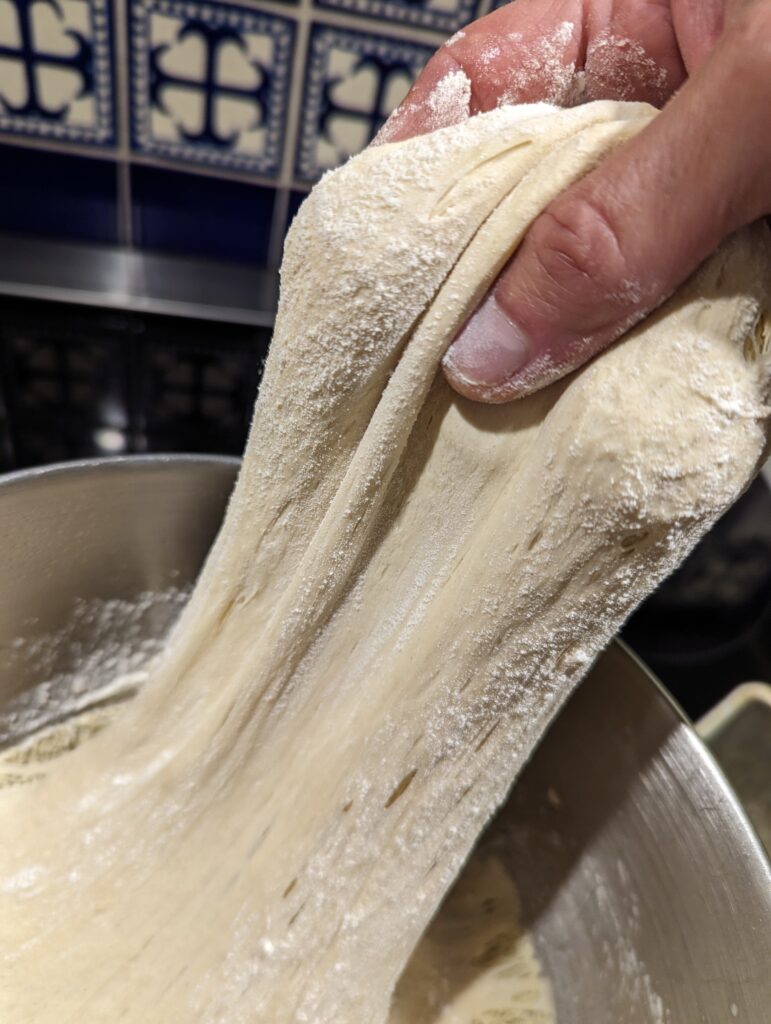
Readers have been asking me about using einkorn flour in my Master Recipe, and since it’s basically winter in Minnesota (see Halloween picture below), it’s time to bake.

Einkorn is a variety of wheat that’s been available in the U.S. for a while. Its flour makes a delicious loaf, and some of you have told me here on the site that einkorn bread is easier to digest than other breads. I can’t make any medical claims about this because there’s no reliable data. To be clear: if you have celiac disease or otherwise can’t eat gluten, you can’t eat einkorn either, because einkorn is a variety of wheat, and wheat contains gluten. It has less gluten than standard wheat flour, and that may account for why some people prefer it. For the same reason, it yields “weaker” (less stretchy, and softer) dough, has a little less rise, and spreads more (in free-form loaves). But I can vouch for this: it makes delicious bread.
I wondered if I could store dough made from einkorn, and whether it would work in my high-moisture method, with adequate dough strength. Short answer: yes, and I was able to use the same 75% hydration as I use in my Master Recipe. The basic formula is: 24 ounces of water by weight, 32 ounces flour by weight, or 750 grams water/1,000 grams flour. But because the gluten is lower, the rise was less exuberant, the resting loaf spread sideways, and the result was denser than what I get with white all-purpose flour. That said, it makes a delicious loaf with an attractive yellow-brown crumb. I’d strongly recommend that you measure flour and water by weight for this recipe rather than using cup-measures. Measurement by volume introduces the possibility for errors that will be particularly problematic for einkorn doughs, which can be heavy if you’re off on the hydration.
Because it was the only brand I could find in supermarkets near me, I tested with the Jovial All-Purpose Einkorn flour product. It’s not entirely white flour; there’s a little of the bran and germ left in. I didn’t test with Jovial’s whole grain einkorn flour.
I used the same hydration as I always do–the dough looked about as wet as my usual dough from the standard Master Recipe when einkorn was simply swapped in for regular all-purpose (by weight). Note that if you use a different brand of einkorn, the water requirement may change.
Ingredients
24 ounces, or 750 grams lukewarm water (you can use cold water, but it will take the dough longer to rise. Don’t use hot water, which can kill yeast). I know that the ounces and grams aren’t identical quantities, but they both represent 75% hydration–it’s the weighed ratio of water to flour that matters. The yeast and salt don’t need to appreciably change for the metric version. The metric recipe makes a little more dough (6 ounces more).
1 tablespoon granulated yeast ( any type, including instant, quick, rapid rise, bread machine, or active dry)
1 to 1 1/2 tablespoons Morton Kosher Salt (adjust to suit your taste; more information here)
32 ounces, or 1,000 grams by weight, all-purpose einkorn flour
Mixing the dough:
In a 5- or 6-quart bowl, pot, or lidded dough bucket (the lid is sold separately), dump in the water, and add the yeast and salt.
My recipes violate the old dictum that yeast shouldn’t be in contact with salty water in the absence of flour (the fear was that this would inhibit the rise). If you’re worried about this, whisk the salt into the flour instead of putting it into the water.
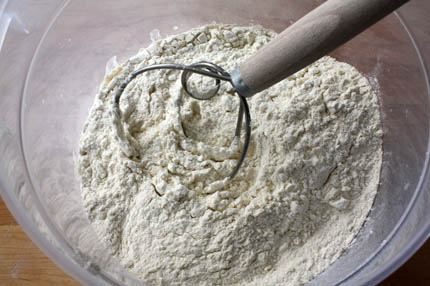
Dump in the flour all at once and stir with a long-handled wooden spoon or a Danish Dough Whisk, a tool that makes hand mixing much easier. So does a stand mixer if you have one (here’s a post on using a stand mixer with my method).
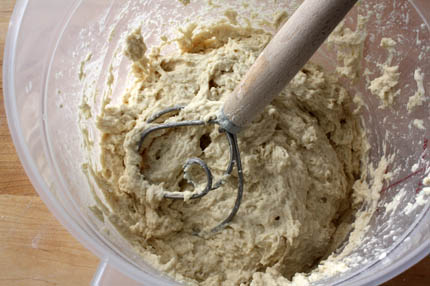
Stir it until all of the flour is incorporated into the dough; the result will be very moist and rough-looking.
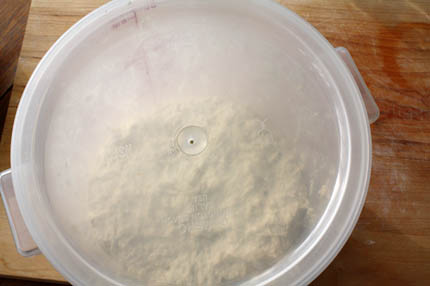
Put the lid on the container, but do not snap it shut, which allows gas from the yeast to escape (you can put a little hole in the top of the lid so that you can close the lid and still allow the gas to escape. A pinhole will work.
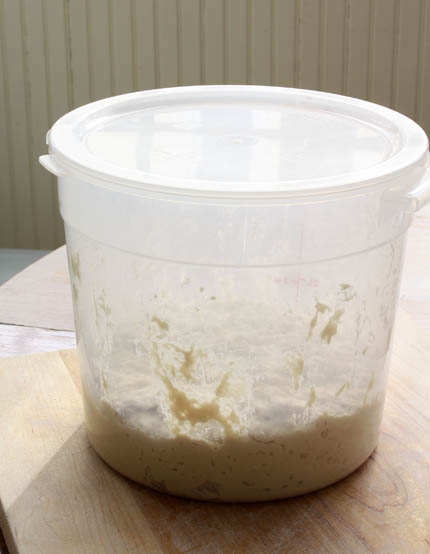
Allow the dough to sit at room temperature for about 2 hours to rise (it may take longer). When you first mix the dough it will not occupy much of the container.
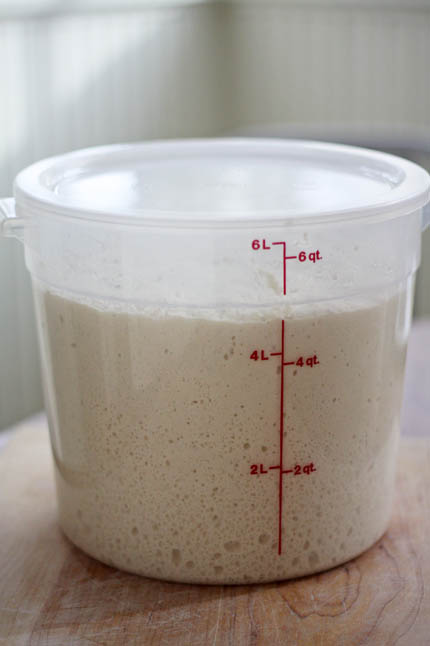
After the initial 2 hour rise it will look like this. (If you have decreased the yeast you will have to let it go longer than 2 hours.) DO NOT PUNCH DOWN THE DOUGH!
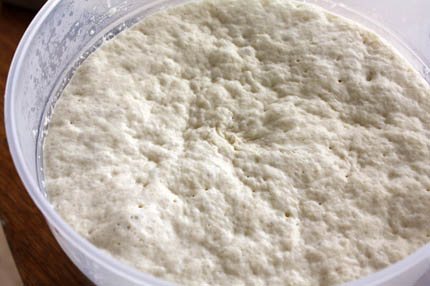
The dough will be flat on the top and some of the bubbles may even appear to be popping. (If you intend to refrigerate the dough after this stage it can be placed in the refrigerator even if the dough is not perfectly flat. The yeast will continue to work even in the refrigerator.) The dough can be used right after the initial 2-hour rise, but it is much easier to handle when it is chilled. It is intended for refrigeration and use over the next week, ready for you anytime (doughs made with regular flour can go for 2 weeks). For the first two days of storage, be sure to leave the lid open a crack, to allow gasses to escape. After that, you can usually snap down the lid on plastic contains without problems, because they’re usually not entirely airtight. BUT, DON’T SEAL GLASS CONTAINERS OR THEY MIGHT SHATTER. The flavor will deepen over that time, developing sourdough characteristics.
If the dough develops a hard crust, you can usually fold that into the next loaf, but it may create a hard area in the crumb. If you want to prevent this, scrape off the crust before using. Transfer the dough into smaller containers as you deplete it to prevent the crust from forming, and close the non-airtight container after two days.
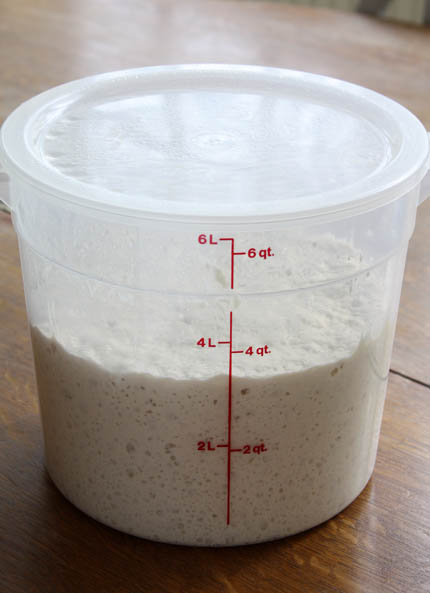
The next day when you pull the dough out of the refrigerator you will notice that it has collapsed and this is totally normal for my dough. It will never rise up again in the container.
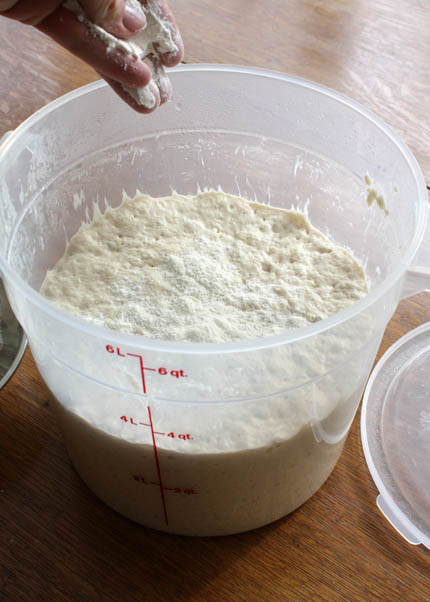
Dust the surface of the dough with a little flour, just enough to prevent it from sticking to your hands when you reach in to pull a piece out. On Day 1, this is how the einkorn dough looked:
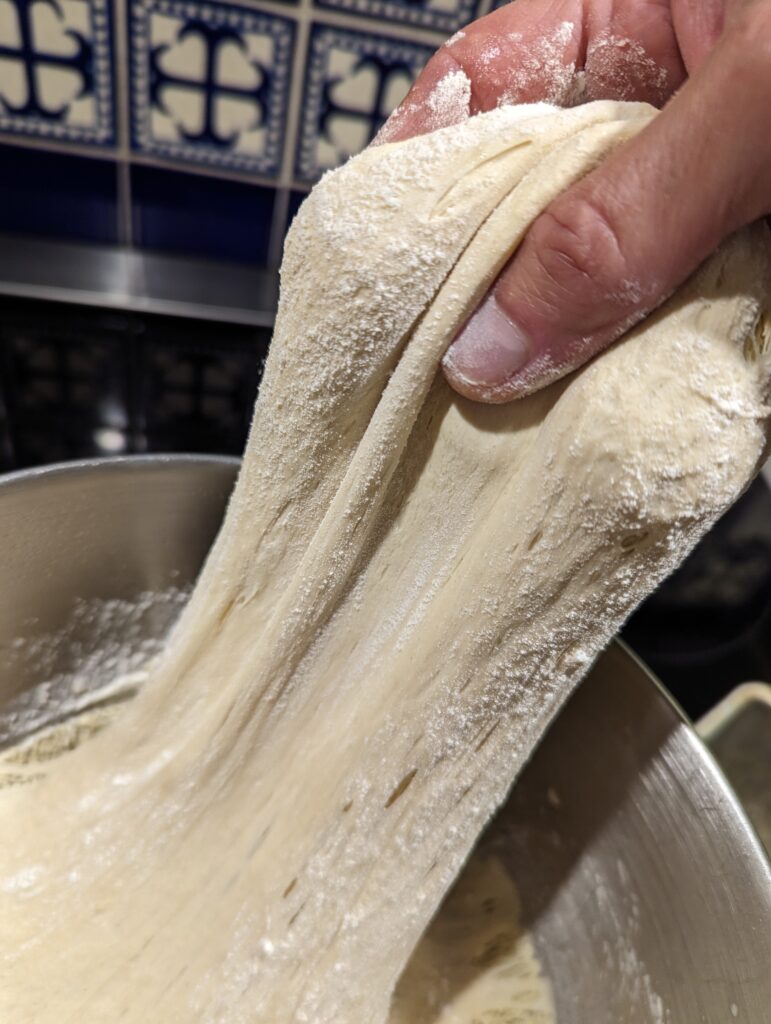
It had adequate stretch, but I could tell that the “dough strength” wasn’t at the level of dough made with higher-gluten flours like all-purpose. It didn’t take as much force to stretch it. I decided to bake a loaf-pan bread on Day 1, then compare the results when the dough had a week’s storage.
I cut off a 1.5-pound piece of dough using kitchen shears or a knife and formed it into a ball, elongated it, and dropped it into a well-greased 9 x 4 x 4 loaf pan. Shaping wet doughs like this one’s a little different; this video shows the technique for shaping this very wet dough (more on loaf pan breads at this link). Allow the dough to rest in the pan at room temperature for 90 minutes, then place in an oven preheated to 450F, with a metal broiler tray on the bottom, which will be used to produce steam (never use a glass vessel for this or it will shatter). Pour a cup of hot water into the broiler tray before closing the oven door (if you have an older oven without tempered glass in its window, cover the glass with a towel and remove it before closing the oven door). It baked for about 50 minutes, and it looked great:
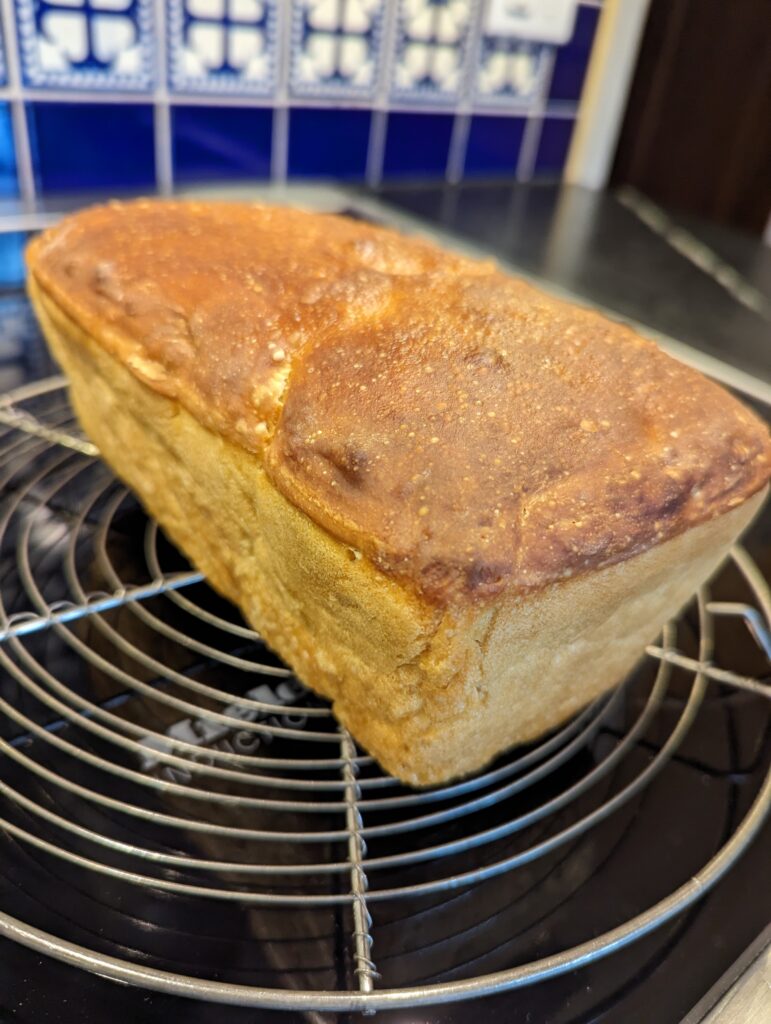
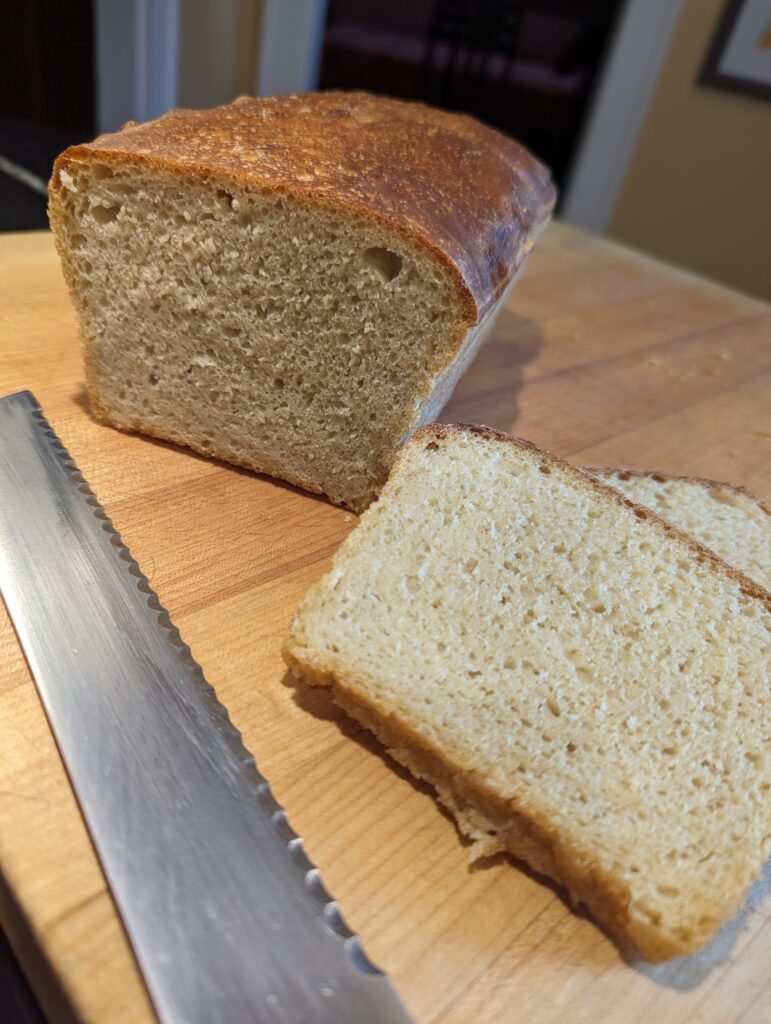
The crumb was nice, but there were small holes–this dough doesn’t have the dough strength to support large holes (OK, there’s one):
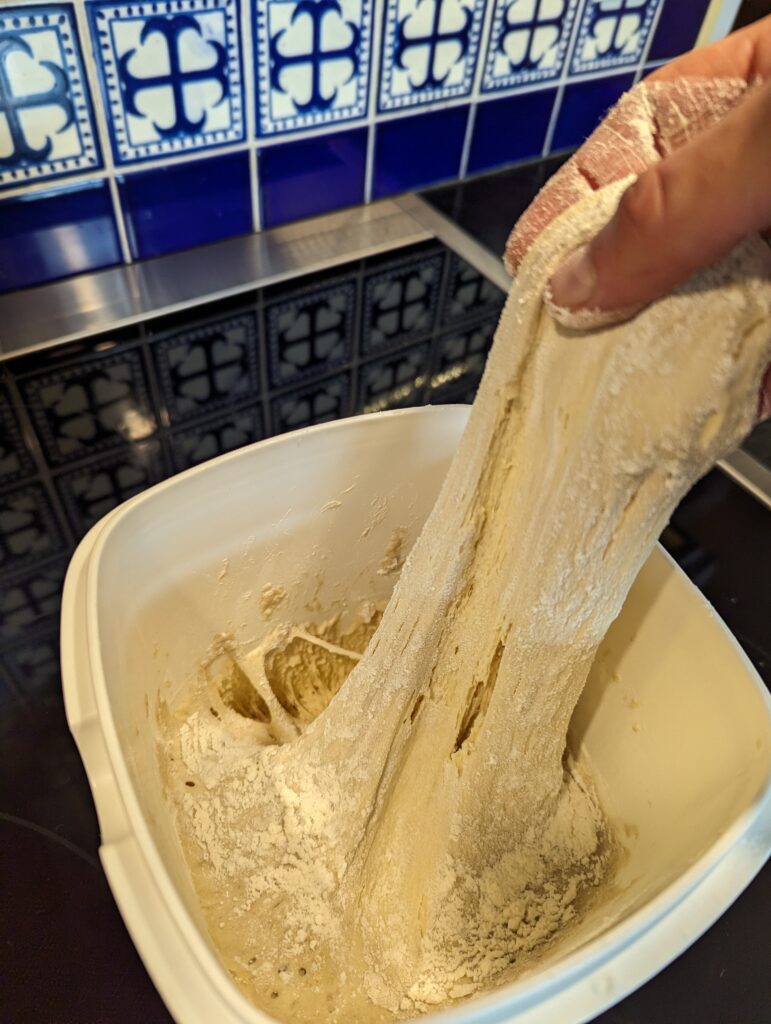
The flavor was terrific, but I wanted to see if the flavor would deepen or if the hole structure might improve with a week’s storage. So seven days later, I followed the shaping and baking directions for the Master Recipe (click for the link). Here’s how it looked through the process. First, I noticed that the dough was a bit weaker than a week before–note the hole developing as I stretched a piece to cut off:
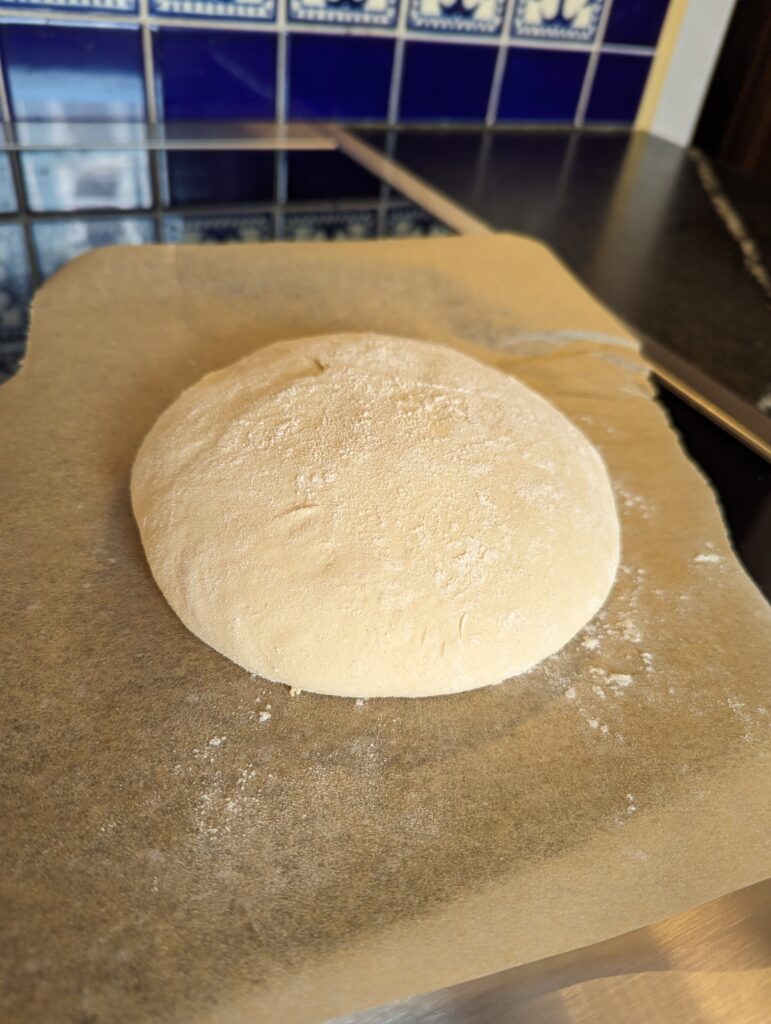
It shaped fine as a boule (ball-shaped loaf) to sit for a 90 minute rest on parchment paper (you can place it on a cornmeal-covered pizza peel instead). I preheated the oven, with a baking stone near the middle of the oven, to 450F, for the last 45 minutes of the rest time.
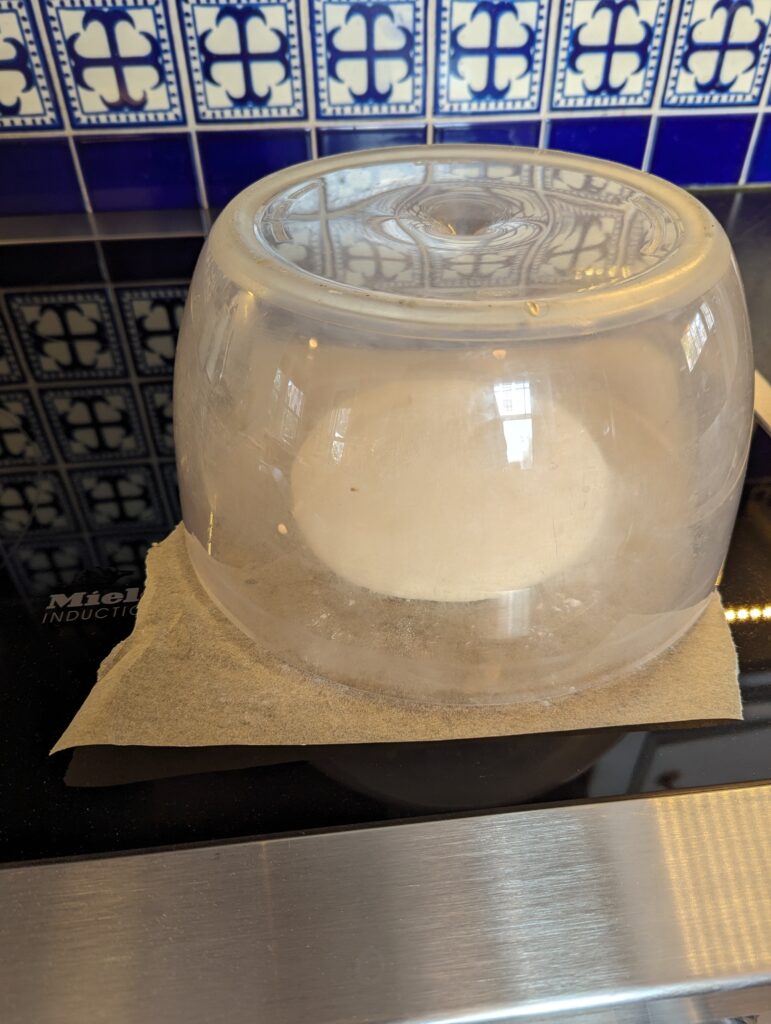
I’ve been covering the resting dough with the plastic bowl from a salad spinner. This really helps in dry environments (like cold weather when heating systems dry the air):
During the rest period, the loaf spread sideways more than it rose upward, but the key was expansion, yielding a reasonably open crumb structure even though there wasn’t much vertical rise. This turned out to be a semi-flat bread, about 2 inches tall when baked…
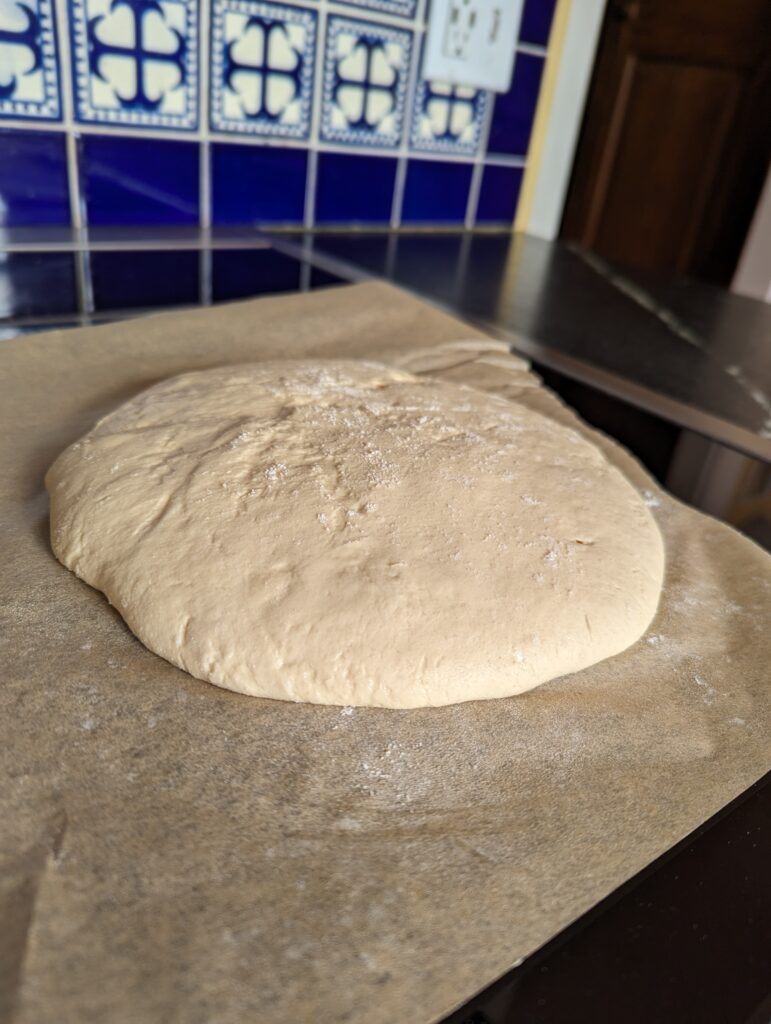
After sprinkling with flour, I gave it three slashes with a bread knife. Cut with the blade perpendicular to the surface for wet-dough loaves like this one (or any of my recipes)…
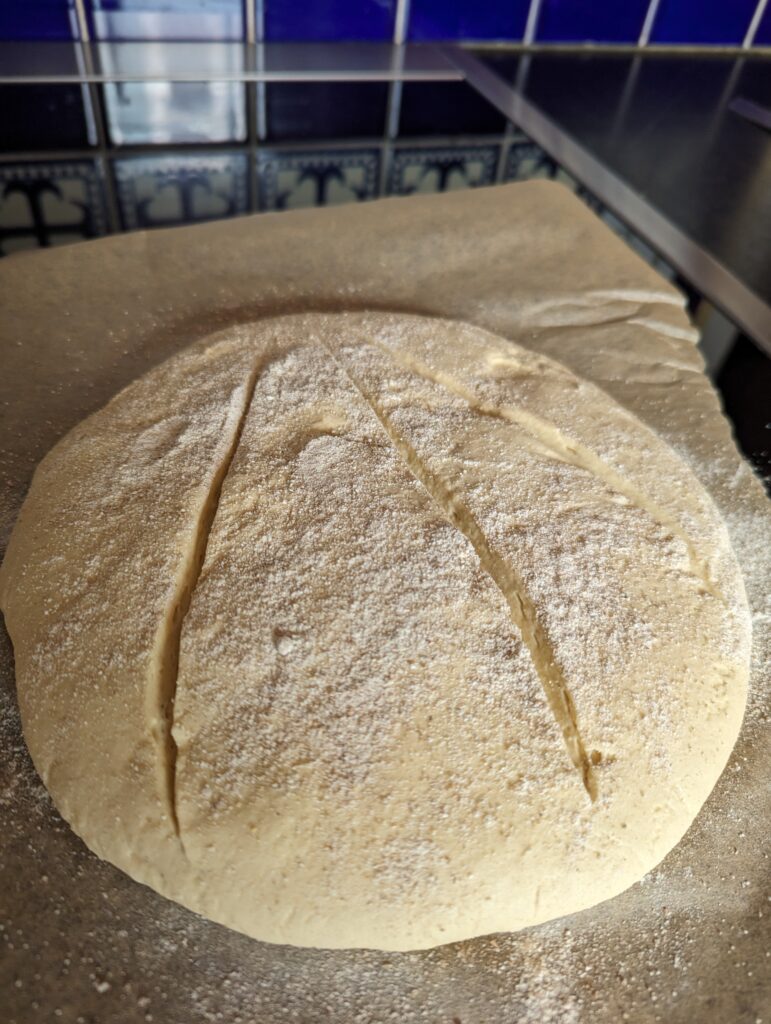
Get under the parchment with a pizza peel or a board…
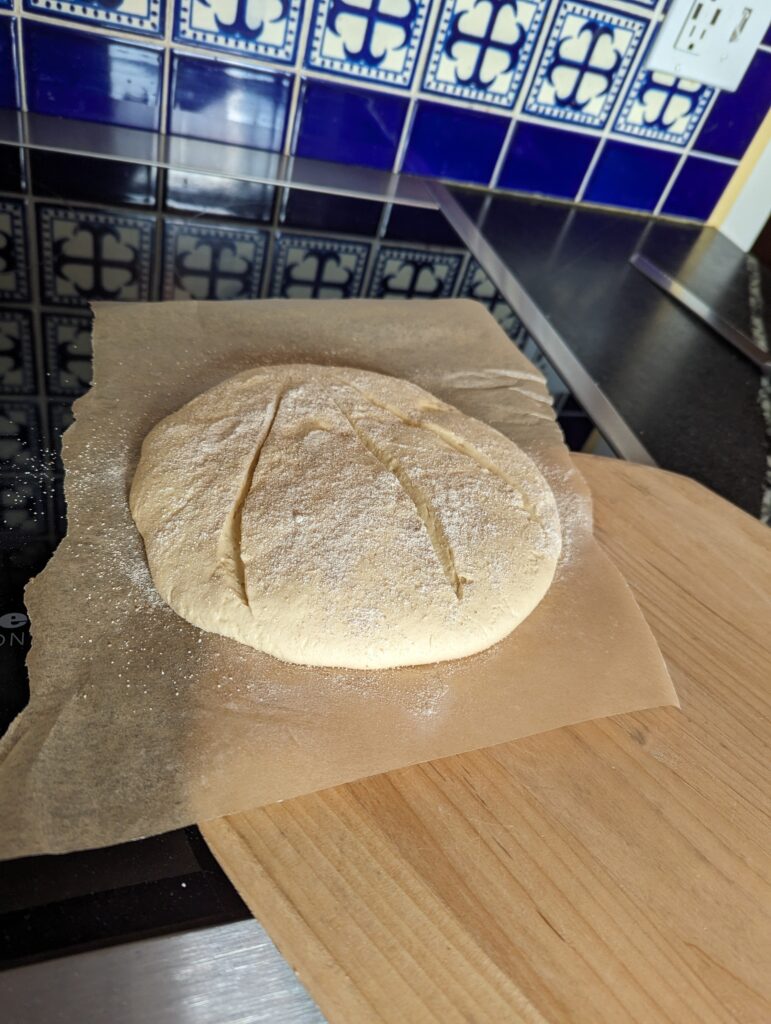
… and slide the loaf, parchment and all, onto the hot baking stone.
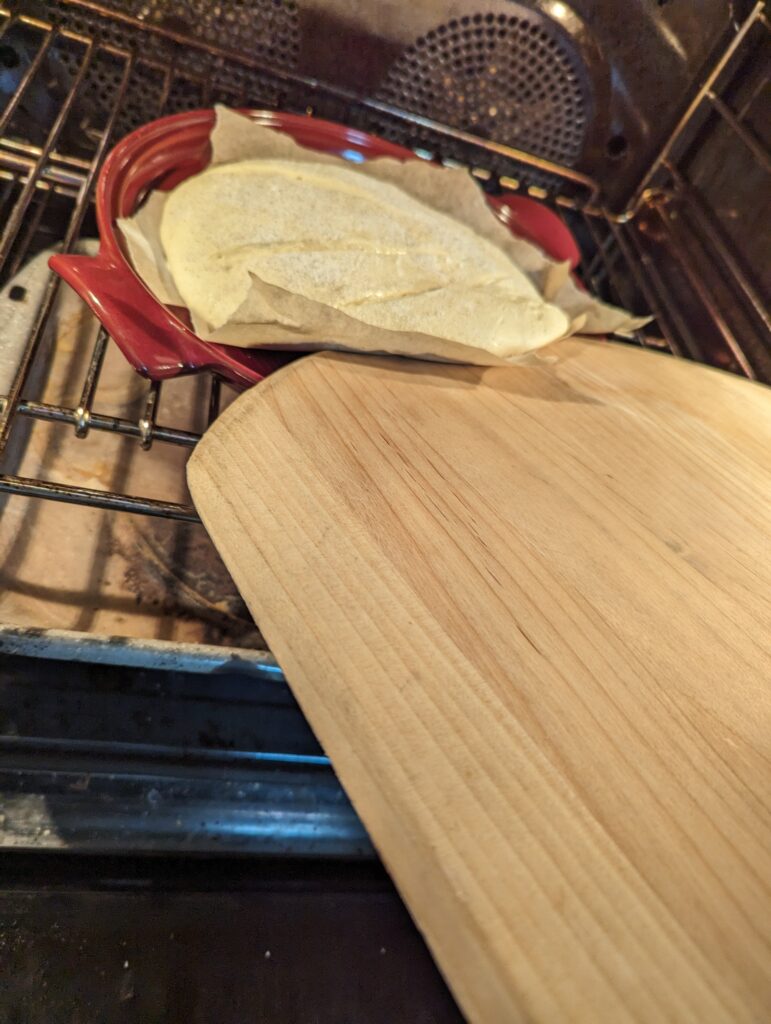
Pour a cup of hot water into the broiler tray (same caution as above if your oven’s door doesn’t have tempered glass)
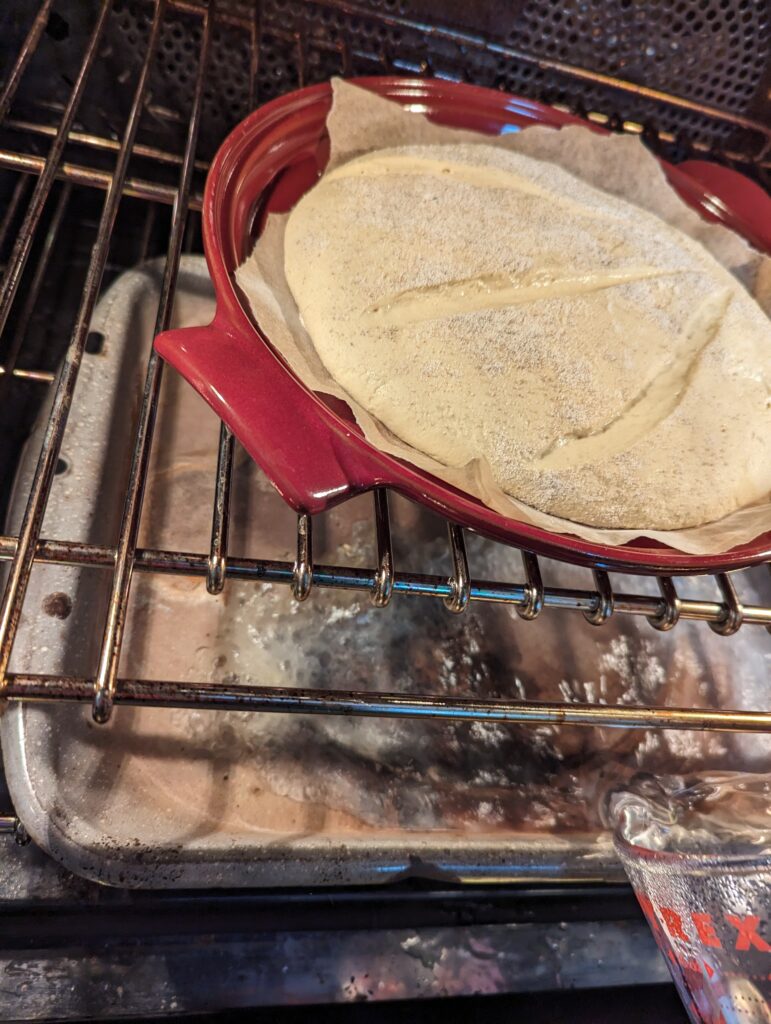
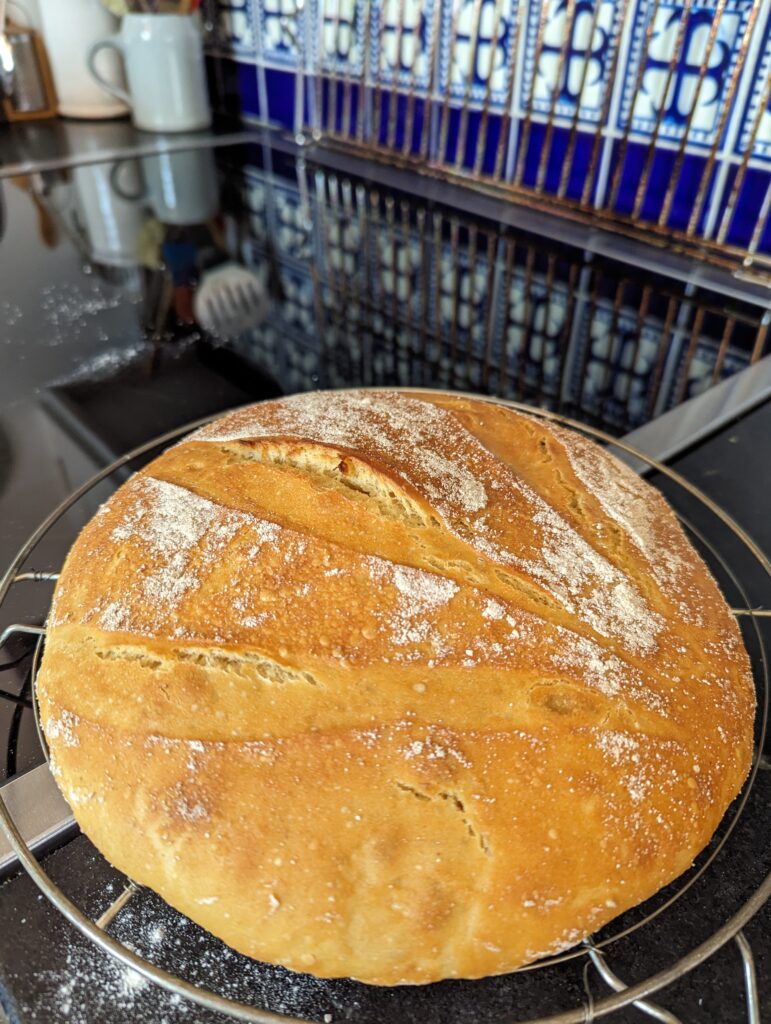
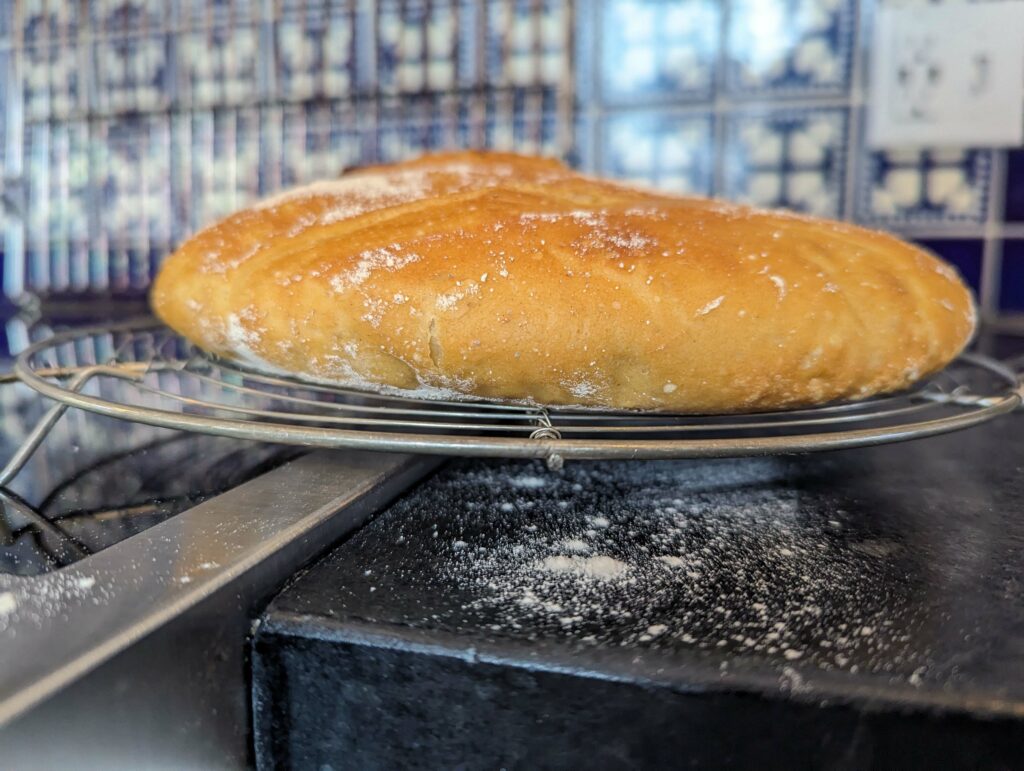
This baked up nicely, with some imperfections in the final crumb result (a bit dense in places). I wouldn’t store this dough for longer than 7 days.
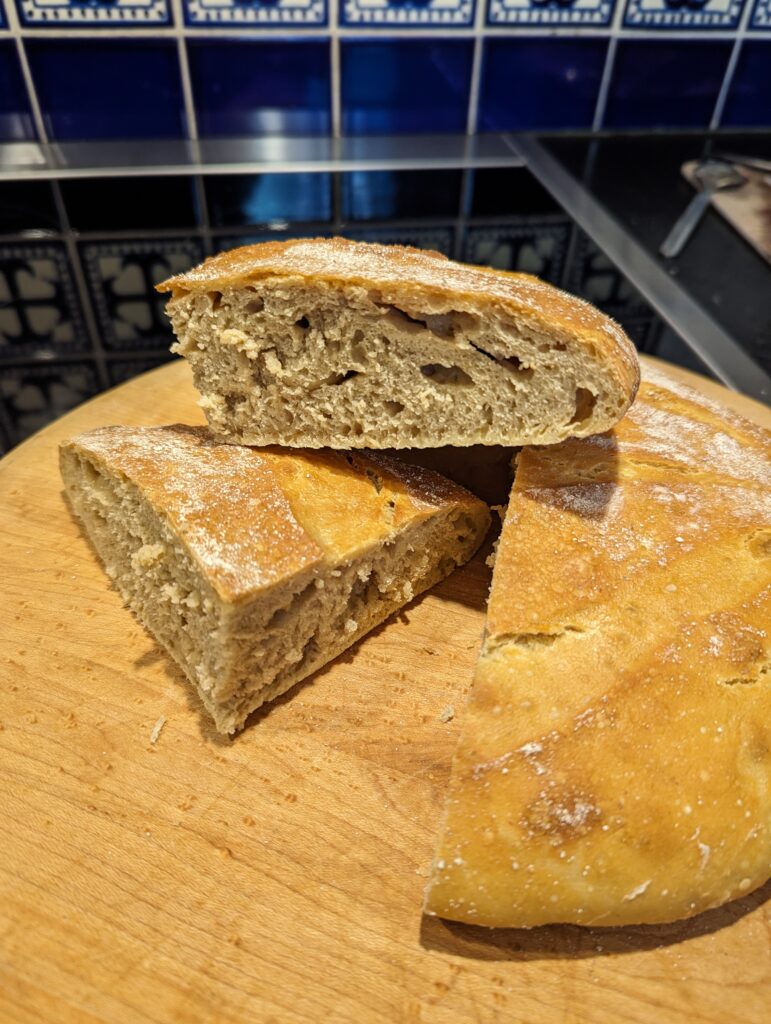
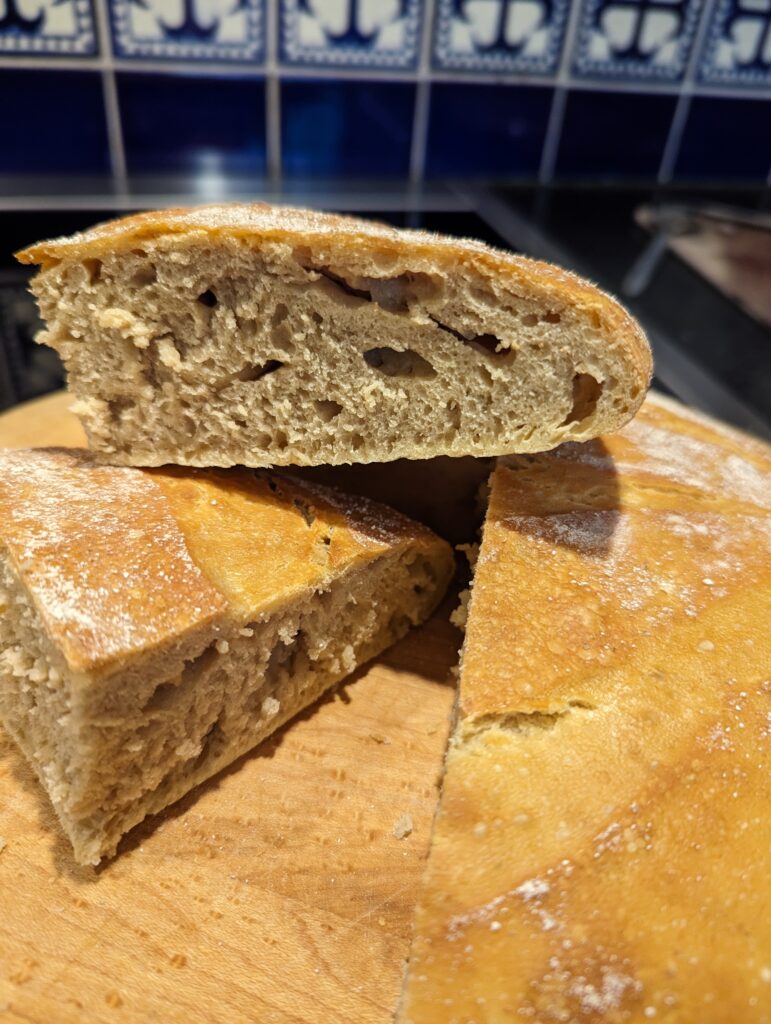
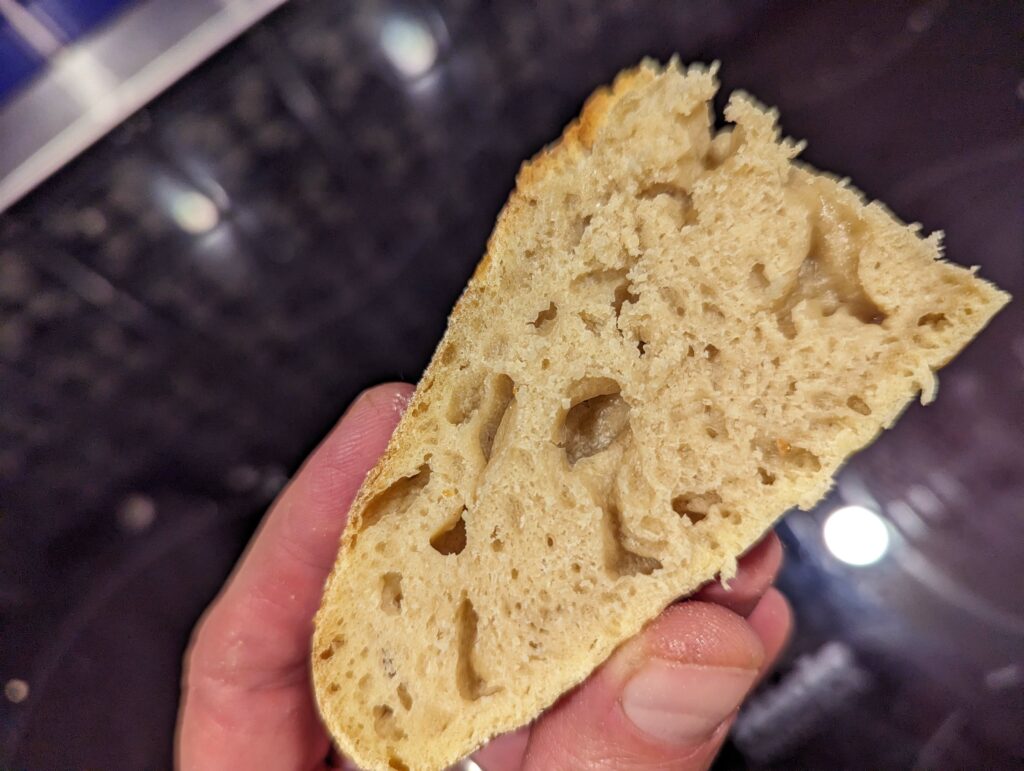
The verdict? The bread’s delicious, and that’s the main thing. I don’t think I’d choose einkorn for a lofty, high, freeform bread, but for loaf-pan breads, flatbreads and pizzas–fantastic.
Enjoy, have fun baking, and check out the FAQs page if you’re having trouble getting the bread to turn out the way you’d like.
Note: BreadIn5.com is reader supported–when you buy through links on the site, BreadIn5 LLC earns commissions.
Minnesota is in a heat wave, so I can’t say that I’m itching to fire up the oven and bake fresh buns for hot dogs or bratwurst. It’s a cinch to do it on the same grill that you use for your hot dogs or bratwurst, and this video shows you how. Use any lean dough my books, like The New Artisan Bread in Five Minutes a Day. Click for a recipe here. If anything in the video’s unclear, just visit back and post a question into the “Comments” field. There might be–some wacky highjinks in this old video. And more on shaping hot dog buns at this post, click here.
One word of caution: I can’t vouch for the durability of baking stones placed on a gas grill. I haven’t had any trouble with my half-inch thick stone but the thin ones tend to crack. My guess is that if you call any stone manufacturer, they will tell you not to do this. None of them warrant stones against cracking (one company did in the past, but they’ve withdrawn that).
Click here if you’d like to see the list of past postings on summer grill-breads…
Read More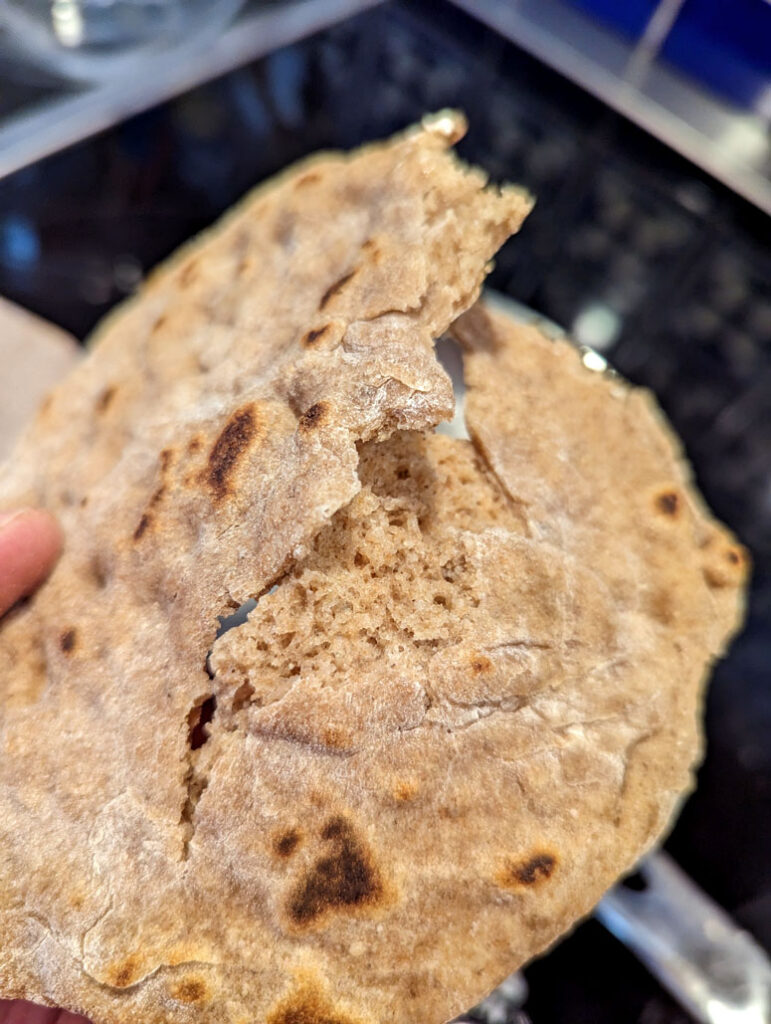
In all my books, I call this fast and delicious flatbread “naan,” which is a specialty from India, but truth be told, it isn’t really naan, because the authentic article is made in a massive ceramic oven (“tandoor”), and the flatbreads are slapped onto the sides of its huge bowl-shaped surface and cooked over charcoal. My version is from page 260 of “The New Artisan Bread in Five … .” For those of us who don’t have a tandoor at home, we can still make chewy, fragrant flatbreads in a skillet, right on the stovetop. I’ve done it on gas, electric, and induction stovetops, but I’m going to put in a brief plug for induction, because I recently got one, and I’m in love with it. It’s instant-on, rapidly responsive, and very, very stingy with energy and carbon emissions. This is part of the electric transition that is probably in all our futures and that my family has started trying to make. Induction is nothing like traditional radiant electric stovetops — it’s actually better than gas, by a lot, despite persuasive advertising from the gas industry, since the 1930s which brought us the wacky expression, “Now you’re cookin’ with gas!” I was a gas diehard … until I tried induction at a friend’s house. Melissa Clark had a great article on this last year if you’re interested in learning more. But this bread, which doesn’t care what kind of stovetop you use, is fast and delicious, and stovetop cooking doesn’t heat up your kitchen like an oven, so it’s a great choice for the upcoming warm weather (someday soon, fingers crossed, even here in Minnesota). Read on …
They say that everyone’s Irish on St. Patrick’s Day, and I hope that’s true, because I loved my trip to Ireland—the music, the literature, the Guinness Stout, and yes, the food. It’s been many years since I was in Ireland, but I remember swooning over the fresh, wild salmon, buttered potatoes (of course), and the moist and flavorful brown bread. But brown bread’s not particularly festive (or green!), and I don’t have a recipe for classic Irish soda bread, which is made without yeast (for that, I rely on James Beard’s recipe in Beard on Bread—the first bread I ever made). But there is a broccoli & cheddar bun recipe in Healthy Bread in Five Minutes a Day. Turns out four-leaf clovers aren’t especially Irish, but they’re very lucky! Sprinkled with cheese, these cheddar buns make a lovely and healthy accompaniment to corned beef and cabbage. One little disclosure—the broccoli doesn’t make it all that deeply green, as you can see. Some would have used green food coloring, I suppose. Bain taitneamh as do bhéil! Hearty appetite (I think). Read More

In all of my books, you’ll find a bagel recipe made the traditional way, by forming the ring and then submerging it into a brief boiling-water bath before baking–but I don’t do that anymore. I did this every Sunday morning for years, and had lovely family brunches, reading the paper, drinking coffee, and munching on bagels. Growing up, this was an outer-borough New York City ritual (with store-bought bagels). The traditional bagel-making method was captured in this short film, which is archived at the Brooklyn Public Library (and really captures the 1970s vibe!). Just below the video, click on (…more) for instructions on how to skip the boil if you’re feeling lazy like me…:
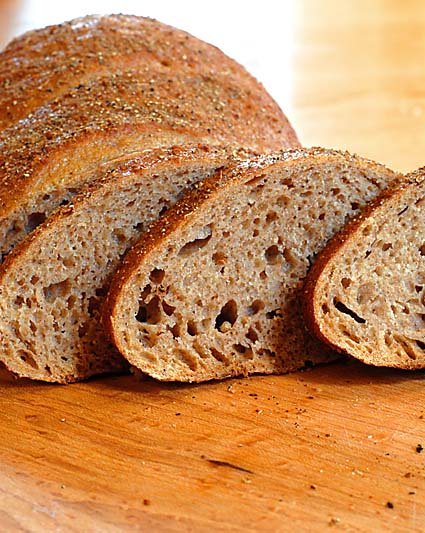
This is the New York-style rye bread that got me interested in baking bread when I left New York for Minneapolis in 1987. It continues to be very hard to find–pretty much anywhere in the US. Why? It’s too complicated (and for commercial bakeries, expensive) to create the rye sour that defines the taste of this loaf. And while two of my books include a true sourdough recipe that you can make from rye (see this link if you want to go that route), in general, I simply let a batch of part-rye dough age long enough for the sourdough flavor to develop right in the batch itself. Seven days is perfect but you can use it for up to fourteen with a dough this wet (stored dough is the basis of this method). All rye breads need some wheat flour in order to properly rise, because rye is low in air-trapping gluten, so the real question comes down to the ratio of rye to white all-purpose flour.
You can play with this recipe just by starting with the Master Recipe for a white country loaf that I put up on the site last week. All you need to do is swap in rye flour for some of the white. Swapping a cup of rye flour (4 1/4 ounce / 120 grams) is about right, though sometimes I prefer a little less–half that. Really, no other changes are needed, except for adding 1.5 tablespoons of caraway seeds (if you like them–to me, it’s not rye bread without them). If you go for a full cup of rye you may need a little more water–2 to 4 tablespoons. Shape ovals as in this video:
To clarify a couple of things from the video: I said to turn and shape the loaf pulling around on three sides– I meant “on four sides;” turn the loaf in quadrants and pull the top around to the bottom to create a “cloak.” And of course, rest the loaf on on cornmeal or parchment, not on the board where you shaped it or you’d have to lift the fully proofed loaf, which isn’t a good idea.
Let the dough rest after shaping for 60 to 90 minutes, preheating a baking stone to 450 degrees F (230 degrees C) in the last 40 minutes of that time, with a metal broiler tray on any other shelf that won’t interfere with rising bread (do not use glass for this purpose or it will shatter). Using a pastry brush, paint the loaf with water or cornstarch wash and sprinkle with additional caraway seeds.
Slash at least 1/2-inch deep with a serrated bread knife, making perpendicular, not angled cuts, as in the video. Slide loaf onto the baking stone and pour 1 cup of hot water into the broiler tray and close the oven door. Bake for about 30 minutes or until golden brown.
And then, it’s Super Bowl tomorrow–some ideas:
Sheet Pan Taco Pizza for Super Bowl Sunday
Chili Bread Bowl for the Super Bowl
Note: BreadIn5.com is reader supported. When you buy through links on the site, BreadIn5 LLC earns commissions.
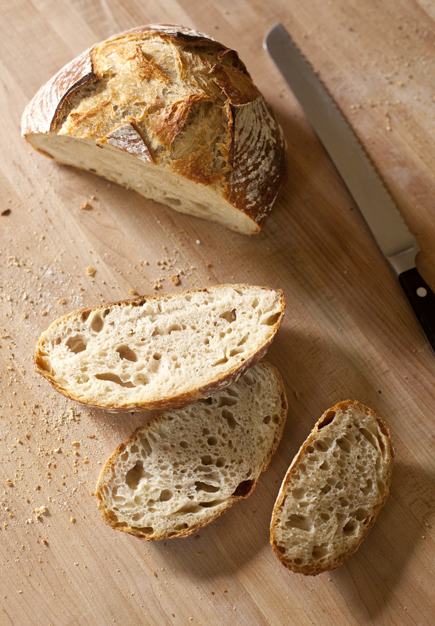
It’s the dead of winter here in Minnesota, and everyone I know is baking again–so it’s time to review the basic recipe from my BreadIn5 books. Back when the cookbooks first came out (2007!), authors didn’t generally put their most important recipe out on a website for free.
I took a different approach.
You can really teach people a new method, and communicate with them in near real-time (about problems they’re having with recipes). That means using this technology to let people sample the method, and comment back. So this is one of my sites most popular posts, and it contains the most important method that really made these books a success–the stored-dough recipe for a round European-style loaf, that tastes better the longer you let the dough age in the fridge (to a point–up to 14 days with this dough, in this post!). Here’s the recipe, from The New Artisan Bread in Five Minutes a Day.
For the Master Recipe…
Read More