Fresh Bread made with Older Dough

Old dough boule | Breadin5 04

You may open a bucket of dough that’s been untouched for several days or more and find it’s gray, leathery and has some liquid on it (pictures below), with a strong “sourdough” smell to it, since it had been fermenting for a very long time. For those of us who like that kind of character in our bread, it’s great. The best thing to do with this older dough is to incorporate it into a new batch. It jump starts the flavor in your new dough, without having to wait days for the fermentation. It is like having a sourdough starter, that you never had to feed.

Old dough boule | Breadin5 07 Read More

Master Recipe from Gluten-Free ABin5

Gluten-Free Artisan Bread Master Recipe | Gluten Free Artisan Bread in Five Minutes a Day

The idea for a gluten-free version of The New Artisan Bread in Five Minutes a Day started here on the website. People were writing in to say they loved the method, but couldn’t eat wheat. It set off a quest to develop recipes that fit this fast and easy method but used flours that were gluten-free. Gluten-free breads have appeared in all of the books since then, but they were just small chapters among a bunch of wheat filled recipes. It seemed unfair to the folks who couldn’t eat wheat to buy a book filled with recipes that didn’t suit their needs, so… a book just for them. Last week Gluten-Free Artisan Bread in Five Minutes a Day came out–here is its Master Recipe.

There’s been great feedback from the original gluten-free recipes, but what you see here is even further simplified. That meant developing two flour mixes that all our recipes are based on, so you just have to mix the flour once for many loaves. You just mix up a big batch of our Gluten-Free All-Purpose Flour Mix and/or our Whole-Grain Gluten-Free Flour mix and you’ll be able to quickly mix and bake all 90 gluten-free artisan bread recipes in our book. (Commercial flour mixes haven’t worked well for breads made from stored dough).

I also wanted to provide recipes that are mostly vegan (no eggs) and dairy free. Because eggs are a leavening ingredient, we do like the Master Recipe made with eggs for a lighter loaf. In fact, we find that the dough made with egg whites is the lightest of all the options. You can also use an egg substitute if you choose not to use eggs. And as always with the method, you save time by mixing a large batch and storing it in the refrigerator, pulling off dough to use as you need it.

Master Recipe from Gluten-Free Artisan Bread in Five Minutes a Day

The following recipe is the Master Recipe from GFABin5 made with egg whites, but you can make the same recipe with whole eggs, egg substitutes or without any eggs at all. Read More

peasant bread

How to Make a 2-pound Loaf

In Artisan Bread in Five Minutes a Day and Healthy Bread in Five Minutes a Day we suggest baking a 1-pound loaf and give detailed instructions for making this smallish bread. It seems like a nice size loaf for a family of 4 to eat in a day. On some occasions you may want to bake a larger loaf and it requires a few adjustments to our recipe. Here are step by step instructions for baking a 2-pound free form loaf. Read More

Watching Dough Rise – how high should it go? (Plus, a new member of the Bread in Five family)

We have you mix up your dough in a nice big 6-Quart Food-Storage Container, because over the course of 2 hours it will grow to nearly touch the lid.  Some folks have asked exactly what that should look like, so I mixed up a batch of each Master recipe from ABin5 and HBin5, then sat back and watched them rise. I promise this is more fun than watching paint dry, it will show you exactly what your dough should look like and I’ve set it to a little Johnny Cash (Ooops, apparently I can’t do that. Had to switch to something with a little less….copyright).

We also have an exciting announcement to make, especially for those Brits who are baking our bread or people excited to bake with weights.

Our first book Artisan Bread in Five Minutes a Day was translated for British bakers. Yes, it is still in English, but the recipes are converted to weights. They appear in both ounces and metrics. For those of you Americans excited to bake by weights this will be a welcome edition. The book’s title and look are also changed, but the recipes are the same. Five Minute Bread is now available for pre-order on Amazon.com.UK and will be on bookstore shelves in January 2011.

Happy Baking!

Underbaked! My loaf didn’t bake through to the center. What am I doing wrong?

Return to FAQs page

When we talk with people with a loaf-center that won’t bake through, it’s almost always one of these explanations:

  1. The oven temperature is off: Usually it’s running too hot, and the outside looks brown before the center is baked through.  But a low oven temperature can fool you too– you think you’ve baked long enough, but it’s actually running 50 degrees too cool.  Home ovens can be off by 50 to 75 degrees F, so check with an inexpensive oven thermometer like this one on Amazon.
  2. Inadequate oven and stone pre-heat: This can be an issue for really large ovens and thick baking stones. Some professional-style ovens (Wolf and Viking, for example) may need up to an hour of pre-heating. If you are using a thick baking stone, it may also need up to an hour of pre-heat. Even thin stones will benefit from a longer preheat.
  3. Measuring flour incorrectly: The most common mistake is that someone isn’t measuring the way we describe in our books.  We use the standard scoop-and-sweep method.  See our video on this for proper technique.  Do not spoon the flour into the measuring cup before sweeping– if you do, the cup will be too-lightly filled, and the dough will be too wet, leaving you with a center that won’t bake through.  Consider weighing flour if you want to get away from the uncertainty of volume measurement, see the post…

If you’re really struggling with underbaking, you can try an instant-read thermometer.  For lean breads (no eggs), the temperature at the center of the loaf should be 205 to 210 degrees F (96 to 99 degrees Celsius).  For egg-enriched doughs, the temperature should be about 185 degrees F (85 degrees Celsius).

One other thing– thanks for a great review of Healthy Bread in Five Minutes a Day on Mary Hunt’s EverydayCheapskate.com, click to view.

More in The New Artisan Bread in Five Minutes a Day, and our other books.

Return to FAQs page

How I measure flour using the “scoop-and-sweep” method

Return to FAQs

When people write to tell me that their dough seems “too wet,” the first question I ask is: how are you measuring?  Because I measured with the “scoop-and-sweep” method, not the “spoon-and-sweep” method.–view the video to see exactly how I do it.

American recipes usually are based on volumes, measured with standardized measuring cups.  If you press down into the flour bin (use a flour bin, not the flour’s bag), you’ll compress and get too much flour.  If you use the “spoon-and-sweep” method, where a spoon is used to gently fill the measuring cup before sweeping, you’ll get too little flour into the cup.  Likewise, don’t “aerate” the flour by mixing it or whisking before measuring; that will lighten the cup.

If you do it the way I tested it (and use flours like the standard ones I tested with), you’ll get results like you see in our photos and videos.  You can also consider weighing flour, using the weight equivalents that appear in all our books starting in 2009. There’s more about using weighing flour in this post; I use this scale.

Side issue: ignore what I said in the video (made some years ago) about bleached flour absorbing less water than unbleached–it’s not true anymore. Modern bleaching doesn’t include anything that decreases protein content. I prefer unbleached flour just to avoid the chemicals and because I love the richer color of the crumb that you get with unbleached, but it won’t affect the measuring or the ability to absorb water.

Note: BreadIn5.com is reader supported. When you buy through links on the site, BreadIn5 LLC earns commissions.

Return to FAQs

New video: Gluten-cloaking, or how to shape a loaf


So many of you have asked for close-up video of someone shaping a loaf  (what we called “gluten-cloaking” in the first book) Doing this quick shaping step is the same with whole grain doughs, but the feel is different– it isn’t quite as resilient.

But as you can see in the video, it’s basically the same process with this 100% whole wheat dough (the honey-enriched variation on page 92 of The New Healthy Bread in Five Minute a Day).

Back to Basics ~ tips and techniques to create a great loaf in 5 minutes a day.

fresh-yeast-bread031

Note that there is an updated version of this post, click here to view.

Recently we have seen lots of new readers on the website who are asking wonderful questions about how to perfect their loaves. First I’d like to say welcome to the site and thank you for trying the bread. As I bake through the basic Master recipe from ABin5 I will try to answer some of the most frequently asked questions and also introduce you to a few new pieces of equipment I’ve recently started to use that make the whole experience just a little easier.  The goal is to create a large batch of dough that stores in the refrigerator for up to two weeks. That’s why our method saves  you so much time– all the mixing and prep is divided over four one-pound loaves.

Read More

Gray color and liquid on my dough: Is there something wrong? Is it mold?

Return to FAQs page

As your dough stores in the refrigerator, it might develop a uniform gray discoloration and liquid on its surface or at the bottom of the bucket.  This is not mold and can be safely ignored (scroll down to the bottom of this page for instructions on how to recognize mold). Here are ways to deal with dough that’s developed gray color and liquid on top.

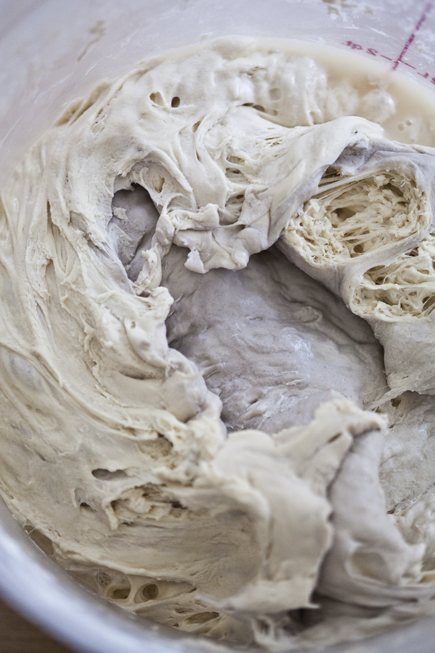
If your dough has a leathery gray top and liquid on the bottom:

Old Dough | Breadin5 01

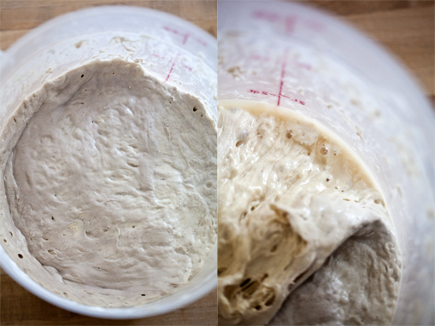
If you have a bucket of dough that was untouched for several days, it may develop a gray cast to it. As we mentioned this is safe to consume, but it may have a tough, almost leathery texture (a “skin”). If the dough has become hard and leathery, that suggests that there’s too much air-space in your container (or that it isn’t sealed well enough).  You can decrease the effect of air that gets into the container by transferring into smaller containers as the dough is getting used up.

Old Dough 2 | Breadin5 06

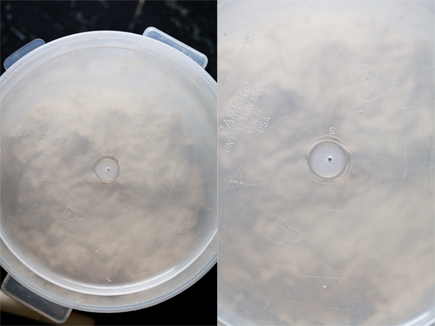
Another way to prevent too much air from getting into your bucket is to poke a small hole in the lid, that way you can snap it shut, but still let the gases escape.

Old Dough | Breadin5 02

You can simply ignore the gray portion of the dough and form it into a loaf, but you will likely end up with a streak of gray in your dough and that area may be dense. If you’d prefer not to use the gray part, the dough underneath will be creamy in color and full of flavor, so you’ll want to use it. Just peel off or scoop up, depending on the texture, the gray portion of the dough.

Old Dough | Breadin5 03

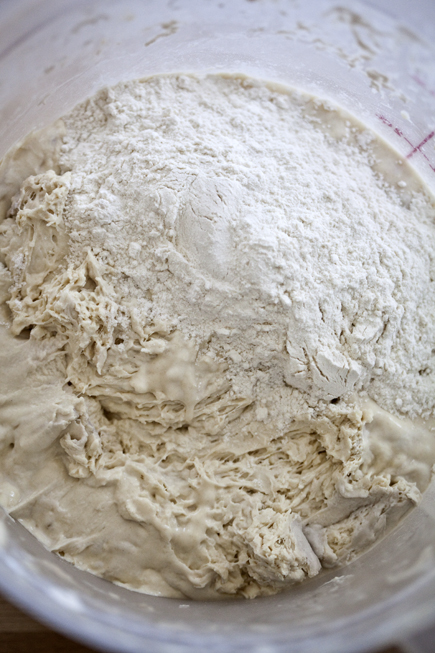
If you find liquid under the dough, which can happen if your dough has sat untouched for several days, just add enough flour to absorb that liquid and get your dough back to the consistency of the original dough.

Old Dough | Breadin5 04

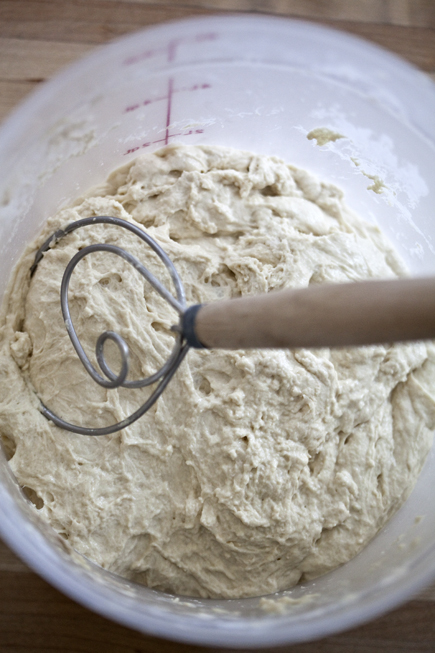
Mix in the flour and let it sit until the new flour absorbs all the liquid.

Old Dough | Breadin5 05

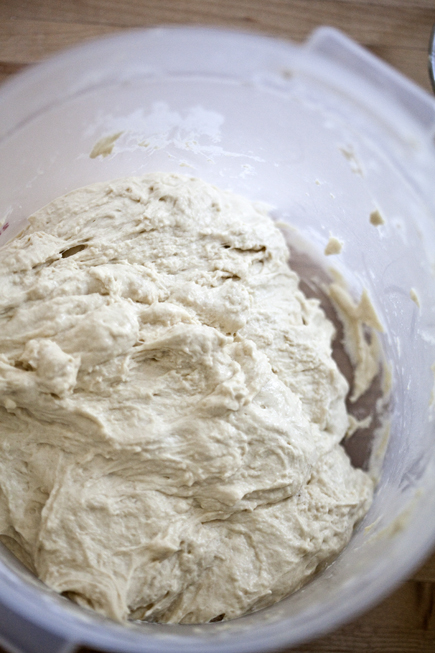
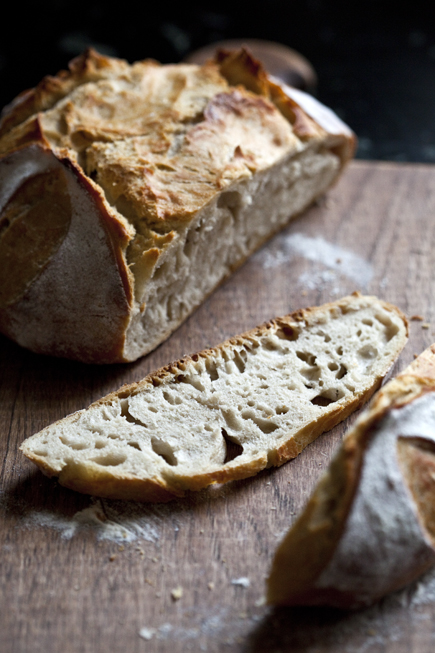
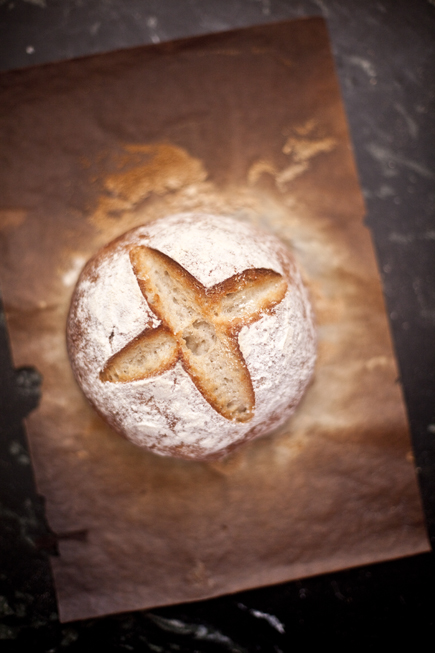
It is now ready to use to make bread. Click here to see Fresh Bread made from Older Dough. The dough may spread more than usual, but you will get a lovely loaf that is full of flavor.

If you only have a tiny bit of dough left, even if it is gray and liquidy, you can incorporate it into your next batch of dough to jump-start the flavor in your next batch: Click here to find out how.

*Is it mold? If you see patchy light or dark areas on your dough, whether smooth or fuzzy, that could be mold and the dough should be discarded. You are not likely to see mold if you follow our directions for maximum storage life, and keep the dough in the refrigerator.

More in The New Artisan Bread in Five Minutes a Day, and our other books.

Note: BreadIn5.com is reader supported. When you buy through links on the site, BreadIn5 LLC earns commissions.

Return to FAQs page

My shaped loaves don’t seem to rise much before it’s time for the oven. What am I doing wrong?

Return to FAQ page

In my method, proportionally more of the rise comes from “oven spring,” rather than “proofing.”  Traditional bread methods get more proofing rise than we do.  Proofing is the time that the shaped loaf spends just sitting and waiting for the oven.  Oven spring is the sudden expansion of gasses within the pores of the loaf that occurs upon contact with the hot oven air and the stone or other hot surface that you might be using.

Don’t be surprised if you don’t see a whole lot of rise during proofing with our method. You’ll still get a nice rise during the oven spring, so long as you didn’t over-work the dough while shaping.  Make sure your oven’s up to temperature by checking with a thermometer like this one on Amazon.  If the oven is too cool or too hot, you won’t get proper oven spring.

If you’re still not happy with the final result– if it seems to dense and under-risen, check under “Dense Crumb” FAQ.

More in The New Artisan Bread in Five Minutes a Day, and my other books.

Note: BreadIn5.com is reader supported. When you buy through links on the site, BreadIn5 LLC earns commissions.

Return to FAQ page