Back to Basics ~ tips and techniques to create a great loaf in 5 minutes a day.

Note that there is an updated version of this post, click here to view.
Recently we have seen lots of new readers on the website who are asking wonderful questions about how to perfect their loaves. First I’d like to say welcome to the site and thank you for trying the bread. As I bake through the basic Master recipe from ABin5 I will try to answer some of the most frequently asked questions and also introduce you to a few new pieces of equipment I’ve recently started to use that make the whole experience just a little easier. The goal is to create a large batch of dough that stores in the refrigerator for up to two weeks. That’s why our method saves you so much time– all the mixing and prep is divided over four one-pound loaves.
Master Recipe from The New Artisan Bread in Five Minutes a Day: The Discovery That Revolutionizes Home Baking:
3 cups lukewarm water (you can use cold water, but it will take the dough longer to rise. Just don’t use hot water or you may kill the yeast)
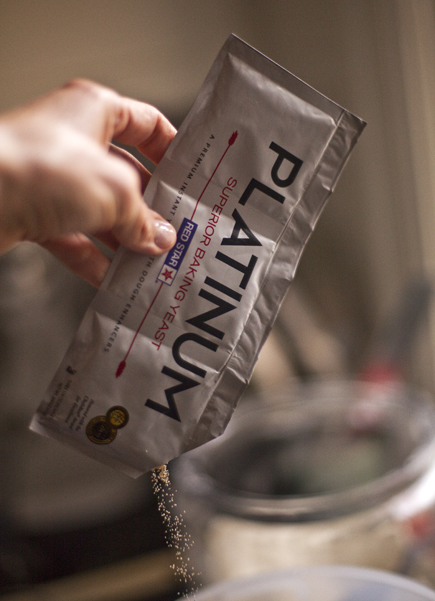
1 tablespoon granulated yeast ( you can use any kind of yeast including: instant, “quick,” rapid rise, bread machine, active dry, or fresh cake yeast*. We’ve always tested with Red Star Yeast and they have a new premium product called PLATINUM, which has worked beautifully in our recipes. You can also decrease the amount of yeast in the recipe by following the directions here. Or you can bake with a sour dough starter, see instructions here.)
*If you use cake yeast you will need 1.3 ounces.
1 to 1 1/2 tablespoons Morton Kosher Salt (adjust to suit your taste or eliminate it all together. Find more information here)
6 1/2 cups (2-pounds) all-purpose flour (we tested the recipes with typical supermarket flour. If you use a higher protein flour check here)
Mixing the dough:

In a 5 or 6 quart bowl or lidded Food Storage Container, dump in the water and add the yeast and salt. Because we are mixing in the flour so quickly it doesn’t matter that the salt and yeast are thrown in together.

(If you are using the fresh cake yeast break it up with a spoon)

Dump in the flour all at once and stir with a long handled wooden spoon or a Danish Dough Whisk, which is one of the tools that makes the job so much easier!

Stir it until all of the flour is incorporated into the dough, as you can see it will be a wet rough dough.

Put the lid on the container, but do not snap it shut. You want the gases from the yeast to escape. (I had my husband put a little hole in the top of the lids so that I could close the lids and still allow the gases to get out. As you can see it doesn’t take much of a hole to accomplish this.)

Allow the dough to sit at room temperature for about 2 hours to rise. When you first mix the dough it will not occupy much of the container.

But, after the initial 2 hour rise it will pretty much fill it. (If you have decreased the yeast you will have to let it go longer than 2 hours.) DO NOT PUNCH DOWN THE DOUGH! Just let it settle by itself.

The dough will be flat on the top and some of the bubbles may even appear to be popping. (If you intend to refrigerate the dough after this stage it can be placed in the refrigerator even if the dough is not perfectly flat. The yeast will continue to work even in the refrigerator.) The dough can be used right after the initial 2 hour rise, but it is much easier to handle when it is chilled. It is intended for refrigeration and use over the next two weeks, ready for you anytime. The flavor will deepen over that time, developing sourdough characteristics.

The next day when you pull the dough out of the refrigerator you will notice that it has collapsed and this is totally normal for our dough. It will never rise up again in the container.

Dust the surface of the dough with a little flour, just enough to prevent it from sticking to your hands when you reach in to pull a piece out.

You should notice that the dough has a lot of stretch once it has rested. (If your dough breaks off instead of stretching like this your dough is probably too dry and you can just add a few tablespoons of water and let it sit again until the dough absorbs the additional water.)

Cut off a 1-pound piece of dough using kitchen shears* and form it into a ball. For instructions on how to form the ball watch one of our videos. Place the ball on a sheet of parchment paper… (or rest it on a generous layer of corn meal on top of a pizza peel.)
*I actually use a pair of Sewing Shears because I like the long blade. I just dedicated a pair to the kitchen.

Let the dough rest for at least 40 minutes, (although letting it go 60 or even 90 minutes will give you a more open hole structure in the interior of the loaf. This may also improve the look of your loaf and prevent it from splitting on the bottom. ) You will notice that the loaf does not rise much during this rest, in fact it may just spread sideways, this is normal for our dough.
You can also try our “refrigerator rise trick,” shaping the loaves and then immediately refrigerating them overnight. By morning, they’ll have risen and are ready for the oven after a brief room-temp rest while the oven preheats (click for instructions).
Preheat the oven to 450 degrees with a Baking Stone* on the center rack, with a metal broiler tray on the bottom (never use a glass vessel for this or it will shatter), which will be used to produce steam. (The tray needs to be at least 4 or 5 inches away from your stone to prevent it from cracking.)
*(or Cast Iron Pizza Pan– which will never crack and conducts heat really well. Be careful to dry it after rinsing with water or it will rust)

Cut the loaf with 1/4-inch slashes using a serrated knife. (If your slashes are too shallow you will end up with an oddly shaped loaf and also prevent it from splitting on the bottom.)

Slide the loaf into the oven onto a preheated stone (the one I’m using is the cast iron) and add a cup of hot water to the broiler tray. Bake the bread for 30-35 minutes or until a deep brown color. As the bread bakes you should notice a nice oven spring in the dough. This is where the dough rises. To insure that you get the best results it is crucial to have an Oven Thermometer to make sure your oven is accurate.

If you used parchment paper you will want to remove it after about 20-25 minutes to crisp up the bottom crust. Continue baking the loaf directly on the stone for the last 5-10 minutes.

Allow the loaf to cool on a rack until it is room temperature. If you cut into a loaf before it is cooled you will have a tough crust and a gummy interior. It is hard to wait, but you will be happy you did! Make sure you have a nice sharp Bread Knife that will not crush the bread as you cut. Or you can tear it apart as they do in most of Europe.

If you have any leftover bread just let it sit, uncovered on the cutting board or counter with the cut side down. If you cover a bread that has a crust it will get soggy.
Enjoy and have fun baking. Bread that is made with love and joy tastes better!
Note: Red Star Yeast is a sponsor of this website and its promotional activities, and provided samples of yeast for recipe testing.
I am at my wits end!!! I have tried your Artian Bread and can’t get it to work. My Mom gave me the recipe and makes wonderful loaves and rolls all the time. Here is my problem- I follow the directions exactly- using unbleached flour, warming my water to exactiy 100 degrees- I set it out on the counter for 2-5 hours- it rises, maybe double the size- then I put it in the fridge for about 2 days before I use it. Here’s the problem- my dough is SO wet- it almost drips through my hands- so when I get it into some sort of shape and put it on the sheet, it flattens out- then when I bake it it’s maybe 1/4 inch on the sides, with a big bubble on top (I do score the top of the loaf)- maybe I’m not measuring the flour correctly? I use a spoon to put the flour in a measuring cup and then level off. Should I use the measuring cup and scoop it in the bag, then level off? Oh, and if I try to make another loaf a couple days later , the dough is hard on top and WET on the bottom of the container. I made yeast breads and have no problem- can someone please help????? When I watch the video about shaping the loaf- well, my dough looks nothing like that, like I said, its dripping through my hands. I am determined to get this right!!! I have thrown away probably 5 batches so far- HELP!!
Hi Jill,
I think we have the answer. We use a scoop and sweep method of measuring, which results in much more flour than spooning the flour into the measuring cup. If you spoon the flour then you will end up with a very wet dough. This should fix up your dough! Let me know if all the other issues go away too.
Thanks and enjoy the bread! Zoë
My loaves are turning out nice except the shaping. They are flattening out more than I would like. What am I a doing wrong?
Kelly: Why don’t you just add a little more flour to the mix? Also might benefit from more tight “cloaking,” see our videos.
Finally, consider doing the loaves in a cast-iron pan, or a loaf pan to control sideways spread. Jeff
Quick Question. I live in the UK and can’t find a source of Vital Wheat Glutin. Do you (or any of your readers) know of a good source?
Hi Andrew,
Hopefully someone will have an answer for you. I found this link that might be useful: https://www.flourbin.com/cgi-bin/psProdSrch.cgi?mode=user&transid=~transid~&search_text=vital+wheat+gluten&formCategory=All&search=Search
Thanks, Zoë
Even though I was a disaster at bread baking, I have been making your bread since late last summer. With your wonderful FAQ’s, videos, and this blog, however, my breads are getting better and better every time! Thank you so much for bringing Real Whole Food back into my family’s lives where store-bought had been (hurting us)! The Master Boule is SO SIMPLE in content, and we are always amazed at the complexity in flavor as I change out the flours (KAF’s White Whole Wheat, Ancient Grains, Italian, and of course their All Purpose flour to name a few). Your recipes are heaven-sent for those of us with little time and I thank God for the Vital Wheat Gluten’s abilities to smooth over the roughness of the whole wheat! I’ve been letting the dough rest just a little while right out of the refrigerator and then rolling it out to fill with some parmesan cheese, Italian seasoning (fresh when available), and LOTS of garlic. If I wasn’t using whole wheat flour, I’d have to contain my compulsion and refrain from eating this day after day.
I make your Master recipe at least five times a month and the Brioche at least twice a month (for Challah and Cinnamon Buns), but your Olive Oil bread had become our favorite (for Pizza, Garlic bread, and buns). With a diabetic in the house, I’m always looking for ways to increase the whole grain and cut down on the sugars. Being an experimenter at heart, I have to tell you about my latest batch. I took half a recipe of your Olive Oil dough ingredients and mixed them with a half recipe of your Brioche ingredients and ended up with a very lightly-sweet, whole grain-infused dough that braids like a beautiful Challah but is not quite so delicate. It’s sturdier than the Brioche, but nobody really noticed the difference or missed the full amount of the sugar. I’m using it for Cinnamon buns and an Italian loaf but I’ll switch back to the original Olive Oil dough for the Garlic bread, because that was perfect as it was (don’t need a large amount of sugar there, either). I don’t know what to call this mixed dough, but OMG, we love it!
Our Publix bakery manager asked my why I’m not buying bread like I used to and I told her to check out your site. I think she has since bought your book, too! Thank you so much for all you do!
Wow Patti,
Thank you so much for your lovely note and for spreading the word about the book! I think your olive oil/brioche dough sounds amazing! I will have to give it a try.
Happy baking and enjoy all the bread! Zoë
Nice tutorial, thanks. Always good to remind ourselves of the basics. I’ve been baking with your techniques since July and have enjoying making many different kinds of bread from just three recipes. Thank you for sharing your knowledge of and enthusiasm for the ancient art of bread baking.
One tip – the bucket that you had your husband poke a hole in does not have an airtight seal, so no hole is necessary. I always snap my buckets shut for rising as well as in the refrigerator.
Thanks again to both of you for your work.
Hi Mark,
Thanks and I’m so glad you are enjoying the breads! The lids on these buckets are surprisingly tight and I’ve had them POP right off when clicked shut. It thrilled my boys to no end, but I had dough all over my book case in the kitchen. That was the day my husband started drilling holes! 😉
Happy baking! Zoë
Hi Zoe and Jeff,
Let me start by saying how much we love your book and technique, and have really enjoyed playing around with the Master Recipe to get things “just right”. We love the crusty crust, and the “holey-ness” of the crumb.
We have come to the conclusion that we just like our crumb a little less custardy. We’re aiming for a very crusty crust and a dry hole-y center that you find in a typical European loaf.
We have tried many of your suggested modifications to make the center less moist. We’ve tried increasing the amount of flour to 7cups, using longer rise/rest times, making smaller loafs, trying different yeast, trying to be really gentle when handling the dough, trying the overnight fridge rest on parchment, and not cutting the bread until its fully cooled. These changes have made only small improvements toward our desired dryness of the crumb. As a result, we’ve begun to wonder if the ABin5 technique just naturally creates a gummier center than we prefer.
Do you have any suggestions on what else we can try to dramatically dry out the center of the loaf? Everything else (taste/rise/crust) is perfect!
We are using:
-a gas oven with an oven thermometer, pizza stone and a water tray beneath
-Gold Medal unbleached AP flour
-Fleishmans Yeast in a jar or packets, or Red Star Yeast packets
As a final note, sometimes we notice that the dough is slow to rise, so we’ve wondered if a problem could be that our house is too cold or dry.
Tom and Theresa
Hi Theresa,
Our dough, due to the high hydration, may never produce the type of crumb you are looking for. It is a challenge to be able to store dough without having it be too wet. The dry crumb you are looking for would be from a dough that is much drier and therefore will not store well. You may be able to dry out the dough to achieve this crumb, but then you’ll have to knead and not store.
Slow to rise during the first 2 hour rise or when resting after shaped?
Thanks and have fun playing, be sure to report back.
Zoë
Hi Zoë,
Thanks for the quick response!
Its comforting to know that I’m not completely crazy in finding that I just couldn’t get it dry enough with this method. If I wanted to push it to maximum dryness, is there anything else that I can do, or do more? Would adding a different flour (wheat?) change the consistency? Add even more flour? I haven’t yet tried reducing the yeast. Can you suggest a combination that would maximize the internal dryness, while keeping the internal holey-ness and external crustiness?
I love this technique so much that I’m not willing to walk away because of a little additional internal moistness- I just want to get it as close to ideal (for us) as possible 🙂
As for the slow rise- its during the first 2 hours. I’ve usually left it to rise for much longer (~4hours or so) before popping into the fridge. Sometimes its no where near where it should be at the 2 hour mark. Not expecting much rise after the shaping…
Cheers!
Theresa
Theresa: What comes to mind is that you might prefer a higher-protein flour, which absorbs more water. A mixture of bread and AP flour? Give it a shot… Jeff
Dear Zoe and Jeff, I have been using your recipes for a year now and still LOVE them. I have your first two books.
I have two questions:
1. You mention in your book that if we are not getting a crust that lasts and doesn’t soften then we are not baking it long enough. Is there an internal temp that I can take to determine if I have cooked it long enough until I get it right?
2. I don’t have the kind of success that you do with chilled dough. I have great success if I use the dough fresh, but when I chill it, though it is easier to handle, it doesn’t rise as well. I find that the loaf spreads out a lot and makes a very shallow loaf. If I bake it before it flattens out, then I have a beautiful loaf that is gooey inside. I just can’t seem to get the hang of how long to leave it before I bake it.
I have tried letting the dough come to room temp before I form the loaf, I have also tried forming the loaf straight from the frig. Each time the same thing happens–a flatter loaf. What can you suggest? Thank you!
Ellen
Ellen: Look at our videos and make sure you are adequately “gluten-cloaking” the bread– that contains the sideways spread. Also, consider doing the bread in a cast-iron or other closed pot– see instructions at https://artisanbreadinfive.com/?p=552.
I’m also wondering if you’d like this a little drier– can add a bit more flour– let’s say a quarter-cup.
For lean breads, internal temp = 205F, for enriched (with eggs), it’s 185F. Jeff
Jeff,
Thanks for the suggestion! I’m eager to try it, and I’ll report back.
Cheers,
Theresa
Thank you Jeff. I watched the video again and feel that I have been gluten cloaking the way you suggest. I will keep working at it on the cold dough. I will also try drying the dough out a little as you suggested. Can you help me though with knowing how I can tell when a rested cold loaf is ready for the oven? Is it by look, temp or what?
By the way I did read Zoe’s comments about the overnight raise in the frig and I will try that too.
Thanks again,
Ellen
Hi Ellen,
When the dough is ready to go into the oven it will no longer feel dense and cold as it does when it is first shaped. It will have a slight puffiness to it. You will want to feel the dough as you first shape it and then again after it has rested. If it is still dense and has no softness then let it sit longer.
Hope that helps! Zoë
One more thing Jeff, Is there any way to do a group buy on your books directly from you?
Hi Ellen,
The least expensive way to purchase the books is through Amazon, you can find a link on this page. If you are looking for books for an event you can contact our publisher and buy through them, but it is typically no cheaper, depending on the current price at Amazon.
I hope that answers your question? Thanks, Zoë
Theresa, I read your comments about the crumb being too gummy. I’m not an expert, but three things you might try are: 1) leave the bread in the oven an extra 3-5 minutes; or 2) make a smaller loaf; or 3) make sure not to slice the bread until it’s cooled for an hour.
Thank you Zoe for both answers. I did try a refrigerated loaf with a white dough yesterday and had better success. I think it is the whole grain ones where I have trouble. I think making a drier dough will help.
About the books. Thanks for letting me know. I am teaching a “Preparedness” class of about 20 people tonight and I am using your breads as an example of ways to use stored grains for those who are fear making bread is a “lifetime” event. I know that many will want to buy your books. I am being careful of your copyrights.
Thank you,
Ellen
Ellen: Thanks for spreading the word about our method. To our surprise, Amazon and other on-line sellers remain pretty much the cheapest way to get our books (click on any image of a book on this page to go to Amazon). Jeff
Zoe, you used a dough whisk in this post. I’ve seen them online in the past, and they’ve always looked a little too special-purpose and flimsy for me to actually buy one. So I ended up repurposing a potato masher as a dough whisk. It’s worked remarkably well, and I definitely prefer it to the wooden spoon I previously stirred dough with. Anyway, I hope this might be helpful for someone else out there.
Hi Andrew,
What an amazing idea, I will have to try with my potato masher next time I mix a batch up.
Thanks! Zoë
I’ve been baking bread every week for a friend if mine. Recently she told me her mother has s restricted diet and can eat no salt. She has had to give up eating her favorite foods including bread and butter. I’m wondering if there is a salt free loaf I could make for her mom. Does the yeast need the salt? Thank you!
Beth
Hi Beth,
You can make all of our recipes with no salt. It only effects the flavor in our bread, but doesn’t seem to mess up the recipe at all. https://artisanbreadinfive.com/?p=139
Thanks and enjoy! Zoë
Hi Jeff and Zoe,
Have both your books and have had several wonderful years baking bread from ABin5. Received the HBin5 book in December but have not had much success getting these loaves to raise. Is vital wheat gluten flour the same as vital gluten listed in your recipes? I bought Bob’s Red Mill. The loaves from HBin5 are looking like biscotti when sliced! Other ingredients are same as used for recipes in ABin5 and I use King Arthur flours.
I will ask all my questions in one post…
Latest problem, a batch of HBin5 master recipe has separated while in the refrig for 6-7 days. When I pulled dough to cut, it was very dry and all the liquid was a sludge under it. Had to remix by hand and incorporate more flour to salvage a 2lb loaf. Now two days later, the remaining 1 lb. in bucket has also separated again with liquid under the dough. Weird! Any ideas why?
Lastly, I have had no success baking different types of frozen dough. Generally thaw overnight and bake later the next day. Dough does not expand at all and loaves are not edible after baking. How do you do it?
I have added King Arthur’s Healthy Grains to ABin5 Light Whole Wheat Bread dough and it tastes like German Siebenfelder (spelling?)) bread! Grain/seeds do absorb liquid which makes a denser loaf. I’m going to try soaking seeds first before adding to other ingredients to see if it alleviates water absorption.
To both of you, thank you! I have told so many people about your method and the books. Bread making has become a joy!
Jodie: Whole grain breads, especially 100% whole grain ones, simply do not rise as much as white breads and the result is always denser. It’s a very specific style of bread, and it’s not for everyone (though I love it). But you should not be getting biscotti, so something is wrong. First suggestion: switch to Gold Medal, which has a lower protein level than KAF and yields a wetter dough. See if that makes a difference. If it does, you could then try switching back to KAF but increase the moisture to match your experiments with Gold Medal.
Yes, vital wheat gluten = vital wheat gluten flour
You did the right thing to mix in more flour when your dough “separated.” You do get pooling liquid when the dough sits that long undisturbed. We tested the batches with frequent removal of dough for loaves, with some dusting each time. This absorbs some of that water.
Unfortunately I can’t guess what’s up with your frozen dough– again, see what happens when you switch to a lower-protein flour. Anything else you might be doing differently? Jeff
I recently made the gluten free version of the bread. Mine was very tough-I live at a high altitude, here in Calgary, Alberta-what can I do to improve my bread with the alititude issue?
thanks/ Carrie
Carrie: Go to our FAQs tab, and see the “high-altitude” suggestions. If that doesn’t help, check back with us here. Jeff
Hi Jeff and Zoe:
I haven’t tried making the dough again. Went into the FAQ section and I think I must be over-kneading it. I haven’t finished the last bread, so I think I will have to take a break before I set my eyes on it again. I also saw the video on how you made the bread… that is also where I kind of found that I must be over-kneading it. Another question though, when the dough in the bucket is a bit tough, should I add a little water and leave it alone for a day? Thanks.
Hi Mari,
Yes, if you add some water to the dough just let it sit for a long while so the flour can absorb it. Please let us know if there is anything else and we will help to make this a enjoyable experience!
Thanks! Zoë
Thank you Jeff for your quick response to my questions. I will try Gold Medal whole wheat to compare dough wetness to KAF.
As for my batch of totally separated whole wheat dough, I did try using KAF white whole wheat flour rather than regular whole wheat in this batch. Perhaps WWW doesn’t have the same long-term liquid retaining capabilities of regular whole wheat.
No idea what my problem is with frozen dough. A batch will bake well after the initial resting period but freezing any of it seems to kill the instant yeast. In the last 2.5 years, I have tried freezing different doughs from ABin5, with zero success. I’ll try your idea of using lower protein Gold Medal and check freezing results. May also be time to try a different yeast.
Thanks for teaching me how to make bread so easily that I no longer can even tolerate Wonder-type bread. Hurray, life is good!
Jodie: Well, just let us know if the results are inexplicable even with Gold Medal. As for WWW versus regular WW, I doubt that’s going to be the deciding factor. I think this is a function of a long undisturbed storage, which can introduce some variability.
I doubt this is the issue, but we usually use “active dry” varieties of yeast (actually, the Red Star brand), not instant, though we always say that it doesn’t matter. I suppose you could try switching to “active dry” and see if that performs better after freezing. I have to say, that this shouldn’t make a difference but it’s worth a try.
I have to say, that freezing always increases the density of stored-dough breads. Maybe it’s just exceeded your personal tolerance for a density level? Jeff
Why is mine always undercooked recently, even if I up the time?
Hi Kathy,
Do you have an oven thermometer in your oven? This issue is often due to an oven that is not running true to its settings. The other possibility is that you are cutting into the loaf while it is too warm. The bread needs to cool completely to finish setting properly. As long as you are using the amount of dough we specified in the recipes the breads should be cooked through.
Hope that helps! Zoë
Hi,
Thanks for all your great recipes and tasty breads. I just halved a batch of your Whole Grain Olive Oil bread, but I messed up and used the full amount of yeast! It’s rising quite nicely now, but I wonder if I ruined the taste/flavor? I’ll still give it a try! Thanks again!
Nick: Some people detect a strong yeast flavor when using yeast on the high side, and if you’re sensitive to that, this is the batch where you’re going to notice it. You can actually decrease the yeast, see our FAQs page above.
Don’t throw it out– just see what you think. Jeff
Hi Jeff and Zoe –
I’ve read your first book and attempted my first bread this afternoon. Used Bob’s Red Mill unbleached white flour, bulk yeast granules, kosher salt and tap water.
All seemed well, although I did end up adding a little more than 1/3 cup more water than called for in the master recipe because the dough didn’t look as wet as I thought it should. It rose during the rest time, and a little bit more in the oven, but it seems flatter and longer than it should…like it didn’t raise enough. It also seemed to fall a bit after it was in the oven for a while. I had some trouble shaping it, even after watching the video…it never really looked like a ball, unless looking like a half a football counts.
Any thoughts on what I did wrong?
Janet: Given all the changes in the recipe that you did, it’s hard to say. Why don’t you try again, doing it exactly as we describe? Sounds like you ended up with something too wet. Those won’t rise as well, and will spread sideways rather than rising in an upward direction. Jeff
Zoe and Jeff– I have both books and am enjoying the baking results. I have 2 specialty flour blends from King Arthur Flour — Harvest Grains and Ancient Grains. Have you used either in your recipe formulations? I am anxious to use both because I prefer multi grain bread. KAF recommends adding up to 1 1/3 cup of Harvest Grain to the recipe and substitute up to 1/5 of Ancient Grains for whole wheat. Do these proportions work in your recipes? Thanks!
Judy: Haven’t tried those products but I trust KAF. If they give you a way to make swap, I’m guessing it will work. And about resting time, yes, longer is great, see our post on that, at https://artisanbreadinfive.com/?p=141
Jeff
Zoe and Jeff–Two more comments. Punching a hole in the lid of the bucket–what an amazingly simple idea! And I have noticed a huge improvement in the hole structure of the bread by allowing it to rest at least 60 min rather than 40 min. I do need to improve my slash technique–anything more creative than diagonal slashes across the loaf do not look as “pretty” as the photos in the books!
Jeff,
Thanks for the quick reply. I made a loaf and I thought it was just OK, def strong yeast overtones, but now I know how the smaller amounts of yeast affect the flavor! My wife didn’t like it at all!
I’m going to try an experiment with the remaining dough and I’ll let you know how that works out!!
All righty, I have yet another bread question, but this time it’s more about the baking than the actual recipe and/or ingredients.
I’ve been looking at countertop convection/toaster ovens, simply because I live in a dorm currently and I found one that’ll go to 450 degrees F here at Amazon:
My question is, is using this a good idea to create results like you guys do, with the steam element going into the crumb tray? (I’m sure someone else thought of this and can help me on this one)
Thanks again for your amazing books (and I bought Healthy Bread in 5 not too long ago, gotta say, the chapter on gluten-free bread baking was pretty eye-opening. Maybe I could try millet flour at some point in place of brown rice flour.
BJ
Aagh, forgot the link: https://www.amazon.com/Black-Decker-CTO4500S-CounterTop-Convection/dp/B001GJSMKE
BJ
BJ: I’ve been meaning to try a toaster oven, I know they make a baking stone to fit them (see below for Amazon link, it’s 7 by 10 inches if that would fit). I’m not sure that steam in the crumb tray’s going to work. Is it watertight? Is it safe? I wouldn’t want people dumping water onto electrical elements. Since I haven’t owned one since college (!) I just can’t say how this would work.
Millet’s great by the way… Jeff
https://www.amazon.com/gp/product/B000QJBNHY?ie=UTF8&tag=arbrinfimiada-20&linkCode=as2&camp=1789&creative=9325&creativeASIN=B000QJBNHY“>Kitchen Supply Old Stone Oven Toaster Oven Pizza Stone 7-inch by 10-inch<img src=”https://www.assoc-amazon.com/e/ir?t=arbrinfimiada-20&l=as2&o=1&a=B000QJBNHY” width=”1″ height=”1″ border=”0″ alt=”” style=”border:none !important; margin:0px !important;
Jeff and Zoe;
Theresa asked about how to get a drier crumb, and I was wondering….
My father-in-law is no longer with us and, if ever I could have made bread for someone (before, when I wasn’t good at it), he was the one. Visiting him in Germany allowed my son and I the chance to see how my husband grew up, see the sights he saw, and eat what he ate. I really miss the plain Bauern Brot that my father-in-law fed us for two meals every day, usually. The bread, purchased fresh every day (but NOT in a plastic bag, UGH!) was a consistently denser, drier loaf, full of rye flavor and sometimes a licorice flavor.
I was wondering if the drier texture could be achieved by using a similar method in your books for enriched dough (adding eggs, fat, and a cooler oven without the steam)? I think it’s the 450-plus degree oven along with the steam that creates the crunchy, lovely crust but also that traps the moisture inside. Do you think a cooler oven and no steam could provide the drier crumb?
Thanks for feeding our Souls!
Hi Patti,
The dough is very wet in order to store it for any amount of time, and this is what is the cause of the wetter crumb. It is true that the enriched doughs have a lighter and drier crumb, but it is the nature of the ingredients more than the oven temperature or added steam.
Thanks, Zoë
Oooh, I made this last night and it is delicious and so easy! I was dubious at first about the rising in the oven part, but followed it to the letter (which I often don’t do, to my downfall) and it worked a treat.
I’m spreading the word, thanks guys!
i’ve made about 8 loaves now with the master recipe (and 4 with the whole wheat) and i love it. so nice to have fresh bread so often. i made the baguette and the ciabatta from the book, too. quick question: i know you increased the resting time for the master recipe, should i increase the resting time for the other breads in the book? i think it’s 20 min for the baguette and ciabatta.
Elana: Baguette and ciabatta are skinny— they warm up quicker and you really can get away with the short rest time, no need to increase… unless you’ve tried 40 minutes and you prefer it. Jeff
I got the book yesterday, made a big batch albeit with a heavier flour so had to add some water; last night made a batard which had somewhat thin crust, but basically was fantastic. Now just made two more batards, one shaped a little, the other one not and that second one wouldn’t come off the peel, landed up with half it’s ‘tail’ oozing over the side of the oven and tile, getting damaged in the process of manhandling it back onto the tile and being somewhat straight, stuck to the tile on taking it out of the oven, but basically looks fantastic too. The more shaped one is a bit darker and thinner and smaller so I have learned by doing that your recommendation not to shape them too much is on the money.
Thanks a lot for your book. I really like this approach (less fuss, more forgiving, more flavor) and am grateful you put it all together.
Thanks Ash,
That was quite an experiment you conducted, so glad they came out!
happy baking! Zoë
Jeff, I made sesame seed crackers with the remainder of that over-yeast-ed dough. I think the flavor works very well with the crackers!
Thanks for that recipe also.
Your tip on how to store the bread is incredible! We’ve been loosely covering them with plastic wrap or throwing them in a plastic bag, and the end always gets stale or the crust soggy. This is working beautifully. Thank you!!!
My books just came in the mail today! I am thrilled. A couple of questions. On this post is this your master recipe because you don’t use the vital wheat gluten? Also, it uses different amounts from the master recipe. One other question…if I don’t have vital wheat gluten, what will happen to my bread? I wanted to make bread today but no gluten on hand. I live at 6500 ft also so some major challenges I feel are ahead for me! =) Thanks so much.
Hi Jordan,
The recipe on this post is the Master Recipe from Artisan Bread in Five Minutes a Day. It sounds like you are baking from Healthy Bread in Five Minutes a Day. Here is a post that talks all about that book and the use of vital wheat gluten. https://artisanbreadinfive.com/?p=1087 and some other info: https://artisanbreadinfive.com/?p=142.
Thank you and happy baking! Zoë
Just bought your book, LOVED the master recipe, made a free form loaf, pizza and bagel! However, the bagels were a very weird consistency,,,very rubbery,,,did I just not cook them long enough? I did cook them for almost 35 minutes so I figured I had better take them out. My husband says they taste ok, but I can’t even get myself to try them, they are weird! Any thoughts? Thank you so much..
Hi Bobbie,
I just made bagels in a class last night and the thing I stressed was not to over boil them or they get soggy/gummy. About 30 seconds on each side is often good enough, unless they are really large. Here is a post on making bagels that may be helpful! https://artisanbreadinfive.com/?p=423
Thanks, Zoë
I made the recipe for your whole wheat brioche on page 275 of the book yesterday and placed it in my six-quart King Arthur Flour dough rising plastic bucket to rise on the counter until it doubled and collapsed then placed it in the refrigerator overnight. I thought that I had left it slightly open not sealed tight but about six this morning I heard a loud noise and found that it had “exploded” in the bucket so hard that it blew the plastic lid up against the next shelf and shattered it into a million pieces! I am asking King Arthur if they will sell me a replacement lid only for the bucket but I wondered what you thought about this?
I plan to go ahead and bake it as the apple strudel bread on the next page and hope for the best in my oven (smiles) . Any advice for next time??
I am enjoying your book, started with the Anadama Bread, which has excellent flavor. Thanks for your reply.
Hi Pam,
Oh, no! This exploding bucket has only happened to me once when I snapped the lid shut. It blew the top off and sent dough flying into the air and onto the ceiling! If you just place the lid on top of the bucket, but do not snap it shut for the first 48 hours you will not have this issue!
Thanks! Zoë
Hi Zoe & Jeff,
Your techniques look really easy and your bread looks delicious. I have only made bread once using the NYTimes No-Knead recipe and it was a disaster (dense and gummy bread on the inside). I gave up after that. However, your website has inspired me to try baking bread again.
I think it’s so cool of you guys to post recipes from your book and answer everyone’s queries on this website . Thank you so much for your time & effort.
I don’t have a broiler pan to put the water in the oven. Can I do any of the following instead:
1) Can I use a ceramic bowl (individual-sized souffle baking dish) or silicone loaf pan for the water?
2) I know you said “no” to glass baking pans – but what if I put enough water in the pan so that all of it won’t evaporate?
3) I have a 5-quart lidded cast-iron dutch oven. Can I put the formed bread dough in it with the lid on like in the NYTimes No-knead method?
4) any other options?
Hi Farida,
Thank you for your lovely note, we are thrilled you will be baking bread again!
You really want to avoid having ceramic or glass in the oven to create the steam. You can certainly use the Dutch oven method: https://artisanbreadinfive.com/?p=552
Thanks and enjoy the bread! Zoë
Thanks for the answer. The book said to boil them 2 min on one side and 1 more on the other, so maybe mine were boiled to long,,,,maybe I will try them again….
Hi Bobbie,
I would err on the side of too little time in the water and think that 1 minute on each side is just about right.
Thanks! Zoë
Hello Zoe & Jeff,
Second baking attempt. First attempt, bread tasted great, but was wide and thin. Must not have measured the water properly. This attempt, presto, two gorgeous looking loaves of the whole wheat with olive oil recipie. I noticed the dough was dryer coming out of the tub, was able to shape them better, the rose during the rest way better (added a wee bit more yeast, ditto olive oil) and look like artisan loaves as they cool down.
Thanks so much for your book on Health Bread and for this great web site which is just a great source of info. I have become inspired and will be trying various recipes. I am also spreading the news about your book and method and having colleagues taste the results.
Hi Bill,
That is fantastic news! We are so glad that it worked out for you.
Happy baking! Zoë
PS, I get the same brand and weight of vital wheat gluten that the amazon link offers for better than ten dollars for a third the price at a local grocer know for their typically high prices. Shop around bread makers.
Just bought ABin5 and baked my first little boule round this morning. Tastes great, but looks really funny! It was round with a nice tic-tac-toe slashing when it went in the oven, but came out all puffy and funky. Is this normal? Like I said, it tastes wonderful, but doesn’t look like anything in the book.
Now I just tried using the boule for Ciabatta, and it doesn’t look right either. A little more of an oval shape, but very puffed up. (It doesn’t look like the ciabatta I have bought at the store…) I did make sure it wasn’t under 3/4 of an inch, so I know I did things right there. But clearly I must be goofing something up!
Awesome book! I’m so excited to try more!
Hi Kim,
Is it possible on the tic-tac-toe slash that you were not going 1/4-inch deep with the slashes? If you are too tentative the bread will bust open any old way. It may also be an issue of not allowing the bread to rest long enough before baking. Let it rest an extra 15-20 minutes and be sure that the slashes are plenty deep.
Try rolling the dough out a bit thinner for the ciabatta next time and let that rest an extra 10 minutes and you should have better results.
Hope that helps, Enjoy! Zoë
Hey, thanks for your response!!!!
Well, could my slashes be TOO DEEP??? Tried again, making nice deep slashes (tic-tac-toe). This was after I let the boule rest for just over 60 min, instead of just 40 like last time.
Looks ridiculous! : ) Definitely nothing round about it either!
I ended up trying a baguette too, and that seemed a little more normal. Not perfect, but at least a little more like normal bread…
Hmmmmm. I will have to keep experimenting I guess!
Hi Kim,
You may want to just try the straight slashes across the bread, like the one on the cover of the book. It is a little more predictable.
Thanks and enjoy all the bread! Zoë
what is the best way to tell if the bread is done inside? up till now, I have been waiting (till it cools!) and cut it. if it’s still not done enough, gotta re-bake, etc.
Mary Beth: I go by color and firmness– the lean doughs should be pretty dark. But to take some guesswork out of it, you can use an instant-read thermometer. Lean doughs should read 205 to 210 F, and egg-enriched doughs should read 185. Make sure you’ve got the probe tip in the center of the loaf, and let the reading settle down. Jeff
Dollar store unbleached, white flour! the dough was too wet when I used it in the master recipe. normally I use King Arthur Bread flour, and it’s perfect. what do you suggest so I can use the rest of the dollar store flour up making bread? how much more flour should i add?
Increase by quarter cup increments, Mary Beth. Or even 1/8-cup increments– that may be all you need. Jeff
Love your books! I was wondering, though, if I can use some of the Nordic Ware shaped cake pans I have to bake my bread? and if I can, which breads would be best suited for them?
Thanks!
Which shape do you mean, don’t they have many different products? Jeff
Zoe–I would like to buy a dough whisk but I am having trouble sorting out the dimensions online. Can you help?
I always make 1/2 the recipe in a container that is much smaller than the 6 quart–for ease of storage. Do I want to buy a large or a small dough hook??
FYI, my bread is coming out great. I have been baking rye recently and it is yummmmmmy!
Sincerely–
Michele
Michele: Especially for the small batches you’re considering, the smaller (11-inch) should be just fine. I use that size, even for larger batches. Haven’t tried the 14-inch one. Jeff
Zoe, Jeff
I was intrigued by the whole wheat+vital wheat gluten bread recipe that I found on Amazon (was searching for vegan baking cookbooks). It seemed so simple that I wanted to try it rightaway!
Result: the loaf didnt seem to appear like how it did in your video. My bread was dense, elastic and tasteless.
I used red star instant yeast (1.5 tblspn), Hodgson Vital wheat gluten (1/4 cup), pilsbury all purpose flr(2 cups),gold medal whole wheat flr (51/2 c) and 365 organic sea salt (1tblspn).
when i added luke warm water (4 cups) my mix was not as wet as it appeared in your video.
I used a 5 qrt steel vessel with lid. it did raise well, but i had to let it sit for close to 4hrs before it really doubled.
the refrigerated it.
next day, when i prepared the oven and took out the dough, it was not as elastic as you showed it be in your video. i could easily tear off a small ball , didnt require scissor.
after baking, the loaf looked good, it did raise. I had a hard time cutting it tho, very elastic and dense.
This is my second experience with bread, sadly not a very successful one either. We dont bake that often.
Please let me know what I did wrong. We are Lacto-vegetarians and lately smitten by the “organic” bug. I would love to bake delicious bread for my family and be assured of the healthy stuff going in, rather than buying bread from outside.
Please guide.
Regards
D
Hi Deepti,
The fact that your dough didn’t have any elasticity when you took it from the refrigerator makes me wonder if your refrigerator runs a bit cool. Sometimes when I take dough from my basement refrigerator it is colder than usual and has much less stretch to it. If this is the case I let the dough rest an extra 10-15 minutes before baking.
Are you using an oven thermometer? The fact that your crust came out tough and the interior was elastic sounds like the oven is perhaps running a bit off temperature? An inexpensive oven thermometer is one of our most useful tools. The other culprit for this is cutting into the loaf when it is still warm.
If the bread tastes a bit flat you may want to up the amount of salt by a bit. In this book we reduced the amount of salt to fit with a healthier diet, but both of us prefer it with a touch more than 1 tablespoon.
I hope this helps! Thanks for trying the bread, Zoë
I made a batch of wholewheat master recipe a couple of weeks ago and after the initial rise and colapse, I transferred it to a smaller container so that it will fit into the fridge. Unfortunately, it rose up again – a lot. So then I had to clean my fridge… Is this normal (as you said it will never rise again after the initial rise) or is it due to the transfer? or cause my fridge is a little on the warm side?
Hi Alex,
It sounds like the dough may have gotten a bit warm and activated the yeast again. If the dough is in the refrigerator and stays cold it will not usually rise again in the bucket. I had a similar thing happen when I put a container of warm soup in the refrigerator next to my bucket of dough, which caused the dough to warm up and rise again.
When you transfer to a smaller container make sure it isn’t too small to allow for some growth.
Thanks! Zoë
this looks so fantastic!