Back to Basics ~ tips and techniques to create a great loaf in 5 minutes a day.

Note that there is an updated version of this post, click here to view.
Recently we have seen lots of new readers on the website who are asking wonderful questions about how to perfect their loaves. First I’d like to say welcome to the site and thank you for trying the bread. As I bake through the basic Master recipe from ABin5 I will try to answer some of the most frequently asked questions and also introduce you to a few new pieces of equipment I’ve recently started to use that make the whole experience just a little easier. The goal is to create a large batch of dough that stores in the refrigerator for up to two weeks. That’s why our method saves you so much time– all the mixing and prep is divided over four one-pound loaves.
Master Recipe from The New Artisan Bread in Five Minutes a Day: The Discovery That Revolutionizes Home Baking:
3 cups lukewarm water (you can use cold water, but it will take the dough longer to rise. Just don’t use hot water or you may kill the yeast)
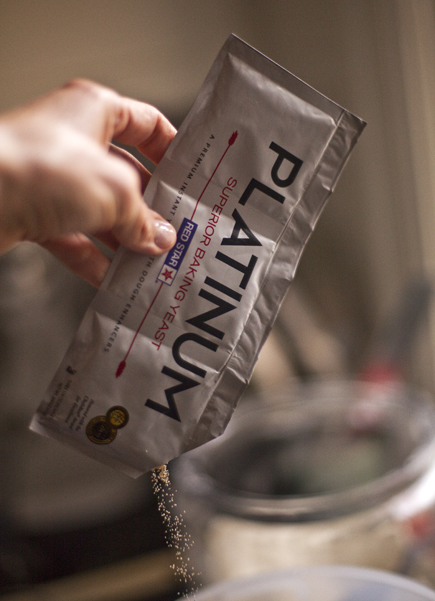
1 tablespoon granulated yeast ( you can use any kind of yeast including: instant, “quick,” rapid rise, bread machine, active dry, or fresh cake yeast*. We’ve always tested with Red Star Yeast and they have a new premium product called PLATINUM, which has worked beautifully in our recipes. You can also decrease the amount of yeast in the recipe by following the directions here. Or you can bake with a sour dough starter, see instructions here.)
*If you use cake yeast you will need 1.3 ounces.
1 to 1 1/2 tablespoons Morton Kosher Salt (adjust to suit your taste or eliminate it all together. Find more information here)
6 1/2 cups (2-pounds) all-purpose flour (we tested the recipes with typical supermarket flour. If you use a higher protein flour check here)
Mixing the dough:

In a 5 or 6 quart bowl or lidded Food Storage Container, dump in the water and add the yeast and salt. Because we are mixing in the flour so quickly it doesn’t matter that the salt and yeast are thrown in together.

(If you are using the fresh cake yeast break it up with a spoon)

Dump in the flour all at once and stir with a long handled wooden spoon or a Danish Dough Whisk, which is one of the tools that makes the job so much easier!

Stir it until all of the flour is incorporated into the dough, as you can see it will be a wet rough dough.

Put the lid on the container, but do not snap it shut. You want the gases from the yeast to escape. (I had my husband put a little hole in the top of the lids so that I could close the lids and still allow the gases to get out. As you can see it doesn’t take much of a hole to accomplish this.)

Allow the dough to sit at room temperature for about 2 hours to rise. When you first mix the dough it will not occupy much of the container.

But, after the initial 2 hour rise it will pretty much fill it. (If you have decreased the yeast you will have to let it go longer than 2 hours.) DO NOT PUNCH DOWN THE DOUGH! Just let it settle by itself.

The dough will be flat on the top and some of the bubbles may even appear to be popping. (If you intend to refrigerate the dough after this stage it can be placed in the refrigerator even if the dough is not perfectly flat. The yeast will continue to work even in the refrigerator.) The dough can be used right after the initial 2 hour rise, but it is much easier to handle when it is chilled. It is intended for refrigeration and use over the next two weeks, ready for you anytime. The flavor will deepen over that time, developing sourdough characteristics.

The next day when you pull the dough out of the refrigerator you will notice that it has collapsed and this is totally normal for our dough. It will never rise up again in the container.

Dust the surface of the dough with a little flour, just enough to prevent it from sticking to your hands when you reach in to pull a piece out.

You should notice that the dough has a lot of stretch once it has rested. (If your dough breaks off instead of stretching like this your dough is probably too dry and you can just add a few tablespoons of water and let it sit again until the dough absorbs the additional water.)

Cut off a 1-pound piece of dough using kitchen shears* and form it into a ball. For instructions on how to form the ball watch one of our videos. Place the ball on a sheet of parchment paper… (or rest it on a generous layer of corn meal on top of a pizza peel.)
*I actually use a pair of Sewing Shears because I like the long blade. I just dedicated a pair to the kitchen.

Let the dough rest for at least 40 minutes, (although letting it go 60 or even 90 minutes will give you a more open hole structure in the interior of the loaf. This may also improve the look of your loaf and prevent it from splitting on the bottom. ) You will notice that the loaf does not rise much during this rest, in fact it may just spread sideways, this is normal for our dough.
You can also try our “refrigerator rise trick,” shaping the loaves and then immediately refrigerating them overnight. By morning, they’ll have risen and are ready for the oven after a brief room-temp rest while the oven preheats (click for instructions).
Preheat the oven to 450 degrees with a Baking Stone* on the center rack, with a metal broiler tray on the bottom (never use a glass vessel for this or it will shatter), which will be used to produce steam. (The tray needs to be at least 4 or 5 inches away from your stone to prevent it from cracking.)
*(or Cast Iron Pizza Pan– which will never crack and conducts heat really well. Be careful to dry it after rinsing with water or it will rust)

Cut the loaf with 1/4-inch slashes using a serrated knife. (If your slashes are too shallow you will end up with an oddly shaped loaf and also prevent it from splitting on the bottom.)

Slide the loaf into the oven onto a preheated stone (the one I’m using is the cast iron) and add a cup of hot water to the broiler tray. Bake the bread for 30-35 minutes or until a deep brown color. As the bread bakes you should notice a nice oven spring in the dough. This is where the dough rises. To insure that you get the best results it is crucial to have an Oven Thermometer to make sure your oven is accurate.

If you used parchment paper you will want to remove it after about 20-25 minutes to crisp up the bottom crust. Continue baking the loaf directly on the stone for the last 5-10 minutes.

Allow the loaf to cool on a rack until it is room temperature. If you cut into a loaf before it is cooled you will have a tough crust and a gummy interior. It is hard to wait, but you will be happy you did! Make sure you have a nice sharp Bread Knife that will not crush the bread as you cut. Or you can tear it apart as they do in most of Europe.

If you have any leftover bread just let it sit, uncovered on the cutting board or counter with the cut side down. If you cover a bread that has a crust it will get soggy.
Enjoy and have fun baking. Bread that is made with love and joy tastes better!
Note: Red Star Yeast is a sponsor of this website and its promotional activities, and provided samples of yeast for recipe testing.
Hi, I don’t know how I found you guys but am in the middle of making this now. I halfed the mixture do to a mishap the first time I tried with yeast that was WAY past its expiration date lol. So my halved batch is rising right now and it is doing great! My question is I left out the salt only b/c I read that it kills yeast and I wanted that huge airy fluff I saw in your pictures. Can I add it after the fact to the dough somehow? I thought about kneading it in but then I’m scared about a VERY dense bread which is what I had the first time with the bad yeast. Help! 🙂
Hi Jason,
If you knead the salt into the dough, you will need to let the dough rest much longer before baking, so that it can develop air bubbles again. Let the dough rest for about 90 minutes after shaping for the first loaf.
We use quite a bit of yeast in our recipes, so the salt will not effect the rise.
Thanks, Zoë
I have actually kneaded salt into the dough because I accidentally left it out, and it gave us a bit of a pretzel-y saltiness to the bread because it was not dissolved into the water, which was not bad actually.
Hi Autumn,
I bet it was tasty, I love pretzels. I bet it would be great with the pretzel roll recipe in our new book. I’ll have to give it a try!
Thanks, Zoë
keep your yeast in the freezer with all the sir out of the bag or container,keeps mine very fresh
I do it— and it can be used cold, right out of the freezer.
Hi Zoe! Thanks for the answer, my bread came out really great except for one thing, it was burning on top. I have to confess that I forgot to add the water until 7-8 minutes in the baking process DOH! Anyway could that have been the problem? I have an oven thermometer and glad I did b/c my oven is over 50* off, but my thermo stayed very close to 450, I finally took it out at about 22 minutes and it is slightly burned up top, I am getting ready to try again but wanted some advice first, thanks so much!!!
Hi Jason,
Which shelf in the oven were you baking on? If the loaf is toward the top of the oven it is more likely to burn.
Thanks, Zoë
Hi Zoe!
I was baking on the top shelf, close to the top so I guess that was the issue like you said. I guess I thought since the top element wasn’t on it wouldn’t matter, sorry if this is a stupid question but why would the top burn if the top element wasn’t on?
My second attempt turned out beautifully, well except for no salt lol, kinda bland tasting but looked great. I’m getting ready to do my third attempt with a new batch of dough that is salted according to recipe, very excited about how it will taste in comparison. I’m still only finding that I need 20 minutes or less or the bread will burn, and that is at between 425-450, is this normal? It seems like it is a lot faster than the 30-35 you all recommend. Thanks so much for your help, i’m going to the store this weekend to check out your books!
Hi Jason,
Because heat rises and it is such a small environment, the top shelf of the oven is much hotter than the middle, even though the element is on the bottom. Try moving the bread to the middle rack and see if you get better results.
Thanks, Zoë
Hi Zoe, I did move it and I did get excellent results thank you so much, can’t wait to make sourdough!
Terrific Jason,
So glad it worked out!
Cheers, Zoë
Hi there i hope you can help me – my wife has been making bread for about a year and it has been fine until the last couple of times where the bread has gone soggy and sticky after one day and it never happened before. We keep the bread in plastic bag and the weather has been hot, could that be the reason?
Hi Collin,
The weather can effect the dough, especially the heat. If it is particularly humid it will also have an effect. It sounds like the dough may need a bit more flour to get it back to what you are used to working with.
Thanks, Zoë
I tried to add a cup or so of my dormant starter to the above recipe for extra flavor/body. Mixed it, let it sit from 5 am to around 1pm then shaped and am allow it to rest right now. Three boules and 1 in a large tall-sided round crock. The dough seems REALLY wet. When I make sourdough using my usual method (KAF’s extra-tangy sourdough), the dough comes out really wet, also. IS this a result of addition of starter??
Hi Jacqueline,
It may very well be your starter, which can be adding additional liquid to an already wet dough. Here is our recommendation for adding starters to our dough, in case you hadn’t already seen it: https://artisanbreadinfive.com/2009/11/30/sourdough-starter-in-our-recipes
Thanks, Zoë
Does it matter at all if the flour is “bleached”? I’m having some issues with oven spring and I was just wondering, thanks!
Hi Jason,
Doesn’t matter if it is bleached. What is the issue with the oven spring?
Thanks, Zoë
I’m just not getting much, the bread looks/tastes great, just kind of flat, is more spreads out not up. I’ve read all your faq’s on it and I’m thinking my stone is not fully preheated or i’m overproofing it, gonna do some experimenting unless you have some things I should be looking at? Thanks!
Hi Jason,
Here is a video that may help you with the shaping of your loaf: https://artisanbreadinfive.com/2010/03/08/new-video-shaping-the-ball-from-a-very-wet-dough
Hope that helps! Zoë
Any tips on doing this with whole wheat flour?
Hi Mya,
We have an entire book on whole grain and healthy breads. Here is the master recipe from our book Healthy Bread in Five Minutes a Day: https://artisanbreadinfive.com/2009/10/26/our-new-book-healthy-bread-in-five-minutes-a-day-is-released-tomorrow-get-yourself-some-vital-wheat-gluten-and-make-our-whole-grain-master-recipe
Thanks, Zoë
Hi! I’ve made this recipe a couple of times now, and I just wanted to say that I love it! I love being able just to do all the waiting on that first day, then have fresh baked bread anytime after that. Mine has never lasted two weeks though… We always eat it all before then! Thank you for sharing this recipe.
So I think I added 1 cup less of flour on accident because mine is so sticky… it’s baking in the oven right now so we’ll see how it turns out! Could I just add the cup of flour or will that ruin it since it has already risen?
Thanks!
Hi Melissa,
Have you made the dough before and it just feels different this time? If so, you can add flour until the dough feels as it usually does. After you add the new flour, you will need to let the dough sit for an hour or two to allow the flour to absorb the excess water.
Let me know if this is actually your first time mixing our dough and I can lead you to some helpful videos.
Thanks, Zoë
Yes this is my first time making the dough. I lost track of how many cups of flour so I think I added one less. It is pretty sticky when I pull it out, I had it all over my fingers but it did form into a blog/ball that I let rest for 45 minutes. After I baked my bread, it seems a lot flatter than your pictures…I mixed it in the container with my bosch hand mixer that has a dough hook, could over mixing it make it rise less? It still tasted good:) I just would like it to be more fluffy inside. I might try adding a little more flour and let it rise though.
Hi Melissa,
Yes, try adding a bit more flour, since it sounds like your dough is too wet. Here is a video that may help you shape the very wet dough, so your loaf won’t lose its shape: https://artisanbreadinfive.com/2010/03/08/new-video-shaping-the-ball-from-a-very-wet-dough
Thanks, Zoë
Hi there,
I’ve made the recipe several times and I love it! I know there’s another recipe for whole grain or healthy breads, but I’m wondering if I can just use this recipe and substitute whole wheat flour for white flour without any added ingredients. Thanks!
Lindsey
Hi Lindsey,
Unfortunately, whole wheat flour absorbs more water than white flour and it doesn’t produce as much gluten, so the dough will not work if you just substitute whole wheat for the all-purpose.
Thanks, Zoë
Hi Zoe,
I haven’t made this bread yet and was wondering, if I don’t have the special tool to mix the bread can I use my kitchen aid mixer with a dough hook?
Hi Nancy,
The only tool you need to mix by hand is a spoon, but the kitchenaid works brilliantly also. If you use your stand mixer, you’ll actually have a better time with the paddle attachment, since our dough is so wet.
Thanks and enjoy! Zoë
Thanks
Can I use this recipe in the loaf pan? I’ve been making this bread for the last week according to your recipe and I absolutely LOVE it! Wanted to make it more like a ‘sandwich bread”…can I ? And do I need to make any alterations ?
Hi Agnes,
Here is a post about baking in a loaf pan: https://artisanbreadinfive.com/2011/09/12/the-best-school-lunches-start-with-homemade-bread
Thanks, Zoë
Do you have any suggestions for high altitude adjustments for this recipe? I’ve made this three times and mine comes out with more density than I’d like. The crust is awesome, better than the bread I used to spend eight hours kneading and proofing, but I want more and bigger bubbles inside so it looks like your pictures.
Hi Dave,
Here is a post on baking at high altitudes, hope this helps:
https://artisanbreadinfive.com/2008/02/10/qa-high-altitude-baking
Thanks, Zoë
Hi, this may be a stupid question, but does it *have* to be a wooden spoon? This is the 2nd bread recipe that stirs with a wooden spoon & thought I’d ask. 🙂
Thanks!
Hi Marjori,
You can use any kind of spoon you’d like or even a Danish Dough Whisk! 🙂
Cheers, Zoë
This is my 1st attempt at making bread EVER, and I decided to use Whole Wheat flour instead of Unbleched Flour. I left the dough out on the counter, covered, with a hole for ‘breathing’ & it really doesn’t look as though it rose…HELP!!
I put it in the fridge in hopes of it doing something!!!
How old is the yeast and did you put the salt on top of the yeast? Salt kills yeast so if they came into direct contact, that will eg get the result.
Hi John,
The salt may slow the rise of the yeast, but it won’t kill it off, only hot water will do that.
Thanks, Zoë
Ooops, Zoe is correct. Therefore, water temp might be the problem if the water was too hot. cold water would slow the initial rise making a possible 4 hour rest before putting in the fridge. Did you measure the water temp before mixing the ingredients?
Hi Zoe and Jeff,
I tried mixed up a batch of dough last night and cooked the first boule in my crock pot this afternoon. I reduced all the amounts by about one third because I did not have a large container, and also I’ve never made bread before.
I substituted parchment with aluminium foil and it worked. The bread was rather dense and chewy, but was lovely toasted. I was so encouraged by the result that I cooked another boule right away. The last bit of the dough, I flattened and added crannberries and sugar and then rolled it up like how you showed in one of your videos. This was also cooked in my crock pot. That turned out fine too.
I’ve mixed up another batch of dough, but now I realise that I should have dumped all the flour in at once, instead of adding it slowly to the water and yeast slurry. Is that why my bread turned out to be more dense and chewy?
Much thanks for coming up with such an easy way of making bread!
Esther
That shouldn’t matter, our way is just faster. Have a look at our Dense Crumb posting on our FAQs page, though that isn’t exactly relevant to our Crock Pot stuff.
Hi Jeff,
Thanks for your prompt answer. I will try to be faster in shaping the dough.
Esther
Just found these postings and am anxious to try them. My grandmother always told me to add a tiny pinch of sugar to the yeast/ water mixture because the yeast needs something to eat! I have always done that and it seems to make it very active (doesn’t add any sweetness because you only add a pinch of sugar).
Just a thought.
Turns out, it’s not necessary. The yeast can metabolize starch as well. Sugar in small amts like this also acts as a tenderizer, which some people like.
Can I freeze the dough before baking?
Yep!
Hi, I have been enjoying making both the basic bread and healthy bread in five recipes. I was wondering if I could use the basic recipe and sub in 2 cups of whole wheat with 2T of VWG? Would I need to adjust the water? Do you think it would work? Thank you and love the bread!
When you say “basic recipe,” not clear which recipe you mean. From which book, what page number?
Sorry for the confusion, Master Recipe from Artisan Bread in Five Minutes a Day.
Hi, I have been enjoying making both the basic bread and healthy bread in five recipes. I was wondering if I could use the basic recipe and sub in 2 cups of whole wheat with 2T of VWG? Would I need to adjust the water? Do you think it would work? Thank you and love the bread!
Yes, that will work, but yes, you will probably need to increase the water. 2T? 4T? Will have to experiment. You can also try that whole-grain swap without the VWG– after all, there’s lots of white flour in the mix you suggest. You may like it just as well without it, and you probably won’t need to adjust the water.
Thanks so much for this recipe! Is there any way to make it into an “extra sourdough” loaf?
Thanks again!
More in the book (https://bit.ly/cNtfJI for the current edition, or https://amzn.to/17Rw23Y for the new edition out next month), but just save the dough up to 14 days as described; the flavor you’re looking for will develop.
If I wanted to freeze the dough before baking, should I let it rise first, and then freeze? or freeze after making the dough and let it rise after it defrosts? Thanks!
See FAQs page: “Freezing the dough: Can I do it?”
I do not have a baking stone or cast iron pizza pan. What else can this bread be baked on?
greased baking sheet works, crust isn’t as good
Thanks for the recipe.
Can I use an old cast iron skillet – 10″ in diameter?
Sure Sandra! See our roundup on stones, cast-iron, at https://artisanbreadinfive.com/2010/08/24/pizza-stones-which-creates-the-best-crust
Hello,
After you have used all the dough and you have one loaf left, is it possible to add more flour and water to get it going again? IF so, what are the measurements of the ingredients to add to the starter?
Sure can! The proportions in what you add are exactly the same– we use yeast, are you trying to do this all-natural, without adding a new dose of yeast? I’ve done that, it’s just less reliable and takes a lot longer.
Hi Jeff and Zoe,
I was using your artisan bread recipe in a crockpot and just changed to using it in a convection oven last week. I love the way the dough rises in the the oven! I could even get crispy crust without using any steam.
I’ve been substituting about a quarter of the flour with rye flour. Tonight, I’m going to mix in some sourdough starter that I started culturing last week.
I’ve noticed that in the oven, the base of the dough puffs up a little during the baking process. Looks like the dough is not just expanding upwards, but also downwards too. How can I avoid this downward push?
Cheers,
Esther
Which of our recipes are you using? Which book and page number?
Hi Jeff,
It’s the one described at the beginning of this page.
Esther
Slashing deeply at the start of baking might help with more even expansion.
Ok, I need to work on my slashing technique. I just bought a serrrated knife specially for this, but I still have problems making clean cuts without dragging the sticky dough along with the knife.
Using enough flour on the surface? Make quick cuts, don’t give it time to catch, and stabilize the loaf with your other hand (don’t cut yourself!).
Hi Jeff,
Yes, I’ve scrutised your video about cutting sticky rye dough, and I’ve tried sprinkling more flour on the surface. When I tried to stabilise the dough with my other hand, I end up with a mis-shapen loaf hahaha.
I think I need more practice.
Yes, practice will help– and a very sharp serrated knife, it occurred to me that your dough may be dull– those’ll stick.
Hi Jeff,
Dull dough???
Esther: Sorry, dull knife!
Hi Jeff,
hahaha 🙂
OK I’ll keep at it with a sharp knife. Seems to catch less if I wet the blade rather than sprinkle with flour.
I found some wholemeal atta flour in the supermarket. How much of the all purpose flour can I substitute without having to use vital wheat gluten? I can’t find VWG here.
Esther
Hi Esther,
We suggest about 1 cup of whole wheat can be substituted without having to make any other changes.
Thanks, Zoë
Hi Zoe,
Great! I’ll try that in my next batch of dough. I just made up a batch of brioche dough, but without the eggs and I used my sourdough starter. I guessed the amount of butter because I do not have a weighing scale, and I used sugar in place of honey.
I’ll find out if it is OK when I bake a portion tonight.
Esther
Hi Zoe,
I just baked and ate my first bun made with atta flour. It came out soft and tender. I baked it at 230 C for 10 minutes, and probably could have baked it longer for a better crust. I used the olive oil dough recipe and incorporated my sourdough starter (all purpose flour and rye flour). I substituted half of the AP flour in the recipe with the atta flour (I had read that this is a high gluten flour, so I experimented with adding more that what you recommended.)
The other bun has walnuts and cranberries rolled into the dough and I am saving for tomorrow’s lunch!
cheers,
Esther
Hi Esther,
This is fantastic, thanks for letting us know!
Enjoy, Zoë
oops, I meant to say ‘light and tender’ but typed out ‘soft and tender’ instead.
Has anyone tried replacing the AP flour completely with rye flour and sourdough starter in the master recipe? Will it work?
Hi Esther,
Rye has very little gluten, so the dough will be even wetter and the bread very dense. It will take lots of experimenting.
Thanks, Zoë
I’ve a beginner in baking & just came across this technique from your website. I have a try (measure out half of all the ingredients) but the dough / mixture did not come out as it should be. I measured the right amount of ingredients (by half) & used easy bake yeast but the dough is all sticky and cannot even form a proper dough. I did let it sit in room temperature for 4 hours and can see the mixture rise at least double. What did I do wrong? Help, thanks.
Hi Katherine,
I suggest you watch this video on how to handle very wet dough: https://artisanbreadinfive.com/2010/03/08/new-video-shaping-the-ball-from-a-very-wet-dough
How are you measuring your flour? We use the scoop and sweep method.
If your dough looks even wetter than what you see in the video, you may want to work in some more flour. If you do this, let it sit for a while to allow the flour to absorb the excess water.
Thanks, Zoë
Wow. I just made my first batch of this dough yesterday and today I baked a loaf of bread, and 9 little rolls (brushed with egg white, as for your Broetchen recipe, and sprinkled with garlic, rosemary and salt).
It was the best bread I have ever made, and I bake a lot of bread. My previous favourite was the NYT no-knead recipe, but yours beats it for the convenience of making up a big batch of dough and keeping it for a week or so in the fridge. And the crust and crumb of your recipe is just as good as the NYT one.
I love that it seems quite forgiving too. I screwed up with the salt – I didn’t know what kosher salt was (it’s not a thing here in Australia), so substituted with the same amount of table salt and then realised while browsing your site later that kosher must be bigger crystals. But the dough doesn’t taste too salty.
I thought while forming the loaves that it might be too wet, as it was quite hard to form, and spread sideways a lot, but since it has more oven spring than any bread I have ever seen, it still bounced up into a perfect shaped loaf and beautiful little spherical rolls.
Thanks! I am off to buy your books now 🙂
Hi Rachel,
Thank you for giving the bread a try and for the lovely note! Enjoy all the bread.
Cheers! Zoë
am going to brave making my own bread, have been wanting to for ages and felt intimidated by the process.
Do I have to use a broiler tray or will a 9inch bread tin be OK to put the water in?
Also, where can I get a good baking stone from?
Thanks!
Hi Alice,
You can use any metal container to hold the water for steam. You don’t want to use your favorite bread tin, since the evaoporating water may leave marks on the pan.
Thanks, Zoë
I want to make bread bowls for soup. Any suggestions on how to adapt recipe for this? I need 15 bowls.
Hi Ellen,
We have bread bowls in our new book! 🙂 If you are doing individual size bowls, I would start with no more than a half pound of dough to make the boules. Much of that bread will be scooped out, so they won’t be eating that much bread. It somewhat depends what you are serving inside your bread bowl, but make sure the soup isn’t too thin or it will make the bread soggy and spill out the sides.
Thanks, Zoë
This is the best thing for making sliced breads. I have tried white, wheat, graham flour breads, and raisin/cinnamon (yum) bread and now I am excited to expand my skills to Crock-Pot bread. Thanks for sharing!
Just wondering if anyone has tried this recipe with gluten free flours?
Hi Vickie,
You can’t just swap out g-f flours, but we have many g-f recipes in our books! https://artisanbreadinfive.com/2010/01/05/gluten-free-crusty-boule
Thanks, Zoë
Has anyone had a different outcome with organic flour? I just mixed up my first batch and had to add water since the dough wasn’t at all wet.
Is organic flour a different consistency?
Thanks!
Hi Sandi,
What brand of flour are you using? It probably has more to do with the protein content in the flour.
Thanks, Zoë
I think it is sunrise mills flour. It actually looks like your pictures now after being refrigerated. I haven’t tried baking it yet but will today and tomorrow I am purchasing the book.
I wonder if you have ever wondered about this or read anything about sensitivities. I am allergic to “wheat” but bread made from just these few organic ingredients does not seem to have any adverse affect. It makes me wonder if it is not the wheat but the way bread is processed today.
Thanks for this site!
Hi Sandi,
I think there is something to that, or at least it is one of many theories on why some people are sensitive to some wheat products, but not others. I guess we eat what makes us feel good and avoid the stuff that doesn’t, and that is such an individual thing.
Enjoy!!! Thanks, Zoë
Thank you so much, i’m going to make this one!
Hello!
I’ve attempted this recipe twice now (the second time is in the oven now) but I can’t seem to get that sticky, elastic consistency. Last time, the bread tasted just fine, but it didn’t rise much and was dense. My dough feels wet, but it is not sticky and comes right apart when I pull.
I’ve been halving the recipe, including the amount of yeast because I’m only baking for myself, but I wouldn’t think that would affect consistency? I do tend to find that I add more water because my dough is always very dry and won’t mix property unless I add about 1/2 cup of extra water… could that be causing the crumbly-ness of my dough?
Thank you!
Hi Allison,
What kind of flour are you using?
Thanks, Zoë
Hi there, I am in the midst of the first part of the master recipe…(ie I have just mixed up the ingredients), the dough seems drier than I would have imagined, sort of like the consistency of pizza dough, or a “regular” bread dough. I am SURE I did the measurements correctly, will this affect the result?
Thanks!
Melissa
Hi Melissa,
What kind of flour are you using?
After the dough has risen, if the dough still seems dry to you, just let it rest a bit longer than we suggest after the loaf has been formed.
Thanks, Zoë
Hi, thanks for your reply, I was using Pillsbury (I’m a MN girl too 🙂
I added a tiny bit more water and it seems to have turned out fine. I did find the post about higher-protein flours and Pillsbury is at the higher end of the “normal” range (10.5%) so I added another T of water.
Hi
I made your bread posted in the St Paul Pioneer Press last Sunday. Thank you.
I made one pound loaves two nights in a row but want to make one large for the last bit. Do you know how long I should bake the larger portion?
Hi Shari,
Thank you so much for giving the recipe a try. We have all kinds of information about baking larger and smaller loaves in the book, but here is a post that can get you started: https://artisanbreadinfive.com/2012/03/20/how-to-make-a-2-pound-loaf
Thanks, Zoë
Thanks. I’ll try your suggestions. I’ve asked for your new book for my birthday!
Hi! I have made your delicious basic white recipe a few times and always have great success with the 1/2 recipe (3, 1.5, 1.5, 6.5).
I want to make some bread with my kids at school but don’t have a lot of space for storing the dough.
Can I quarter the original recipe and still have success (e.g. 1.5 c water, 3.25 c flour etc.)?
Thanks!
Hi Heidi,
Yes, you sure can, it works just great! So pleased you’re baking with the kids!
Thanks, Zoë
Can the “basic” dough be used to make baguettes? I don’t have your book yet but it is on my Christmas gift wish list.
The book was recommended to me by my Physical Therapist.
Hi Tom,
Yes, the master recipe is perfect for baguettes. Here is a post to show you how, with or without rosemary: https://artisanbreadinfive.com/2008/05/21/rosemary-scented-baguette
Cheers, Zoë
I received Your new book for Christmas and read it cover to cover in 2 days. It is great and so much more.
I have a couple of questions:
1. Can “Eden Traditional Organic Barley Malt Syrup” be used to replace barley malt powder (non-diastatic)? If so in what proportion?
2. I have a Big Green Egg charcoal fired ceramic cooker that may work as a “wood fired oven”. I have gotten it to 750F and above for pizza. How would I get it to steam enough to make your bread in this since it is vented not sealed?
You should be able to use a liquid barley malt, with a slight decrease in the liquid in the recipe. Hard to guess how much. But not much; it depends on how much malt you’re using. I’m guessing you should decrease by about half the volume of malt syrup.
The big green egg won’t capture steam, but you can use the lasagne pan method to create a steam environment for the first two-thirds of baking– see in the book in the part about “3 ways to make steam…”
Hi,
First, thanks for your great method. I’ve been practicing it for a little while, trying to fine-tune every parameters to my own cooking situation (flour, oven, etc.) I now succeed very beautiful golden loaf with nice open hole structure. I now bake it in closed put which I find best for heat and baking uniformity. In my recent batch, I replaced one of the cup of white flour with a cup of organic whole weat bread flour. I did adjust the hydratation and it came out really good. The only thing is that my bread have a soapy aftertaste. I read here and there that It might be caused by an unbalanced acidity but I’m not sure what I can do about it. Is it in link with that cup of whole wheat flour ?
Thanks
(sorry for my english – not my first language)
Wow, I haven’t heard that. Is it possible that your WW flour is stale? Or– some people find that WW has a bitter taste, and you and others may experience that as a soapy taste. The usual way that WW is made more palatable to those who don’t love it is to sweeten it a bit. Maybe a little honey, 50 to 100 grams? Or sugar, less by weight because it’s got water in it.
Thanks for you fast answer, I just bake a new loaf this morning and the soapy taste is gone. My doughs was store in two different container, maybe, something was wrong with he first one, badly rinse ? There’s almost 5 days between the two bake, maybe that played … Anyway, this is my best bread to date. That one cup of WW, really improve the taste and texture.
fantastic! Maybe it was just soap in the vessel!
Hi, I have your Artisan Bread in Five Minutes a Day Book and just noticed that on the site here the proportions are a little bit different than in the book. In the book it says 1 1/2 tb sp yeast and salt and on the website it says 1 tb spoon. Is the recipe on the website an updated version? What will the difference be? Also, how do you double the recipe? Does everything still double, yeast included like it says in the book?
Thank you!
Go with the 1T amount, it works just as well–we’ve updated that in our new book, on Amazon at https://amzn.to/17Rw23Y
I love this bread! I see you have a olive oil recipe for pizza… but since I just made this recipe above can I use it for pizza? Or add in oil and sugar to make it for pizza? Thanks!
it’ll work exactly as mixed, or you can add a little olive oil/sugar to the next batch; see our pizza book: https://amzn.to/eo10NJ
great! thank you!
Where do i find a bucket with lid that large to do this dough please?
Cheap options: large ice-cream bucket, soup pot with a lid
A little more expensive, something like this on Amazon (but you have to buy the lid separately): https://www.amazon.com/Cambro-Round-6-Quart-Storage-Container/dp/B0001MRUUU/ref=as_li_wdgt_ex?&linkCode=wey&tag=arbrinfimiada-20
Can usually find something similar in kitchen stores.
Does it matter if the bucket is not very tall, but wide (like the dimensions of a dutch oven)? I have a gallon ice-cream bucket.
That’s fine. A gallon may be a little small, may need to take some out at the initial rise. Once it subsides, should be perfect.
I will get the one you suggested from Amazon, my restaurant supply store is just miserable. The folks in there are so rude. I went ahead and used my cambro square 6 QT. Thanks.
I made this today, and i used a 6Qt. container like you suggested accept mine was square. The dough only rose up to the 4 Qt mark, no higher, and i left it out for 5 hours. So… put it in the fridge. Need I be worried what I might find tomorrow? Should I do something different?
No, it’ll be just fine!
Hey, I want to try making this bread, but I just want to cut the reciepe in half. Im not good with cutting the measurements in half and also afraid it might not come out right. Would you email me the mesurement if i only want to make half?
Just divide everything by two, it’ll come out fine.
Hello Zoe and Jeff,
I have been making your master recipe bread and also the olive oil bread for a couple of months. Yesterday, I made a batch of the challah dough. I baked it at 177 degrees Celsius. I noticed that with the olive oil dough (baked at 230 degrees Celsius) and the challah dough, the bottom is a little burnt by the time the bread is cooked. I am baking in a convection oven, using the middle rack and a baking tray (pre-heated in the oven). What can I do to prevent the burnt bottom?
Thanks,
Esther
First– check your oven temp with a thermometer, something like https://ow.ly/8CVPU. We have several olive oil doughs and challahs, from different books. Which book/recipe/page number are you working from?
I don’t have an oven thermometer. Should I lower the temperature for the rest of the batch of dough?
I am using the recipes from your Artisan Bread in 5 minutes book. Can’t tell you the page numbers because I’m at work and don’t have the book with me.
Sure, just try lowering the temp and see how you do. Consider a higher oven shelf; will brown the top at the expense of the bottom crust.
Since I bake my bread in a close pot, I find that I have better heat distribution. The crust is nice and for a little more brownish color, I take of the lid for the last 5 min (but I’m not even sure if that’s necessary).
We generally say that the last 1/3 of baking should be with the lid off– does a better job of crisping the top crust.
Good to know – I’ll try it – tnx.
Making your Basic recipe- thanks for mentioning about the protein counts per flour. I used 1/2 sprouted emmer, 1/4 sprouted spelt and 1/4 sprouted pastry flours with higher protein. Made it original, then added an extra 1/2 c to the batch to make it stretchy (1/4 c at a time). Let soak, stretched up from container, formed dough, let rest and now in oven for test loaf.
Interesting– just to be sure I understand, you’re using all sprouted flours? Let us know how that turns out?