Reviewing the Master Recipe from Artisan Bread in Five Minutes a Day
It’s the dead of winter here in Minnesota, and everyone I know is baking again–so it’s time to review the basic recipe from my BreadIn5 books. Back when the cookbooks first came out (2007!), authors didn’t generally put their most important recipe out on a website for free.
I took a different approach.
You can really teach people a new method, and communicate with them in near real-time (about problems they’re having with recipes). That means using this technology to let people sample the method, and comment back. So this is one of my sites most popular posts, and it contains the most important method that really made these books a success–the stored-dough recipe for a round European-style loaf, that tastes better the longer you let the dough age in the fridge (to a point–up to 14 days with this dough, in this post!). Here’s the recipe, from The New Artisan Bread in Five Minutes a Day.
For the Master Recipe…
As you bake through this basic Master recipe from The New Artisan Bread in Five Minutes a Day you should be able to answer some of the most frequently asked questions. The goal is to create a large batch of dough that stores in the refrigerator for up to two weeks. That’s why the method saves you so much time– all the mixing and prep is divided over four one-pound loaves (a little less to be exact, about 0.9 pounds).
Master Recipe from The New Artisan Bread in Five Minutes a Day: The Discovery That Revolutionizes Home Baking:
3 cups (1 1/2 pounds/680 grams) lukewarm water (you can use cold water, but it will take the dough longer to rise. Just don’t use hot water or you may kill the yeast)
1 tablespoon granulated yeast ( you can use any kind of yeast including products labeled as instant, “quick,” rapid rise, bread machine, active dry, or even fresh cake yeast (which isn’t granulated)*. You can also decrease the amount of yeast in the recipe by following the directions here. Or you can bake with a sour dough starter, see instructions here.)
*If you use cake yeast you will need 1.3 ounces (37g).
1 to 1 1/2 tablespoons Morton Kosher Salt (adjust to suit your taste or eliminate it all together. Find more information here)
6 1/2 cups (2 pounds/910 grams) all-purpose flour (the recipe’s tested with typical supermarket flour. If you use a higher protein flour check here)
You can scale up the recipe slightly with very intuitive metric weights: 750 grams of water, and 1,000 grams of flour. You can see that the Baker’s Percentage for hydration here is 75%. I like the higher end of the salt with that tweak.
Mixing the dough:
In a 5 or 6 quart bowl or lidded dough bucket (the lid is sold separately), dump in the water, and add the yeast and salt.

Because we are mixing in the flour so quickly it doesn’t matter that the salt and yeast are thrown in together.

Dump in the flour all at once and stir with a long handled wooden spoon or a Danish Dough Whisk which is one of the tools that makes the job so much easier!

Stir it until all of the flour is incorporated into the dough, as you can see it will be a wet rough dough.

Put the lid on the container, but do not snap it shut. You want the gases from the yeast to escape (you can put a little hole in the top of the lid so that you can close the lid and still allow the gases to get out. It doesn’t take much of a hole…

Allow the dough to sit at room temperature for about 2 hours to rise (it may take longer). When you first mix the dough it will not occupy much of the container.

But, after the initial 2 hour rise it will pretty much fill it. (If you have decreased the yeast you will have to let it go longer than 2 hours.) DO NOT PUNCH DOWN THE DOUGH! Just let it settle by itself.

The dough will be flat on the top and some of the bubbles may even appear to be popping. (If you intend to refrigerate the dough after this stage it can be placed in the refrigerator even if the dough is not perfectly flat. The yeast will continue to work even in the refrigerator.) The dough can be used right after the initial 2 hour rise, but it is much easier to handle when it is chilled. It is intended for refrigeration and use over the next two weeks, ready for you anytime. For the first two days of storage, be sure to leave the lid open a crack, to allow gasses to escape. After that, you can usually snap down the lid on plastic contains without problems, because they’re usually not entirely airtight. BUT, DON’T SEAL GLASS CONTAINERS OR THEY MIGHT SHATTER. The flavor will deepen over that time, developing sourdough characteristics.
If the dough develops a hard crust, you can usually fold that into the next loaf, but it may create a hard area in the crumb. If you want to prevent this, scrape off the crust before using. Transfer the dough into smaller containers as you deplete it to prevent the crust from forming, and close the non-airtight container after two days.

The next day when you pull the dough out of the refrigerator you will notice that it has collapsed and this is totally normal for our dough. It will never rise up again in the container.

Dust the surface of the dough with a little flour, just enough to prevent it from sticking to your hands when you reach in to pull a piece out.

You should notice that the dough has a lot of stretch once it has rested. (If your dough breaks off instead of stretching like this your dough is probably too dry and you can just add a few tablespoons of water and let it sit again until the dough absorbs the additional water.)

Cut off a 1-pound piece of dough using kitchen shears* and form it into a ball. This video shows the technique for shaping this very wet dough.
Place the ball on a sheet of parchment paper… (or rest it on a generous layer of corn meal on top of a pizza peel.)
*Sewing Shears can be nice because of the long blade. I just dedicated a pair to the kitchen.

Let the dough rest for at least 40 minutes, (although letting it go 60 or even 90 minutes will give you a more open hole structure in the interior of the loaf. This may also improve the look of your loaf and prevent it from splitting on the bottom.) You will notice that the loaf does not rise much during this rest, in fact it may just spread sideways, this is normal for our dough.
You can also try our “refrigerator rise trick,” shaping the loaves and then immediately refrigerating them overnight. By morning, they’ll have risen and are ready for the oven after a brief room-temp rest while the oven preheats (click for instructions).
Preheat the oven to 450 degrees F. with a Baking Stone* on the center rack, with a metal broiler tray on the bottom (never use a glass vessel for this or it will shatter), which will be used to produce steam. (The tray needs to be at least 4 or 5 inches away from your stone to prevent it from cracking.)
*(or Cast Iron Pizza Pan– which will never crack and conducts heat really well. Be careful to dry it after rinsing with water or it will rust)

Cut the loaf with 1/4-inch deep slashes using a serrated bread knife. (If your slashes are too shallow you will end up with an oddly shaped loaf and also prevent it from splitting on the bottom.) If your dough is collapsing when you make the slashes, it may be that the dough has overproofed or your knife it dull and dragging the dough too much.

Slide the loaf into the oven onto a preheated stone (the one pictured below is cast iron) and add a cup of hot water to the broiler tray. Bake the bread for 30-35 minutes or until a deep brown color. As the bread bakes you should notice a nice oven spring in the dough. This is where the dough rises. To insure that you get the best results it is crucial to have an Oven Thermometer to make sure your oven is accurate.

If you used parchment paper you will want to remove it after about 20-25 minutes to crisp up the bottom crust. Continue baking the loaf directly on the stone for the last 5-10 minutes.

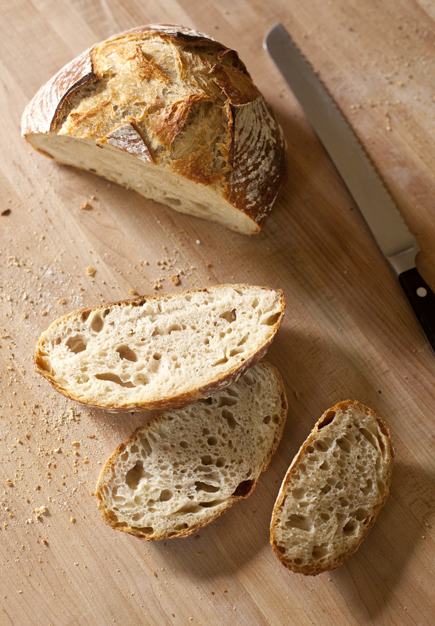
Allow the loaf to cool on a rack until it is room temperature. If you cut into a loaf before it is cooled you will have a tough crust and a gummy interior. It is hard to wait, but you will be happy you did! Make sure you have a sharp serrated bread knife that will not crush the bread as you cut.

If you have any leftover bread just let it sit, uncovered on the cutting board or counter with the cut side down. If you cover a bread that has a crust it will get soggy.
Enjoy, have fun baking, and check out the FAQs page if you’re having trouble getting the bread to turn out the way you’d like.
Note: BreadIn5.com is reader supported–when you buy through links on the site, BreadIn5 LLC earns commissions.
Letting dough raise can be taking very long in a chilly kitchen during winter. Recently I found a different way to make this process go a lot faster ! I put my instant pot on the ‘keep warm’ setting and dump 2 cups of water in it.
Then I slide a cookie sheet over the top of the pan and put the bucket with the dough on top of the sheet. This way the dough warms up gradually and raises faster, anywhere between 60 and 90 minutes. Make sure you have the ‘keep warm’ setting on ‘low’. I tried this method a few times now and I like the way it works out !
Fantastic!
I live in a chilly house and my kitchen is under 60 degrees in the winter. I bought a reptile warmer mat and put it into an Igloo cooler. I put a cooling rack over the warmer and then put the dough on the rack and loosely closed the lid. The reptile mat has a thermostat and if I loosely close the lid to the cooler, it keeps both the warmth and moisture in. My plastic bin with the dough also has a loosely closed lid. I will use the same method to let the dough rise before baking.
Cool idea!
I do something similar – I place my rising dough on a metal tray (with baking paper) on top of the stove whilst it preheats. This helps it rise quite nicely in time to go in the hot oven.
Yep, another option for a warm place to do that final rise
Bought the book, made the bread many times and other recipes. Grateful for all the insight ad details. I am grinding fresh whole wheat berries for all my flours and it is the best ever! Thank you for the inspiration to start baking. From LA – Lower Alabama (Dothan, AL)
Fantastic, have you seen my fresh flour post?
Is there a sourdough version?
Sure, just type sourdough into my search bar above. But it’ll be easier if you learn my basic method first
I noticed you changed the amount of years here to 1 tablespoon. In the book it’s for 1 1/2 tablespoon. Can you respond telling my why, and what difference ce it will make in the bread?
Some readers of the first book, which used the larger amount of yeast, mentioned here on the website that they could taste the flavor of the commercial yeast… And it wasn’t a positive. By decreasing the yeast, that problem goes away. In cold situations, or if you make one of the recipes that has eggs and you don’t let them come to room temperature, the lower amount of yeast can lead to the need for a longer initial rise time.
Hi,
How come your books are not available on Kindle in the UK?
Thanks,
Romeo
Ah yes, the ways of Amazon are mysterious, even to the authors themselves. You’re right, they’re not offering the Kindle version in the UK. Is it possible to order it through the US website?
Can this be made in a stand mixer with a dough hook?
Yes indeed! Put the words “stand mixer” into my search bar above and you should get to a post all about that. Let me know if it doesn’t go where I’m expecting
I have a question, instead of placing the loaf on a preheated stone can you place it in a preheated Dutch oven to bake as you may do with a sourdough loaf?
Yes, check this out: https://artisanbreadinfive.com/2009/03/11/baking-bread-in-a-dutch-oven/
I LOVE that you’ve included measurements by weight as well as by volume in this recipe! I live in a very dry climate which dramatically affects the hydration of dough when I measure by anything but weight. I adapted using the chart (from book 2?) listing an estimated weight per volume of various ingredients, then did a calculation for each recipe I wanted to try in order to approximate desired hydration, and made notes on the recipe for the future. Bit of a pain, but I really like the 5MAD method, and still use it several times a year.
Do subsequent books also list measure by weight?
Yes, all of the books had weights, starting 2011.
Wonderful! I obviously bought mine in 2007/2008. My spouse just said, “Get the new ones.” While calculating bakers’ percentages may help keep the brain young and fit, Ikm inclined to take her advice. Will take a look at the newer works, as well. Much happy dancing.
Great, let me know if you have questions about that stuff too
I’m finding that the bottom crust of my bread is always very tough and usually overcooked or slightly burned. Any advice on how to prevent this?
Also, what’s the intended internal temperature of the bread when you pull it out of the oven? I’ve been cooking to 190-200 F, since I struggle with undercooking if I don’t use an probe thermometer.
First off, use a stone if you’re not already. Secondly, bake higher in the oven, on a higher shelf, and see if that helps. About temperature, on page 60 of the book, you’ll find the recommended temperature for lindo like this is 205 to 210F. Lower for egg enricher dough
Hi, I don’t seem to get the beautiful rise that you show in the pictures. It may be because I do not have a marble stone or pizza cast iron. Could I use a regular case iron skillet?
My loafs are delicious but seem to spread out on the cookie sheet that I use and only rise about one inch.
Thanks for your help. Judith
The cast iron skillet is a great substitute, yes. That may be part of your problem. Or you may not be creating quite enough of the gluten cloak. Have you seen the videos here on the site? About how to do that? If all else fails, you can try using a little less water and that will create a stiffer dough that will hold a shape better. Maybe two tablespoons less water for starters and see what happens.
I am going to make homemade ricotta and the recipe uses 3-4 tablespoons of vinegar of lemon juice with a half gallon of whole milk. Can I use the leftover whey in place of water in your master bread recipe, or will the acid from the lemon juice or vinegar make it too acidic for the dough?
I’ve used whey before, but never acidified. My best advice would be to taste it first, and if it tastes good to you, I’m sure it’ll make good bread. If it doesn’t taste good to you, don’t use it, or consider using only half of the quantity of water called for in my recipe. Or a quarter?
I’m new to this so just reading still, but plan to make my first batch this week. I make my own Greek yogurt in my instant pot so have an abundance of whey from the straining. I donate as much as I can to a local farm where they feed it to their pigs but don’t get there often. Could I use that in place of all or some of the water in the basic recipe or any of the others?
Yes, I’ve used at least half-replacement for water, and the result is excellent. Feel free to experiment with 75%, or even 100% and let me know what the result is. It may mean that the dough won’t be quite as store-able before it gets too sour. But maybe not.
Canadian here. I’ll be trying your basic Master recipe for the first time this weekend and am seeking clarification about the type of all purpose flour you’re referring to (bleached or unbleached?) in the following statement in your FAQ’s: “Canadian all-purpose flour, most brands: add approximately 1/4 cup extra water to the full recipe”. Is this extra water recommended for only unbleached Canadian all-purpose flour, or is this a way to successfully use normal bleached all purpose flour?
Actually, bleached or unbleached all purpose doesn’t make a difference, they should have the same protein content if everything else is held constant. This wasn’t true when I was working on the first book in 2003. Bleaching methods have changed since then. The main reason I personally avoid bleached flour is to avoid the unnecessary chemicals. I also like the creamy color you get with unbleached
Any tips for freezing loaves made from the Master Recipe? I’m hoping to make enough loaves in advance this summer, and freeze them to have after our new baby arrives in the fall.
I do it all the time– you can even pre-slice them (though I think this works better with whole-grain loaves). I double-bag with two grocery produce bags, wrapping tightly. It makes great toast–have to admit that the untoasted isn’t quite as good as fresh, but this is a great compromise.
I’m wondering if you’ve tried your master recipe with Einkorn flour and, if so, how did it work? Would I need to make adjustments?
I’m guessing that it behaves about like whole grain flour, unless you have a really highly refined version of einkorn. So you can swap a whole grain version into my whole grain recipe. Masters, but not the white flower ones. I’m planning on testing this sometime this summer or early fall
The Master Recipe from Artisan Bread in Five Minutes a Day is a game-changer! I love how this approach allows for a large batch of dough to be stored in the fridge for up to two weeks, giving me freshly baked bread whenever I want. The method is easy to follow, and the results are outstanding. The dough’s slow fermentation in the fridge adds depth and complexity to the flavor, making it taste even better with time. The step-by-step instructions and helpful tips provided by the author make the whole process enjoyable and stress-free. I’m grateful for sharing this recipe online, fostering a community of bakers eager to learn and improve together.
Glad you’re enjoying the recipes! Thanks for the kind words.
I’ve been making mostly rye and peasant breads from your book for years. I’ve found that with King Arthur flour and upping the whole wheat flour a little, I have to add more water to get all the flour incorporated. Maybe 70 grams. After a week in the refrigerator, the bottom of the dough in the bucket is very wet, the formed loaf on the counter spreads out, and the breads don’t have much spring at all. The first week’s bread is terrific. Thanks for your help!
Well…
That is to some extent, a characteristic of the week-old dough, but this sounds a little extreme. I have a feeling you’ll be happier if you don’t increase the water quite so much. Also, whole wheat doesn’t yield quite as “strong” a dough as white flour, so that may be contributing. Solution possibilities:
1: Halve your water increase
2: Go back to lower level of whole grain
3. Consider a loaf pan for dough aged longer than 6 days. This solves the spreading problem. It’s not that you’re not getting spring, it’s just that it’s “springing” sideways rather than up.
Good advice! Especially the loaf pan, because the flat breads taste fine. I’ll try to cut the water, but there always seems to be extra flour that isn’t getting incorporated.
Many thanks for the response.
What would you do with natural yeast?
Do you mean my sourdough recipe, at https://artisanbreadinfive.com/2017/02/06/easy-sourdough-starter/ ?
I don’t know. I saw a recipe to make natural yeast using fruit, and I am how it would change the recipe? I may just need to change it like the sourdough starter, even thought it isn’t sourdough.
It is a sourdough, so if you can get it to start up, which may be tricky, you can use my sourdough recipe at https://artisanbreadinfive.com/2020/04/20/easy-sourdough-starter-with-new-troubleshooting-tips/
Dear Zoe Mark,loe the original five minutes a day book. The Vermont cheader is our favorite. When Zoe said that there were more I purchased all I could find.Today I made the master recipe from the healthy bread in five minutes book it turned out great. Took some pictures of it. Don’t know how to send them or I would.
Fantastic!
can I cut the recipe in half?????
Yes, definitely!
Could you please clarify what a baking stone is? It looks like a cast iron skillet and that is what a few comments reference, but I am not 100% sure that is what is what you are using.
There’s ceramic, and also cast-iron, and even steel, and they all work. A cast-iron pan would work if it’s big enough. See my post on this at http://www.artisanbreadinfive.com/2010/08/24/pizza-stones-which-creates-the-best-crust
I’ve been making this recipe for a year or two now. It’s fantastic. I want to incorporate a little white whole wheat flour to make it a little healthier. Every time I do, though, it doesn’t come out right. Any suggestions for amount of flour to replace and amount of water to add? Thank you.
Jennifer: you need a little more water, take a look at my post on this at https://artisanbreadinfive.com/2014/09/18/whole-grain-loaves-without-vital-wheat-gluten-and-highlights-from-the-mill-city-bread-festival/
… it may take a little more water than that, depending on your brand of flour, could be as much as a quarter cup for the half and half whole grain in that post. Gauge it to look about like your all-white flour version works. But understand– whole grain breads will have a very different texture and flavor compared with the all-white flour version, and it just may not be to your liking. But I’m guessing you were finding it dry, and the moisture correction will help there.
I’m a newbie Canadian bread-maker and I LOVE your method! I’m adding the additional 1/4 cup water for Canadian flour and the results are wonderful. However….I find the flavour to be quite strong and don’t enjoy the taste as much as my husband. Is there a workaround for this? (I’m using the Master Recipe from your New Artisan Bread in Five Minutes a Day with 1T of yeast.)
Two things to try:
1) The low-yeast version: http://www.artisanbreadinfive.com/2007/12/19/low-yeast-version-of-our-master-recipe But it’s going to take much longer to rise. Could also try cold water to slow down the rise, but again, needs patience.
2) You may not be liking the storage–the flavor gets stronger over time. If you figure out what level of aging is to your liking, you could freeze dough at that point, staggering batches. Or make the breads, slice them, put them back together, and freeze.
Please help me follow your instruction as best I can. In one video, Zoe folded the dough to form it using as little flour as possible. In another video Jeff actually dropped the dough in a bowl with flour and coated all sides of it before forming it. Are there different advantages to each system? Thank you. Your 5 minute system is a life changer for me.
In both cases, you’re using as little flour as possible, and carefully avoiding folding lumps of flour into the dough ball. You’ll notice that I pat the ball, helping the flour to fall off the ball. Both methods work, I find mine a little easier to master for beginners. It’s a bit of a waste of flour though, unless you do this in your actual flour bin, which isn’t all that hygienic if you don’t use flour much! (that’s what I actually do when the video’s not running)
Hi! I have been making your master recipe for years! We have recently moved from the US to the UK and here ovens all seem to be fan ovens. Do you have any advice on temperature when using a fan oven? I have my first batch of UK dough roaring as I type!
I assume you mean a convection oven. If so, that can shorten the baking time a bit and can increase the browning. Some ovens automatically compensate, but you may have to decrease the temperature by 25° F. Unfortunately, it’s going to take some experimentation, but I’ve baked in the UK as well, and everything worked out great in these kinds of ovens
Hi! We’ve been enjoying your master recipe for about 12 years or so – our favorite is adding in some quality aged shredded cheddar and hatch green chile from here in NM! But lately we’ve been trying to switch our flour usage over to ancient grains einkorn whole grain and einkorn all-purpose, khorasan whole grain. Just wondering if you have experimented modifying your recipes for use with anything like this, knowing the gluten in these grains is much lower and protein quite a bit higher than white flour? Not to mention high altitude and very dry climate. Any advice – thanks much!
Yes, I have posts on all that. Type “einkorn” into the Search Bar above and you’ll go to a post– read all the way through to the bottom. About high-altitude, type “altitude” into the Search Bar next, for details. Much more in the books (click on the book-images on my home page). That said, this discussion is about testing I did with an einkorn product that isn’t whole-grain. Your result will be denser, and will need more hydration. Extra quarter-cup?? But you’ll need to experiment.