Crock Pot Monkey Bread

Baking with Kids: Crock Pot Monkey Bread

The school year is upon us, and many parents and kids alike are finding themselves in a completely new routine. Our children are trying to navigate distance learning, hybrid learning (or something in-between) while parents are juggling jobs and their new teaching career. It’s wild, and often overwhelming, to say the least.

Since our kids are now home more, they are encouraged to take on more responsibility; we all have to pitch in to make our Covid lifestyles work. One area they are taking charge in is the kitchen: chopping vegetables, baking bread, and learning to use the Crock-Pot are all on their to-do lists.

There are several recipes here on our site for Crock-Pot breads, and they have been a huge hit. Teaching kids to use the Crock-Pot is a win-win: it’s easier to use than the oven, and there is less chance of getting burnt transferring items in and out of it. Combine it with the ease of this no-knead bread, and the options are endless.

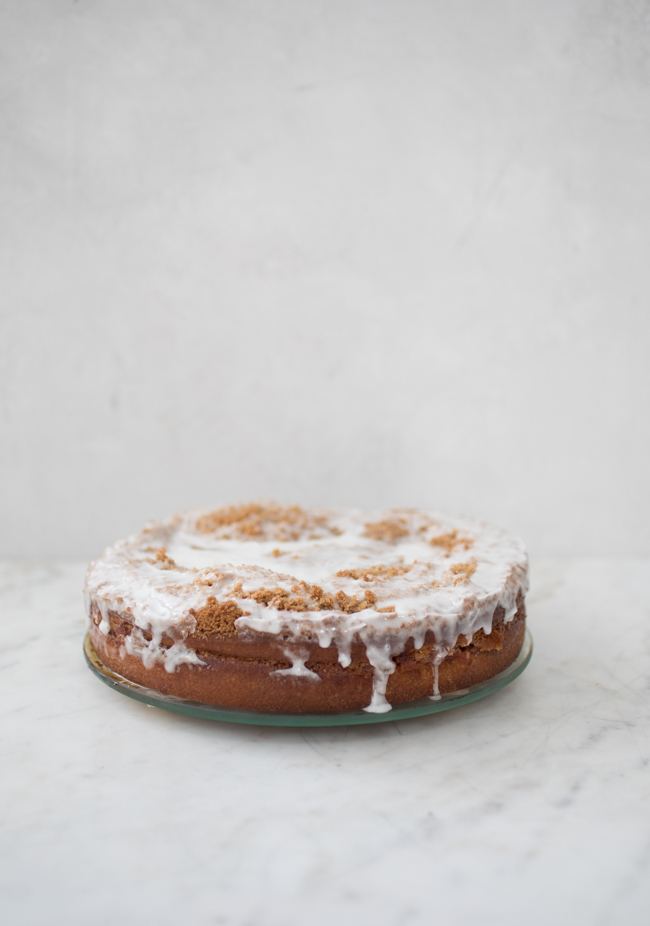
We’ve made this bread extra-simple by topping it with store-bought caramel sauce that is poured on after baking, so you don’t have to worry about transferring and flipping hot caramel.

And, if you need more Crock-Pot ideas, check out Crock-Pot Cinnamon Rolls, Crock-Pot Challah, Crock Pot Brioche, Gluten-Free Crock-Pot Bread, and Crock-Pot Dinner Rolls.

Brioche dough, from New Artisan Bread in Five Minutes a Day (makes about 4.5 pounds of dough)

1 1/2 cups lukewarm water

1 tablespoon granulated yeast (any type)

1 tablespoon kosher salt

6 large eggs

1/2 cup [170 g] honey

1 1/2 cups [340 g] unsalted butter, melted and cooled slightly

7 cups [990 g] unbleached all-purpose flour

Filling

8 tablespoons [1 stick, or 114 g] unsalted butter, melted

1 cup [200 g] granulated sugar

1 1/2 tablespoons ground cinnamon

1/8 teaspoon salt

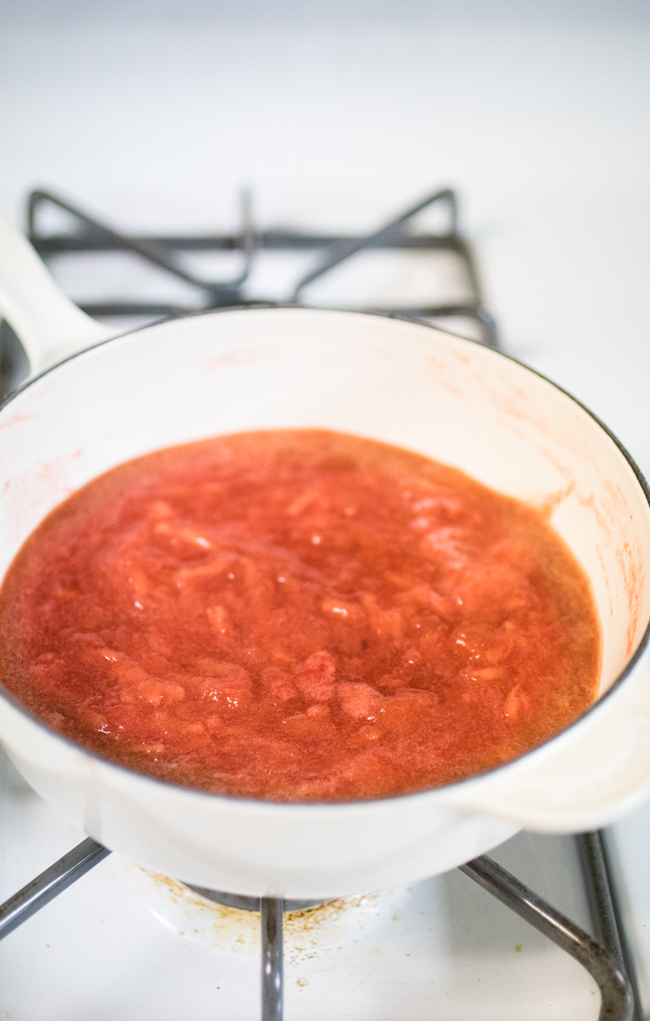
3/4 cup store-bought Caramel Sauce

For the dough

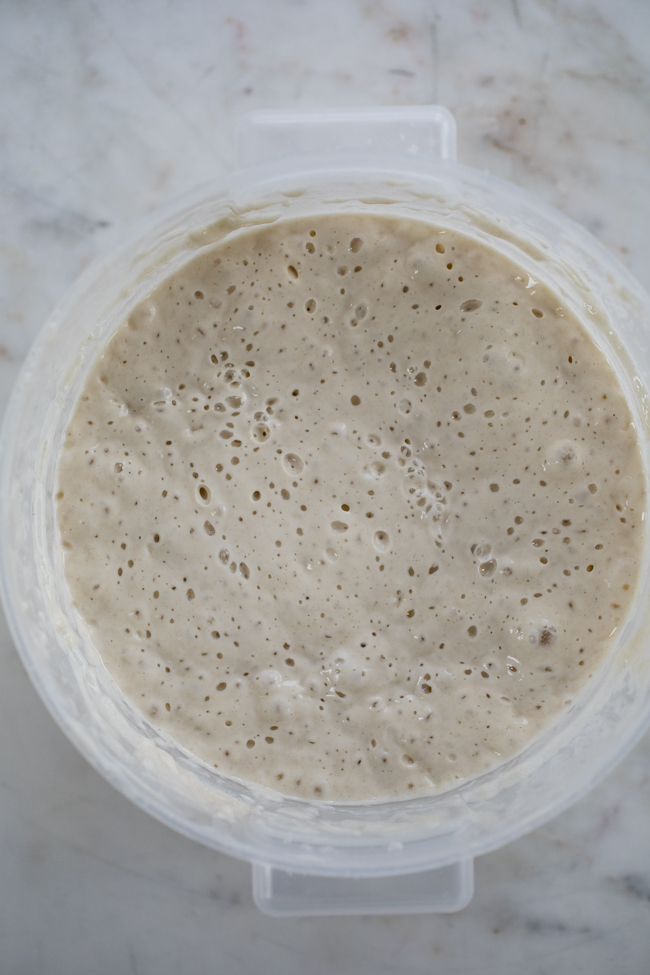
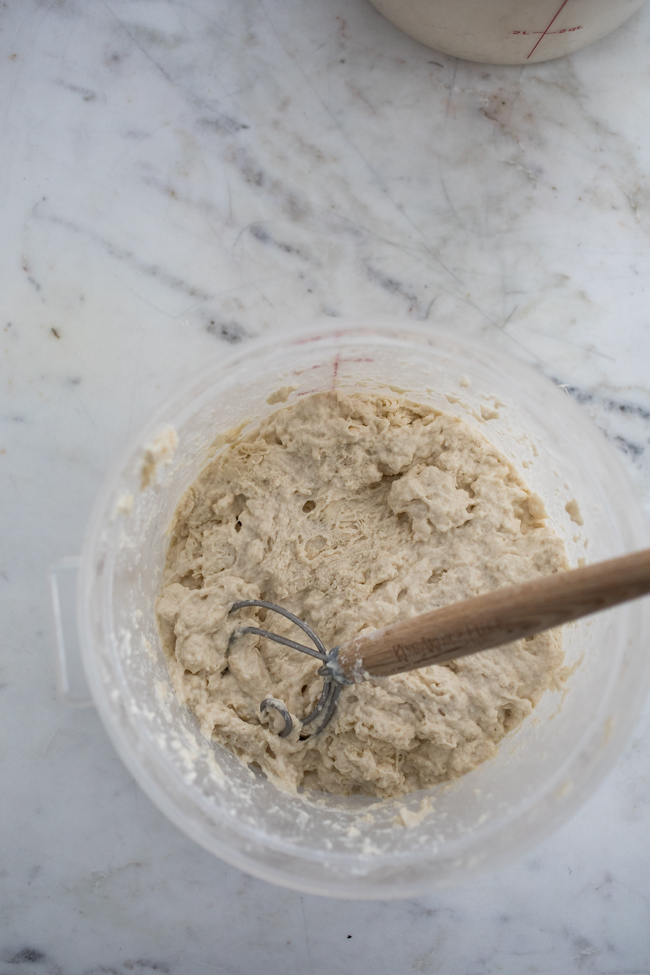
Mix yeast, salt, eggs, honey and melted butter with water in a 6-Quart Round Food-Storage Container with Lid (not airtight) container.

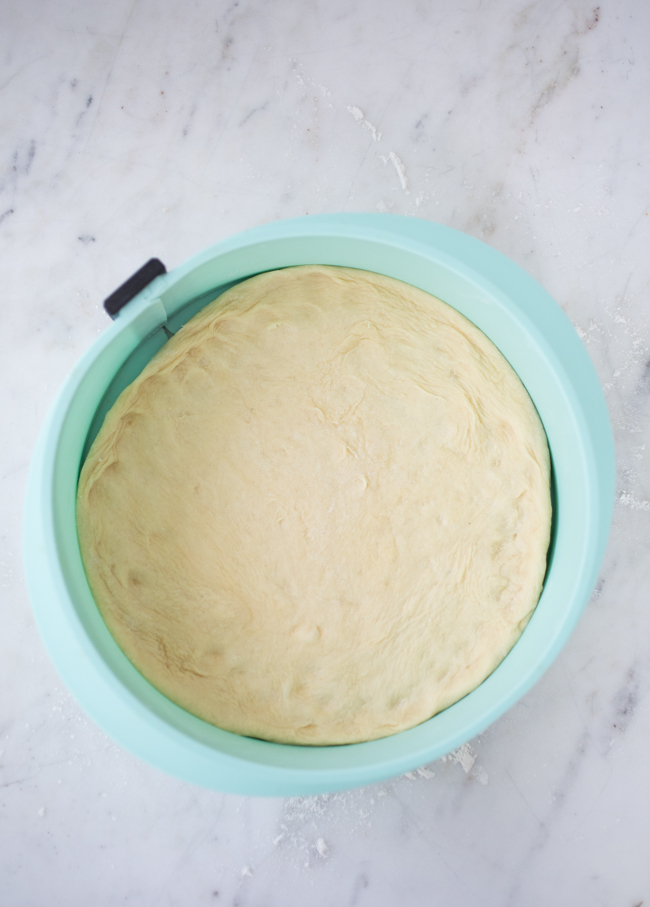
Mix in flour without kneading, using a spoon, a Danish Dough Whisk or a heavy-duty stand mixer (with paddle). The dough will be loose but will firm up when chilled.

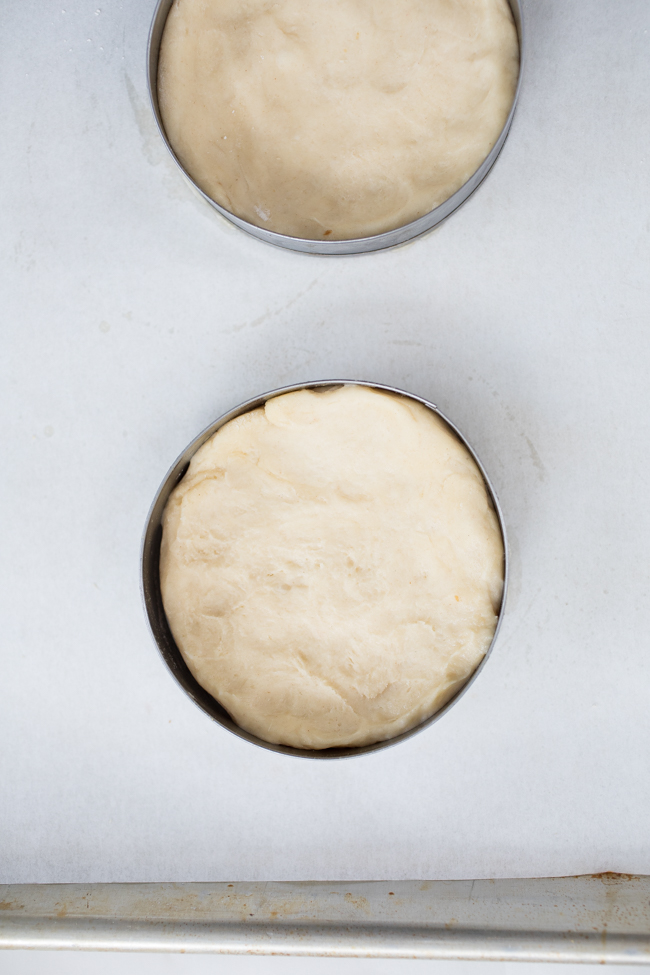
Cover (not airtight), and allow to rest at room temperature until dough rises for approximately 2 hours. Then refrigerate for at least four hours before first use; it is easier to handle when thoroughly chilled. This dough can be stored for up to 5 days in the fridge. Beyond that, the dough stores well in the freezer for up to four weeks in an airtight container, in one-pound portions.  When using frozen dough, thaw and use as instructed.

For the filling

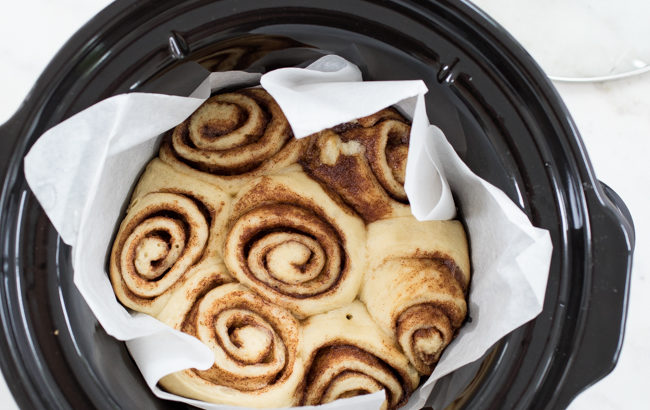
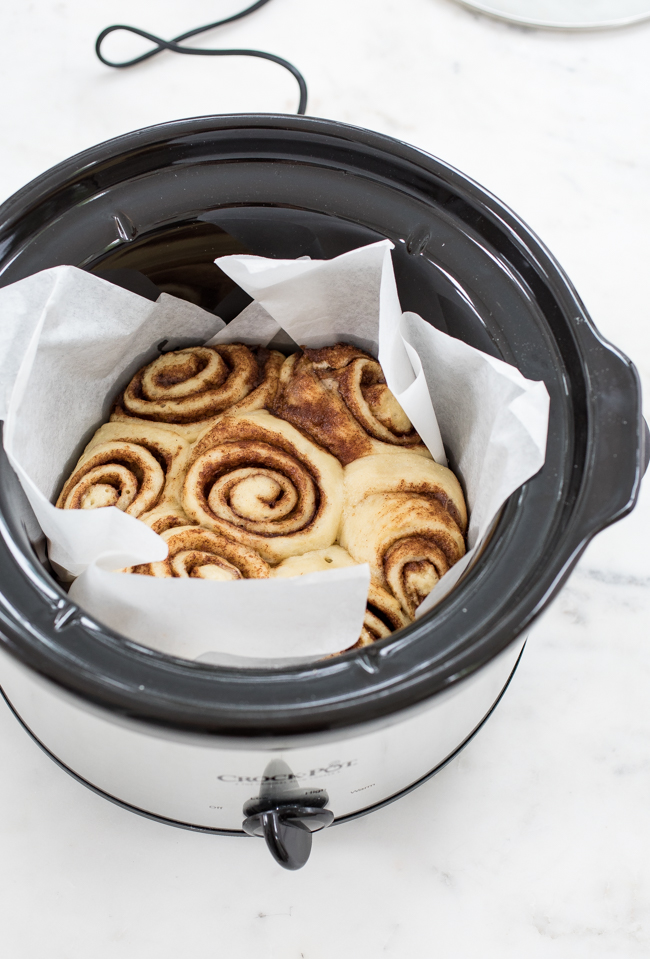
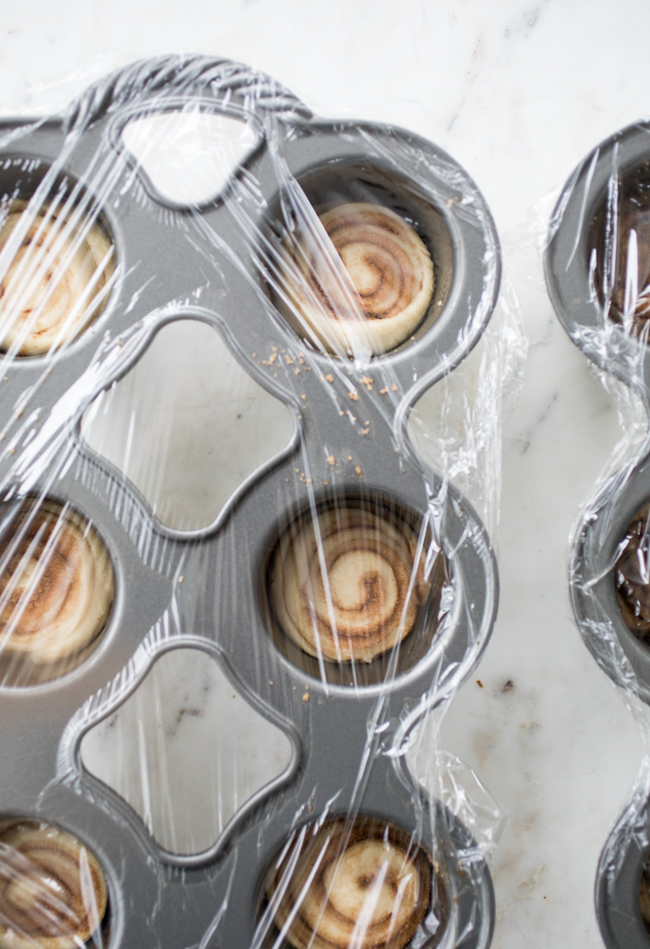
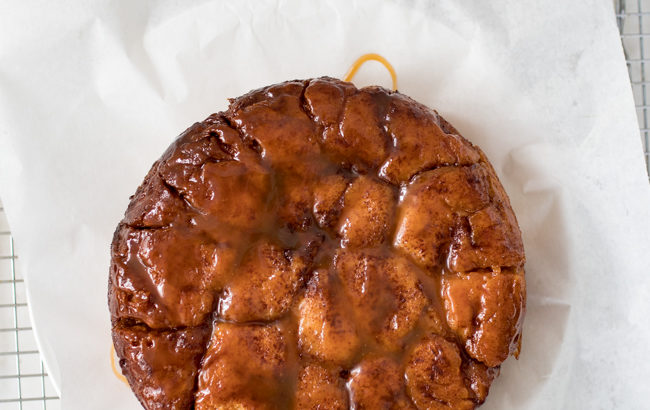
Line your Crock-Pot with parchment paper. You will use this paper to remove the monkey bread from the pot, so make sure it is coming up the sides of the Crock Pot (it may have some creases, but this won’t affect the bread baking).

Sprinkle the surface of your dough with flour and take out a 1 1/2 pound piece.

Divide the dough into about 32 pieces, as even in size as possible, but perfection is not needed here.

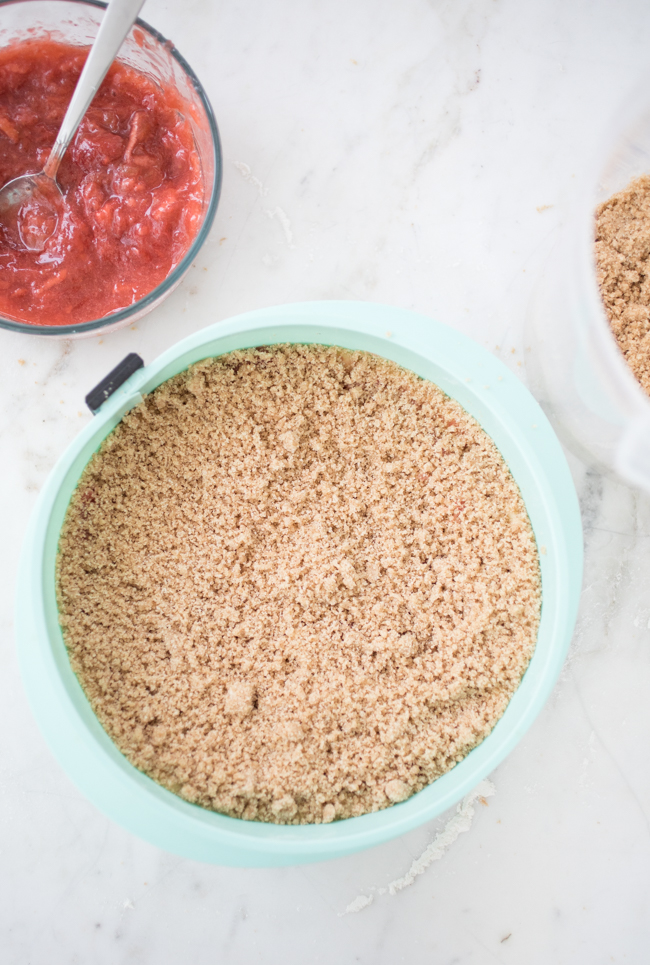
Roll the dough into small balls. If the dough is sticking to your hands, coat your palms with a small amount of flour.

Combine the sugar, salt, and cinnamon in a bowl. Drop the dough balls into the melted butter, then the bowl of cinnamon sugar and roll them around to coat them evenly.

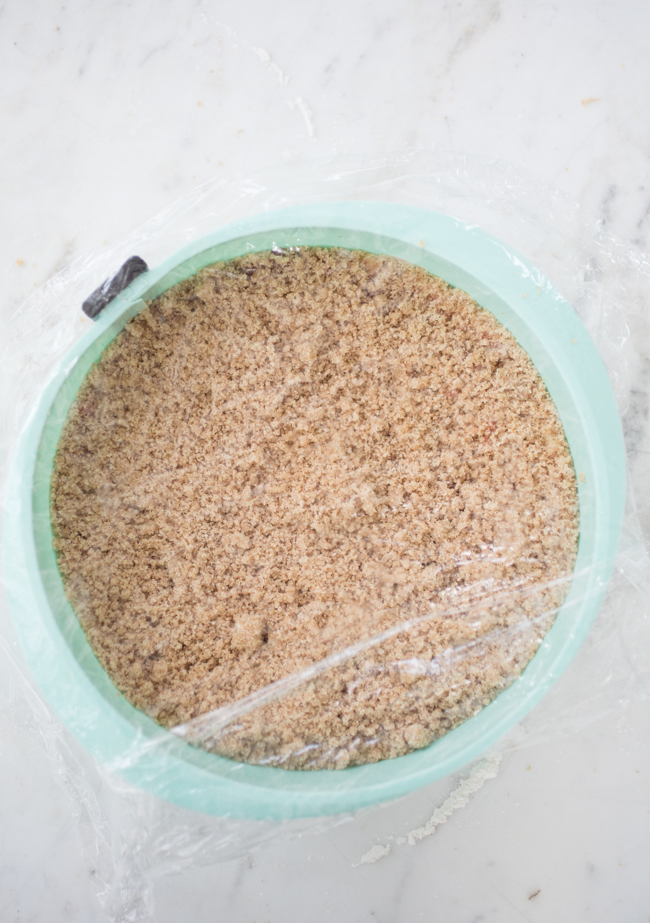
Place the balls in the lined  Crock-Pot, cover and turn it to high.

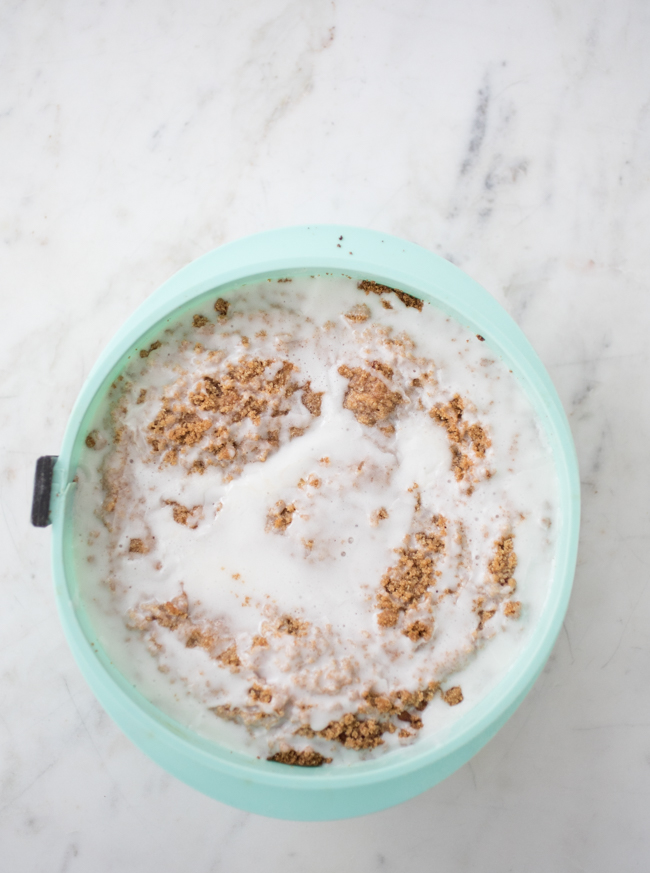
Leave the crock pot covered until the dough is cooked through and springs back when touched, anywhere from 1 to 2 hour, depending on your Crock-Pot. Use the parchment paper to remove the Monkey bread from the pot.

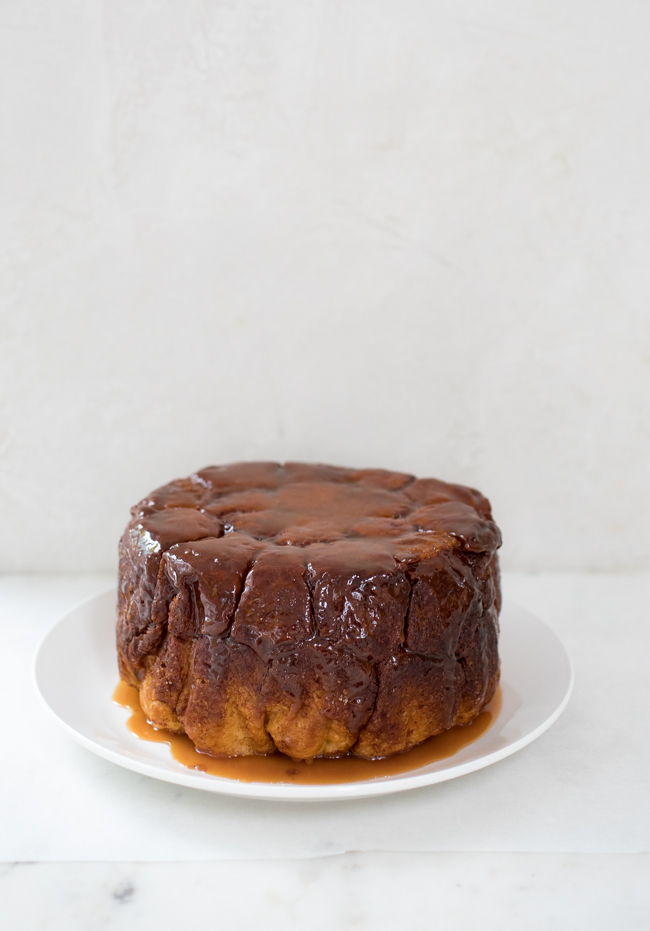
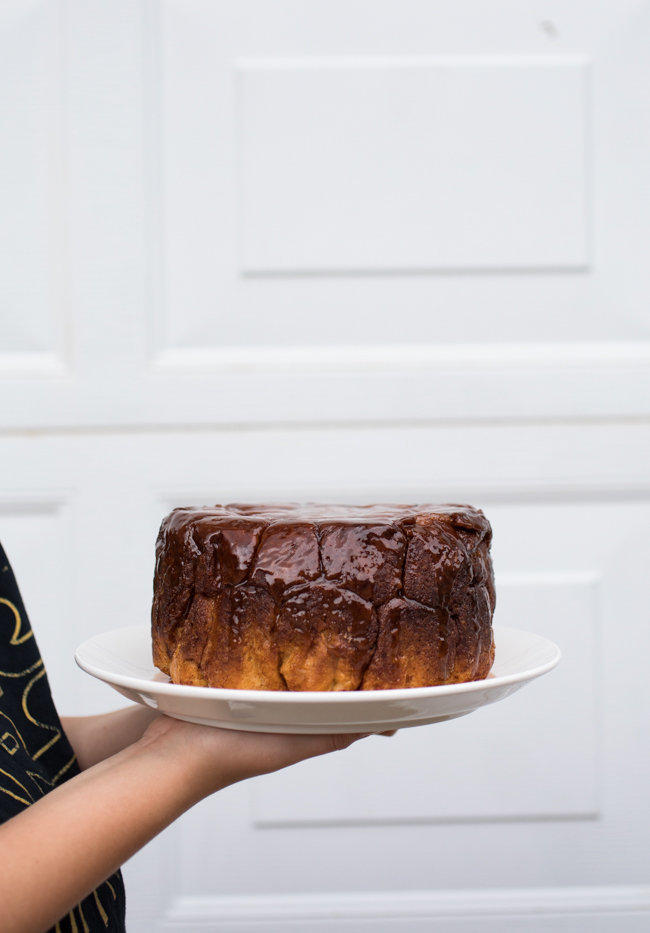
Flip the monkey bread onto a serving plate and remove the parchment paper (which is now the top).

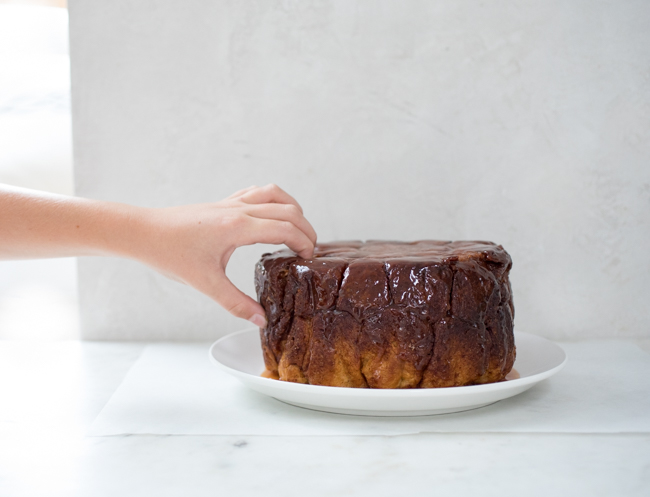
Drizzle the Monkey Bread with the caramel sauce and let cool for 5 to 10 minutes. Eat and enjoy!

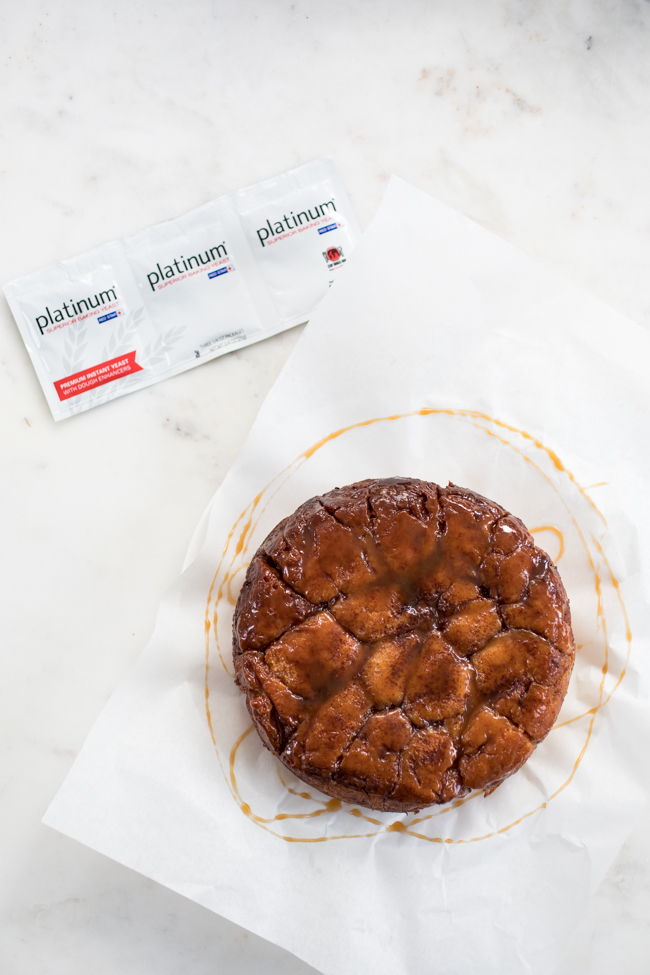
Red Star Yeast provided yeast samples for recipe testing, and sponsored this post.  

Note: BreadIn5.com is reader supported. When you buy through links on the site, BreadIn5 LLC earns commissions.

Blackberry Mascarpone Focaccia

Blackberry Mascarpone Focaccia with Basil

We wanted to sneak in some summer berries before apples and pumpkin take center stage (and also take over the internet). This delicious focaccia bread is based on a recipe from Edd Kimber’s beautiful new cookbook, One Tin Bakes; his version uses fragolina grapes and rosemary. But I had blackberries in my fridge that needed to be used, some leftover Master dough, and my basil plant is currently larger than life, so Blackberry Basil Focaccia was born.

This focaccia is sweet: it’s dolloped with mascarpone and sprinkled with sugar, and the results are amazing. You will want to eat this the day it’s made, and I highly recommend digging in while it still slightly warm.

Blackberry Mascarpone Focaccia with Basil

Inspired by Edd Kimber’s One Tin Bakes

For the mascarpone topping

1/2 cup [4 ounces] Mascarpone

1 tablespoon granulated sugar

1/2 teaspoon pure vanilla extract

In a small bowl, mix the mascarpone, sugar, and vanilla together until combined.

For the focaccia

1 1/4 pounds dough, Master recipe, from New Artisan Bread in Five

4 tablespoons olive oil, divided

1 cup blackberries, chopped

4 tablespoons turbinado sugar

Pour two tablespoons of olive oil into a quarter sheet pan (a 9 x 13 pan will work, too) and use a pastry brush or your fingers to to rub it all over the base and up the sides of the pan. Place the dough into the pan, coating the bottom with oil, then turn the dough over so that both sides are coated in oil. Using your fingertips, gently spread the dough into the pan in an even layer. If the dough resists, let it rest a few minutes and try again, until the dough is nestled into the pan and into the corners. Lightly cover with plastic wrap and let the dough rise until doubled in size, about 1 hour.

Adjust an oven rack to the middle position and preheat the oven to 425F. Gently dimple the dough with your fingertips.

Scatter the blackberries evenly over the dough, then sprinkle the turbinado sugar over the top (it will look like too much sugar).

Dollop the mascarpone mixture over the dough, and then drizzle with the remaining 2 tablespoons of olive oil.

Bake the bread for 18 to 25 minutes, or until light golden.

Scatter the basil leaves over the top of the hot bread. Move the pan to a wire rack to cool for 5 minutes, then remove the focaccia from the pan and let cool on a wire rack (this helps it stay crisp).

Cut the bread into squares and serve. Best eaten the same day it’s made.

Note: BreadIn5.com is reader supported. When you buy through links on the site, BreadIn5 LLC earns commissions.

Crock Pot Cinnamon Rolls

Crock Pot Cinnamon Rolls

Crock Pot Cinnamon Rolls

Well, we’ve made our Master recipe in a crock pot, our brioche in a crock pot, dinner rolls, and even our gluten-free dough in the slow cooker. It seemed a good time to add to the list, and so we took on crock pot cinnamon rolls. I’m happy to report that they work just as well; it’s as easy as rolling out dough, brushing some butter and sprinkling sugar, shaping rolls, and then letting them bake for an hour. My family couldn’t tell they weren’t baked in the oven, and my kids had the best after school snack of the year.

Read More

Cream-filled Brioche Buns

Cream-filled Brioche Buns with Fruit for the 4th of July

We come to you again this week with one more 4th of July dessert, after realizing we didn’t have a version of these brioche buns on our website. These sweet little treats are made with our no-knead dough, filled with pastry cream and fresh fruit, then sprinkled with pearl sugar, making these red, white, and blue desserts perfect for your holiday weekend, or any day this summer.

Cream-filled Brioche Buns with Fruit

2 pound Brioche dough (page 300 in New Artisan Bread in Five)

Egg wash (1 egg + 1 tablespoon water, whisked together)

1 cup Pastry Cream (page 348 in New Artisan Bread in Five)

2 cups fruit (sliced strawberries, blueberries, or raspberries work best)

Pearl sugar, for sprinkling

Divide the dough into 3 ounce pieces. Gently smooth the pieces into round balls of dough. Grease English Muffin Rings, and flatten the dough into 1/4 inch disks and place them in the molds on a parchment-lined baking sheet (if you don’t have rings you can make them free form, but they won’t keep their shape as well). Cover loosely with plastic wrap (spraying the plastic with a little cooking spray will help it not to stick to the top of the dough) and allow the dough to rest for 20 minutes. While the dough is rising, adjust an oven rack to the middle position and and preheat the oven to 350F.

Use a pastry brush to brush each round of dough with egg wash. Gently press in the center of the dough to make an indentation. Fill the center with 2 tablespoons of pastry cream.

Place the berries over the pastry cream, and sprinkle the edges with pearl sugar. Bake for 20 to 25 minutes, until the buns are puffed and light golden brown.

Eat the buns slightly warm; best eaten the same day they are made. Happy 4th of July!

4th of July Berry Pizza on the Grill!

4th of July Pizza 10

There is nothing more American than grilling on the 4th of July, well, maybe a star spangled pizza is the most patriotic of all. This is a super fast pizza that is ideal for breakfast, which I just served my family this morning, or can be throw together at your holiday BBQ as dessert. I made the pizza in a small baking sheet, but you can make a larger one if you have a crowd to feed.

Happy 4th of July!

Read More
Potato Brioche Buns

Potato Brioche Buns for Father’s Day

It’s almost Father’s Day (did you remember?) and that might mean pulling out the grill this weekend and serving Dad up some serious burgers. We came up with this soft and delicious Potato Brioche Bun to serve alongside your favorite burger recipe, and it’s easy enough to put together that the kids can jump in and help, too. As with all our no-knead, refrigerated dough recipes, you can bake as little or as much as you want. So if you are social distancing and only need a couple buns (because the grill-out party is small this year), this is a perfect recipe for that.

If cooking and mashing potatoes just seems like too much work (even for a holiday), you can always check out our straight up Brioche Burger Buns, complete with Lamb Burger and Cilantro-Yogurt Sauce.

Potato Brioche Buns (based on the Brioche Recipe from New Artisan)

1 1/4 cup warm water

1 cup mashed Russet potatoes (sent through a food ricer for fine consistency, or mashed by hand)

8 tablespoons (1 stick) unsalted butter, melted

2 large eggs, room temperature

3 tablespoons granulated sugar

2 teaspoons yeast

1 1/2 teaspoons salt

4 cups all-purpose flour

Egg wash (1 egg whisked with 1 tablespoon water)

Seeds, for sprinkling (optional) – plain sesame seeds work fine; I used a bagel seed mix

Mix the water, potato, butter, eggs, sugar, yeast, and salt in a 5-quart bowl, or lidded (not airtight) food container.

Mix in the flour, using a spoon until all of the flour is incorporated.

Cover (not airtight), and allow to sit at room temperature for about two hours. Chill the dough for at least two hours, and up to 3 days.

The dough can be used as soon as it is chilled. This dough is way too sticky to use after the initial rise, but once it is chilled it is very easy to handle. That said, because potatoes can vary in their water-content, you may have to adjust the flour–you can add more after everything’s mixed, but give the dough a couple of hours on the counter to re-ferment or the buns will be dense.

Divide the dough into 3 ounce pieces (this dough will make about 14 buns, but you can make less if desired). Gently smooth the pieces into round balls of dough. Grease six English Muffin Rings. Flatten the dough into 1/4-inch disks place them in the molds. If you don’t have rings you can make them free form, but they won’t keep their shape as well.

Cover loosely with plastic wrap (spraying the plastic with a little cooking spray will help it not to stick to the top of the buns) and allow the buns to rest for 30 to 60 minutes (depending on temperature of your kitchen), until the dough is just peeping over the top of the rings, and feels like a marshmallow when gently pressed/jiggled.

Place an oven rack in the center of the oven, and preheat your oven to 350 degrees.

Use a Pastry Brush to paint on the egg wash, and then sprinkle with seeds if desired.

Bake for 20 to 25 minutes until they are golden brown (I baked with steam for an extra soft bun, but you don’t have to do that).

Perfect for loading with a burger and toppings, or just nibbling on with a slice of cheese.

Strawberry Rhubarb Streusel Coffeecake for Mother’s Day

Strawberry Rhubarb Streusel Coffeecake

It’s Mother’s Day this weekend (you remembered, right?) and if you are celebrating your Mom or any other women in your life, we have a lovely (and easy!) coffeecake for you to put together. It is made with our 5 minute no-knead brioche and a delicious strawberry-rhubarb filling, but in a pinch you can use your favorite store-bought jam to substitute. We also have a coffeecake in Blueberry if that is more your jam (pun intended).

Other Bread in 5 news: Zoe did a Instagram live with our no-knead brioche, and made cinnamon rolls! You can watch her here shape the buns and cook them (and some other treats) in the slow cooker. We also have a recipe for Crock Pot Cinnamon Rolls if you’d rather take that route for Mother’s Day.

We have updated our Sourdough Starter post, with more helpful tips and troubleshooting suggestions. We also have a FAQ page we are constantly updating if you are having issues with your bread baking.

Strawberry Rhubarb Streusel Coffeecake

Strawberry Rhubarb Streusel Coffeecake

Streusel Topping

2/3 cup all-purpose flour

1/3 cup brown sugar

1/3 cup granulated sugar

1/2 cup almond flour or oats

2 teaspoons ground cinnamon

1/4 teaspoon salt

6 tablespoons unsalted butter, room temperature

Strawberry Rhubarb Filling

1 cup rhubarb, chopped into 1-inch pieces
3 ounces strawberries
1/4 cup granulated sugar (if your rhubarb is really tart, you can add up to 1/2 cup sugar total, however the streusel and icing will add a lot of sweetness, so it’s better to keep the jam slightly on the tart side)
Pinch salt

1 pound (grapefruit-size portion) Brioche dough, from New Artisan Bread in Five Minutes a Day

Icing
2 ounces cream cheese, room temperature
2 tablespoons milk
Pinch salt
1/2 teaspoon pure vanilla extract
1 to 1 1/4 cups confectioners’ sugar

Prepare the streusel topping: In the bowl of a stand mixer, combine the all-purpose flour, sugars, almond flour, salt, and cinnamon on low. With the mixer on low, add the butter, one tablespoon at a time, until the mixture comes together but still is quite crumbly.

Prepare the fruit filling: Place the rhubarb, strawberries, sugar, and salt into a medium pan and simmer over medium-low heat for about 30 to 40 minutes, stirring often, until the rhubarb and strawberries have broken down and the jam has thickened. The jam will cling to a wooden spoon when it is done. Remove from the heat and allow to cool to room temperature. Refrigerate the jam until ready to use. (Taste your jam – if it is a little flat, you can add a squeeze or two of lemon juice – about 1/2 teaspoon at a time, until it brightens the flavor.)

Grease an 8-inch springform cake pan with butter and dust with flour. Set aside. Dust the surface of the refrigerated dough with flour and cut off a 1-pound piece. Divide the piece in two, dust with more flour, and quickly shape each piece into a rough ball by stretching the surface of the dough around to the bottom, rotating the ball a quarter-turn as you go.

Roll the balls out into two 1/4-inch thick rounds, about 9 inches across. As you roll out the dough, add flour as needed to prevent sticking. Place one of the dough rounds in the bottom of the prepared pan.

Top with half of the fruit filling and and sprinkle half the streusel topping over it. Repeat with the remaining dough round, fruit filling, and streusel.

Cover loosely with plastic wrap and allow to rest at room temperature for 90 minutes. Preheat the oven to 350F, with a rack placed in the center of the oven. Bake for 55 to 60 minutes.

While the cake is baking, prepare the icing: In a small bowl, mix the cream cheese, milk, salt, and vanilla until smooth. Add 1 cup of the confectioners’ sugar and mix again until smooth. If the mixture is too thin, add more powdered sugar until the desired consistency is reached.

Move the cake pan to a wire rack and let cool for 10 minutes. Pour the icing over the cake, and then let it continue cooling for 20 minutes.

Remove the cake from the springform pan while it is still warm.

Serve the cake warm or at room temperature.

Easy Sourdough Starter (with new troubleshooting tips)

Easy Sourdough Starter | Artisan Bread in Five Minutes a Day

Before we even start, if you’ve already tried this recipe and are having trouble getting your sourdough starter to the “very-active” stage, or if your loaves aren’t rising well, or if they’re too dense, you can skip to the Troubleshooting tips below… scroll waaaay down. If you’re new to this page, start right here with this post about sourdough starter. –Jeff

This sourdough starter recipe appears in The New Healthy Bread in Five Minutes a Day–and also in The Best of Artisan Bread in Five Minutes a Day. You can create sourdough starter (in French, levain) easily and without dedicating your whole day to the project. In fact, it only takes a few minutes a day to get your starter up and running. It really is that easy, but it takes several days to “strengthen” your starter enough to actually use it to rise a batch of bread.

All you need to make your sourdough starter is flour, water and a container to keep it in. Nothing special or fancy. Just make sure the container can hold at least two quarts. You’ll see some Baking Bloopers below of what happens if your container is too small.

Sourdough Bread Loaf | Easy Sourdough Starter | Artisan Bread in Five Minutes a Day

Once you have created your starter you can use it to bake beautiful loaves, with or without added yeast. The flavor is incredible and you will still be making a large batch of dough and storing it for up to a week, so you will do the work on one day for many loaves.

To make the starter:

Read More
Kulich

Kulich for Easter, Two Ways

Kulich (cool-ich) is an Easter bread that is scented and colored with saffron threads and topped with a sweet layer of icing. It is often made with St. Lucia Bun dough, but we took a favorite no-knead brioche dough from The New Artisan Bread in Five book and added a little saffron to it to make this version. If you scroll down, there’s also a recipe for ‘Cinnamon Roll Kulich’ – which is this same dough made with a cinnamon swirl center and baked in a popover pan to help keep its tall shape. Icing and sprinkles are also included, of course.

Kulich

2 pounds Brioche dough (page 300 of The New Artisan Bread in Five Minutes a Day, or the recipe here on the website), with 1/2 teaspoon saffron threads mixed into the wet ingredients

All-purpose flour, for dusting

Egg wash (1 egg beaten with 1 tablespoon water), for brushing the dough

Icing

1/2 cup confectioners’ sugar

2 tablespoons cream (or more as needed for a thick but pourable consistency

To bake: Generously grease a panettone mold with butter (the mold I use in the photos is currently unavailable but it is a 6 x 6 inch panettone pan with a removable bottom. Many people also bake them in large, empty, parchment lined coffee cans to achieve the high domed loaf.) Dust the surface of the refrigerated dough with flour and cut off a 2-pound (cantaloupe-size) piece. Dust the piece with more flour and quickly shape it into a ball by stretching the surface of the dough around to the bottom, rotating the ball a quarter-turn as you go. Place the ball in the greased panettone mold, seam-side down.

Cover loosely with plastic wrap and allow to rest at room temperature for 90 minutes.

Preheat the oven to 350F, with a rack placed in the center of the oven. Brush the dough with egg wash. Bake for 50 to 55 minutes, or until golden brown. Allow the bread to cool on a wire rack.

Make the icing: Mix the confectioner’s sugar and heavy cream together until smooth and thick enough to cling to the cake. You don’t want it to drip off the sides (like the very first photo shows) but if it does (like the one directly above) it will still taste good. Drizzle the icing over the cake and cover with colorful sprinkles.

Cinnamon Roll Kulich

1 1/2 pounds Brioche dough (page 300 of The New Artisan Bread in Five Minutes a Day, or the recipe here on the website), with 1/2 teaspoon saffron threads mixed into the wet ingredients

All-purpose flour for dusting

Filling

2 tablespoons unsalted butter, melted and slightly cooled

1/2 cup brown sugar

1 tablespoon ground cinnamon

Pinch salt

Icing

1/2 cup confectioners’ sugar

2 tablespoons cream (or more as needed for a pourable consistency)

Grease a 12 cup (or two 6 cup) large popover pans. (If you don’t have popover pans, you can use a greased 9×13 inch baking pan.)

Roll the dough into 1/4-inch thick rectangle. Brush the entire surface with the melted butter. In a small bowl mix together the sugar, cinnamon, and salt. Spread the mixture over the butter topped dough. Use your hands to make sure you have an even coat of the sugar. Then roll the dough up, starting at the long end.

Use a Bread Knife, Kitchen Scissors or floss to cut the log into 12 equal pieces.

Loosely cover the buns and let them rest between 1 1/2 to 2 hours. The long rest will insure that you have a fluffy bun. (You can set these up the night before and let them rest overnight in the refrigerator. In the morning take them out and let them sit on the counter for about 45 minutes to an hour.) You may get away with slightly shorter rise, but the buns will not be quite as soft.

Preheat the oven to 350°F and place the rack in the middle of the oven.

Bake for about 20 to 30 minutes, just until the centers are set when poked with your finger (they should be caramel colored). Turn the buns out of the pan (if using the popover pans). Let them cool on a wire rack.

Make the icing: Mix the confectioners’ sugar and heavy cream together until smooth and thick enough to cling to the cinnamon rolls. Drizzle the icing over each roll and cover with colorful sprinkles.

Note: BreadIn5.com is reader supported–when you buy through links on the site, BreadIn5 LLC earns commissions.

sourdough pizza

Sourdough Pizza

Making sourdough is a favorite pastime for many, but within the last few weeks thousands more have joined the club, as yeast is suddenly hard to find on the grocery store shelves. We here at Breadin5 have been making sourdough for years, and while we have a post on our Easy Sourdough Starter, we realized there are many more things to make with our no-knead bread method. We had some requests for a sourdough pizza crust, and we are delivering (pun intended).

We know that flour is also scarce, and the bread flour called for below may not be available to you right now. Since different types of flours have different protein levels (and this of course effects the recipe), we have included a video on mixing flour and adding more water if necessary. If you need help finding flour, good places to look are local bakeries (they sometimes will sell flour to customers), and restaurant supply stores.

Sourdough Pizza

Note: You’re going to need a sourdough starter. If you haven’t started one yet, please check out our post for Easy Sourdough Starter. Our method uses whole wheat flour, but I used bread flour (same proportions) in mine for the pizza.

Flour has different protein contents depending on the type and brand, which can effect how much water to use. If you mix your dough and it seems dry, more water can be added. We have included a video below so you can see how your dough should look, and add water accordingly.

We have instructions in our Healthy Bread in Five Book for ‘semi’ sourdough – using some of the starter along with yeast to give a milder sourdough flavor. Check out page 390 for details.

Extra dough can be portioned into 10-ounce balls and frozen, if desired. Wrap each ball in plastic wrap, and then place in a freezer safe bag. Dough can be pulled out the night before using and thawed in the refrigerator overnight.

If you need extra help rolling out pizza dough and transporting it to the oven, there’s more on that in the video.

2 cups lukewarm water (see note above)

3 cups activated levain (sourdough starter)

1 tablespoon kosher salt

1 tablespoon granulated sugar

1/8 cup olive oil

6 cups [840 g] bread flour

Mix the water, activated levain, salt, sugar, and olive oil together in 5-quart container or the bowl of a stand mixer.

Mix in the flour with a Danish dough whisk or a heavy duty stand mixer. Cover (not airtight) and allow it to rest at room temperature until the dough rises, two hours or more (sourdough can take a lot longer to rise than commercial yeast. I let mine rise for 4 hours at room temperature, then moved it to the fridge overnight, where it continued to do a slow rise).

If your dough looks dry (which may happen depending on what type of flour you are using) you can add more water. Here’s how your dough should look– see the video below:

The dough can be used immediately after it’s initial rise, though it is easier to handle when cold. Refrigerate it in a lidded (not airtight) container and use for pizza over the next few days.

Preheat a baking stone at your oven’s highest temperature for at least 30 minutes. Sprinkle a pizza peel liberally with flour. Dust the surface of the refrigerated dough with flour and cut off a 10-ounce piece. Dust it with more flour and quickly shape it into a ball by stretching the surface of the dough around to the bottom on all four sides, rotating the ball a quarter turn as you go. Cover the dough with a piece of plastic wrap or kitchen towel, and let rest for 20 minutes.

Flatten the dough with your hands and/or a rolling pin on a work surface, or directly onto a wooden pizza peel, to produce a 1/8-inch thick round. (You can also put it on a piece of parchment paper for ease. Note that your crust won’t brown as nicely if doing so! Parchment is shown in the photos below because I needed to move the pizza around to take photos. Also, my kids prefer a lighter crust. But if you want a dark crust, use a pizza peel.) Dust with flour to keep the dough from adhering to the surface. Use a dough scraper to unstick the dough as needed, and transfer to a pizza peel if you haven’t stretched the dough out on one already. When you’re finished, the dough round should have enough flour under it to move easily when you shake the peel.

Add toppings to your pizza (I kept mine simple: sauce and cheese, with a scattering of basil leaves after the pizza emerged from the oven). Slide the pizza onto the preheated stone. Check for doneness in 8 to 10 minutes, and turn the pizza around in the oven if one side is browning faster than the other. I took my pizza out earlier for a lighter crust (my kids’ preference), but you can take your crust as dark as you like.

Allow to cool slightly, preferably on a wire cooling rack. Cut into wedges and serve.

Here’s another video for rolling out the pizza dough here (you can find the full video on Instagram):

You can also do cracker-crust pizza with this dough, or any of our lean doughs.